


从2014年开始,作者主要写了三个Python系列文章,分别是基础知识、网络爬虫和数据分析。
- Python基础知识系列:Pythonj基础知识学习与提升
- Python网络爬虫系列:Python爬虫之Selenium+Phantomjs+CasperJS
- Python数据分析系列:知识图谱、web数据挖掘及NLP

随着人工智能和深度学习的风暴来临,Python变得越来越火热,作者也准备从零学习这些知识,写相关文章。本篇文章讲解阿里云服务器CentOS系统下的MySQL数据库开启及配置过程,同时教大家如何编写Python操作MySQL数据库的基础代码,为后面的网络爬虫并存储至服务器打下基础。
文章非常基础,希望这系列文章对您有所帮助,如果有错误或不足之处,还请海涵~
系列文章:
[CentOS Python系列] 一.阿里云服务器安装部署及第一个Python爬虫代码实现
[CentOS Python系列] 二.pscp上传下载服务器文件及phantomjs安装详解
参考文献:
基于CentOS的Mysql的使用说明 - chisj专栏
一. MySQL数据库开启
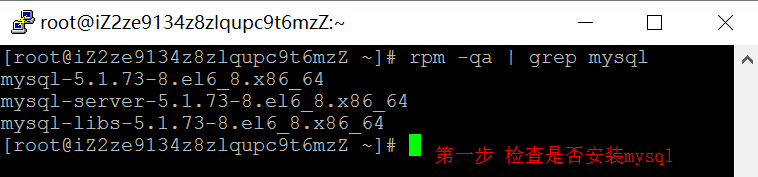
1.检查数据库是否安装
命令:rpm -qa | grep mysql
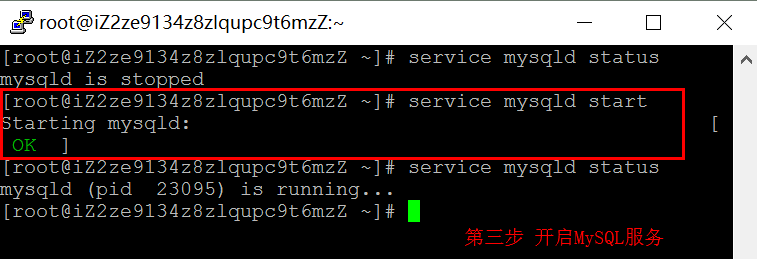
2.检查MySQL服务是否开启
命令:service mysqld status

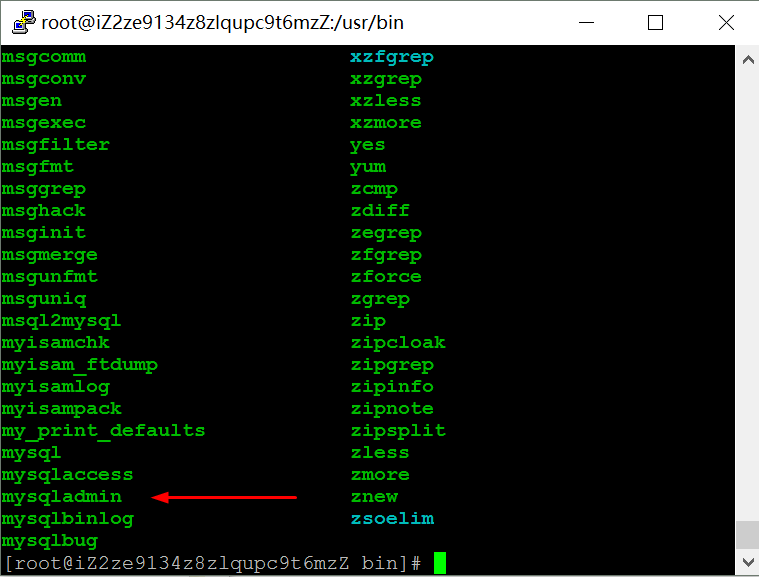
3.开启MySQL服务
命令:service mysqld start
可以看到 /usr/bin 目录下存在mysqladmin命令。

4.使用root用户登录mysql数据
命令:mysqladmin -u root -p password 123456

但是报如下错,这是连接MySQL数据库最常见的一个错误,怎么解决呢?
mysqladmin: connect to server at 'localhost' failed
error: 'Access denied for user 'root'@'localhost' (using password: NO)'
5.更新root密码登录
命令如下:
--关闭服务
service mysqld stop
--安装赋权限
mysqld_safe --skip-grant-tables &
--root用户登录
mysql -u root -p
--输入密码
123456
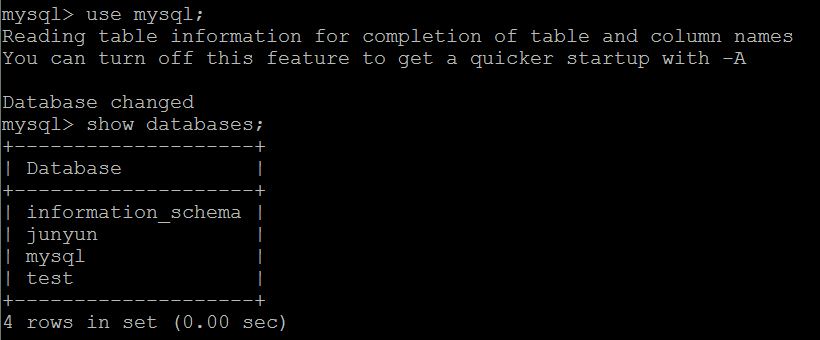
--使用数据库
use mysql;
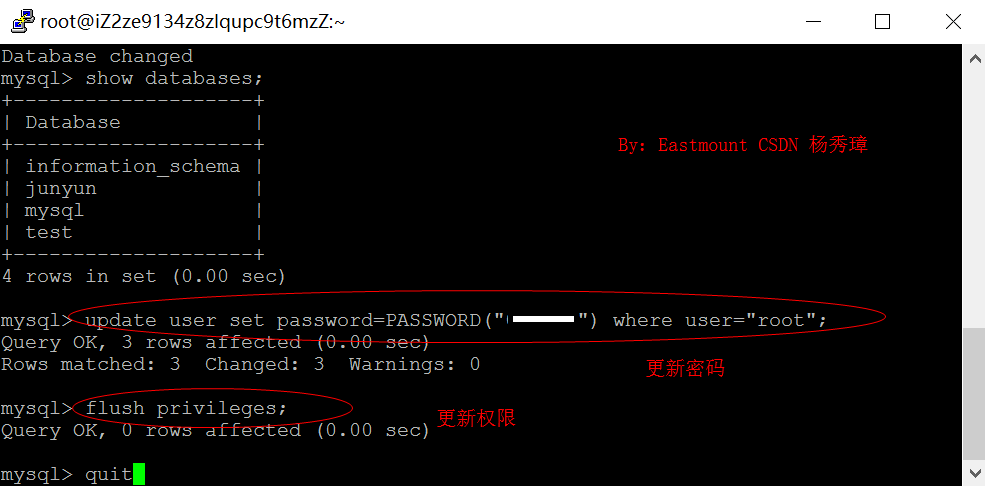
--更新密码
update user set password=PASSWORD("123456") where user="root";
--更新权限
flush privileges;
--退出
quit
--服务器重启
service mysqld restart
--root用户登录
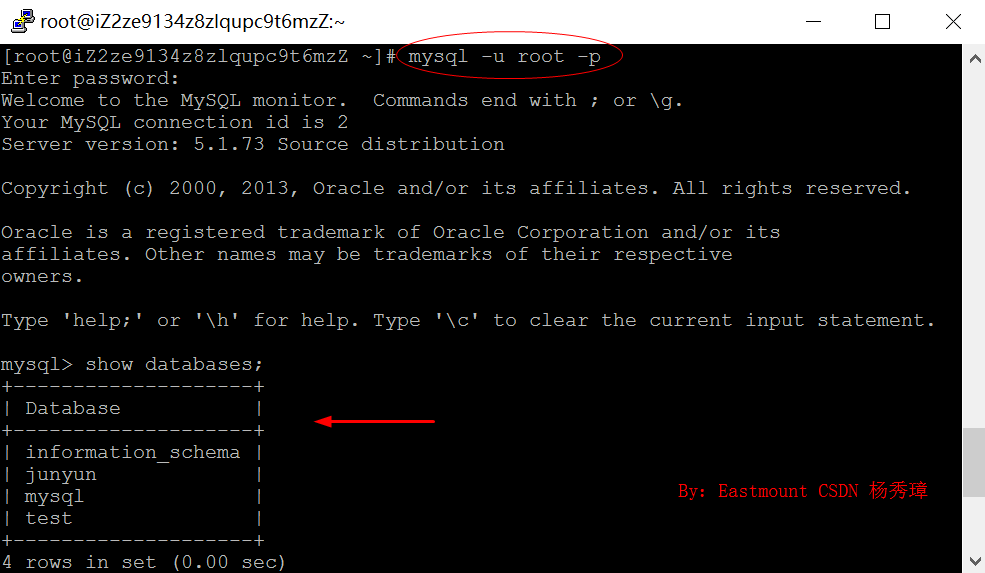
mysql -u root -p
新密码进入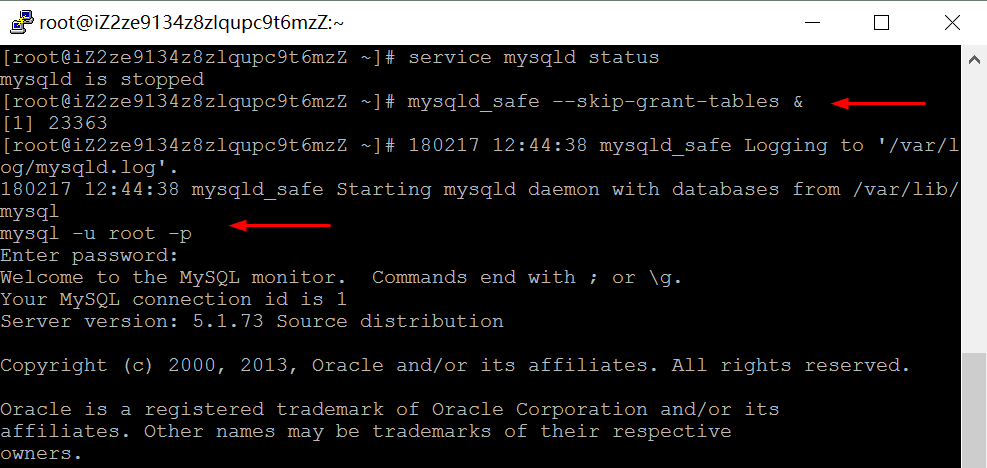
然后输入“use mysql;”使用数据库,尝试“show databases;”显示所有数据库。
接下来就是更新root用户的密码:
6.重启服务本地连接mysql数据库
命令:service mysqld restart
mysql -u root -p

二. MySQL数据库增加新用户
1.使用mysql数据库
命令:use mysql;
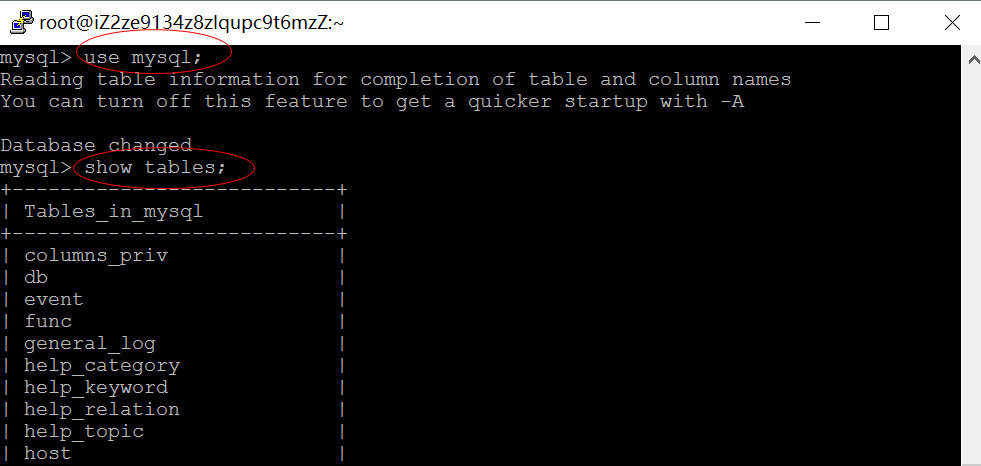
2.显示所有表
命令:show tables;
这里我们使用user表,定义mysql数据库的用户。
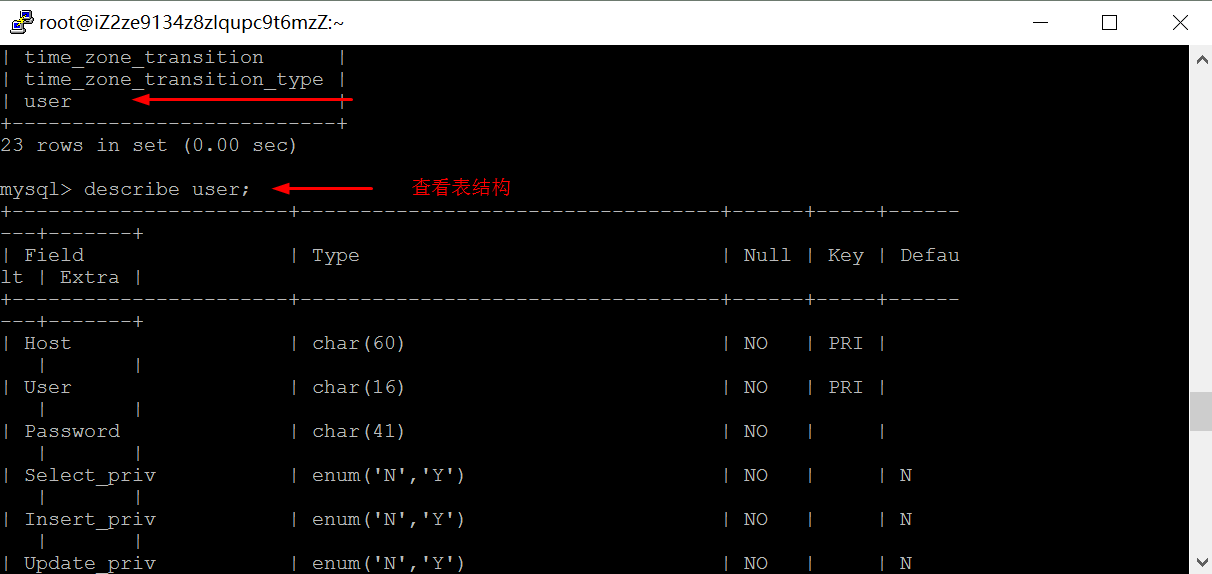
3.查看表结构
命令:describe user;
| Host                  | char(60)                          | NO   | PRI |                            |       |
| User                  | char(16)                          | NO   | PRI |                            |       |
| Password              | char(41)                          | NO   |     |                            |       |
4.添加一个新用户yxz,密码为123456
命令如下:
mysql> use mysql;
Reading table information for completion of table and column names
You can turn off this feature to get a quicker startup with -A

Database changed
mysql> insert into mysql.user(Host,User,Password) value ("localhost","yxz",password("123456"));
Query OK, 1 row affected, 3 warnings (0.00 sec)

mysql> flush privileges;
Query OK, 0 rows affected (0.00 sec)

mysql> create database Eastmount;
Query OK, 1 row affected (0.00 sec)

mysql> show databases;
+--------------------+
| Database           |
+--------------------+
| information_schema |
| Eastmount          |
| junyun             |
| mysql              |
| test               |
+--------------------+
5 rows in set (0.00 sec)

mysql> grant all privileges on Eastmount.* to yxz@localhost identified by "yxz";
Query OK, 0 rows affected (0.00 sec)

mysql> flush privileges;
Query OK, 0 rows affected (0.00 sec)

mysql>quit;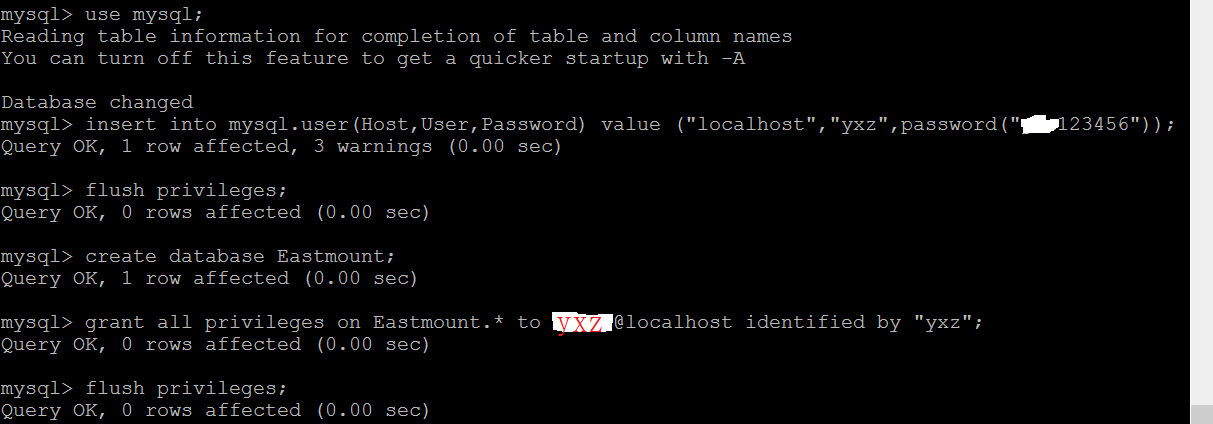
但是同样报错:error: 'Access denied for user 'root'@'localhost' (using password: NO)',需要像前面一样修订密码,代码如下:
[root@iZ2ze9134z8zlqupc9t6mzZ ~]# service mysqld stop
Stopping mysqld:                                           [  OK  ]
[root@iZ2ze9134z8zlqupc9t6mzZ ~]# mysqld_safe --skip-grant-tables &
[1] 24403
[root@iZ2ze9134z8zlqupc9t6mzZ ~]# 180217 13:50:37 mysqld_safe Logging to '/var/log/mysqld.log'.
180217 13:50:37 mysqld_safe Starting mysqld daemon with databases from /var/lib/mysql
mysql -u yxz -p
Enter password:
Welcome to the MySQL monitor.  Commands end with ; or \g.
Your MySQL connection id is 1
Server version: 5.1.73 Source distribution

Copyright (c) 2000, 2013, Oracle and/or its affiliates. All rights reserved.

Oracle is a registered trademark of Oracle Corporation and/or its
affiliates. Other names may be trademarks of their respective
owners.

Type 'help;' or '\h' for help. Type '\c' to clear the current input statement.

mysql> show databases;
+--------------------+
| Database           |
+--------------------+
| information_schema |
| Eastmount          |
| junyun             |
| mysql              |
| test               |
+--------------------+
5 rows in set (0.00 sec)

mysql> use mysql;
Reading table information for completion of table and column names
You can turn off this feature to get a quicker startup with -A

Database changed
mysql> update user set password=PASSWORD("123456") where user="yxz";
Query OK, 1 row affected (0.00 sec)
Rows matched: 1  Changed: 1  Warnings: 0

mysql> flush privileges;
Query OK, 0 rows affected (0.00 sec)

mysql> quit;
三. SQL语句
1.root登录并进入Eastmount数据库
命令如下:
[root@iZ2ze9134z8zlqupc9t6mzZ ~]# mysql -u yxz -p
Enter password:
Welcome to the MySQL monitor.  Commands end with ; or \g.
Your MySQL connection id is 5
Server version: 5.1.73 Source distribution

Copyright (c) 2000, 2013, Oracle and/or its affiliates. All rights reserved.

Oracle is a registered trademark of Oracle Corporation and/or its
affiliates. Other names may be trademarks of their respective
owners.

Type 'help;' or '\h' for help. Type '\c' to clear the current input statement.

mysql> show databases;
+--------------------+
| Database           |
+--------------------+
| information_schema |
| Eastmount          |
| test               |
+--------------------+
3 rows in set (0.00 sec)

mysql> use Eastmount;
Database changed
mysql> show tables;
Empty set (0.00 sec)

mysql>
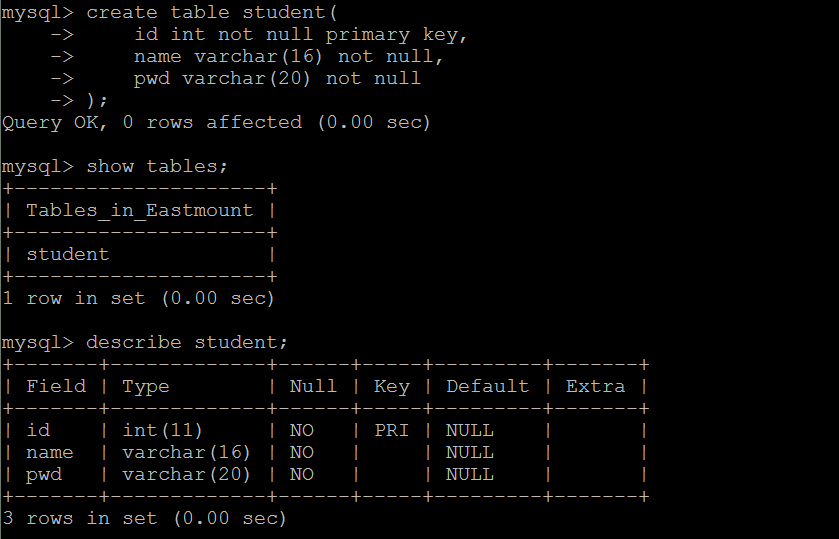
命令如下:
create table student(
    id int not null primary key,
    name varchar(16) not null,
    pwd varchar(20) not null
);命令:describe student;
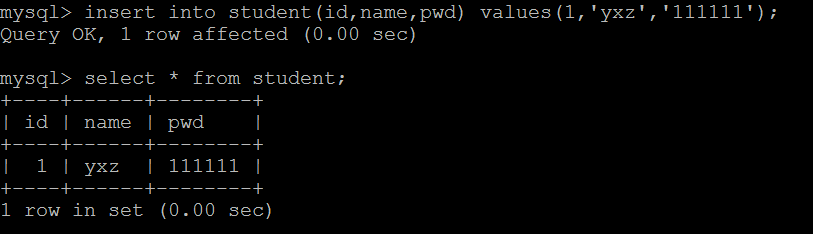
4.插入数据
命令:insert into student(id,name,pwd) values(1,'yxz','111111');
5.查询数据
命令:select * from student;
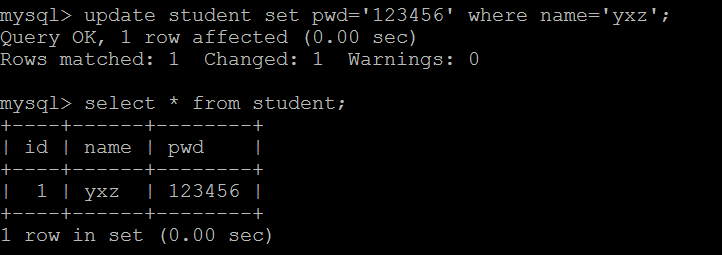
6.更新数据
命令:update student set pwd='123456' where name='yxz';
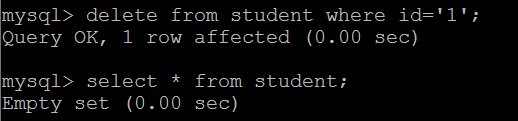
7.删除数据
命令:delete from student where id='1';
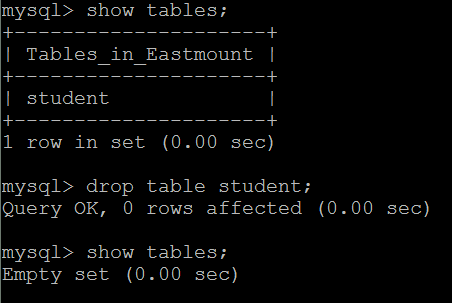
8.删除表
命令:drop table studentl;
总之,希望这篇基础文章对您有所帮助,尤其是刚接触云服务器的新手,如果您是高手,还请多提意见,共同提高。祝大家新年快乐,又一年过去了,娜我们来年一起进步加油。
( By:Eastmount CSDN 2018-02-13 中午12点 http://blog.csdn.net/Eastmount )


 2512
2512

 被折叠的 条评论
为什么被折叠?
被折叠的 条评论
为什么被折叠?
 到【灌水乐园】发言


