


INTRODUCTION
本文是学校ROBOCON比赛需要在NUC上部署MID360进行建图和导航并通过串口发送给下位机。
主要是给自己看的所以对读者帮助不会太大,不过可以看看我写的流程图和主要借鉴的文章使用mid360从0开始的那篇。
环境ubuntu 20.04 ROS:noetic 硬件:MID360 NUC
主要借鉴文章:
使用mid360从0开始搭建实物机器人入门级导航系统,基于Fast_Lio,Move_Base
刘世杰写的(第一个链接是写的雷达相关IP配置问题SDK2和DRIVER2相关的下载,第二个链接有关串口):
流程图
MID360发送数据---->FAST_LIO2进行建图---->将三维点云的PCD文件转为2d栅格地图---->重定位---->发布初始位置---->用move_base框架路径规划导航---->发布导航点---->串口订阅/Odemotry与/cmd_vel 两个话题的信息
如何使用
MXC文件夹是git别人的代码仓库用来建图导航,ws_livox是用来发布mid360消息,listener_ws是用来串口发送数据。
1.发送MID360消息
cd /ws_livox
source dev/setup.bash
roslaunch livox_ros_driver2 msg_MID360.launch //发送MID360消息
2.建图
cd /mxc
source dev/setup.bash
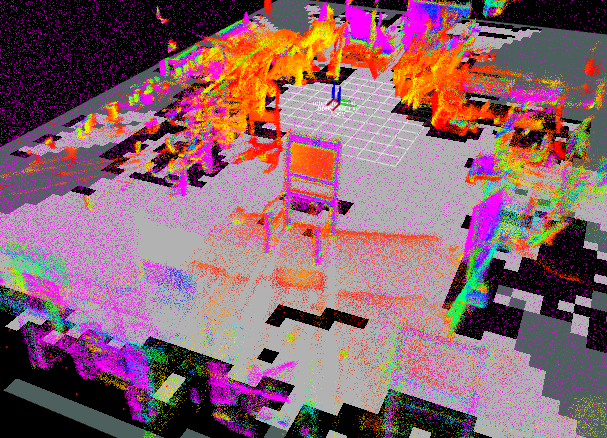
roslaunch fast_lio_localization sentry_build_map.launch
3.pcd-->2D栅格地图
//三维点云地图pcd文件会在sentry_build_map.launch运行结束后自动保存到fast_lio/PCD文件夹下
roslaunch pcd2pgm run.launch
再开一个终端
将其保存下来rosrun map_server map_saver //此时生成的2D地图在MXC文件夹下,需要把他放入PCD文件夹下
修改文件名 将map.pgm和map.yaml改为scans.pgm和scans.yaml
将scans.yaml文件第一行改为相应路径image: /home/mxc/mxc/src/NEXTE_Sentry_Nav/sentry_slam/FAST_LIO/PCD/scans.pgm
4.重定位
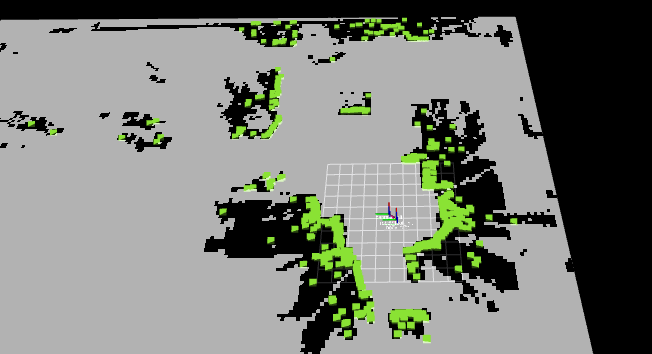
roslaunch fast_lio_localization sentry_localize.launch
//这时候你就可以看到地图上有绿色的二维点云
5.发布初始位置
source dev/setup.bash
rosrun fast_lio_localization publish_initial_pose.py 0 0 0 0 0 0
6.用move_base
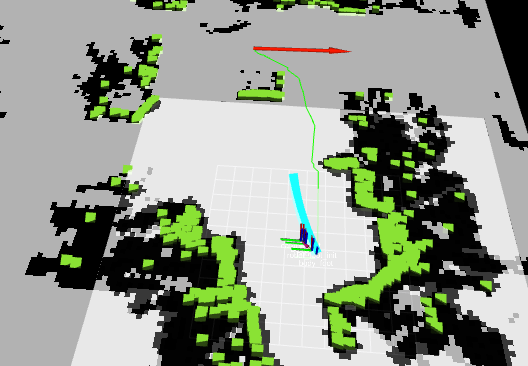
roslaunch sentry_nav sentry_movebase.launch
7.指定导航点
8.可以使用rostopic list查看话题 发现有/Odometry和/cmd_vel
可以使用echo将其打印出来先看下有没有信息
9.串口发送
插上USB转TTL去到listener_ws文件夹中
source dev/setup.bash
rosrun seria_demo serial_sender_minimal //运行此节点
对应的成功现象
建图成功
重定位成功(有绿色的二维点云)
move_base导航成功
一些问题
1.!!!最重要的需要用到python3.8的环境 不知道谁下的Anaconda导致很多次依赖下不来例如numpy
2.empy问题 具体解决办法可以在我的csdn收藏夹MID360篇找到解决问题所在
3.无法做到动态避障 办法:修改膨胀半径,在sentry_nav/param/costmap_common_params.yaml中修改膨胀半径
4.修改高度 因为我们是从3维转为2D 而例如电风扇一些高度较高的东西不需要映射到地图上,所以我们需要修改高度。而3维转2D地图时用的是pcd2pgm run.launch,所以我们只需要修改run.launch,将其中的thre-2-max修改即可
5.串口发送 需要修改cpp文件,一开始主要参考文章的代码仓库只订阅cmd_vel没订阅odometry,所以需要修改cpp文件,也千万不要忘记修改Cmaklist.txt
serial.cpp文件
#include <ros/ros.h>
#include <nav_msgs/Odometry.h>
#include <geometry_msgs/Twist.h>
#include <serial/serial.h>
#include <tf/transform_datatypes.h>  // 加入用于四元数转欧拉角

struct DataBuffer {
    double x = 0.0;
    double y = 0.0;
    double vx = 0.0;
    double vy = 0.0;
    double yaw_rate = 0.0;
    double yaw = 0.0;
    bool odom_received = false;
    bool cmd_received = false;
};

int main(int argc, char** argv)
{
    ros::init(argc, argv, "serial_sender_minimal");
    ros::NodeHandle nh;

    serial::Serial serial_port;
    try {
        serial_port.setPort("/dev/ttyUSB0");
        serial_port.setBaudrate(115200);
        serial::Timeout timeout = serial::Timeout::simpleTimeout(1000);
        serial_port.setTimeout(timeout);
        serial_port.open();
    }
    catch (serial::IOException& e) {
        ROS_ERROR_STREAM("无法打开串口: " << e.what());
        return 1;
    }

    DataBuffer buffer;

    // 订阅 odometry
    ros::Subscriber odom_sub = nh.subscribe<nav_msgs::Odometry>("/Odometry", 10,
        [&](const nav_msgs::Odometry::ConstPtr& msg) {
            buffer.x = msg->pose.pose.position.x;
            buffer.y = msg->pose.pose.position.y;

            // 提取四元数并转换为偏航角
            tf::Quaternion q(
                msg->pose.pose.orientation.x,
                msg->pose.pose.orientation.y,
                msg->pose.pose.orientation.z,
                msg->pose.pose.orientation.w
            );
            tf::Matrix3x3 m(q);
            double roll, pitch, yaw;
            m.getRPY(roll, pitch, yaw);
            buffer.yaw = yaw;

            buffer.odom_received = true;

            if (buffer.cmd_received) {
                std::string data = "x:" + std::to_string(buffer.x) +
                    ",y:" + std::to_string(buffer.y) +
                    ",yaw:" + std::to_string(buffer.yaw) +
                    ",vx:" + std::to_string(buffer.vx) +
                    ",vy:" + std::to_string(buffer.vy) +
                    ",yaw_rate:" + std::to_string(buffer.yaw_rate) + "\n";
                serial_port.write(data);
                ROS_INFO_STREAM("[Serial Send] " << data);
            }
        });

    // 订阅 cmd_vel
    ros::Subscriber cmd_sub = nh.subscribe<geometry_msgs::Twist>("/cmd_vel", 10,
        [&](const geometry_msgs::Twist::ConstPtr& msg) {
            buffer.vx = msg->linear.x;
            buffer.vy = msg->linear.y;
            buffer.yaw_rate = msg->angular.z;
            buffer.cmd_received = true;
        });

    ros::spin();
    serial_port.close();
    return 0;
}
Cmakelist.txt文件别忘了加这两行
add_executable(serial_sender_minimal src/serial.cpp)
target_link_libraries(serial_sender_minimal ${catkin_LIBRARIES})
完整的Cmakelist.txt文件
cmake_minimum_required(VERSION 3.0.2)
project(seria_demo)

## Compile as C++11, supported in ROS Kinetic and newer
# add_compile_options(-std=c++11)

## Find catkin macros and libraries
## if COMPONENTS list like find_package(catkin REQUIRED COMPONENTS xyz)
## is used, also find other catkin packages
find_package(catkin REQUIRED COMPONENTS
  roscpp
  rospy
  serial
  std_msgs
  geometry_msgs
  tf
  nav_msgs
)

## System dependencies are found with CMake's conventions
# find_package(Boost REQUIRED COMPONENTS system)


## Uncomment this if the package has a setup.py. This macro ensures
## modules and global scripts declared therein get installed
## See http://ros.org/doc/api/catkin/html/user_guide/setup_dot_py.html
# catkin_python_setup()

################################################
## Declare ROS messages, services and actions ##
################################################

## To declare and build messages, services or actions from within this
## package, follow these steps:
## * Let MSG_DEP_SET be the set of packages whose message types you use in
##   your messages/services/actions (e.g. std_msgs, actionlib_msgs, ...).
## * In the file package.xml:
##   * add a build_depend tag for "message_generation"
##   * add a build_depend and a exec_depend tag for each package in MSG_DEP_SET
##   * If MSG_DEP_SET isn't empty the following dependency has been pulled in
##     but can be declared for certainty nonetheless:
##     * add a exec_depend tag for "message_runtime"
## * In this file (CMakeLists.txt):
##   * add "message_generation" and every package in MSG_DEP_SET to
##     find_package(catkin REQUIRED COMPONENTS ...)
##   * add "message_runtime" and every package in MSG_DEP_SET to
##     catkin_package(CATKIN_DEPENDS ...)
##   * uncomment the add_*_files sections below as needed
##     and list every .msg/.srv/.action file to be processed
##   * uncomment the generate_messages entry below
##   * add every package in MSG_DEP_SET to generate_messages(DEPENDENCIES ...)

## Generate messages in the 'msg' folder
# add_message_files(
#   FILES
#   Message1.msg
#   Message2.msg
# )

## Generate services in the 'srv' folder
# add_service_files(
#   FILES
#   Service1.srv
#   Service2.srv
# )

## Generate actions in the 'action' folder
# add_action_files(
#   FILES
#   Action1.action
#   Action2.action
# )

## Generate added messages and services with any dependencies listed here
# generate_messages(
#   DEPENDENCIES
#   std_msgs
# )

################################################
## Declare ROS dynamic reconfigure parameters ##
################################################

## To declare and build dynamic reconfigure parameters within this
## package, follow these steps:
## * In the file package.xml:
##   * add a build_depend and a exec_depend tag for "dynamic_reconfigure"
## * In this file (CMakeLists.txt):
##   * add "dynamic_reconfigure" to
##     find_package(catkin REQUIRED COMPONENTS ...)
##   * uncomment the "generate_dynamic_reconfigure_options" section below
##     and list every .cfg file to be processed

## Generate dynamic reconfigure parameters in the 'cfg' folder
# generate_dynamic_reconfigure_options(
#   cfg/DynReconf1.cfg
#   cfg/DynReconf2.cfg
# )

###################################
## catkin specific configuration ##
###################################
## The catkin_package macro generates cmake config files for your package
## Declare things to be passed to dependent projects
## INCLUDE_DIRS: uncomment this if your package contains header files
## LIBRARIES: libraries you create in this project that dependent projects also need
## CATKIN_DEPENDS: catkin_packages dependent projects also need
## DEPENDS: system dependencies of this project that dependent projects also need
catkin_package(
#  INCLUDE_DIRS include
#  LIBRARIES seria_demo
#  CATKIN_DEPENDS roscpp rospy serial std_msgs
#  DEPENDS system_lib
)
add_executable(serial_sender_minimal src/serial.cpp)
target_link_libraries(serial_sender_minimal ${catkin_LIBRARIES})

###########
## Build ##
###########

## Specify additional locations of header files
## Your package locations should be listed before other locations
include_directories(
# include
  ${catkin_INCLUDE_DIRS}
)

## Declare a C++ library
# add_library(${PROJECT_NAME}
#   src/${PROJECT_NAME}/seria_demo.cpp
# )

## Add cmake target dependencies of the library
## as an example, code may need to be generated before libraries
## either from message generation or dynamic reconfigure
# add_dependencies(${PROJECT_NAME} ${${PROJECT_NAME}_EXPORTED_TARGETS} ${catkin_EXPORTED_TARGETS})

## Declare a C++ executable
## With catkin_make all packages are built within a single CMake context
## The recommended prefix ensures that target names across packages don't collide
# add_executable(${PROJECT_NAME}_node src/seria_demo_node.cpp)

## Rename C++ executable without prefix
## The above recommended prefix causes long target names, the following renames the
## target back to the shorter version for ease of user use
## e.g. "rosrun someones_pkg node" instead of "rosrun someones_pkg someones_pkg_node"
# set_target_properties(${PROJECT_NAME}_node PROPERTIES OUTPUT_NAME node PREFIX "")

## Add cmake target dependencies of the executable
## same as for the library above
# add_dependencies(${PROJECT_NAME}_node ${${PROJECT_NAME}_EXPORTED_TARGETS} ${catkin_EXPORTED_TARGETS})

## Specify libraries to link a library or executable target against
# target_link_libraries(${PROJECT_NAME}_node
#   ${catkin_LIBRARIES}
# )

#############
## Install ##
#############

# all install targets should use catkin DESTINATION variables
# See http://ros.org/doc/api/catkin/html/adv_user_guide/variables.html

## Mark executable scripts (Python etc.) for installation
## in contrast to setup.py, you can choose the destination
# catkin_install_python(PROGRAMS
#   scripts/my_python_script
#   DESTINATION ${CATKIN_PACKAGE_BIN_DESTINATION}
# )

## Mark executables for installation
## See http://docs.ros.org/melodic/api/catkin/html/howto/format1/building_executables.html
# install(TARGETS ${PROJECT_NAME}_node
#   RUNTIME DESTINATION ${CATKIN_PACKAGE_BIN_DESTINATION}
# )

## Mark libraries for installation
## See http://docs.ros.org/melodic/api/catkin/html/howto/format1/building_libraries.html
# install(TARGETS ${PROJECT_NAME}
#   ARCHIVE DESTINATION ${CATKIN_PACKAGE_LIB_DESTINATION}
#   LIBRARY DESTINATION ${CATKIN_PACKAGE_LIB_DESTINATION}
#   RUNTIME DESTINATION ${CATKIN_GLOBAL_BIN_DESTINATION}
# )

## Mark cpp header files for installation
# install(DIRECTORY include/${PROJECT_NAME}/
#   DESTINATION ${CATKIN_PACKAGE_INCLUDE_DESTINATION}
#   FILES_MATCHING PATTERN "*.h"
#   PATTERN ".svn" EXCLUDE
# )

## Mark other files for installation (e.g. launch and bag files, etc.)
# install(FILES
#   # myfile1
#   # myfile2
#   DESTINATION ${CATKIN_PACKAGE_SHARE_DESTINATION}
# )

#############
## Testing ##
#############

## Add gtest based cpp test target and link libraries
# catkin_add_gtest(${PROJECT_NAME}-test test/test_seria_demo.cpp)
# if(TARGET ${PROJECT_NAME}-test)
#   target_link_libraries(${PROJECT_NAME}-test ${PROJECT_NAME})
# endif()

## Add folders to be run by python nosetests
# catkin_add_nosetests(test)
总结
弄了一个星期终于弄完了,感谢师兄刘世杰,也算是小小入门,继续加油,最主要的还是借鉴了开头的那个文章。遇到的各种各样的问题都需要自己慢慢解决,切忌耐心,网上帖子很多我们要先找到自己配置时的问题在哪,再去找相应的方法,而不是一同乱试。


 4795
4795

 被折叠的 条评论
为什么被折叠?
被折叠的 条评论
为什么被折叠?
 到【灌水乐园】发言


