


介绍
该代码是为了应对yolo数据集结构做出的设计,我们训练yolo模型经常会因为模型感受野大小而调整模型头或者主干网络,但是对于一些特定场景或者实际应用数据集上标注框在图片上的面积也对模型学习有很大关系,比如我在640640的模型上训练但是我图片是19201208的,而且我的标注框占图片面积的百分之几,这就算使用了数据增强也会对模型泛化能力大打折扣,因为模型学习输入进去的图片tensor的shape就是【1,3,640,640】,感受野640640的图片却是19201280的,这就好比300度近视说10米外能看清。
例如:
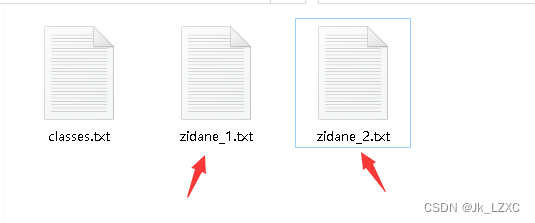
原图片是1280720的,我设置的切割范围是标注框周围的320320区域,运行程序后
就会分别得到两个
320*320的图片和依照区域转换后的yolo格式的txt标注文件


代码特点
我对代码进行了全新的架构设计:
1.使用python来进行结构设计,支持yolo格式的数据集;
2. 仅仅使用os和opencv-python来进行处理;
3. 有数据集图片和标签名称是否一致的判断;
4. 可以自定义图片类型;
5. 可以定义根据标注框自定义裁切大小;
6. 有输出到另外一个文件夹的特点;
7. 不足自定义裁切大小,也能根据标注框周围大小进行裁切。
8. 根据原标注文件在原图片上有多少个标注框生成多少张裁切图片以及生成多少个与之对应的标注文件(一个标注文件里面只有一个标注框数据对应一张裁切图片)
代码介绍
# 输入和输出文件夹路径
input_image_folder = "images"
input_label_folder = "labels"
#下面使用的文件夹需要自行创建一下
output_image_folder = "output_images"
output_label_folder = "output_labels"

# 定义裁剪区域的大小
crop_size = [640,640]#【width,height】

#两种图片文件格式,如果有需求自行添加或修改
image_type1=".jpg"
image_type2=".png"
全部代码(方法一)
import os
import cv2

# 输入和输出文件夹路径
input_image_folder = "images"
input_label_folder = "labels"

output_image_folder = "output_images"
output_label_folder = "output_labels"

# 定义裁剪区域的大小
crop_size = [640,640]#【width,height】

#两种图片文件格式,如果有需求自行添加或修改
image_type1=".jpg"
image_type2=".png"

# 遍历文件夹
for image_file in os.listdir(input_image_folder):
    if image_file.endswith(image_type1) or image_file.endswith(image_type2):
        image_path = os.path.join(input_image_folder, image_file)

        # 找到匹配的标签文件
        label_file = os.path.join(input_label_folder, image_file.replace(image_type1, ".txt").replace(image_type2, ".txt"))

        # 判断原图片文件的名称和标注文件的名称是否一致
        image_name, image_ext = os.path.splitext(image_file)
        label_name, label_ext = os.path.splitext(label_file)
        if image_name != label_name.split('\\')[1]:
            # print('图片:',image_name,'标签:',label_name,'不匹配')
            pass # 跳过该图像和标签文件
        else:
            if os.path.exists(label_file):
                # 读取图像
                image = cv2.imread(image_path)
                image_height, image_width, _ = image.shape

                # 读取标签信息
                labels = []
                with open(label_file, 'r') as label:
                    for line in label:
                        label_data = line.strip().split()
                        if len(label_data) < 5:
                            continue
                        class_id, x, y, width, height = map(float, label_data[0:5])
                        labels.append((class_id, x, y, width, height))

                # 如果没有标签信息,跳过该图像
                if len(labels) == 0:
                    continue

                # 遍历所有的标注框,并对每个标注框进行裁剪操作
                index = 0
                for label in labels:
                    index += 1
                    class_id, x, y, width, height = label

                    # 计算标注框周围的裁剪区域
                    x1 = int(max(0, (x - width / 2) * image_width))
                    y1 = int(max(0, (y - height / 2) * image_height))
                    x2 = int(min(image_width, (x + width / 2) * image_width))
                    y2 = int(min(image_height, (y + height / 2) * image_height))

                    # 计算裁剪区域的大小
                    crop_width = x2 - x1
                    crop_height = y2 - y1

                    # 如果裁剪区域小于指定大小,将其大小调整为crop_size
                    if crop_width < crop_size[0]:
                        x1 -= (crop_size[0] - crop_width) // 2
                        x2 = x1 + crop_size[0]

                    if crop_height < crop_size[1]:
                        y1 -= (crop_size[1] - crop_height) // 2
                        y2 = y1 + crop_size[1]

                    # 确保更新的坐标在图像边界内
                    x1 = max(0, x1)
                    y1 = max(0, y1)
                    x2 = min(image_width, x2)
                    y2 = min(image_height, y2)

                    # 计算新的x和y相对于裁剪区域的比例
                    new_x = (x * image_width - x1) / (x2-x1)
                    new_y = (y * image_height - y1) / (y2-y1)
                    new_x1 = width * image_width / (x2-x1)
                    new_y1 = height * image_height / (y2-y1)

                    # 裁剪图像
                    cropped_image = image[y1:y2, x1:x2]

                    # 保存裁剪后的图像,文件名为原始文件名加上下标
                    output_image_path = os.path.join(output_image_folder,
                                                     image_file.replace(image_type1, f"_{index}"+image_type1).replace(image_type2,
                                                                                                         f"_{index}"+image_type2))
                    cv2.imwrite(output_image_path, cropped_image)

                    # 保存新的标注框信息,文件名为原始文件名加上下标
                    output_label_path = os.path.join(output_label_folder,
                                                     image_file.replace(image_type1, f"_{index}.txt").replace(image_type2,
                                                                                                         f"_{index}.txt"))
                    with open(output_label_path, 'w') as output_label:
                        output_label.write(f"{int(class_id)} {new_x:.6f} {new_y:.6f} {new_x1:.6f} {new_y1:.6f}\n")
全部代码(方法二)
import os
import cv2

# 输入和输出文件夹路径
input_image_folder = "images"
input_label_folder = "labels"

output_image_folder = "output_images"
output_label_folder = "output_labels"

# 定义裁剪区域的大小
crop_size = [640,640]#【width,height】

#两种图片文件格式,如果有需求自行添加或修改
image_type1=".jpg"
image_type2=".png"

# 遍历文件夹
for image_file in os.listdir(input_image_folder):
    if image_file.endswith(image_type1) or image_file.endswith(image_type2):
        image_path = os.path.join(input_image_folder, image_file)

        # 找到匹配的标签文件
        label_file = os.path.join(input_label_folder, image_file.replace(image_type1, ".txt").replace(image_type2, ".txt"))

        if os.path.exists(label_file):
            # 读取图像
            image = cv2.imread(image_path)
            image_height, image_width, _ = image.shape

            # 读取标签信息
            labels = []
            with open(label_file, 'r') as label:
                for line in label:
                    label_data = line.strip().split()
                    if len(label_data) < 5:
                        continue
                    class_id, x, y, width, height = map(float, label_data[0:5])
                    labels.append((class_id, x, y, width, height))

            # 如果没有标签信息,跳过该图像
            if len(labels) == 0:
                continue

            # 遍历所有的标注框,并对每个标注框进行裁剪操作
            index = 0
            for label in labels:
                index += 1
                class_id, x, y, width, height = label

                # 计算标注框周围的裁剪区域
                x1 = int(max(0, (x - width / 2) * image_width))
                y1 = int(max(0, (y - height / 2) * image_height))
                x2 = int(min(image_width, (x + width / 2) * image_width))
                y2 = int(min(image_height, (y + height / 2) * image_height))

                # 计算裁剪区域的大小
                crop_width = x2 - x1
                crop_height = y2 - y1

                # 如果裁剪区域小于指定大小,将其大小调整为crop_size
                if crop_width < crop_size[0]:
                    x1 -= (crop_size[0] - crop_width) // 2
                    x2 = x1 + crop_size[0]

                if crop_height < crop_size[1]:
                    y1 -= (crop_size[1] - crop_height) // 2
                    y2 = y1 + crop_size[1]

                # 确保更新的坐标在图像边界内
                x1 = max(0, x1)
                y1 = max(0, y1)
                x2 = min(image_width, x2)
                y2 = min(image_height, y2)

                # 计算新的x和y相对于裁剪区域的比例
                new_x = (x * image_width - x1) / crop_size[0]
                new_y = (y * image_height - y1) / crop_size[1]
                new_x1 = width * image_width / crop_size[0]
                new_y1 = height * image_height / crop_size[1]

                # 裁剪图像
                cropped_image = image[y1:y2, x1:x2]

                # 保存裁剪后的图像,文件名为原始文件名加上下标
                output_image_path = os.path.join(output_image_folder,
                                                 image_file.replace(image_type1, f"_{index}"+image_type1).replace(image_type2,
                                                                                                     f"_{index}"+image_type2))
                cv2.imwrite(output_image_path, cropped_image)

                # 保存新的标注框信息,文件名为原始文件名加上下标
                output_label_path = os.path.join(output_label_folder,
                                                 image_file.replace(image_type1, f"_{index}.txt").replace(image_type2,
                                                                                                     f"_{index}.txt"))
                with open(output_label_path, 'w') as output_label:
                    output_label.write(f"{int(class_id)} {new_x:.6f} {new_y:.6f} {new_x1:.6f} {new_y1:.6f}\n")
方法一跟方法二不同地方
方法一,采用判断来验证图片名跟txt标签名一致才进行下一步操作:
		image_path = os.path.join(input_image_folder, image_file)

        # 找到匹配的标签文件
        label_file = os.path.join(input_label_folder, image_file.replace(image_type1, ".txt").replace(image_type2, ".txt"))

        # 判断原图片文件的名称和标注文件的名称是否一致
        image_name, image_ext = os.path.splitext(image_file)
        label_name, label_ext = os.path.splitext(label_file)
        if image_name != label_name.split('\\')[1]:
            # print('图片:',image_name,'标签:',label_name,'不匹配')
            pass # 跳过该图像和标签文件
        else:
        	。。。。
方法二,采用直接使用图片名称来使用标签txt文件:
		image_path = os.path.join(input_image_folder, image_file)

        # 找到匹配的标签文件
        label_file = os.path.join(input_label_folder, image_file.replace(image_type1, ".txt").replace(image_type2, ".txt"))

        if os.path.exists(label_file):
            # 读取图像
            。。。。
总结
该代码解决了高分辨率带来的yolo泛化能力弱的问题以及yolo超参数数据增强所带不来的对应模型感受野大小的问题,有问题欢迎讨论指正!


 1191
1191

 被折叠的 条评论
为什么被折叠?
被折叠的 条评论
为什么被折叠?
 到【灌水乐园】发言


