


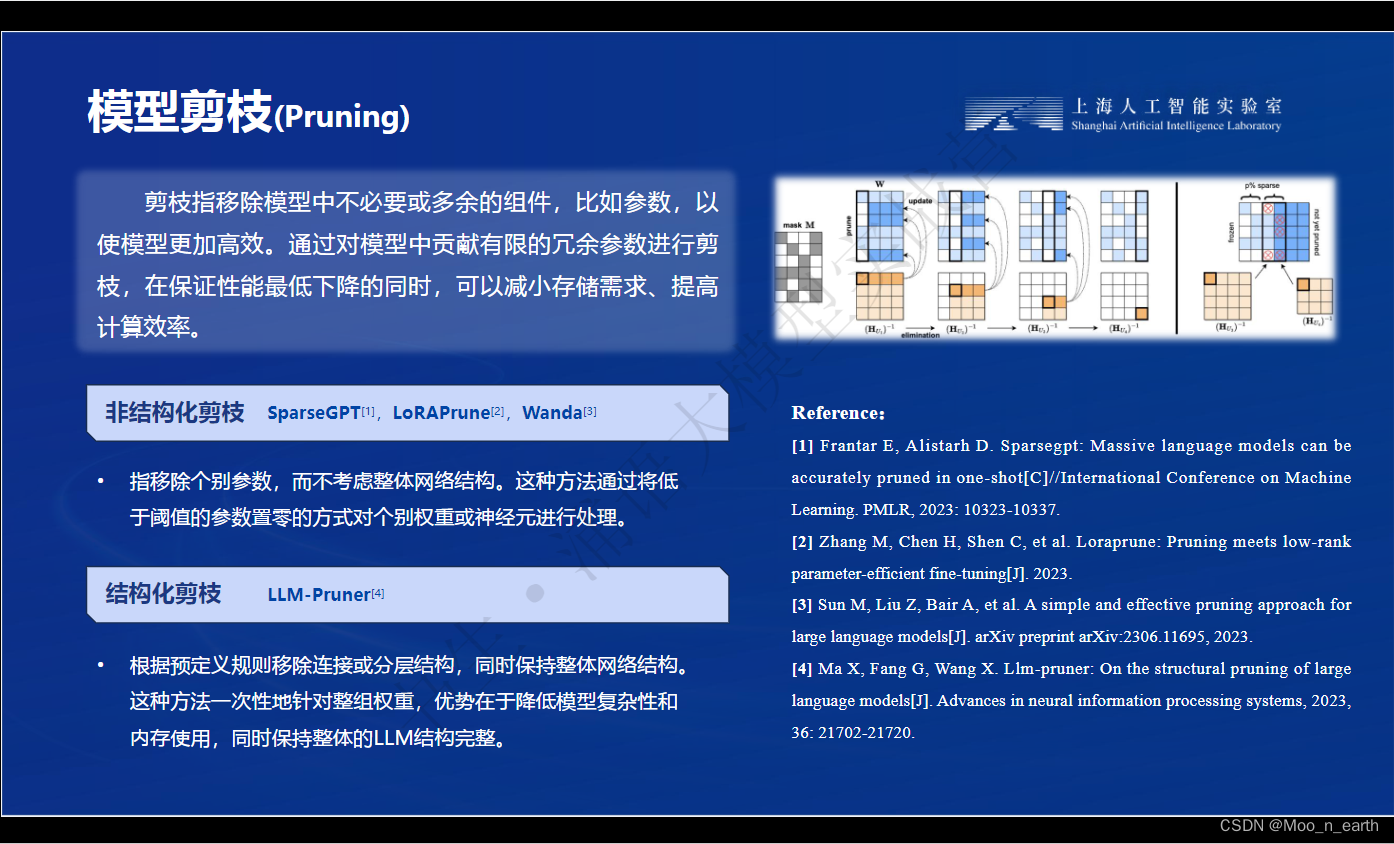
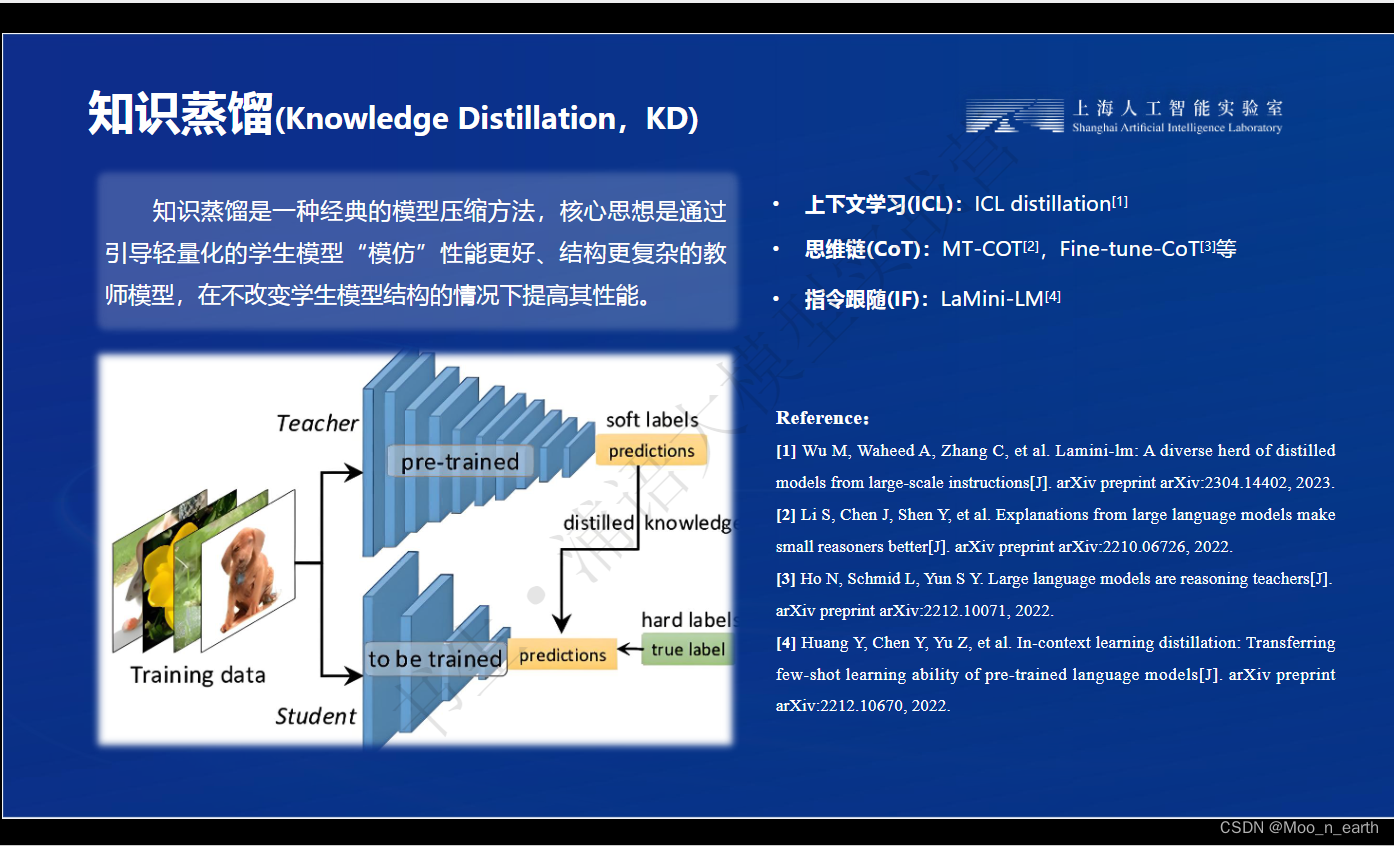
一、前提知识:
大模型部署背景:
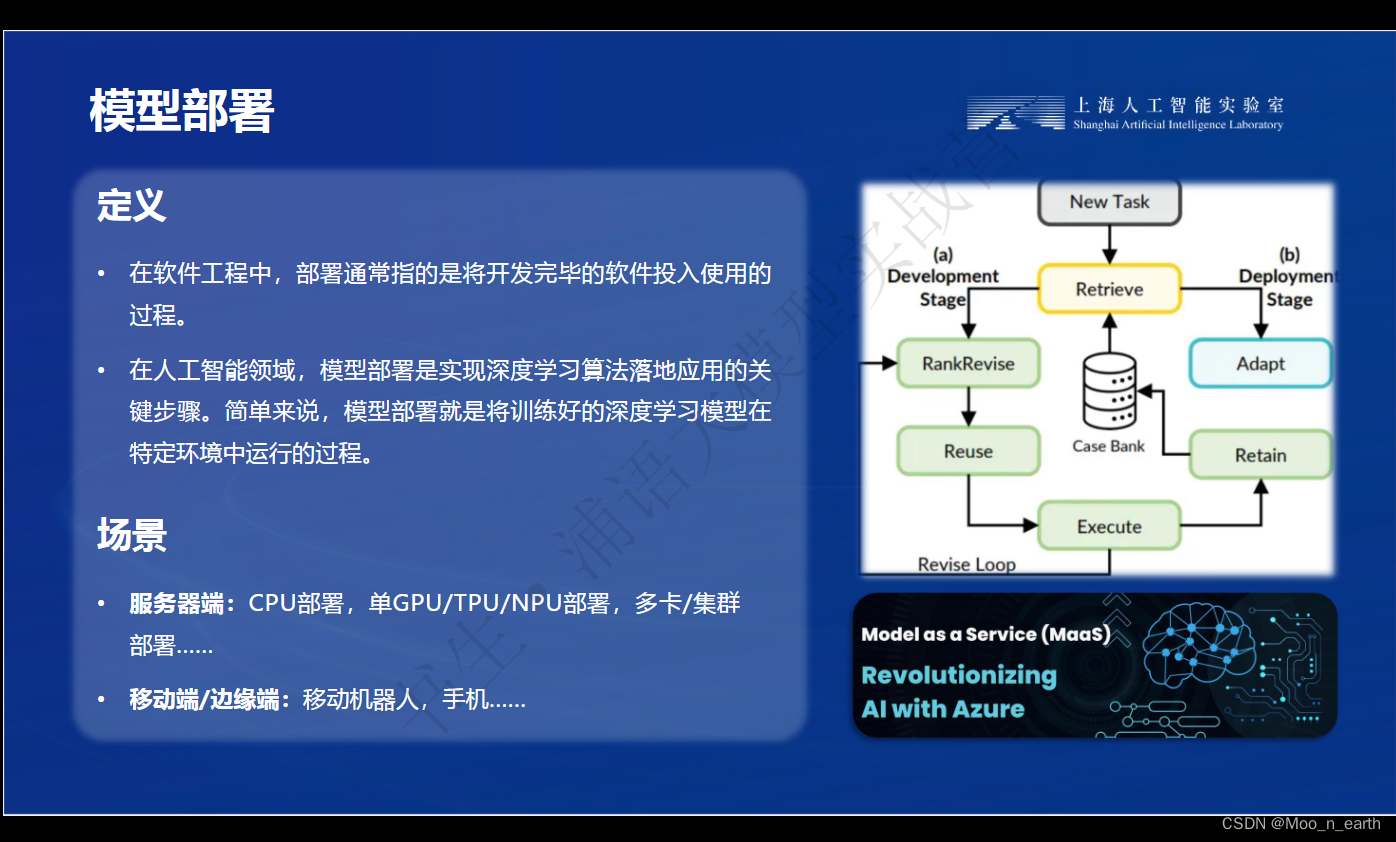
什么是模型部署:
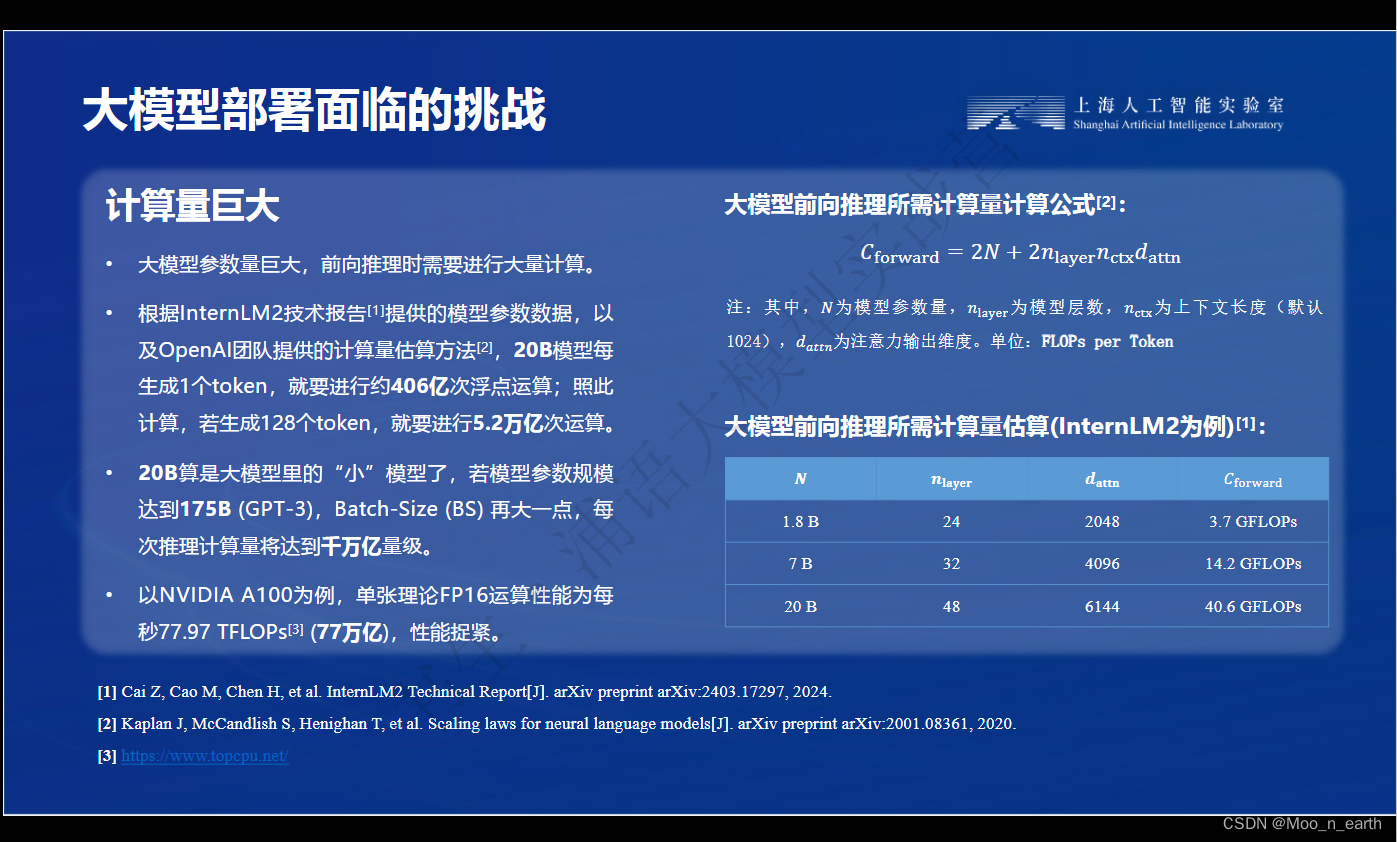
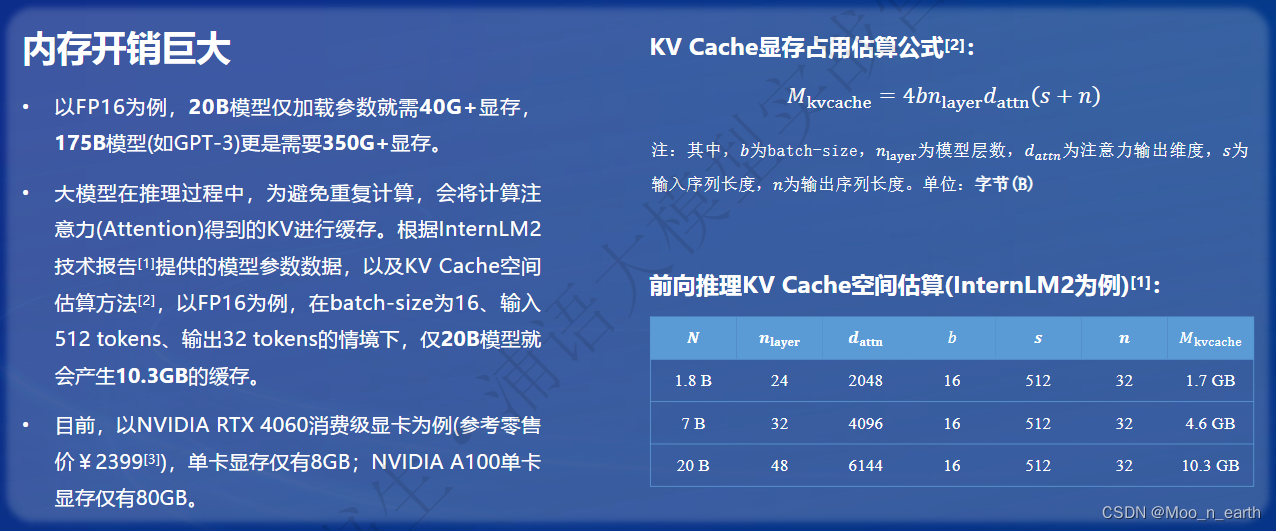
部署面临的挑战:
受Transformer 架构影响:
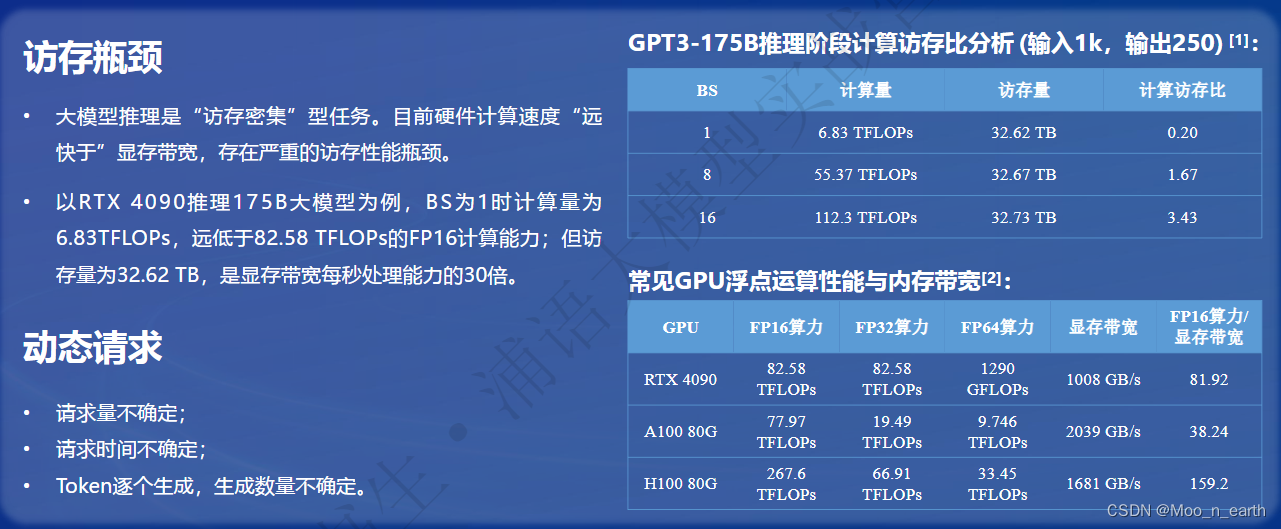
常见GPU算力还能一战,但是显存带宽受限严重,时间花费在数据交换上居多
大模型部署方法:
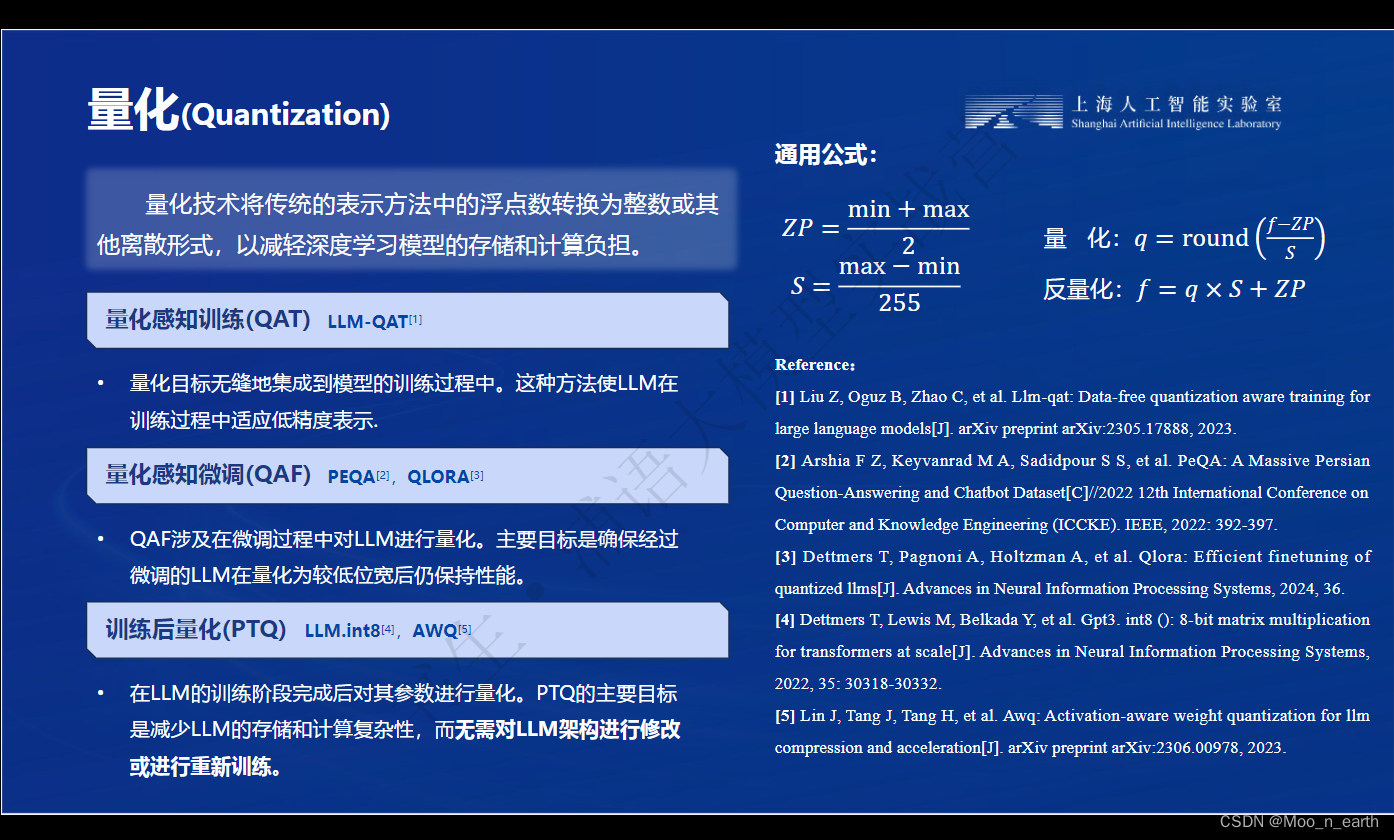
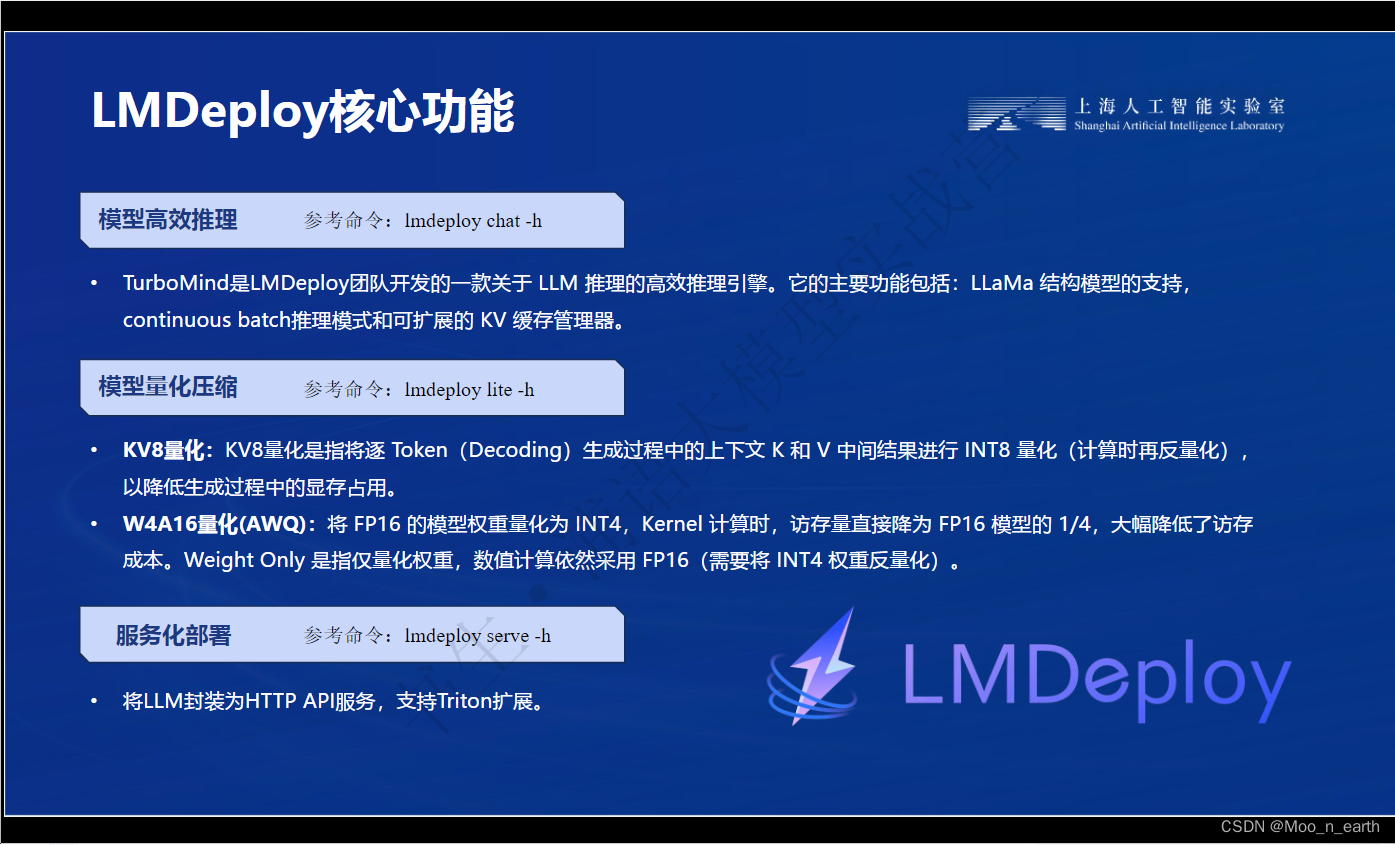
模型参数以定点数或整数形式存储,实际计算时,反量化为浮点数去计算,再用定点数和整数去存储计算结果。量化会降低访存量。
LMDepoly简介:
二、项目实战
环境配置:
进入开发机,切换为终端(Terminal)模式。
创建conda环境,输入命令:
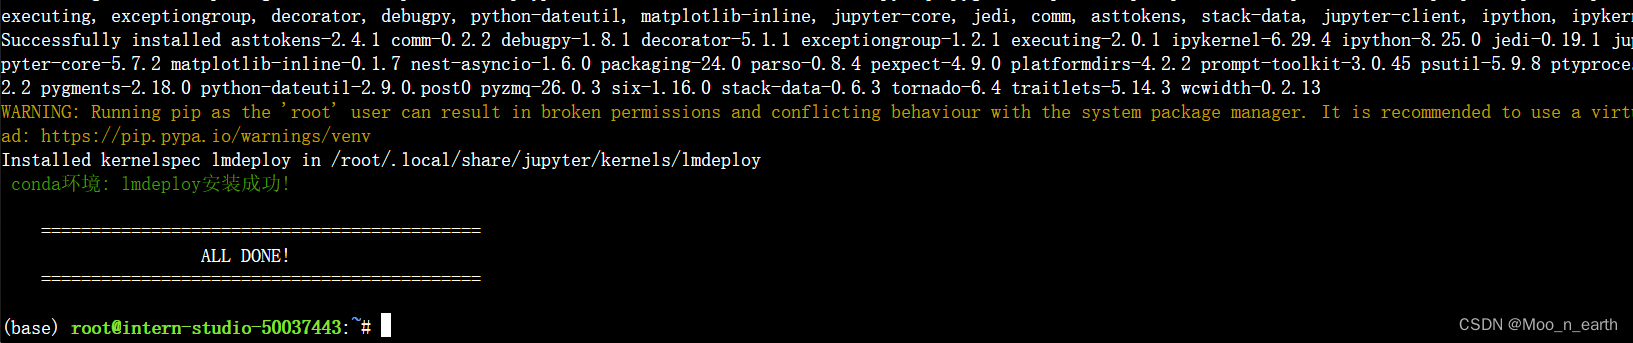
studio-conda -t lmdeploy -o pytorch-2.1.2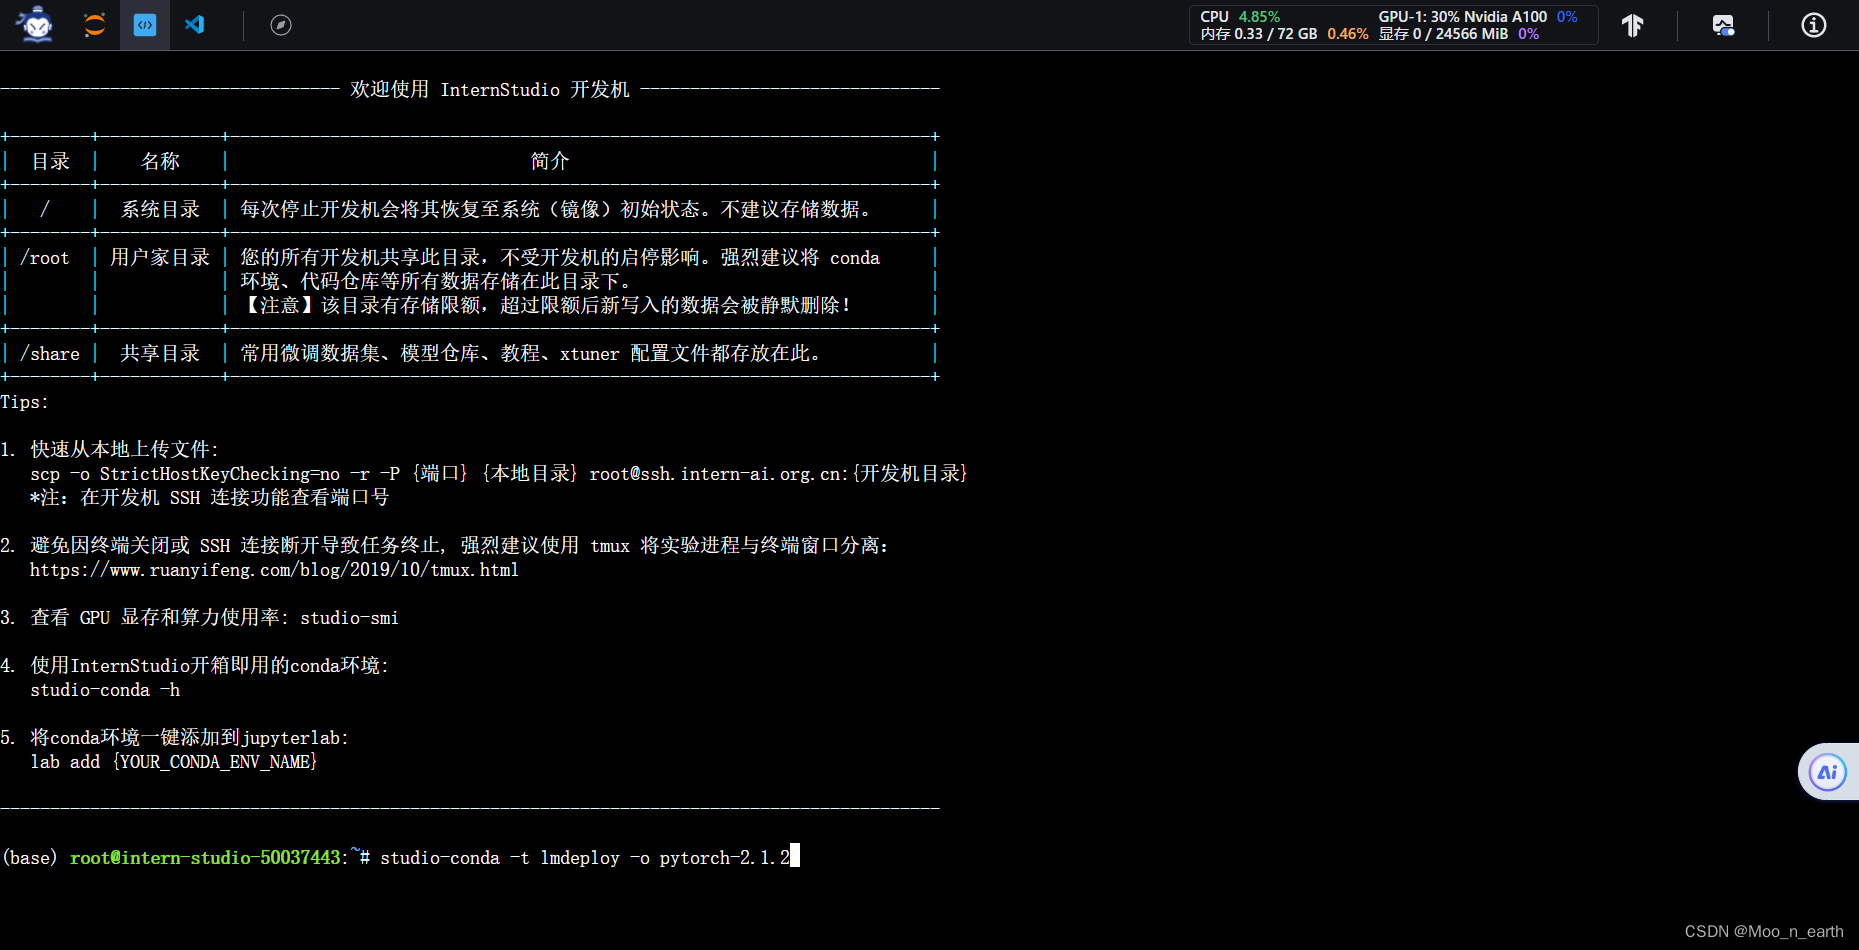
安装LMDeploy:
激活LMDeploy虚拟环境:
conda activate lmdeploy
安装0.3.0版本的lmdeploy:
pip install lmdeploy[all]==0.3.0[all] 表示安装 lmdeploy 包的所有可选依赖项或功能

LMDeploy模型对话:
前提知识:
TurboMind是LMDeploy的一个推理引擎,仅支持推理TurboMind格式的模型,TurboMind在推理HF格式模型时,会自动将模型格式进行格式转换。
准备模型:
从开发机share文件夹创建模型软链接,输入命令:
cd ~
ln -s /root/share/new_models/Shanghai_AI_Laboratory/internlm2-chat-1_8b /root/
# cp -r /root/share/new_models/Shanghai_AI_Laboratory/internlm2-chat-1_8b /root/
使用Transformer库运行模型:
(为后续对比做准备)
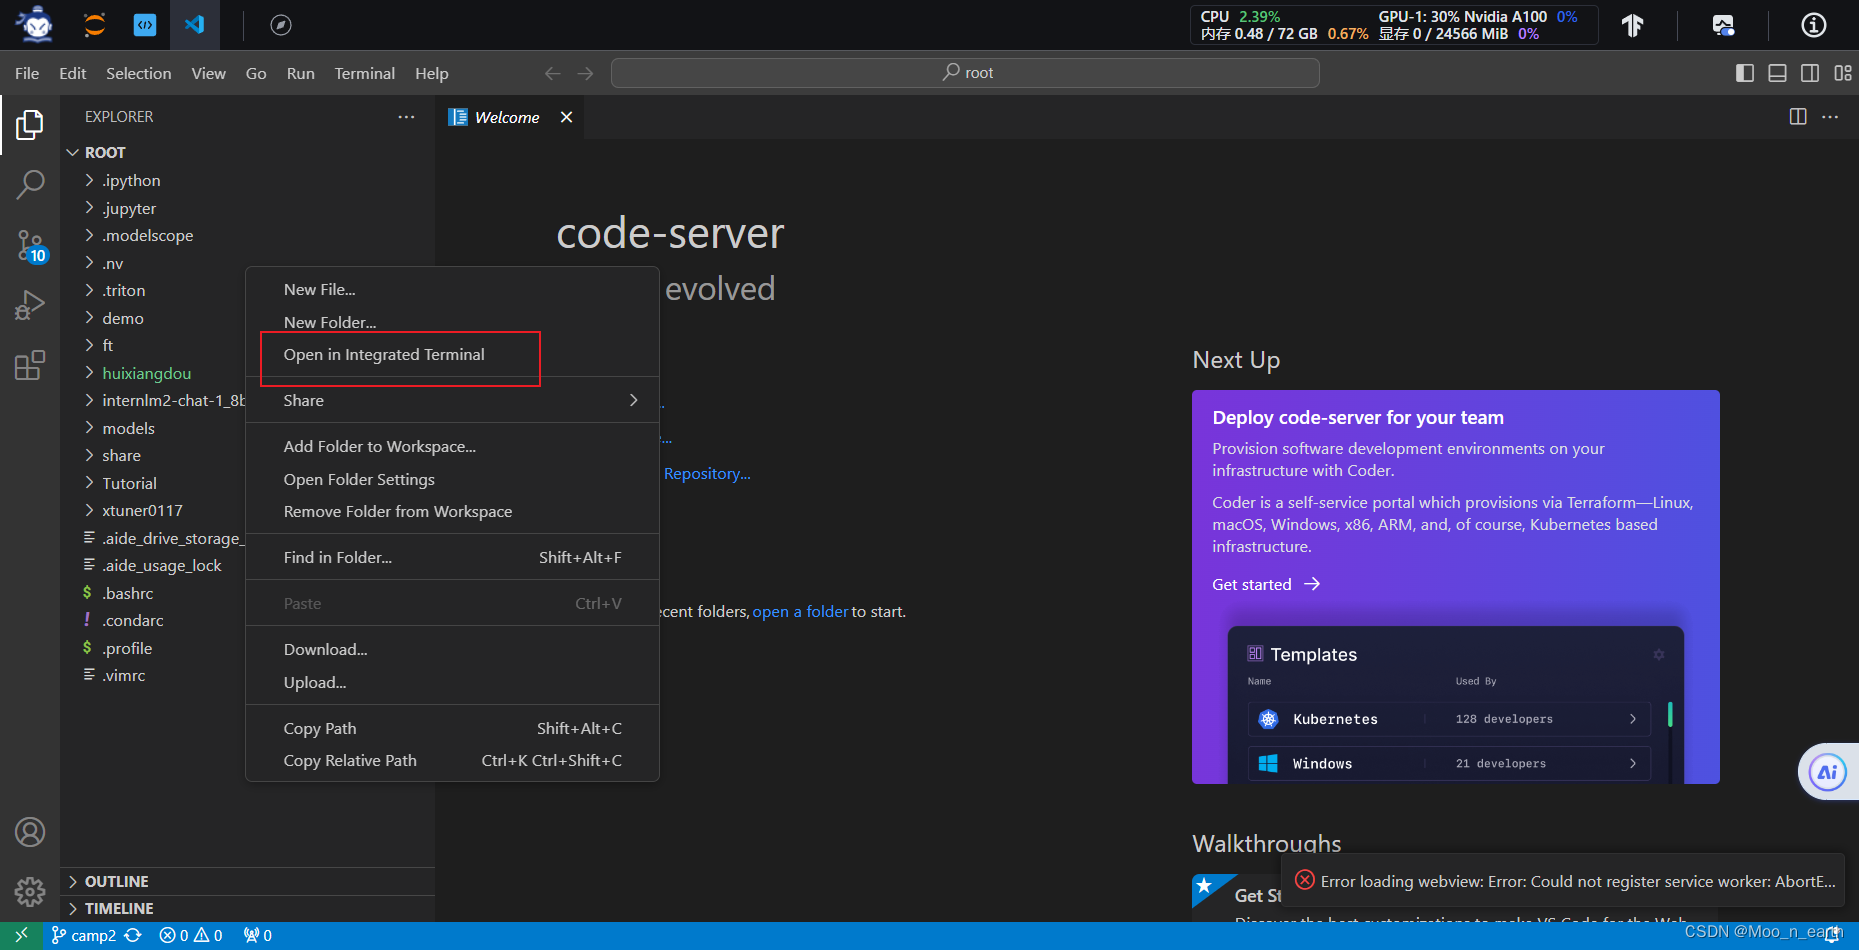
切换到VSCode,左边栏空白处右键,选择Open in Intergrated Terminal,打开终端
在终端中输入如下指令,新建pipeline_transformer.py
touch /root/pipeline_transformer.py
打开pipeline_transformer.py文件,填入代码:
import torch
from transformers import AutoTokenizer, AutoModelForCausalLM

tokenizer = AutoTokenizer.from_pretrained("/root/internlm2-chat-1_8b", trust_remote_code=True)

# Set `torch_dtype=torch.float16` to load model in float16, otherwise it will be loaded as float32 and cause OOM Error.
model = AutoModelForCausalLM.from_pretrained("/root/internlm2-chat-1_8b", torch_dtype=torch.float16, trust_remote_code=True).cuda()
model = model.eval()

inp = "hello"
print("[INPUT]", inp)
response, history = model.chat(tokenizer, inp, history=[])
print("[OUTPUT]", response)

inp = "please provide three suggestions about time management"
print("[INPUT]", inp)
response, history = model.chat(tokenizer, inp, history=history)
print("[OUTPUT]", response)
按Ctrl+S键保存。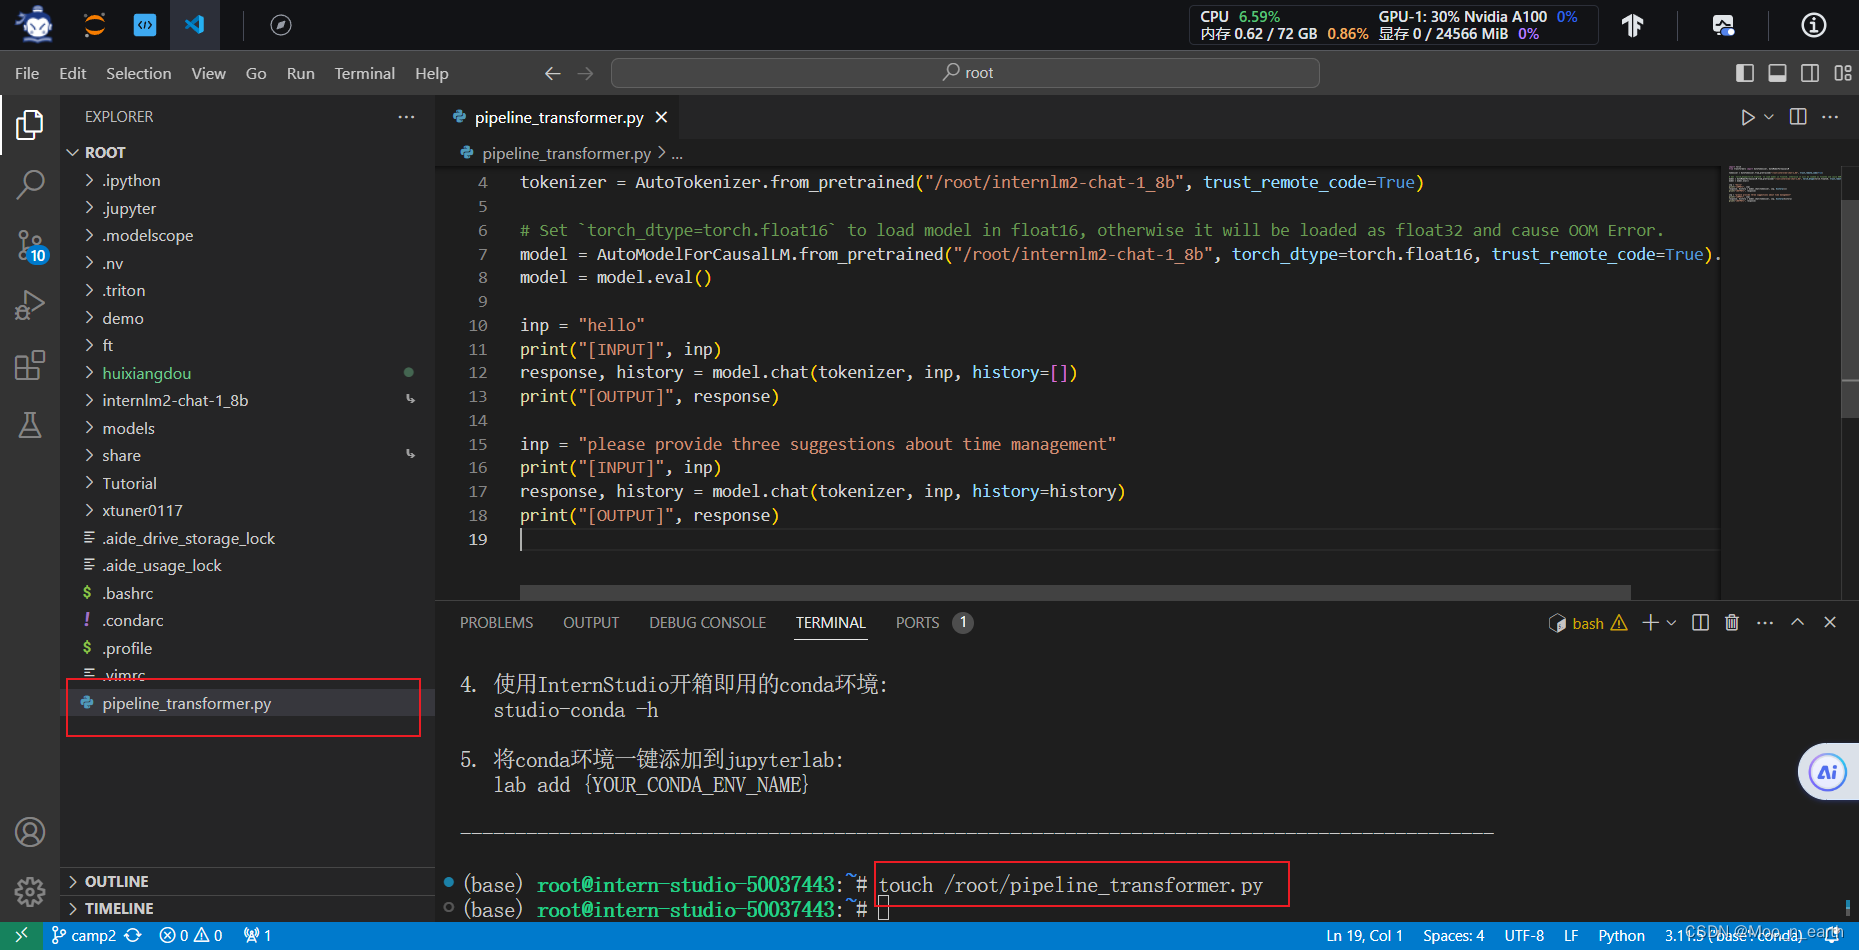
回到终端,激活conda环境:
conda activate lmdeploy运行刚刚创建的python代码:
python /root/pipeline_transformer.py结果如下:
稍后与LMDeploy的推理速度对比
使用LMDeploy与模型对话:
使用LMDepoly命令:
#lmdeploy chat [HF格式模型路径/TurboMind格式模型路径]
lmdeploy chat /root/internlm2-chat-1_8b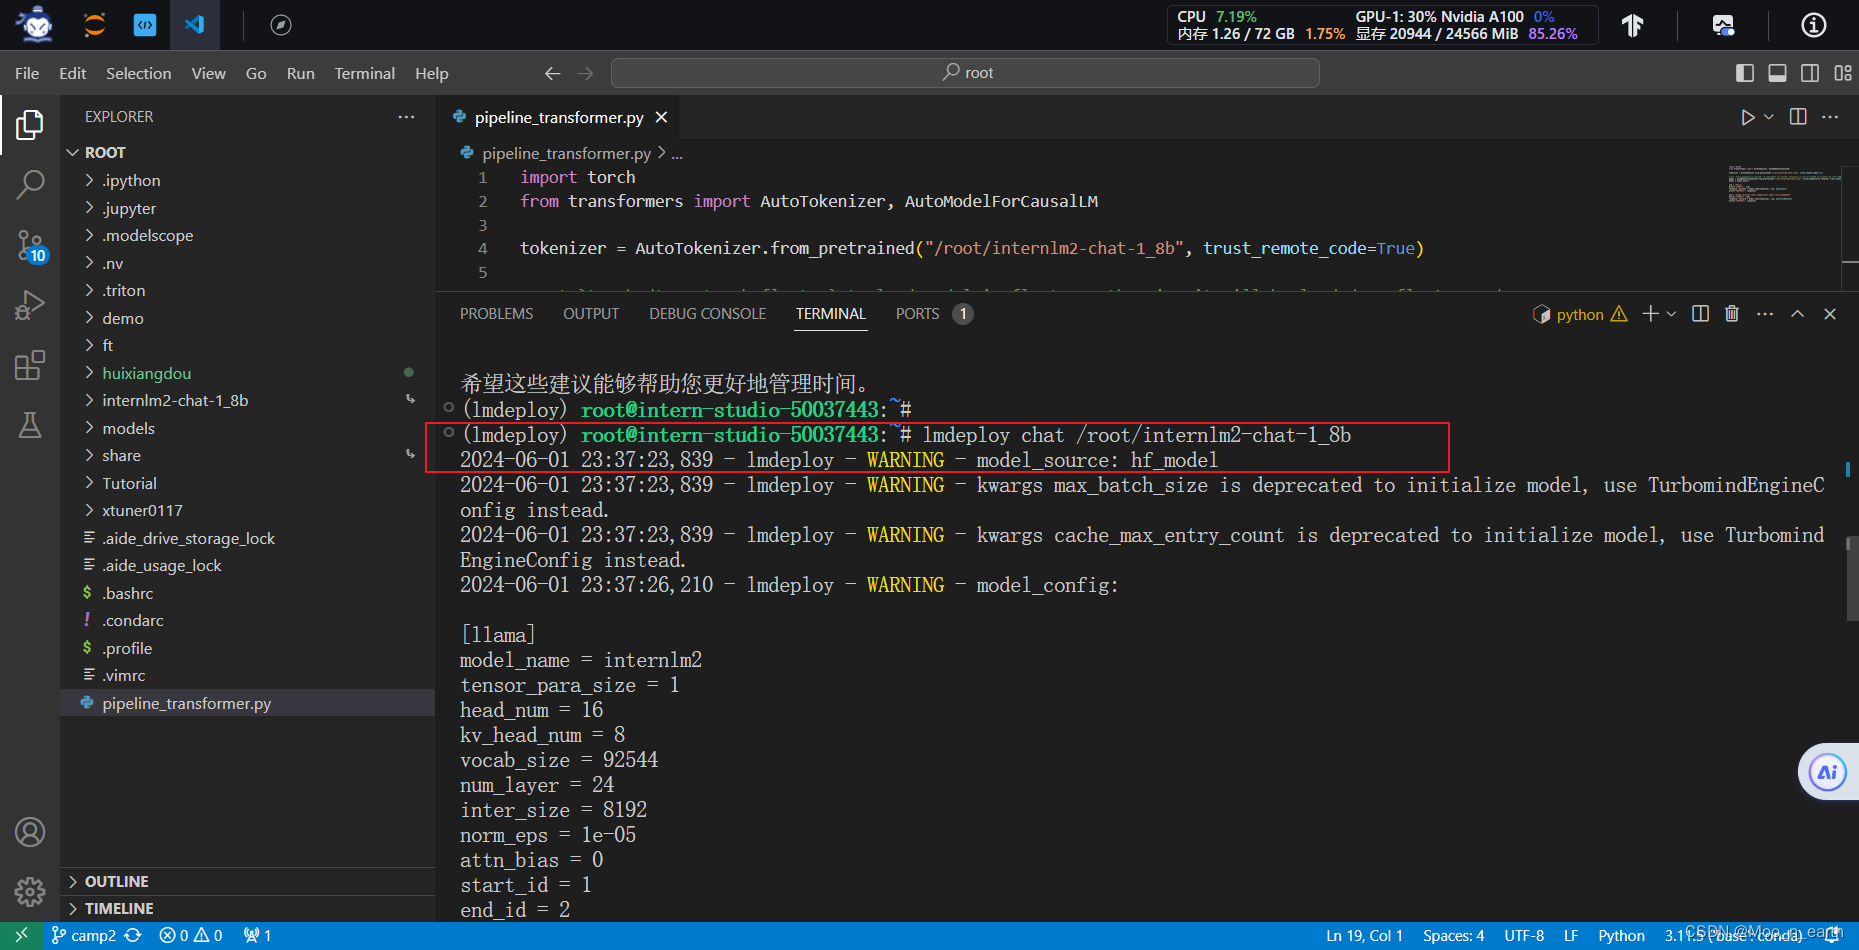
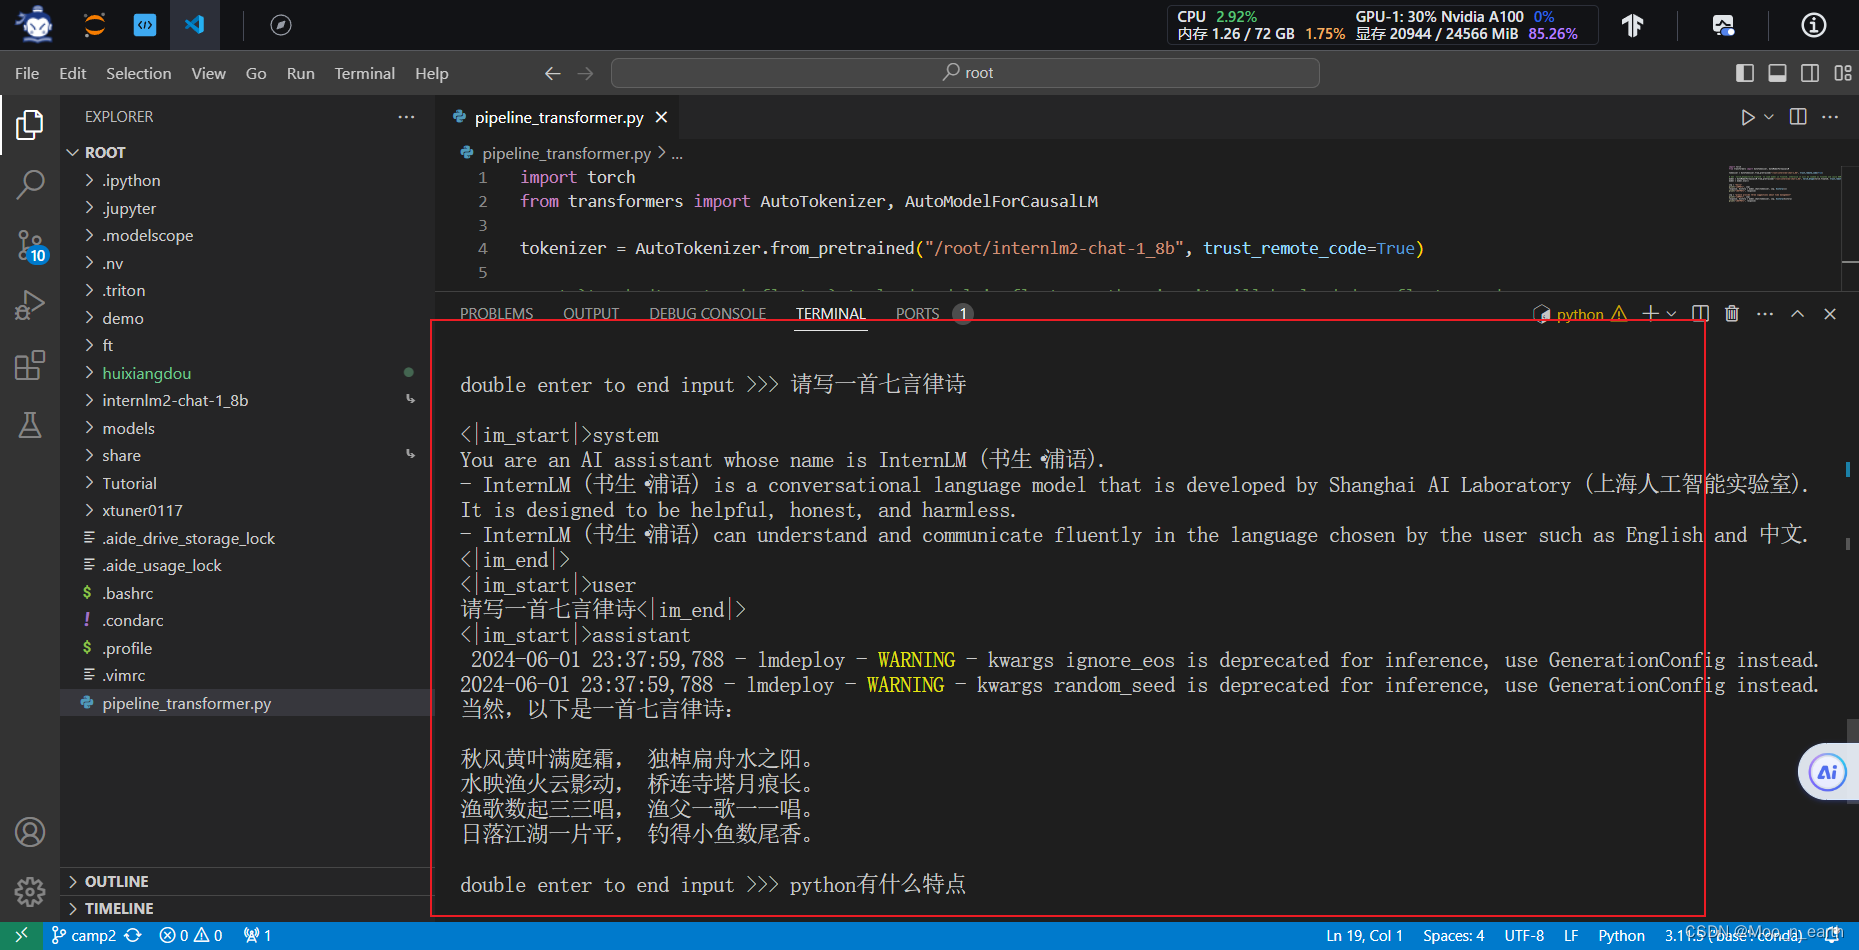
至此,通过LMDepoly以命令行方式与 InternLM2-Chat-1.8B 模型对话跑通。


 2594
2594

 被折叠的 条评论
为什么被折叠?
被折叠的 条评论
为什么被折叠?
 到【灌水乐园】发言


