


OpenCV在图像上随机画直线、椭圆、多边形、圆、显示文字
代码如下:
/**
 * @file Drawing_2.cpp
 * @brief Simple sample code
 */

#include <opencv2/core.hpp>
#include <opencv2/imgproc.hpp>
#include <opencv2/highgui.hpp>
#include <iostream>
#include <stdio.h>

using namespace cv;

/// Global Variables
const int NUMBER = 100;
const int DELAY = 5;

const int window_width = 900;
const int window_height = 600;
int x_1 = -window_width/2;
int x_2 = window_width*3/2;
int y_1 = -window_width/2;
int y_2 = window_width*3/2;

/// Function headers
static Scalar randomColor( RNG& rng );
int Drawing_Random_Lines( Mat image, char* window_name, RNG rng );
int Drawing_Random_Rectangles( Mat image, char* window_name, RNG rng );
int Drawing_Random_Ellipses( Mat image, char* window_name, RNG rng );
int Drawing_Random_Polylines( Mat image, char* window_name, RNG rng );
int Drawing_Random_Filled_Polygons( Mat image, char* window_name, RNG rng );
int Drawing_Random_Circles( Mat image, char* window_name, RNG rng );
int Displaying_Random_Text( Mat image, char* window_name, RNG rng );
int Displaying_Big_End( Mat image, char* window_name, RNG rng );


/**
 * @function main
 */
int main( void )
{
  int c;

  /// Start creating a window
  char window_name[] = "Drawing_2 Tutorial";

  /// Also create a random object (RNG)
  RNG rng( 0xFFFFFFFF );

  /// Initialize a matrix filled with zeros
  Mat image = Mat::zeros( window_height, window_width, CV_8UC3 );
  /// Show it in a window during DELAY ms
  imshow( window_name, image );
  waitKey( DELAY );

  /// 画线
  c = Drawing_Random_Lines(image, window_name, rng);
  if( c != 0 ) return 0;

  /// 矩形
  c = Drawing_Random_Rectangles(image, window_name, rng);
  if( c != 0 ) return 0;

  /// 椭圆
  c = Drawing_Random_Ellipses( image, window_name, rng );
  if( c != 0 ) return 0;

  /// 多边形
  c = Drawing_Random_Polylines( image, window_name, rng );
  if( c != 0 ) return 0;

  /// 填充的多边形
  c = Drawing_Random_Filled_Polygons( image, window_name, rng );
  if( c != 0 ) return 0;

  /// 圆
  c = Drawing_Random_Circles( image, window_name, rng );
  if( c != 0 ) return 0;

  /// 随机位置显示文本
  c = Displaying_Random_Text( image, window_name, rng );
  if( c != 0 ) return 0;

  /// 显示文字
  c = Displaying_Big_End( image, window_name, rng );
  if( c != 0 ) return 0;

  waitKey(0);
  return 0;
}

/// Function definitions

/**
 * @function randomColor
 * @brief Produces a random color given a random object
 */
static Scalar randomColor( RNG& rng )
{
  int icolor = (unsigned) rng;
  return Scalar( icolor&255, (icolor>>8)&255, (icolor>>16)&255 );
}


/**
 * @function 随机画线
 */
int Drawing_Random_Lines( Mat image, char* window_name, RNG rng )
{
  Point pt1, pt2;

  for( int i = 0; i < NUMBER; i++ )
  {
    pt1.x = rng.uniform( x_1, x_2 );
    pt1.y = rng.uniform( y_1, y_2 );
    pt2.x = rng.uniform( x_1, x_2 );
    pt2.y = rng.uniform( y_1, y_2 );

    line( image, pt1, pt2, randomColor(rng), rng.uniform(1, 10), 8 );
    imshow( window_name, image );
    if( waitKey( DELAY ) >= 0 )
      { return -1; }
  }

  return 0;
}

/**
 * @function 画矩形
 */
int Drawing_Random_Rectangles( Mat image, char* window_name, RNG rng )
{
  Point pt1, pt2;
  int lineType = 8;
  int thickness = rng.uniform( -3, 10 );

  for( int i = 0; i < NUMBER; i++ )
  {
    pt1.x = rng.uniform( x_1, x_2 );
    pt1.y = rng.uniform( y_1, y_2 );
    pt2.x = rng.uniform( x_1, x_2 );
    pt2.y = rng.uniform( y_1, y_2 );

    rectangle( image, pt1, pt2, randomColor(rng), MAX( thickness, -1 ), lineType );

    imshow( window_name, image );
    if( waitKey( DELAY ) >= 0 )
      { return -1; }
  }

  return 0;
}

/**
 * @function 随机椭圆
 */
int Drawing_Random_Ellipses( Mat image, char* window_name, RNG rng )
{
  int lineType = 8;

  for ( int i = 0; i < NUMBER; i++ )
  {
    Point center;
    center.x = rng.uniform(x_1, x_2);
    center.y = rng.uniform(y_1, y_2);

    Size axes;
    axes.width = rng.uniform(0, 200);
    axes.height = rng.uniform(0, 200);

    double angle = rng.uniform(0, 180);

    ellipse( image, center, axes, angle, angle - 100, angle + 200,
             randomColor(rng), rng.uniform(-1,9), lineType );

    imshow( window_name, image );

    if( waitKey(DELAY) >= 0 )
      { return -1; }
  }

  return 0;
}

/**
 * @function 多边形
 */
int Drawing_Random_Polylines( Mat image, char* window_name, RNG rng )
{
  int lineType = 8;

  for( int i = 0; i< NUMBER; i++ )
  {
    Point pt[2][3];
    pt[0][0].x = rng.uniform(x_1, x_2);
    pt[0][0].y = rng.uniform(y_1, y_2);
    pt[0][1].x = rng.uniform(x_1, x_2);
    pt[0][1].y = rng.uniform(y_1, y_2);
    pt[0][2].x = rng.uniform(x_1, x_2);
    pt[0][2].y = rng.uniform(y_1, y_2);
    pt[1][0].x = rng.uniform(x_1, x_2);
    pt[1][0].y = rng.uniform(y_1, y_2);
    pt[1][1].x = rng.uniform(x_1, x_2);
    pt[1][1].y = rng.uniform(y_1, y_2);
    pt[1][2].x = rng.uniform(x_1, x_2);
    pt[1][2].y = rng.uniform(y_1, y_2);

    const Point* ppt[2] = {pt[0], pt[1]};
    int npt[] = {3, 3};

    polylines(image, ppt, npt, 2, true, randomColor(rng), rng.uniform(1,10), lineType);

    imshow( window_name, image );
    if( waitKey(DELAY) >= 0 )
      { return -1; }
  }
  return 0;
}

/**
 * @function 填充的多边形
 */
int Drawing_Random_Filled_Polygons( Mat image, char* window_name, RNG rng )
{
  int lineType = 8;

  for ( int i = 0; i < NUMBER; i++ )
  {
    Point pt[2][3];
    pt[0][0].x = rng.uniform(x_1, x_2);
    pt[0][0].y = rng.uniform(y_1, y_2);
    pt[0][1].x = rng.uniform(x_1, x_2);
    pt[0][1].y = rng.uniform(y_1, y_2);
    pt[0][2].x = rng.uniform(x_1, x_2);
    pt[0][2].y = rng.uniform(y_1, y_2);
    pt[1][0].x = rng.uniform(x_1, x_2);
    pt[1][0].y = rng.uniform(y_1, y_2);
    pt[1][1].x = rng.uniform(x_1, x_2);
    pt[1][1].y = rng.uniform(y_1, y_2);
    pt[1][2].x = rng.uniform(x_1, x_2);
    pt[1][2].y = rng.uniform(y_1, y_2);

    const Point* ppt[2] = {pt[0], pt[1]};
    int npt[] = {3, 3};

    fillPoly( image, ppt, npt, 2, randomColor(rng), lineType );

    imshow( window_name, image );
    if( waitKey(DELAY) >= 0 )
       { return -1; }
  }
  return 0;
}

/**
 * @function 圆
 */
int Drawing_Random_Circles( Mat image, char* window_name, RNG rng )
{
  int lineType = 8;

  for (int i = 0; i < NUMBER; i++)
  {
    Point center;
    center.x = rng.uniform(x_1, x_2);
    center.y = rng.uniform(y_1, y_2);

    circle( image, center, rng.uniform(0, 300), randomColor(rng),
            rng.uniform(-1, 9), lineType );

    imshow( window_name, image );
    if( waitKey(DELAY) >= 0 )
      { return -1; }
  }

  return 0;
}

/**
 * @function 显示文本
 */
int Displaying_Random_Text( Mat image, char* window_name, RNG rng )
{
  int lineType = 8;

  for ( int i = 1; i < NUMBER; i++ )
  {
    Point org;
    org.x = rng.uniform(x_1, x_2);
    org.y = rng.uniform(y_1, y_2);

    putText( image, "Testing text rendering", org, rng.uniform(0,8),
             rng.uniform(0,100)*0.05+0.1, randomColor(rng), rng.uniform(1, 10), lineType);

    imshow( window_name, image );
    if( waitKey(DELAY) >= 0 )
      { return -1; }
  }

  return 0;
}显示文本Displaying_Big_End
 */
int Displaying_Big_End( Mat image, char* window_name, RNG )
{
  Size textsize = getTextSize("OpenCV forever!", FONT_HERSHEY_COMPLEX, 3, 5, 0);
  Point org((window_width - textsize.width)/2, (window_height - textsize.height)/2);
  int lineType = 8;

  Mat image2;

  for( int i = 0; i < 255; i += 2 )
  {
    image2 = image - Scalar::all(i);
    putText( image2, "OpenCV forever!", org, FONT_HERSHEY_COMPLEX, 3,
             Scalar(i, i, 255), 5, lineType );

    imshow( window_name, image2 );
    if( waitKey(DELAY) >= 0 )
       { return -1; }
  }

  return 0;
}
结果:
-
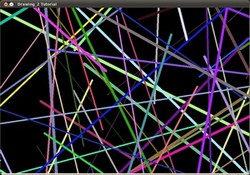
随机画线:
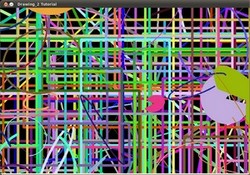
- 矩形和椭圆
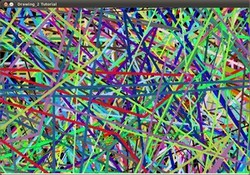
-
多边形
- 填充的多边形(三角形)和圆
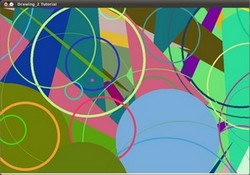
- 最后,"Testing Text Rendering"*将会以不同的字体,大小、颜色出现在不同的位置.最后,显示”OpenCV forever!“


 2411
2411

 被折叠的 条评论
为什么被折叠?
被折叠的 条评论
为什么被折叠?
 到【灌水乐园】发言


