


自定义组件能够复用,提高编程效率,开头不需要加@Entry,表明不是入口组件,不能直接展示,要被入口组件复用才可展示。
比如我们创建的两个页面,它们的头部是差不多的,那我们就可以把头部单独抽取出来做成一个组件,在写页面时复用即可,要注意不要将需要改变的部分写死。
一、例子
我们将页面头部自定义成一个组件,将来在别的页面中也能使用。
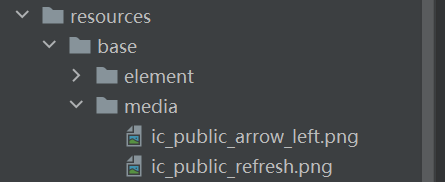
1.导入图标资源
要实现这个效果,首先我们需要导入图标资源至entry/src/main/resources/base/media:
2.创建头部组件
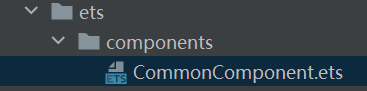
1.文件以及目录创建
首先在ets文件下新建一个components文件夹用来存放组件,再在此文件夹下新建一个.ets文档来写头部组件。
这里我新建一个名为CommonComponent来写通用组件。
2.编写头部组件
@Component
// export 组件可导出
export struct Header {

  private title: string

  build(){
    // 标题
    Row(){
      Image($r('app.media.ic_public_arrow_left'))
        .width(50)
      Text(this.title)
        .fontSize(30)
        .fontWeight(FontWeight.Bold)
      // 空白
      Blank()
      Image($r('app.media.ic_public_refresh'))
        .width(30)
    }
    .width('100%')
    .height(30)
  }
}
3.页面引入该组件
目录结构如下
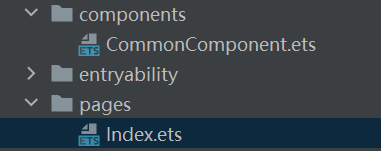
在Index.ets中导入Header()
import { Header } from '../components/CommonComponent'使用Header()
// 标题部分
      Header({ title: '商品列表' })
        .margin({ bottom: 20 })
完整代码如下:
// 定义商品类
class Item {
  name: string
  image: ResourceStr
  price: number
  discount: number

  // discount初始化为0
  constructor(name: string, image: ResourceStr, price: number, discount: number = 0) {
    this.name = name
    this.image = image
    this.price = price
    this.discount = discount
  }
}


import { Header } from '../components/CommonComponent'

@Entry
@Component
struct Index {
  private items: Array<Item> = [
    new Item('Pocket系列', $r('app.media.Pocket'), 7499, 500),
    new Item('Mate系列', $r('app.media.Mate'), 6499),
    new Item('P系列', $r('app.media.P'), 6988),
    new Item('nova系列', $r('app.media.nova'), 4699),
    new Item('畅想系列', $r('app.media.nav'), 1499),
    new Item('畅想系列', $r('app.media.nav'), 1499)
  ]

  build() {
    Column({ space: 8 }) {

      // 标题部分
      Header({ title: '商品列表' })
        .margin({ bottom: 20 })

      // 定义列表
      List({ space: 8 }) {
        ForEach(
          this.items,
          // 也可以写成item => {},但因为传进来的item类型为any,所以没有提示,声明变量类型后就有提示了
          (item: Item) => {
            ListItem() {
              Row({ space: 10 }) {
                Image(item.image)
                  .width(100)
                Column({ space: 4 }) {
                  // 如果有折扣 渲染只有这里有变化
                  if (item.discount) {
                    Text(item.name)
                      .fontSize(20)
                      .fontWeight(FontWeight.Bold)
                    Text('原价:¥' + item.price)
                      .fontColor('#CCC')
                      .fontSize(14)
                      .decoration({ type: TextDecorationType.LineThrough })
                    Text('折扣价:¥' + (item.price - item.discount))
                      .fontColor('#F36')
                      .fontSize(18)
                    Text('补贴:¥' + item.discount)
                      .fontColor('#F36')
                      .fontSize(18)
                  } else {
                    Text(item.name)
                      .fontSize(20)
                      .fontWeight(FontWeight.Bold)
                    Text('¥' + item.price)
                      .fontColor('#F36')
                      .fontSize(18)
                  }
                }
                .height('100%')
                .alignItems(HorizontalAlign.Start)
              }
              .width('100%')
              .backgroundColor('#FFF')
              .borderRadius(20)
              .height(120)
              .padding(10)
            }
          }
        )

      }
      .width('100%')
      .layoutWeight(1) // 权重配比

    }
    .width('100%')
    .height('100%')
  }
}
效果图:

3.进一步优化
我们发现上面代码可读性还是很差,中间商品展示代码可用自定义组件展示,也可以用自定义构建函数封装(适合做内部页面封装)。
3.1自定义构造函数封装代码
1)全局自定义构造函数
// 定义商品类
class Item {
  name: string
  image: ResourceStr
  price: number
  discount: number

  // discount初始化为0
  constructor(name: string, image: ResourceStr, price: number, discount: number = 0) {
    this.name = name
    this.image = image
    this.price = price
    this.discount = discount
  }
}


import { Header } from '../components/CommonComponent'

// 全局自定义构造函数
@Builder function ItemCard(item: Item) {
  Row({ space: 10 }) {
    Image(item.image)
      .width(100)
    Column({ space: 4 }) {
      // 如果有折扣 渲染只有这里有变化
      if (item.discount) {
        Text(item.name)
          .fontSize(20)
          .fontWeight(FontWeight.Bold)
        Text('原价:¥' + item.price)
          .fontColor('#CCC')
          .fontSize(14)
          .decoration({ type: TextDecorationType.LineThrough })
        Text('折扣价:¥' + (item.price - item.discount))
          .fontColor('#F36')
          .fontSize(18)
        Text('补贴:¥' + item.discount)
          .fontColor('#F36')
          .fontSize(18)
      } else {
        Text(item.name)
          .fontSize(20)
          .fontWeight(FontWeight.Bold)
        Text('¥' + item.price)
          .fontColor('#F36')
          .fontSize(18)
      }
    }
    .height('100%')
    .alignItems(HorizontalAlign.Start)
  }
  .width('100%')
  .backgroundColor('#FFF')
  .borderRadius(20)
  .height(120)
  .padding(10)
}

@Entry
@Component
struct Index {
  private items: Array<Item> = [
    new Item('Pocket系列', $r('app.media.Pocket'), 7499, 500),
    new Item('Mate系列', $r('app.media.Mate'), 6499),
    new Item('P系列', $r('app.media.P'), 6988),
    new Item('nova系列', $r('app.media.nova'), 4699),
    new Item('畅想系列', $r('app.media.nav'), 1499),
    new Item('畅想系列', $r('app.media.nav'), 1499)
  ]

  build() {
    Column({ space: 8 }) {

      // 标题部分
      Header({ title: '商品列表' })
        .margin({ bottom: 20 })

      // 商品列表部分
      List({ space: 8 }) {
        ForEach(
          this.items,
          // 也可以写成item => {},但因为传进来的item类型为any,所以没有提示,声明变量类型后就有提示了
          (item: Item) => {
            ListItem() {
              // 使用自定义构建函数
              ItemCard(item)
            }
          }
        )
      }
      .width('100%')
      .layoutWeight(1) // 权重配比

    }
    .width('100%')
    .height('100%')
  }
}
2)局部自定义构造函数
// 定义商品类
class Item {
  name: string
  image: ResourceStr
  price: number
  discount: number

  // discount初始化为0
  constructor(name: string, image: ResourceStr, price: number, discount: number = 0) {
    this.name = name
    this.image = image
    this.price = price
    this.discount = discount
  }
}


import { Header } from '../components/CommonComponent'

/*// 全局自定义构造函数
@Builder function ItemCard(item: Item) {
  Row({ space: 10 }) {
    Image(item.image)
      .width(100)
    Column({ space: 4 }) {
      // 如果有折扣 渲染只有这里有变化
      if (item.discount) {
        Text(item.name)
          .fontSize(20)
          .fontWeight(FontWeight.Bold)
        Text('原价:¥' + item.price)
          .fontColor('#CCC')
          .fontSize(14)
          .decoration({ type: TextDecorationType.LineThrough })
        Text('折扣价:¥' + (item.price - item.discount))
          .fontColor('#F36')
          .fontSize(18)
        Text('补贴:¥' + item.discount)
          .fontColor('#F36')
          .fontSize(18)
      } else {
        Text(item.name)
          .fontSize(20)
          .fontWeight(FontWeight.Bold)
        Text('¥' + item.price)
          .fontColor('#F36')
          .fontSize(18)
      }
    }
    .height('100%')
    .alignItems(HorizontalAlign.Start)
  }
  .width('100%')
  .backgroundColor('#FFF')
  .borderRadius(20)
  .height(120)
  .padding(10)
}*/

@Entry
@Component
struct Index {
  private items: Array<Item> = [
    new Item('Pocket系列', $r('app.media.Pocket'), 7499, 500),
    new Item('Mate系列', $r('app.media.Mate'), 6499),
    new Item('P系列', $r('app.media.P'), 6988),
    new Item('nova系列', $r('app.media.nova'), 4699),
    new Item('畅想系列', $r('app.media.nav'), 1499),
    new Item('畅想系列', $r('app.media.nav'), 1499)
  ]

  build() {
    Column({ space: 8 }) {

      // 标题部分
      Header({ title: '商品列表' })
        .margin({ bottom: 20 })

      // 商品列表部分
      List({ space: 8 }) {
        ForEach(
          this.items,
          // 也可以写成item => {},但因为传进来的item类型为any,所以没有提示,声明变量类型后就有提示了
          (item: Item) => {
            ListItem() {
              // 使用自定义构建函数
              this.ItemCard(item)
            }
          }
        )
      }
      .width('100%')
      .layoutWeight(1) // 权重配比

    }
    .width('100%')
    .height('100%')
  }
  // 局部自定义构造函数 不加function
  @Builder ItemCard(item: Item) {
    Row({ space: 10 }) {
      Image(item.image)
        .width(100)
      Column({ space: 4 }) {
        // 如果有折扣 渲染只有这里有变化
        if (item.discount) {
          Text(item.name)
            .fontSize(20)
            .fontWeight(FontWeight.Bold)
          Text('原价:¥' + item.price)
            .fontColor('#CCC')
            .fontSize(14)
            .decoration({ type: TextDecorationType.LineThrough })
          Text('折扣价:¥' + (item.price - item.discount))
            .fontColor('#F36')
            .fontSize(18)
          Text('补贴:¥' + item.discount)
            .fontColor('#F36')
            .fontSize(18)
        } else {
          Text(item.name)
            .fontSize(20)
            .fontWeight(FontWeight.Bold)
          Text('¥' + item.price)
            .fontColor('#F36')
            .fontSize(18)
        }
      }
      .height('100%')
      .alignItems(HorizontalAlign.Start)
    }
    .width('100%')
    .backgroundColor('#FFF')
    .borderRadius(20)
    .height(120)
    .padding(10)
  }
}
3.2样式优化
不管是全局的还是局部的,只能封装公共样式,组件特有的样式不行。
1)全局公共样式
// 定义商品类
class Item {
  name: string
  image: ResourceStr
  price: number
  discount: number

  // discount初始化为0
  constructor(name: string, image: ResourceStr, price: number, discount: number = 0) {
    this.name = name
    this.image = image
    this.price = price
    this.discount = discount
  }
}


import { Header } from '../components/CommonComponent'

/*// 全局自定义构造函数
@Builder function ItemCard(item: Item) {
  Row({ space: 10 }) {
    Image(item.image)
      .width(100)
    Column({ space: 4 }) {
      // 如果有折扣 渲染只有这里有变化
      if (item.discount) {
        Text(item.name)
          .fontSize(20)
          .fontWeight(FontWeight.Bold)
        Text('原价:¥' + item.price)
          .fontColor('#CCC')
          .fontSize(14)
          .decoration({ type: TextDecorationType.LineThrough })
        Text('折扣价:¥' + (item.price - item.discount))
          .fontColor('#F36')
          .fontSize(18)
        Text('补贴:¥' + item.discount)
          .fontColor('#F36')
          .fontSize(18)
      } else {
        Text(item.name)
          .fontSize(20)
          .fontWeight(FontWeight.Bold)
        Text('¥' + item.price)
          .fontColor('#F36')
          .fontSize(18)
      }
    }
    .height('100%')
    .alignItems(HorizontalAlign.Start)
  }
  .width('100%')
  .backgroundColor('#FFF')
  .borderRadius(20)
  .height(120)
  .padding(10)
}*/

// 全局公共样式
@Styles function fillScreen() {
  .width('100%')
  .height('100%')
}

@Entry
@Component
struct Index {
  private items: Array<Item> = [
    new Item('Pocket系列', $r('app.media.Pocket'), 7499, 500),
    new Item('Mate系列', $r('app.media.Mate'), 6499),
    new Item('P系列', $r('app.media.P'), 6988),
    new Item('nova系列', $r('app.media.nova'), 4699),
    new Item('畅想系列', $r('app.media.nav'), 1499),
    new Item('畅想系列', $r('app.media.nav'), 1499)
  ]

  build() {
    Column({ space: 8 }) {

      // 标题部分
      Header({ title: '商品列表' })
        .margin({ bottom: 20 })

      // 商品列表部分
      List({ space: 8 }) {
        ForEach(
          this.items,
          // 也可以写成item => {},但因为传进来的item类型为any,所以没有提示,声明变量类型后就有提示了
          (item: Item) => {
            ListItem() {
              // 使用自定义构建函数
              this.ItemCard(item)
            }
          }
        )
      }
      .width('100%')
      .layoutWeight(1) // 权重配比

    }
    .fillScreen()
  }
  // 局部自定义构造函数 不加function
  @Builder ItemCard(item: Item) {
    Row({ space: 10 }) {
      Image(item.image)
        .width(100)
      Column({ space: 4 }) {
        // 如果有折扣 渲染只有这里有变化
        if (item.discount) {
          Text(item.name)
            .fontSize(20)
            .fontWeight(FontWeight.Bold)
          Text('原价:¥' + item.price)
            .fontColor('#CCC')
            .fontSize(14)
            .decoration({ type: TextDecorationType.LineThrough })
          Text('折扣价:¥' + (item.price - item.discount))
            .fontColor('#F36')
            .fontSize(18)
          Text('补贴:¥' + item.discount)
            .fontColor('#F36')
            .fontSize(18)
        } else {
          Text(item.name)
            .fontSize(20)
            .fontWeight(FontWeight.Bold)
          Text('¥' + item.price)
            .fontColor('#F36')
            .fontSize(18)
        }
      }
      .height('100%')
      .alignItems(HorizontalAlign.Start)
    }
    .width('100%')
    .backgroundColor('#FFF')
    .borderRadius(20)
    .height(120)
    .padding(10)
  }
}
2)局部公共样式
// 定义商品类
class Item {
  name: string
  image: ResourceStr
  price: number
  discount: number

  // discount初始化为0
  constructor(name: string, image: ResourceStr, price: number, discount: number = 0) {
    this.name = name
    this.image = image
    this.price = price
    this.discount = discount
  }
}


import { Header } from '../components/CommonComponent'

/*// 全局自定义构造函数
@Builder function ItemCard(item: Item) {
  Row({ space: 10 }) {
    Image(item.image)
      .width(100)
    Column({ space: 4 }) {
      // 如果有折扣 渲染只有这里有变化
      if (item.discount) {
        Text(item.name)
          .fontSize(20)
          .fontWeight(FontWeight.Bold)
        Text('原价:¥' + item.price)
          .fontColor('#CCC')
          .fontSize(14)
          .decoration({ type: TextDecorationType.LineThrough })
        Text('折扣价:¥' + (item.price - item.discount))
          .fontColor('#F36')
          .fontSize(18)
        Text('补贴:¥' + item.discount)
          .fontColor('#F36')
          .fontSize(18)
      } else {
        Text(item.name)
          .fontSize(20)
          .fontWeight(FontWeight.Bold)
        Text('¥' + item.price)
          .fontColor('#F36')
          .fontSize(18)
      }
    }
    .height('100%')
    .alignItems(HorizontalAlign.Start)
  }
  .width('100%')
  .backgroundColor('#FFF')
  .borderRadius(20)
  .height(120)
  .padding(10)
}*/

/*// 全局公共样式
@Styles function fillScreen() {
  .width('100%')
  .height('100%')
}*/

@Entry
@Component
struct Index {
  private items: Array<Item> = [
    new Item('Pocket系列', $r('app.media.Pocket'), 7499, 500),
    new Item('Mate系列', $r('app.media.Mate'), 6499),
    new Item('P系列', $r('app.media.P'), 6988),
    new Item('nova系列', $r('app.media.nova'), 4699),
    new Item('畅想系列', $r('app.media.nav'), 1499),
    new Item('畅想系列', $r('app.media.nav'), 1499)
  ]

  // 局部公共样式
  @Styles fillScreen() {
    .width('100%')
    .height('100%')
  }

  build() {
    Column({ space: 8 }) {

      // 标题部分
      Header({ title: '商品列表' })
        .margin({ bottom: 20 })

      // 商品列表部分
      List({ space: 8 }) {
        ForEach(
          this.items,
          // 也可以写成item => {},但因为传进来的item类型为any,所以没有提示,声明变量类型后就有提示了
          (item: Item) => {
            ListItem() {
              // 使用自定义构建函数
              this.ItemCard(item)
            }
          }
        )
      }
      .width('100%')
      .layoutWeight(1) // 权重配比

    }
    .fillScreen()
  }
  // 局部自定义构造函数 不加function
  @Builder ItemCard(item: Item) {
    Row({ space: 10 }) {
      Image(item.image)
        .width(100)
      Column({ space: 4 }) {
        // 如果有折扣 渲染只有这里有变化
        if (item.discount) {
          Text(item.name)
            .fontSize(20)
            .fontWeight(FontWeight.Bold)
          Text('原价:¥' + item.price)
            .fontColor('#CCC')
            .fontSize(14)
            .decoration({ type: TextDecorationType.LineThrough })
          Text('折扣价:¥' + (item.price - item.discount))
            .fontColor('#F36')
            .fontSize(18)
          Text('补贴:¥' + item.discount)
            .fontColor('#F36')
            .fontSize(18)
        } else {
          Text(item.name)
            .fontSize(20)
            .fontWeight(FontWeight.Bold)
          Text('¥' + item.price)
            .fontColor('#F36')
            .fontSize(18)
        }
      }
      .height('100%')
      .alignItems(HorizontalAlign.Start)
    }
    .width('100%')
    .backgroundColor('#FFF')
    .borderRadius(20)
    .height(120)
    .padding(10)
  }
}
如果我们要对组件特有组件进行封装,则不能使用@Style,使用@Extend()
3)特有属性封装
@Extend不能写在组件内
// 定义商品类
class Item {
  name: string
  image: ResourceStr
  price: number
  discount: number

  // discount初始化为0
  constructor(name: string, image: ResourceStr, price: number, discount: number = 0) {
    this.name = name
    this.image = image
    this.price = price
    this.discount = discount
  }
}


import { Header } from '../components/CommonComponent'

/*// 全局自定义构造函数
@Builder function ItemCard(item: Item) {
  Row({ space: 10 }) {
    Image(item.image)
      .width(100)
    Column({ space: 4 }) {
      // 如果有折扣 渲染只有这里有变化
      if (item.discount) {
        Text(item.name)
          .fontSize(20)
          .fontWeight(FontWeight.Bold)
        Text('原价:¥' + item.price)
          .fontColor('#CCC')
          .fontSize(14)
          .decoration({ type: TextDecorationType.LineThrough })
        Text('折扣价:¥' + (item.price - item.discount))
          .fontColor('#F36')
          .fontSize(18)
        Text('补贴:¥' + item.discount)
          .fontColor('#F36')
          .fontSize(18)
      } else {
        Text(item.name)
          .fontSize(20)
          .fontWeight(FontWeight.Bold)
        Text('¥' + item.price)
          .fontColor('#F36')
          .fontSize(18)
      }
    }
    .height('100%')
    .alignItems(HorizontalAlign.Start)
  }
  .width('100%')
  .backgroundColor('#FFF')
  .borderRadius(20)
  .height(120)
  .padding(10)
}*/

/*// 全局公共样式
@Styles function fillScreen() {
  .width('100%')
  .height('100%')
}*/

// 继承模式,只能写在全局
@Extend(Text) function priceText() {
  .fontColor('#F36')
  .fontSize(18)

}

@Entry
@Component
struct Index {
  private items: Array<Item> = [
    new Item('Pocket系列', $r('app.media.Pocket'), 7499, 500),
    new Item('Mate系列', $r('app.media.Mate'), 6499),
    new Item('P系列', $r('app.media.P'), 6988),
    new Item('nova系列', $r('app.media.nova'), 4699),
    new Item('畅想系列', $r('app.media.nav'), 1499),
    new Item('畅想系列', $r('app.media.nav'), 1499)
  ]

  // 局部公共样式
  @Styles fillScreen() {
    .width('100%')
    .height('100%')
  }

  build() {
    Column({ space: 8 }) {

      // 标题部分
      Header({ title: '商品列表' })
        .margin({ bottom: 20 })

      // 商品列表部分
      List({ space: 8 }) {
        ForEach(
          this.items,
          // 也可以写成item => {},但因为传进来的item类型为any,所以没有提示,声明变量类型后就有提示了
          (item: Item) => {
            ListItem() {
              // 使用自定义构建函数
              this.ItemCard(item)
            }
          }
        )
      }
      .width('100%')
      .layoutWeight(1) // 权重配比

    }
    .fillScreen()
  }
  // 局部自定义构造函数 不加function
  @Builder ItemCard(item: Item) {
    Row({ space: 10 }) {
      Image(item.image)
        .width(100)
      Column({ space: 4 }) {
        // 如果有折扣 渲染只有这里有变化
        if (item.discount) {
          Text(item.name)
            .fontSize(20)
            .fontWeight(FontWeight.Bold)
          Text('原价:¥' + item.price)
            .fontColor('#CCC')
            .fontSize(14)
            .decoration({ type: TextDecorationType.LineThrough })
          Text('折扣价:¥' + (item.price - item.discount))
            .priceText()
          Text('补贴:¥' + item.discount)
            .priceText()
        } else {
          Text(item.name)
            .fontSize(20)
            .fontWeight(FontWeight.Bold)
          Text('¥' + item.price)
            .priceText()
        }
      }
      .height('100%')
      .alignItems(HorizontalAlign.Start)
    }
    .width('100%')
    .backgroundColor('#FFF')
    .borderRadius(20)
    .height(120)
    .padding(10)
  }
}


 852
852


 被折叠的 条评论
为什么被折叠?
被折叠的 条评论
为什么被折叠?
 到【灌水乐园】发言


