


一、Dlib 的在Linux下的环境搭建
基础环境 ubutu 20.04  python3.8

sudo apt-get update
sudo apt-get install build-essential cmake
sudo apt-get install libx11-dev libgtk-3-dev libavcodec-dev libavformat-dev libswscale-dev libv4l-dev
sudo apt-get install libxext6 libxrender-dev libjpeg-dev libpng-dev libtiff-dev libdc1394-22-dev

pip install dlib -i https://pypi.tuna.tsinghua.edu.cn/simple


验证是否安装成功:
>>> import dlib
>>> import cv2
>>> detector = dlib.get_frontal_face_detector()
设置特征检测器,dlib有已经训练的好的需要下载,也可以自己根据需要训练
下载链接:http://dlib.net/files/shape_predictor_68_face_landmarks.dat.bz2
下载到本地后解压的方法为:
bunzip2 file.bz2
实现代码如下:
import cv2
import dlib
detector = dlib.get_frontal_face_detector()
landmark_predictor = dlib.shape_predictor('/home/robot/kxn_face/shape_predictor_68_face_landmarks.dat')
img = cv2.imread('/home/robot/kxn_face/1.jpeg')
faces = detector(img,1)
if (len(faces) > 0):
    for k,d in enumerate(faces):
        cv2.rectangle(img,(d.left(),d.top()),(d.right(),d.bottom()),(255,255,255))
        shape = landmark_predictor(img,d)
        for i in range(68):
            cv2.circle(img, (shape.part(i).x, shape.part(i).y),5,(0,255,0), -1, 8)
            cv2.putText(img,str(i),(shape.part(i).x,shape.part(i).y),cv2.FONT_HERSHEY_SIMPLEX,0.5,(255,2555,255))

save_image_path='/home/robot/kxn_face/img_cv.bmp'
cv2.imwrite(save_image_path,img)
测试结果:
以下图像除了第七张图像,能够得到结果,其它的图像均无结果,该方法对侧面脸的检测效果不好。

结果如图所示:
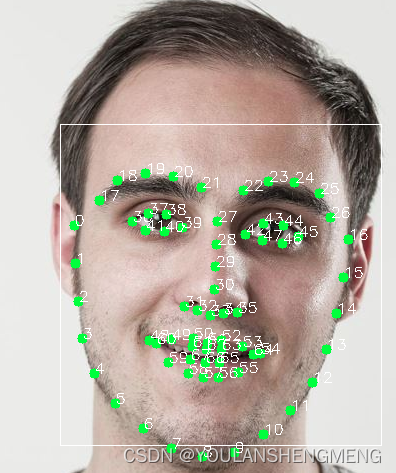
总结:如果要做各种方向的人脸特征点检测,该方法适用性是不好的。
二、基于深度学习的face landmark
2.1 insightface
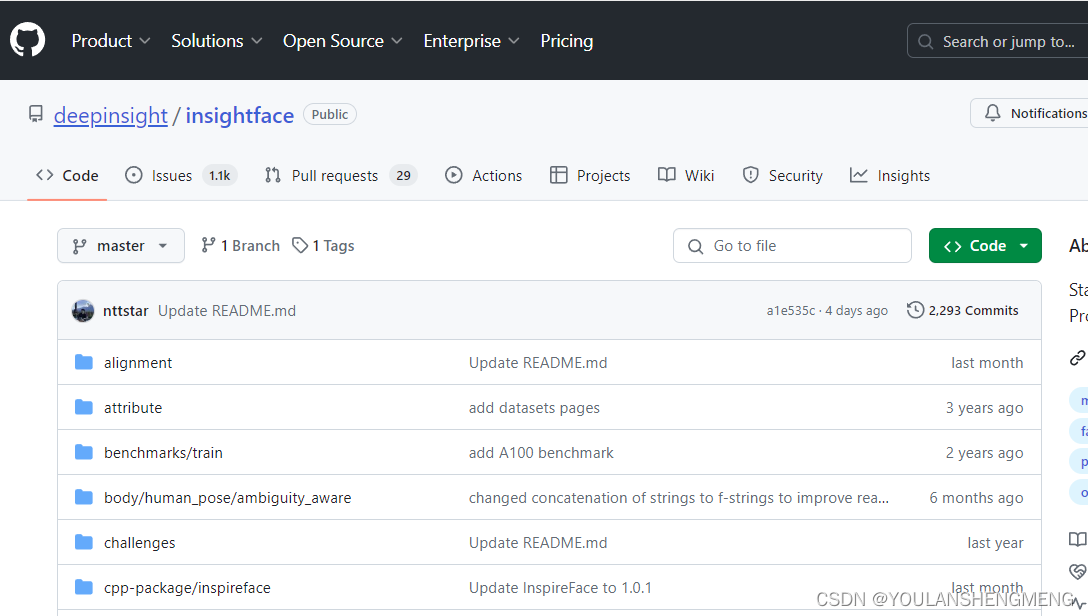
官网地址:https://github.com/deepinsight/insightface/tree/master
2.1.1 运行安装包中的python-package脚本包
环境搭建:
(yolov5) robot@isaac-robot4090:~/kxn_face/code/insightface-0.7/python-package$ python setup.py build_ext -i
执行报错:
pip install Cpython
pip install onnxruntime
模型下载好存放的位置为(需要解压后放入):
download_path: /home/robot/.insightface/models/buffalo_l
测试代码:测试图像在工程中自带的。所以可以直接执行
import cv2
import numpy as np
import insightface
from insightface.app import FaceAnalysis
from insightface.data import get_image as ins_get_image

app = FaceAnalysis(allowed_modules=['detection'],providers=['CUDAExecutionProvider', 'CPUExecutionProvider'],download=False)
app.prepare(ctx_id=0, det_size=(640, 640))
img = ins_get_image('t1')  #不用带后缀,图片放到./insightface/python-package/insightface/data/images
faces = app.get(img)
print("faces::::", faces)
print("len:", len(faces))
rimg = app.draw_on(img, faces)
cv2.imwrite("/home/robot/kxn_face/img_cv.bmp", rimg)
直接使用图像测试的代码为:
import cv2
import numpy as np
import insightface
from insightface.app import FaceAnalysis
from insightface.data import get_image as ins_get_image

app = FaceAnalysis(allowed_modules=['detection'],providers=['CUDAExecutionProvider', 'CPUExecutionProvider'],download=False)
app.prepare(ctx_id=0, det_size=(640, 640))

image_file="/home/robot/kxn_face/face/2.JPG"
image = cv2.imread(image_file)

# img = ins_get_image(image)  #不用带后缀,图片放到./insightface/python-package/insightface/data/images 对文件夹的处理方法
faces = app.get(image)
print("faces::::", faces)
print("len:", len(faces))
rimg = app.draw_on(image, faces)
cv2.imwrite("/home/robot/kxn_face/img_cv.bmp", rimg)
2.2.2 运行examples脚本包
环境安装
pip install -U insightface -i https://pypi.tuna.tsinghua.edu.cn/simple
安装成功后的结果如图所示:

运行出现错误:
AttributeError: module 'numpy' has no attribute 'int'.
解决方法,将报错的地方的代码进行更改:

代码运行:
python /home/robot/kxn_face/code/insightface/examples/demo_analysis.py
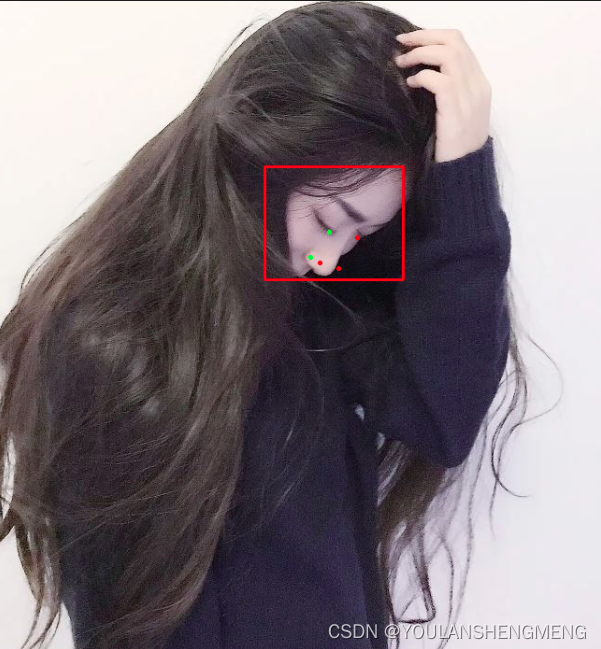
检测结果显示:
2.2.3 人脸对齐代码运行
环境搭建:
pip install -U insightface -i https://pypi.tuna.tsinghua.edu.cn/simple
运行命令:
python /home/robot/kxn_face/code/insightface/alignment/coordinate_reg/image_infer.py
检测结果,检测到的点位是106个点位

遇到的问题:
AttributeError: module 'numpy' has no attribute 'int'.
解决方法,将报错的地方的代码进行更改:
修改后运行的代码为:
import cv2
import numpy as np
import os
import insightface
from insightface.app import FaceAnalysis
from insightface.data import get_image as ins_get_image

if __name__ == '__main__':
    app = FaceAnalysis(allowed_modules=['detection', 'landmark_2d_106'])
    app.prepare(ctx_id=0, det_size=(640, 640))
    img = ins_get_image('t1')
    faces = app.get(img)
    #assert len(faces)==6
    tim = img.copy()
    color = (200, 160, 75)
    for face in faces:
        lmk = face.landmark_2d_106
        lmk = np.round(lmk).astype(np.int_)
        for i in range(lmk.shape[0]):
            p = tuple(lmk[i])
            cv2.circle(tim, p, 1, color, 1, cv2.LINE_AA)
    cv2.imwrite('./test_out.jpg', tim)


 4091
4091


 被折叠的 条评论
为什么被折叠?
被折叠的 条评论
为什么被折叠?
 到【灌水乐园】发言


