


Qt Quick 3D - Introduction
Qt Quick 3D-简介
Demonstrates how to render a scene in Qt Quick 3D.
演示如何在Qt Quick 3D中渲染场景。
This example gives an introductory overview of the basic Quick 3D features by going through the code of a simple example.
本示例通过一个简单示例的代码介绍了基本的Quick 3D功能。
Setting Up the Scene
设置场景
We set up the entire scene in the main.qml file.
我们在main.qml文件中设置了整个场景。
To be able to use the types in the QtQuick3D module, we must import it:
为了能够使用QtQuick3D模块中的类型,我们必须导入它:
import QtQuick
import QtQuick3D
To draw any 3D scene, we need a 3D viewport within the Qt Quick scene. This is provided by the View3D class, and this is where we define our scene. It is also possible to have multiple views in one application, see Qt Quick 3D - View3D Example.
要绘制任何3D场景,我们需要Qt Quick场景中的3D视口。这是由View3D类提供的,这是我们定义场景的地方。在一个应用程序中也可以有多个视图,请参见Qt Quick 3D-View3D示例。
We start with defining the environment of our scene. In this example we just clear the background color with skyblue, which we specify in a SceneEnvironment for the environment property of the view. SceneEnvironment describes various properties related to the environment of the scene, such as tonemapping settings, light probe settings for image based lighting, background mode, or ambient occlusion parameters. It can also control anti-aliasing, see Qt Quick 3D - Antialiasing Example. In our example we set the clearColor and backgroundMode properties to get a blue background.
我们首先定义场景的环境。在本例中,我们只使用天蓝清除背景色,我们在SceneEnvironment中为视图的环境属性指定了skyblue。SceneEnvironment描述与场景环境相关的各种属性,例如色调映射设置、基于图像的照明的光探测器设置、背景模式或环境遮挡参数。它还可以控制抗锯齿,请参见Qt Quick 3D-抗锯齿示例。在我们的示例中,我们设置了clearColor和backgroundMode属性以获得蓝色背景。
environment: SceneEnvironment {
    clearColor: "skyblue"
    backgroundMode: SceneEnvironment.Color
}
Meshes
网格
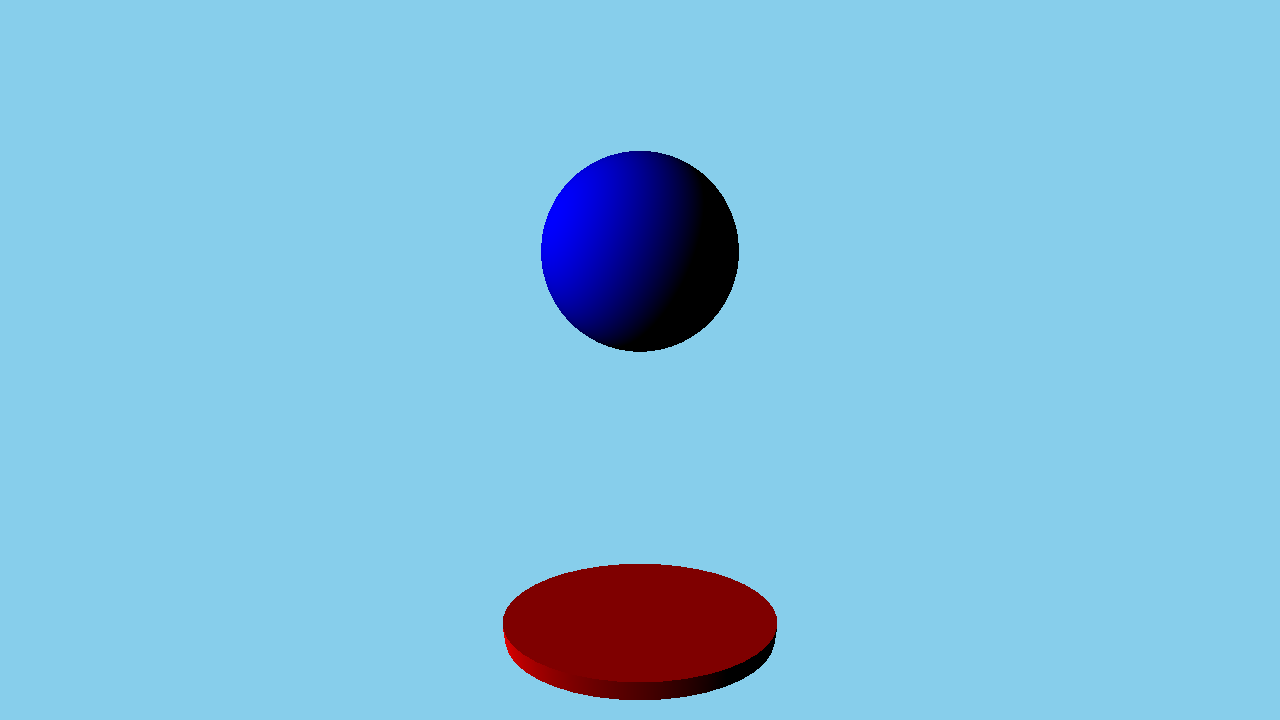
To make the scene a bit more interesting we are now going to add some meshes. In Quick 3D there are a number of builtin meshes for convenience, for example sphere, cube, cone, or cylinder. These are referenced by using the special identifiers, such as #Sphere, #Cube, or#Rectangle in the source property of a Model node. Besides the built-in primitives, a .mesh file can be specified. To generate .mesh files from FBX or glTF2 assets, the assets need to be processed using the Balsam Asset Import Tool. Below shows the code adding a blue sphere and a red flattened cylinder:
为了使场景更加有趣,我们现在将添加一些网格。在Quick 3D中,为了方便起见,有许多内置网格,例如球体、立方体、圆锥体或圆柱体。通过使用模型节点的源属性中的特殊标识符(如#Sphere、#Cube或#Rectangle)来引用它们。除了内置的原型之外。可以指定.mesh文件。从FBX或glTF2资产生成.mesh文件,需要使用Balsam资产导入工具处理资产。下面显示了添加蓝色球体和红色扁平圆柱体的代码:
Model {
position: Qt.vector3d(0, -200, 0)
source: "#Cylinder"
scale: Qt.vector3d(2, 0.2, 1)
materials: [ DefaultMaterial {
diffuseColor: "red"
}
]
}
Model {
position: Qt.vector3d(0, 150, 0)
source: "#Sphere"
materials: [ DefaultMaterial {
diffuseColor: "blue"
}
]
SequentialAnimation on y {
loops: Animation.Infinite
NumberAnimation {
duration: 3000
to: -150
from: 150
easing.type:Easing.InQuad
}
NumberAnimation {
duration: 3000
to: 150
from: -150
easing.type:Easing.OutQuad
}
}
}
To add the meshes, we use two Model nodes, with #Sphere and #Cylinder as the source to load our built-in meshes. To give the model a color we need to first specify a material. In this case we use a DefaultMaterial with a red and blue diffuse color. There are three different materials available with different properties, namely DefaultMaterial, PrincipledMaterial and CustomMaterial, see Qt Quick 3D - Principled Material Example and Programmable Materials, Effects, Geometry, and Texture data. The mesh loaded by a Model can have multiple sub-meshes, and each sub-mesh needs to have a material specified. In the example only the built-in meshes are used, and those only have one sub-mesh each, and therefore it is sufficient to specify a single DefaultMaterial in the materials list.
为了添加网格,我们使用两个模型节点,以#Sphere和#Cylinder作为源来加载内置网格。要为模型提供颜色,我们需要首先指定材质。在本例中,我们使用具有红色和蓝色漫反射颜色的默认材质。有三种具有不同属性的不同材质,即DefaultMaterial、PrincipleMaterial和CustomMaterial,请参阅Qt Quick 3D-Principled材质示例和可编程材质、效果、几何体和纹理数据。模型加载的网格可以有多个子网格,每个子网格都需要指定材质。在本例中,仅使用内置网格,并且每个网格只有一个子网格,因此在“材质”列表中指定一个默认材质就足够了。
A Model is a Node, so it has an associated transformation. To apply a translation, we use the position property. It is also possible to rotate the model by setting the eulerRotation property. To make the cylinder look like a plate we set the scale property accordingly.
模型是一个节点,因此它具有关联的转换。要应用平移,我们使用position属性。也可以通过设置eulerRotation属性来旋转模型。为了使圆柱体看起来像板,我们相应地设置了scale属性。
Camera
摄影机
Then we define a camera, which specifies how the content of the 3D scene is projected onto a 2D surface. In this example, we use PerspectiveCamera which gives us a perspective projection. Orthographic projection is also possible through the OrthographicCamera type. The default orientation of the camera has its forward vector pointing along the negative Z axis and its up vector along the positive Y axis. The example moves the camera back to 300 on the Z axis. In addition, it is moved up an the Y axis a bit, and is rotated slightly around the X axis to look slightly downwards.
然后我们定义一个相机,它指定如何将3D场景的内容投影到2D曲面上。在本例中,我们使用透视相机,它提供了透视投影。正交投影也可以通过正交摄影机类型进行。相机的默认方向具有沿负Z轴指向的前向矢量和沿正Y轴指向的上向矢量。该示例将相机沿Z轴移回300。此外,它在Y轴上稍微向上移动,并围绕X轴稍微旋转,以稍微向下看。
PerspectiveCamera {
    position: Qt.vector3d(0, 200, 300)
    eulerRotation.x: -30
}
Lights
灯光
The scene also needs a light source in order to be able to see the models in our scene. A DirectionalLight, which can be thought of as a distant sun shining from a certain direction, is added to the scene. There are two other light sources available, namely SpotLight and PointLight, see Qt Quick 3D - Lights Example.
场景还需要一个光源,以便能够看到场景中的模型。向场景中添加了方向光,可以将其视为从某个方向照射的遥远太阳。还有两种其他光源可用,即聚光灯和点光源,请参见Qt Quick 3D-灯光示例。
DirectionalLight {
    eulerRotation.x: -30
    eulerRotation.y: -70
}
Animation
动画
Finally, we are also going to animate the sphere. We do this by applying a SequentialAnimation on the y component, moving the sphere up and down infinitely.
最后,我们还将设置球体的动画。我们通过在y分量上应用顺序动画,无限地上下移动球体来实现这一点。
SequentialAnimation on y {
loops: Animation.Infinite
NumberAnimation {
duration: 3000
to: -150
from: 150
easing.type:Easing.InQuad
}
NumberAnimation {
duration: 3000
to: 150
from: -150
easing.type:Easing.OutQuad
}
}With all these parts working together we are able to render our 3D scene. This example touches only some of the basic capabilities of Qt Quick 3D. Visit the examples page for further examples.
所有这些部分一起工作,我们能够渲染我们的3D场景。本示例仅涉及Qt Quick 3D的一些基本功能。有关更多示例,请访问示例页面。
Files:
© 2022 The Qt Company Ltd. Documentation contributions included herein are the copyrights of their respective owners. The documentation provided herein is licensed under the terms of the GNU Free Documentation License version 1.3 as published by the Free Software Foundation. Qt and respective logos are trademarks of The Qt Company Ltd. in Finland and/or other countries worldwide. All other trademarks are property of their respective owners.


 1648
1648


 被折叠的 条评论
为什么被折叠?
被折叠的 条评论
为什么被折叠?
 到【灌水乐园】发言


