


Qt Design Studio 4.5 is here!
Qt Design Studio 4.5就在这里!
Qt Design Studio is back again with upgraded productivity and usability. From intuitive 3D editing to smooth connection to Figma and Qt Creator, Qt Design Studio is here to elevate your product creation. Dive into the new power of Qt Design Studio.
Qt Design Studio再次回归,生产力和可用性得到提升。从直观的3D编辑到与Figma和Qt Creator的平滑连接,Qt Design Studio将提升产品创作。深入Qt Design Studio的新力量。
Bringing Photorealism to 3D Scene
为3D场景带来照片真实感
Fresnel Support
Fresnel支持
The Fresnel effect improves photorealism in 3D scenes. In Qt Design Studio 4.5, users can enable Fresnel in principled materials without coding a custom material. Fresnel is available from the Clearcoat materials and as a standalone material effect.
菲涅耳效果提高了三维场景中的真实感。在Qt Design Studio 4.5中,用户可以在原则材质中启用菲涅耳,而无需对自定义材质进行编码。菲涅耳可从透明涂层材质中获得,并作为独立的材质效果。
Check out the Fresnel example added to Qt Design Studio 4.5 to try out Fresnel support. Here, you can see the available properties for Fresnel Support. For more information, please also check the documentation.
查看Qt Design Studio 4.5中添加的菲涅耳示例,以尝试菲涅耳支持。在这里,可以看到Fresnel Support的可用属性。有关更多信息,请查看文档。
Note that the Fresnel feature is a backported preview from Qt 6.8. It is not available in the regular Qt 6.7 build. You can try this out as part of Qt Design Studio, but if you want to build an application independent of Qt Design Studio, you must install a preview build of Qt 6.8.
请注意,菲涅耳功能是Qt 6.8的后端口预览。它在Qt 6.7的常规版本中不可用。可以将其作为Qt Design Studio的一部分进行尝试,但如果想构建独立于Qt Design工作室的应用程序,则必须安装Qt 6.8的预览版本。
Glow & Bloom
发光和绽放
Mimic how the lights actually work in the real world. Leverage glow effect of Qt Design Studio to elevate the visual quality of your 3D scene.
模拟灯光在现实世界中的实际工作方式。利用Qt Design Studio的光晕效果来提升3D场景的视觉质量。
Qt Design Studio supports ExtendedSceneEnvironment which has built-in effects like tonemapping, DepthofField, Lens Flare, Glow & Bloom and more. Glow & Bloom effect is one of the key elements to bring photorealism into the scene. Explore our new example to see how the effect works with different intensity, blur, blend modes and more.
Qt Design Studio支持ExtendedSceneEnvironment,该环境具有内置效果,如色调映射、DepthofField、镜头光斑、光晕和绽放等。光晕效果是将真实感带入场景的关键元素之一。探索我们的新示例,了解在不同强度、模糊、混合模式等情况下效果如何发挥作用。
User-friendly 3D Development
用户友好的3D开发
Fly Camera Mode
飞行相机模式
Navigate through your 3D scenes with keyboard shortcuts. Now, you can move around 3D scenes without running the project. Explore what your 3D world looks like with your fingertips.
使用键盘快捷键在三维场景中导航。现在,可以在不运行项目的情况下在三维场景中移动。用指尖探索您的3D世界。
By holding the right mouse button and using WASD+Q/E, the perspective camera flies around to show you the 3D View. This saves you time observing the changes you have made in the scene.
通过按住鼠标右键并使用WASD+Q/E,透视相机会四处飞行,显示3D视图。这样可以节省观察场景中所做更改的时间。
Picking 3D Objects
拾取三维对象
Shifting edit mode between 2D and 3D is now one click away. You no longer need to browse 3D objects inside the navigator or switch back and forth between the 2D and 3D Views to edit them. Double-click 3D elements from the 2D View and immediately open them in the 3D View. Now, you can stay in a single workspace.
现在只需单击鼠标即可在二维和三维之间切换编辑模式。不再需要在导航器中浏览三维对象,也不再需要在二维视图和三维视图之间来回切换来编辑它们。在二维视图中双击三维图元,然后立即在三维视图中打开它们。现在,可以呆在一个工作区中。

One Step Closer to Figma
离Figma又近了一步
Support for Figma effects
支持Figma效应
Today, Figma designs are not just wireframes. Great visuals usually use effects like blur and drop shadow. When you export the design from Figma, the effect is rasterized into an image, making fine-tuning the effect itself impossible.
今天,Figma的设计不仅仅是线框。出色的视觉效果通常使用模糊和阴影等效果。从Figma导出设计时,效果会光栅化为图像,因此无法对效果本身进行微调。
Now, with Qt Design Studio 4.5, you can export the Figma effects part of the project, and what we do behind the scenes is transfer both images and effects as components. This results in you getting 1:1 visuals on the components on the Qt side, which you had earlier on the Figma side.
现在,使用Qt Design Studio 4.5,可以导出项目的Figma效果部分,我们在幕后所做的是将图像和效果作为组件进行传输。这将在Qt侧的组件上获得1:1的视觉效果,这是之前在Figma侧获得的。
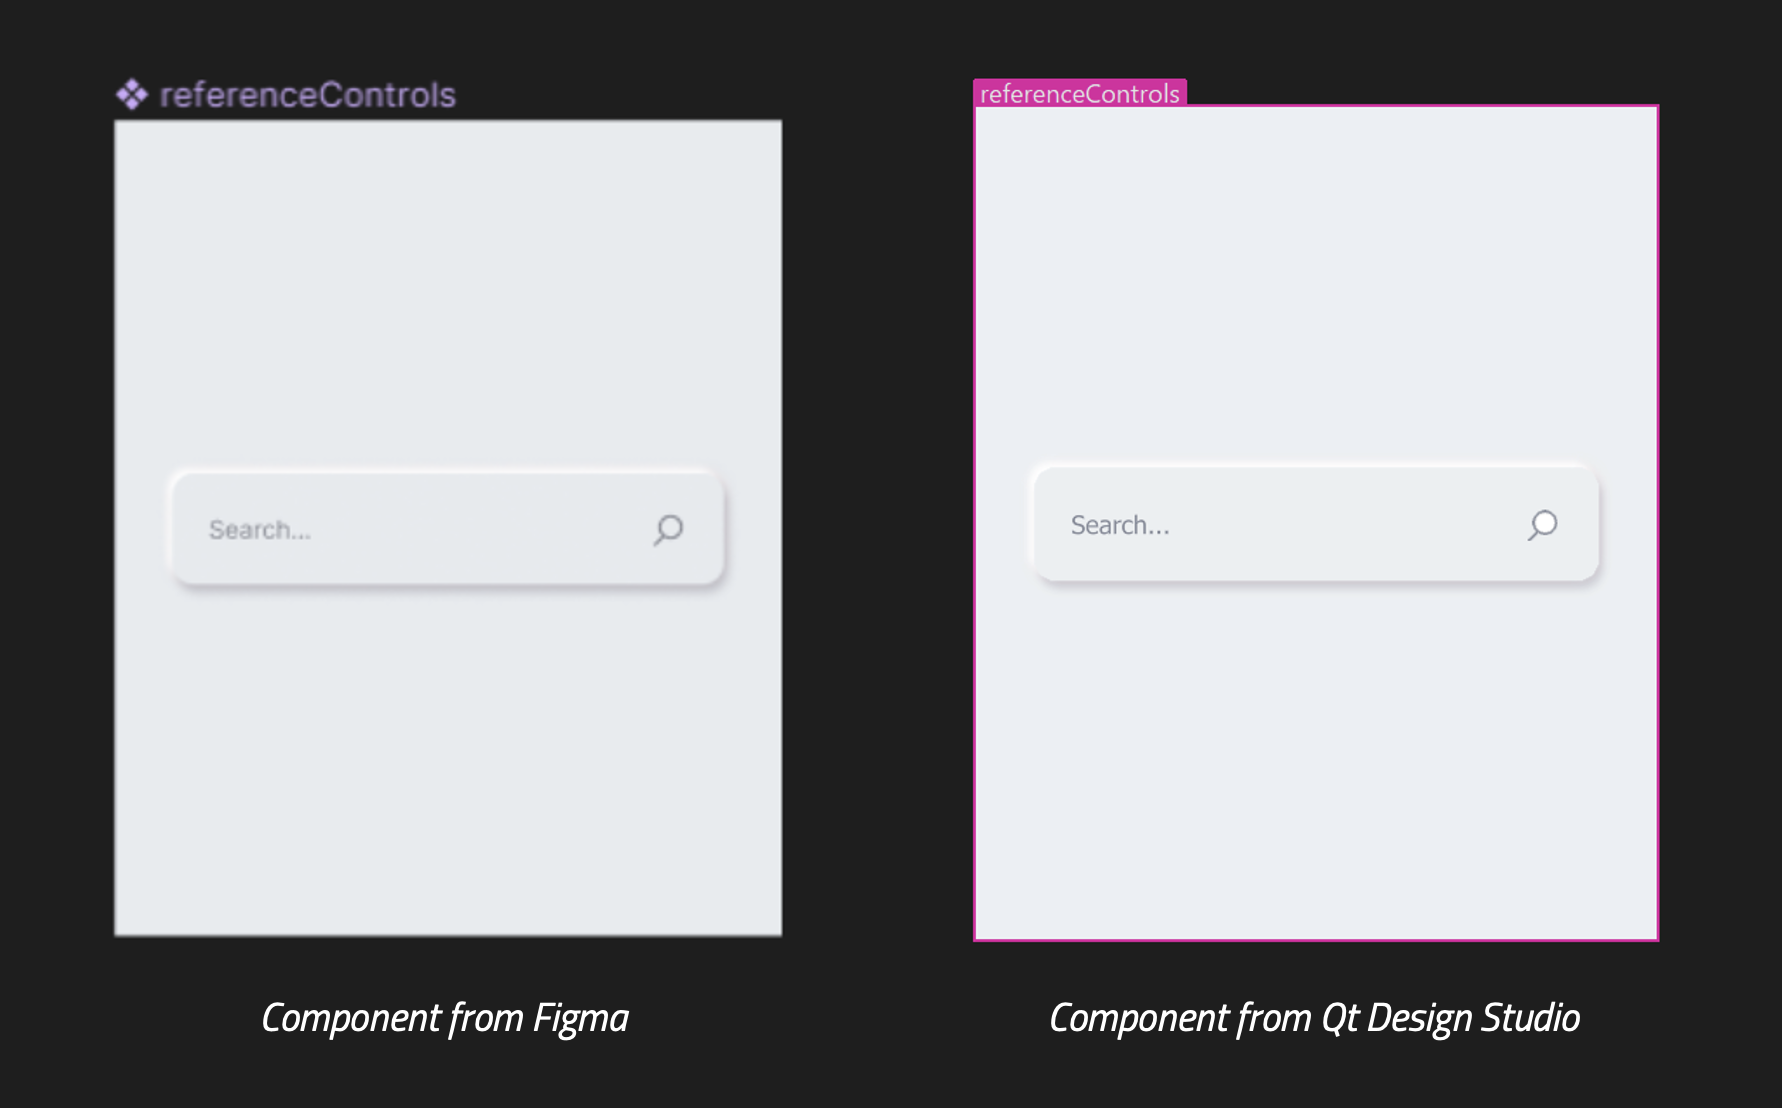
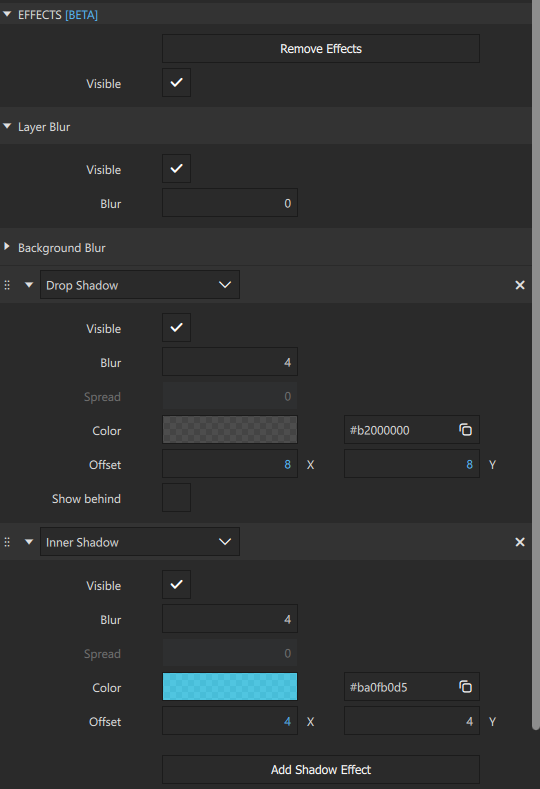
If you want to see this yourself, here is an example of a Figma file that you can load into your Figma environment and then export to Qt using the Qt Bridge for Figma plugin. We currently support all the Figma effects, including layer and background blur, inner shadow, and drop shadow, and follow all parameters that control the effects themselves. If you do not like the output on the Figma side, you can also tweak the effect on the Qt Design Studio side.
如果想自己看到这一点,这里有一个Figma文件的例子,可以将其加载到Figma环境中,然后使用Qt Bridge for Figma插件导出到Qt。我们目前支持所有的Figma效果,包括层和背景模糊、内部阴影和阴影,并遵循控制效果本身的所有参数。如果不喜欢Figma端的输出,也可以调整Qt Design Studio端的效果。
Ready-made 2D effects
现成的2D效果
Why stop at Figma effects? With Qt Design Studio 4.5, you can use those same effects without the Figma in between. For 2D UI components, you can apply the same effects directly on the 2D View in Qt Design Studio. This is the same feature used for the Figma effects, which contain drop shadow, inner shadow, layer blur, and background blur. These effects follow effects from CSS and other design tools.
为什么止步于Figma效果?使用Qt Design Studio 4.5,可以在没有Figma的情况下使用相同的效果。对于二维UI组件,可以在Qt Design Studio中直接在二维视图上应用相同的效果。这与Figma效果使用的功能相同,Figma特效包括下降阴影、内部阴影、层模糊和背景模糊。这些效果遵循CSS和其他设计工具的效果。
The design effects are part of the Studio Components, which means they are also usable in a project exported from Qt Design Studio into a Qt project done with Qt Creator.
设计效果是Studio组件的一部分,这意味着它们也可以在从Qt design Studio导出到使用Qt Creator完成的Qt项目中使用。
For more information on the Design Effects, you can check the documentation.
有关“设计效果”的详细信息,可以查看文档。
Boost Productivity
提高生产力
Qt Creator Interoperability
Qt Creator 互操作性
Experience smooth iteration between Qt Design Studio and Qt Creator. Qt Design 4.5 improved the workflow between Qt Design Studio, Qt Creator, and CMake. Changes in the project made by another tool will be automatically detected, and the user will be asked to reload the project.
体验Qt Design Studio和Qt Creator之间的平滑迭代。Qt Design 4.5改进了Qt Design Studio、Qt Creator和CMake之间的工作流程。将自动检测到另一个工具对项目所做的更改,并要求用户重新加载项目。

Make sure to turn on the automatic CMake generation to enable this, for Qt Design Studio no longer generates the "CMakeLists.txt" in the wizard. Once the CMake generation is enabled, the "CMakeLists.txt" is regenerated automatically whenever required. There is no need to remember to export CMake every time a new file is added to the project. For more detailed information, please check the documentation.
请确保打开自动生成CMake以启用此功能,因为Qt Design Studio不再在向导中生成“CMakeLists.txt”。一旦启用CMake生成,“CMakeLists.txt”将在需要时自动重新生成。无需记住每次向项目中添加新文件时都要导出CMake。有关更多详细信息,请查看文档。
Updates to Web-based Design Viewer
更新到基于Web的设计查看器
Our WebAssembly-based Design Viewer has been updated to v0.8.54 with support for Qt 6.6.1 and Qt Quick Studio Components v4.5. The backend and infrastructure updates have increased downloading and loading speeds by over 60%. Go ahead and try out the new version at https://designviewer.qt.io. Please share your feedback and report bugs under the Qt Design Studio project on our issue tracker.
我们基于WebAssembly的设计查看器已更新到v0.8.54,支持Qt 6.6.1和Qt Quick Studio Components v4.5。后端和基础设施更新将下载和加载速度提高了60%以上。继续在尝试新版本https://designviewer.qt.io.请在我们的问题跟踪器上分享您的反馈并报告Qt Design Studio项目下的错误。
Other Improvements
其他改进
Qt 6.7 support
Qt 6.7支持
Qt Design Studio 4.5 officially supports Qt 6.7 and uses Qt 6.7 for its runtime when running and previewing your project. The Fresnel 3D material is taken from the upcoming Qt 6.8 (first beta in early H2 2024) and customized to work with Qt Design Studio 4.5. If you wish to export a 3D project and use it with Qt Creator, you should use the Qt 6.8 kit. Apart from that, everything else is compatible with Qt 6.7.
Qt Design Studio 4.5正式支持Qt 6.7,并在运行和预览项目时使用Qt 6.7作为运行时。菲涅耳3D材料取自即将推出的Qt 6.8(2024年下半年初的第一个测试版),并定制为与Qt Design Studio 4.5配合使用。如果希望导出3D项目并将其与Qt Creator一起使用,则应使用Qt 6.8工具包。除此之外,其他一切都与Qt 6.7兼容。
Bug Fixes
错误修正
For more detailed information on the update, including small improvements and bug fixes, please visit our change log and release note here.
有关更新的更多详细信息,包括小的改进和错误修复,请访问我们的更改日志和发布说明。
Getting Started
入门
Qt Design Studio is everything you need for quicker and smarter HMI creation. Visit Qt Design Studio product page for more information and to try out the free evaluation.
Qt Design Studio是更快、更智能地创建HMI所需的一切。访问Qt Design Studio产品页面了解更多信息并尝试免费评估。
Are you new to Qt Design Studio? Do not worry.
你是Qt设计工作室的新手吗?别担心。
- Dive into our online documentation to learn about Qt Design Studio.
- 深入我们的在线文档,了解Qt Design Studio。
- Kickstart your journey with Qt Design Studio through our learning portal.
- 通过我们的学习门户,与Qt Design Studio一起开启旅程。
If you encounter any bugs or usability issues, please send us a report in the issue tracker . We always look forward to improving your experience with Qt Design Studio.
如果遇到任何错误或可用性问题,请在问题跟踪器中向我们发送报告 . 我们一直期待着通过Qt Design Studio改善体验。


 1591
1591

 被折叠的 条评论
为什么被折叠?
被折叠的 条评论
为什么被折叠?
 到【灌水乐园】发言


