


实践要求:写一个程序,实现一个完整的太阳系,其他星球围绕太阳的转速必须不一样,并且不再一个法平面内。
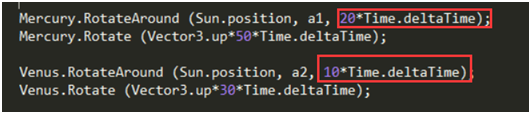
法平面是指过空间曲线的切点,且与切线垂直的平面。要求不在一个法平面内,则在保证所有行星以及太阳在一条轴上时,另外两条轴的比例不相同即可。公转速度在RotateAround参数里面设置。如:
这个程序在课堂程序的基础上完成,使用了预制、动态生成对象,在位置上使用Vector3定好行星初始位置,使用RotateAround设置行星公转,使用Rotate设置行星自转。参数大部分参照了太阳系的参数,如行星大小,公转速度等按比例模拟。
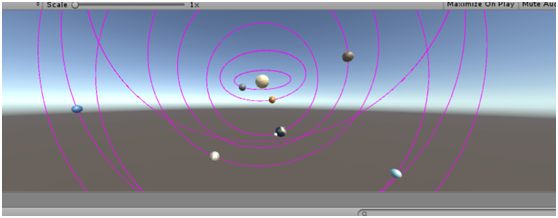
显示效果:
制作概述:
1.制作太阳系预制
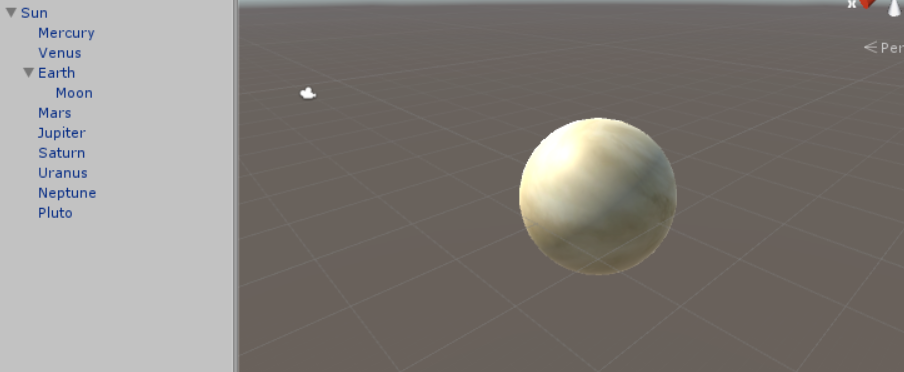
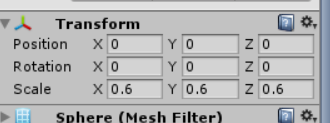
根据太阳系各行星的大小设置Transform中的Scale
想要给白色的球贴上图的,可以去网上找到太阳系贴图,直接百度搜索就好。
然后导入图片资源,再将对应的图片拖到对应的行星即可。
最后将Sun整个拖入Assets/Resources/Perfabs(这一步是为了后续改进,直接放在Hierarchy里面后面再挂载cs文件就可以直接运行)
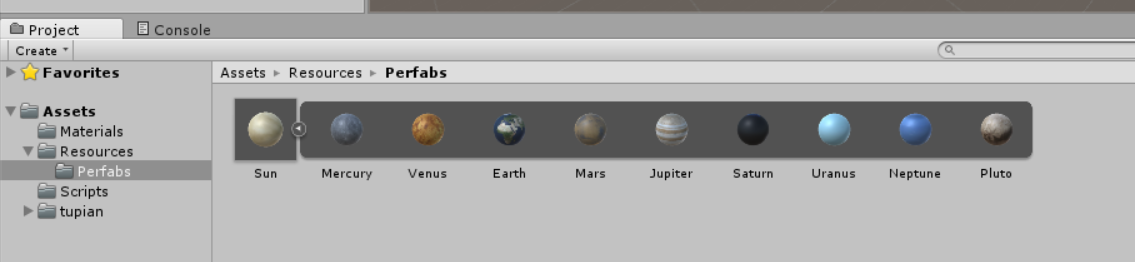
到这预制就做好啦~
2.开始编写代码~
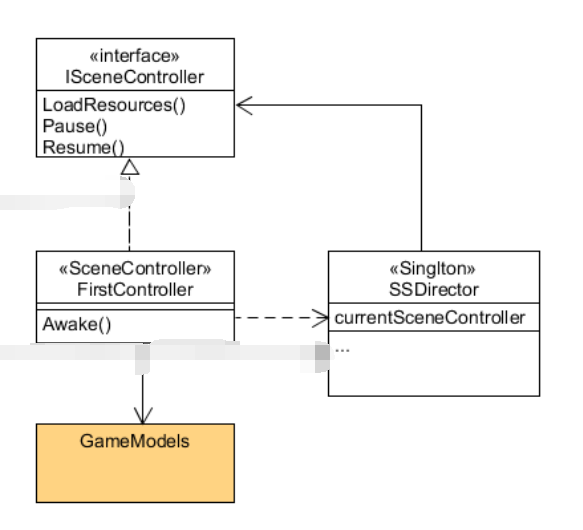
使用了课程中的MVC架构
新建一个RoundSun.cs
cs文件:
2.1声明对象
    public Transform Sun;
    public Transform Mercury;
    public Transform Venus;
    public Transform Earth;
        public Transform Moon;
    public Transform Mars;
    public Transform Jupiter;
    public Transform Saturn;
    public Transform Uranus;
    public Transform Neptune;
    public Transform Pluto;
2.2初始行星位置
void Start () {
        Sun.position = Vector3.zero;
        Mercury.position = new Vector3 (4, 0, 0);
        Venus.position = new Vector3 (6, 0, 0);
        Earth.position = new Vector3 (8, 0, 0);
            Moon.position = new Vector3 (10, 0, 0);
        Mars.position = new Vector3 (12, 0, 0);
        Jupiter.position = new Vector3 (16, 0, 0);
        Saturn.position = new Vector3 (20, 0, 0);
        Uranus.position = new Vector3 (24, 0, 0);
        Neptune.position = new Vector3 (28, 0, 0);
        Pluto.position = new Vector3 (32, 0, 0);
    }
2.3设置行星公转和自转
手动设置的参数,与真实太阳系有偏差
void Update () {
        Vector3 a1 = new Vector3 (0, 9, 2);
        Vector3 a2 = new Vector3 (0, 257, 135);
        Vector3 a3 = new Vector3 (0, 45, 339);
        Vector3 a4 = new Vector3 (0, 4, 9);
        Vector3 a5 = new Vector3 (0, 8, 19);
        Vector3 a6 = new Vector3 (0, 11, 9);
        Vector3 a7 = new Vector3 (0, 6, 137);
        Vector3 a8 = new Vector3 (0, 3, 13);
        Vector3 a9 = new Vector3 (0, 13, 122);

        Mercury.RotateAround (Sun.position, a1, 20*Time.deltaTime);
        Mercury.Rotate (Vector3.up*50*Time.deltaTime);

        Venus.RotateAround (Sun.position, a2, 10*Time.deltaTime);
        Venus.Rotate (Vector3.up*30*Time.deltaTime);

        Earth.RotateAround (Sun.position, a3, 10*Time.deltaTime);
        Earth.Rotate (Vector3.up*30*Time.deltaTime);
        Moon.transform.RotateAround (Earth.position, Vector3.up, 359 * Time.deltaTime);

        Mars.RotateAround (Sun.position, a4, 8*Time.deltaTime);
        Mars.Rotate (Vector3.up*30*Time.deltaTime);

        Jupiter.RotateAround (Sun.position, a5, 7*Time.deltaTime);
        Jupiter.Rotate (Vector3.up*30*Time.deltaTime);

        Saturn.RotateAround (Sun.position, a6, 6*Time.deltaTime);
        Saturn.Rotate (Vector3.up*30*Time.deltaTime);

        Uranus.RotateAround (Sun.position, a7, 5*Time.deltaTime);
        Uranus.Rotate (Vector3.up*30*Time.deltaTime);

        Neptune.RotateAround (Sun.position, a8, 4*Time.deltaTime);
        Neptune.Rotate (Vector3.up*30*Time.deltaTime);

        Pluto.RotateAround (Sun.position, a9, 3*Time.deltaTime);
        Pluto.Rotate (Vector3.up*30*Time.deltaTime);
    }
这时候直接将cs挂载到Sun里,到这里已经可以运行实现啦。
接下来实现预制,动态生成对象吧。直接放代码。
using System.Collections;
using System.Collections.Generic;
using UnityEngine;

public class FirstController : MonoBehaviour, ISceneController {
    void Awake() {
        Debug.Log ("load sunt...\n");
        SSDirector director = SSDirector.getInstance ();
        director.setFPS (60);
        director.currentSceneController = this;
        director.currentSceneController.LoadResources ();
    }

    public void LoadResources() {
        GameObject sunset = Instantiate<GameObject> (
                                Resources.Load <GameObject> ("Perfabs/Sun"),
                                Vector3.zero, Quaternion.identity);
        sunset.name = "sunset";
        Debug.Log ("load sunset...\n");
    }
    public void Pause(){
    }
    public void Resume(){
    }
    // Use this for initialization
    void Start () {

    }

    // Update is called once per frame
    void Update () {

    }
}
using System.Collections;
using System.Collections.Generic;
using UnityEngine;

    public interface ISceneController {
        void LoadResources();
        void Pause();
        void Resume();
    }
using System.Collections;
using System.Collections.Generic;
using UnityEngine;

public class SSDirector : System.Object {
    private static SSDirector _instance;

    public ISceneController currentSceneController { get; set; }
    public bool running{ get; set; }

    public static SSDirector getInstance() {
        if (_instance == null) {
            _instance = new SSDirector ();
        }
        return _instance;
    }

    public int getFPS() {
        return Application.targetFrameRate;
    }

    public void setFPS(int fps) {
        Application.targetFrameRate = fps;
    }
}
在确保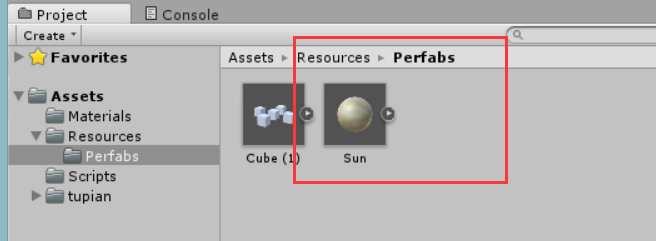
在这个文件目录下
将FirstController挂载到主摄像机或者空对象即可运行
大致架构:


 1894
1894


 被折叠的 条评论
为什么被折叠?
被折叠的 条评论
为什么被折叠?
 到【灌水乐园】发言


