


版本一览:
opencv:3.4.1
vtk7.1.1+pvl1.12.0(不要用sudo apt-get直接安装,不好使的)
pangolin0.6
eigen 3.3.7(命令行直接安装的)
一、配置参考链接1参考链接2(配置最好关闭anaconda环境):
主要按照参考链接来配置(pcl单独自己安装):
1、rar(不安也可):
sudo apt install rar
sudo apt install unrar
来解压rar版本的pangolin0.6,ubutun20一定要用参考链接中的0.6pangolin版本,其他的版本我试过很多都不可以用。
2、sudo: updatedb:找不到命令
sudo apt-get install mlocate
sudo updatedb
3、安装网盘:参考链接
sudo dpkg -i baidunetdisk_4.12.5_amd64.deb
4.opencv安装的是3.4.1,dsp-slam里自带的。
如果安乐很多版本,可以如下语句删除重新安(参考):
sudo rm -r /usr/local/include/opencv2 /usr/local/include/opencv /usr/include/opencv /usr/include/opencv2 /usr/local/share/opencv /usr/local/share/OpenCV /usr/share/opencv /usr/share/OpenCV /usr/local/bin/opencv* /usr/local/lib/libopencv*
slam14讲第二版ch12,运行参考链接:
在dense_mono/CMakeFiles/dense_mapping.dir/dense_mapping.cpp文件,bool update 函数里面补充 上 return true参考链接。
5、pcl:
参考链接
2、clion参考链接:
下载后直接运行人如下代码即可打开:
$ sh /你解压后clion的文件路径/bin/clion.sh
CLion顶部菜单栏点击 Tools > Creat Desktop Entry,创建桌面图标。
5、安装pcl:
参考链接
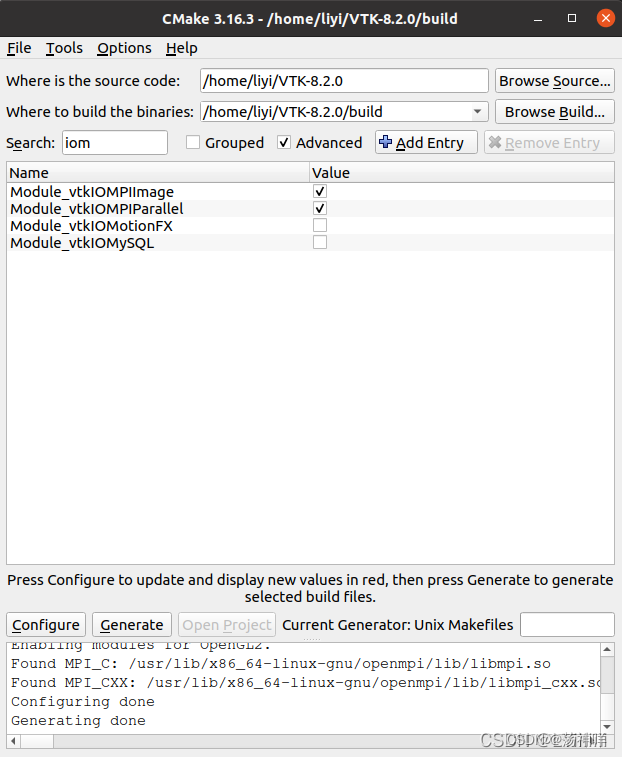
(1)vtk安装的时候,如果configure之后上面还是有红色条目,继续点configure。
VTK-Group-Qt勾选上,我的电脑安装qt5。搜索勾选vtkIOMPImage和vtkIOMPIParallel,之后generate。
报错解决方案和解决方案2。
(2)安装pcl报错:/usr/lib/x86_64-linux-gnu/libSM.so: undefined reference to `uuid_generate@UUID_1.0’
和anaconda有关,把libuuid*的文件移走,之后再移动回来。
ls ~/anaconda3/lib/libuuid*
mkdir ~/anaconda3/libuuid
mv ~/anaconda3/lib/libuuid* ~/anaconda3/libuuid
#移回来
mv ~/anaconda3/libuuid/libuuid* ~/anaconda3/lib
(3)若报错L/usr/include/pcl-1.10/pcl/point_types.h:550:1: error: ‘plus’ is not a member of ‘pcl::traits’,参考链接:
set(CMAKE_CXX_STANDARD 14)
(4) ‘Index’ is not a member of ‘Eigen’:(原本安装3.3.7的eigen是不报错的,后来改成了3.1,报错)
/home/fuyouao/下载/source/pcl/sample_consensus/include/pcl/sample_consensus/impl/sac_model_circle3d.hpp:288:15: error: ‘Index’ is not a member of ‘Eigen’
   for (Eigen::Index i = 0; i < coeff.size (); ++i)
               ^~~~~
#/pcl/sample_consensus/include/pcl/sample_consensus/impl/sac_model_circle3d.hpp中288行
  for (Eigen::Index i = 0; i < coeff.size (); ++i)
#改为
  for (int i = 0; i < coeff.size (); ++i)
5.ceres和g2o最好在官网下载最新版:
ceres
g2o
如果g2o安装不了,则参考链接:
步骤2,把anaconda的相关配置注释掉。
6、稠密建图:
错误:
(1)cmake时候 :so.16 不用管
(2)‘make_shared’ is not a member of ‘boost’:
  boost::make_shared<PointCloud>();
  全部改为:
	std::make_shared<PointCloud>();
(3)报错std::shared_ptr<const pcl::PointCloudpcl::PointNormal >]’ is private within this context:
    //icp.setInputCloud(cloud_in);
    改为:
    icp.setInputSource(cloud_in);
(4) libvtkglew-7.1.so.1: cannot open shared object file: No such file or directory(参考链接):
这是由于环境变量当中没有设置libvtkIONetCDF的目录导致的,解决方法:
export LD_LIBRARY_PATH=/usr/local/lib:$LD_LIBRARY_PATH
但是每次都要export,参考这个链接。
ldconfig
(5)surfel_mapping.cpp:31:9: error:
‘class pcl::MovingLeastSquares<pcl::PointXYZRGB, pcl::PointXYZRGBNormal>’
has no member named ‘setPolynomialFit’;
did you mean ‘setPolynomialOrder’?:
#按提示修改
mls.setPolynomialFit(polynomial_order > 1);
改为
mls.setPolynomialOrder(polynomial_order > 1);
7、anaconda
换源:https://mirrors.tuna.tsinghua.edu.cn/help/anaconda/
安装库或者编译的时候,经常会链接到anaconda,参考这个连接,编译之前关掉它。
conda config --set auto_activate_base false
之后重启终端,路径前面的base就消失了,之后用虚拟环境的时候,就输入:
conda config --set auto_activate_base true
conda activate spacename//环境的名称
./Examples/Monocular/mono_tum Vocabulary/ORBvoc.txt Examples/Monocular/TUM1.yaml /home/fuyouao/文档/ORB_SLAM2_dense/data/rgbd_dataset_freiburg1_xyz
./Examples/RGB-D/rgbd_tum Vocabulary/ORBvoc.txt Examples/RGB-D/TUM1.yaml /home/fuyouao/文档/ORB_SLAM2_dense/data/rgbd_dataset_freiburg1_xyz/ /home/fuyouao/文档/ORB_SLAM2_dense/data/rgbd_dataset_freiburg1_xyz/associate.txt
./Examples/Monocular/mono_tum Vocabulary/ORBvoc.txt Examples/Monocular/TUM1.yaml /home/fuyouao/文档/ORB_SLAM2_PointCloud-master/data/rgbd_dataset_freiburg1_xyz
./bin/rgbd_tum Vocabulary/ORBvoc.txt Examples/RGB-D/TUM1.yaml /home/fuyouao/文档/ORB_SLAM2_PointCloud-master/data/rgbd_dataset_freiburg1_xyz /home/fuyouao/文档/ORB_SLAM2_PointCloud-master/data/rgbd_dataset_freiburg1_xyz/associate.txt
但是运行只有坐标系,改为eigen3.1.0不可用。
./bin/rgbd_tum Vocabulary/ORBvoc.txt Examples/RGB-D/TUM1.yaml /home/fuyouao/文档/data/rgbd_dataset_freiburg1_room /home/fuyouao/文档/data/rgbd_dataset_freiburg1_room/associate.txt
vim或者gedit都可以
vim ~/.bashrc
或者
gedit ~/.bashrc
# >>> conda initialize >>>
# !! Contents within this block are managed by 'conda init' !!
__conda_setup="$('/home/fuyouao/anaconda3/bin/conda' 'shell.bash' 'hook' 2> /dev/null)"
if [ $? -eq 0 ]; then
    eval "$__conda_setup"
else
    if [ -f "/home/fuyouao/anaconda3/etc/profile.d/conda.sh" ]; then
        . "/home/fuyouao/anaconda3/etc/profile.d/conda.sh"
    else
        export PATH="/home/fuyouao/anaconda3/bin:$PATH"
    fi
fi
unset __conda_setup
# <<< conda initialize <<<
export PATH="/home/fuyouao/anaconda3:$PATH"
输入以下命令或者重启系统
source ~/.bashrc


 510
510


 被折叠的 条评论
为什么被折叠?
被折叠的 条评论
为什么被折叠?
 到【灌水乐园】发言


