


【前言】本篇文章旨在实现,在Arduino IDE中使用ESP32-S3-wroom。
一、下载步骤
1.0 下载Arduino IDE
建议官网下载
1.1 下载ESP32库
1.1.1 在线下载
在首选项(preference)中的其他开发板管理地址输入:
https://espressif.github.io/arduino-esp32/package_esp32_index.json点击确定,软件就会自己安装了。安装好后重新启动一下Arduino IDE软件。
在开发板管理器中,搜索ESP32:
下载esp32 by Espressif Systems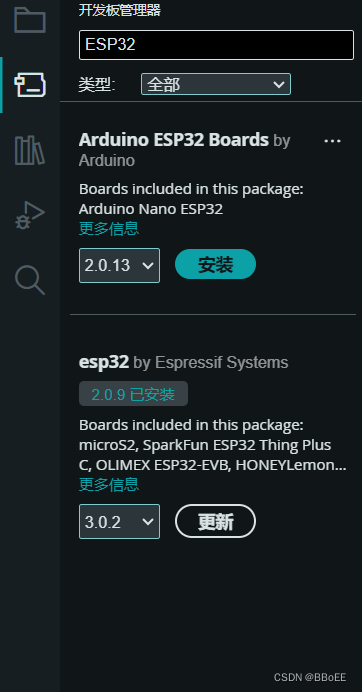
(如果下载失败,可以尝试下载历史版本,多次尝试。如果仍未解决,尝试离线下载)
1.1.2 离线下载
Arduino IDE 使用安装以及ESP32库的导入(离线)_esp32 离线库-CSDN博客
二、烧录流程
2.0 完成ESP32库的导入
2.1 进入下载模式
在烧录前,ESP32模块需要处于下载模式。可以通过按住模块上的BOOT键同时按下RESET键来进入。
2.2 连接设备
使用数据线将ESP32模块连接到电脑上。(注意是数据线,不是充电线)
2.3 选择正确的端口和板型
在IDE中选择正确的COM端口和板型(ESP32 Dev Module)。
2.4 编写代码
在Arduino IDE中编写ESP32的代码。(附,有一个用于检测的示例代码)
2.5 开始烧录
点击IDE中的烧录按钮开始烧录过程。烧录成功后,通常会有相应的提示信息。
2.6 复位设备
烧录完成后,按下ESP32模块上的RESET按钮,设备将运行烧录的程序。
2.7 验证烧录结果
可以通过串口监视器来验证程序是否运行正常。
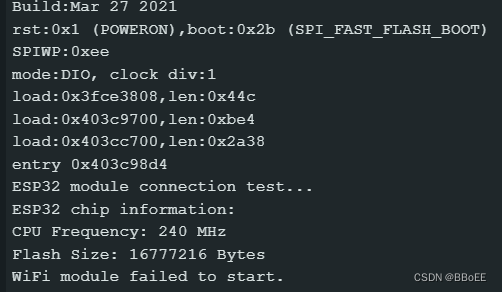
2.7.1 错误情况
![]()
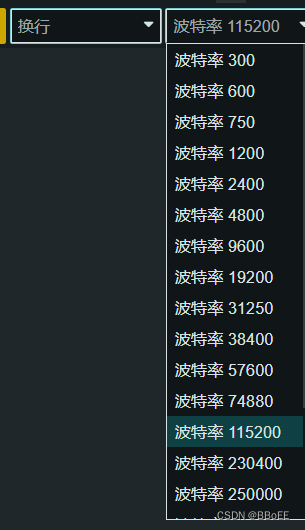
将波特率改为和代码中的波特率相同的数值。示例代码中为115200
2.7.2 正确情况
三、附
3.1 示例代码
#include <WiFi.h> // Include the WiFi library

void setup() {
  Serial.begin(115200); // Start serial communication with a baud rate of 115200

  // Wait for the serial port to be ready
  while (!Serial) {
    delay(10);
  }

  // Print the start message
  Serial.println("ESP32 module connection test...");

  // A short delay to ensure the ESP32 module has started
  delay(1000);

  // Attempt to print the ESP32 module's chip information
  Serial.println("ESP32 chip information:");
  Serial.print("CPU Frequency: ");
  Serial.print(ESP.getCpuFreqMHz()); // Get the CPU frequency
  Serial.println(" MHz");
  Serial.print("Flash Size: ");
  Serial.print(ESP.getFlashChipSize()); // Get the Flash size
  Serial.println(" Bytes");

  // Check if the WiFi module has started
  if(WiFi.status() == WL_IDLE_STATUS) {
    Serial.println("WiFi module started successfully.");
  } else {
    Serial.println("WiFi module failed to start.");
  }
}

void loop() {

}


 6067
6067

 被折叠的 条评论
为什么被折叠?
被折叠的 条评论
为什么被折叠?
 到【灌水乐园】发言


