
红色和青色叠加
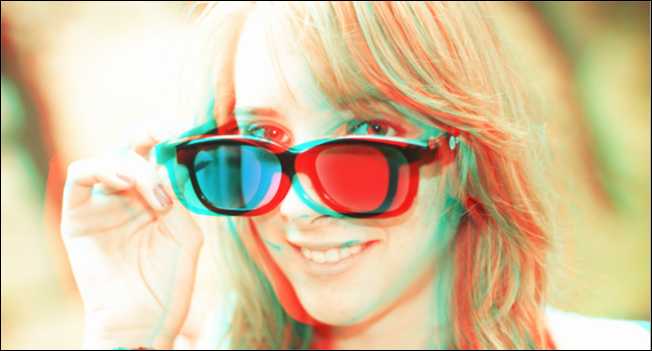
Want to make photos really stand out? Create a fun Red/Cyan 3D effect that will pop off the page and screen, just because it’s a heck of a lot of fun. Grab your 3D glasses, and either Photoshop or GIMP!
是否想让照片真正脱颖而出? 创建一个有趣的红色/青色3D效果,将其弹出页面和屏幕,只是因为它带来了很多乐趣。 拿起您的3D眼镜,然后使用Photoshop或GIMP!
While stereoscopic effects like Cyan/Red 3D are often created with fancy photography tricks, we’ll be creating one today with simple trick image editing. Dive right on in and see how simple it can be, with a simple version for Photoshop beginners, and an optional second part for users that want to give their image a little more oomph. Keep reading!
虽然青色/红色3D等立体效果通常是通过精美的摄影技巧来创建的,但今天我们将通过简单的技巧图像编辑来创建一种效果。 继续学习,看看它有多简单,为Photoshop初学者提供一个简单的版本,为想要给自己的图像增添光彩的用户提供可选的第二部分。 继续阅读!
第1部分,初学者:简单的红色和青色3D效果 (Part 1, Beginner: A Simple Red & Cyan 3D Effect)
 ()
()

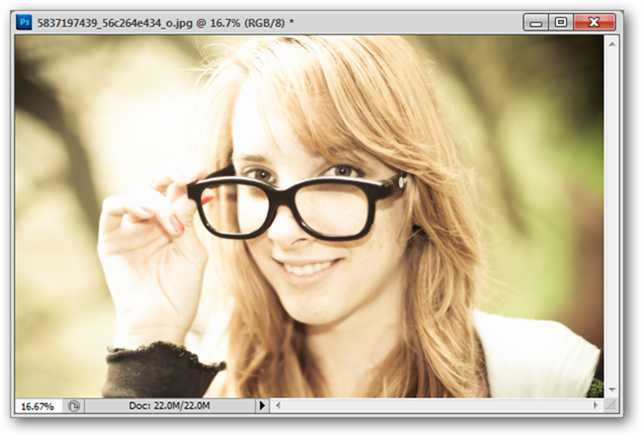
The technical term for a 3D image is an Anaglyph, which are usually created by photographing a subject from two separate vantage points, then combining the images. Today, we won’t be doing that, but we will achieve the same effect by digging through our image channels. Open up a worthy image and let’s get going!
3D图像的技术术语是Anaglyph ,通常是通过从两个单独的有利位置拍摄对象并组合图像来创建的。 今天,我们不会这样做,但是我们将通过挖掘图像通道来达到相同的效果。 打开一个有价值的图像,让我们开始吧!
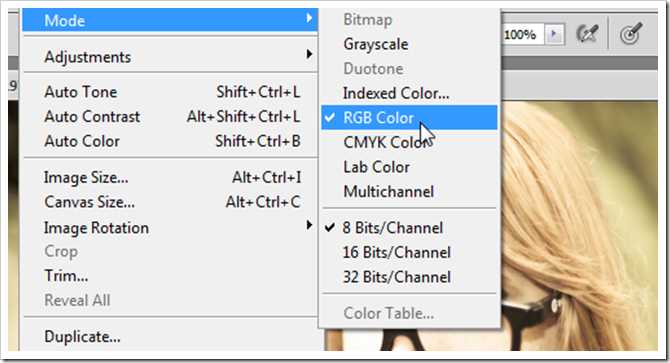
You can use any kind of image for this how-to, but you’ll need to be in RGB Color mode. So if you start in Grayscale, Indexed Color, or CMYK, you should convert to RGB by going to Image > Mode > RGB Color (in Photoshop).
您可以使用任何类型的图像进行此操作,但是您需要处于RGB颜色模式。 因此,如果您从灰度,索引颜色或CMYK开始,则应通过转到图像>模式> RGB颜色(在Photoshop中)转换为RGB。
Author’s Note: This method is appropriate for any image editor that lets you mess around in channels, like Photoshop or GIMP. Photoshop Elements and Paint.NET do not allow this sort of image editing out of the box.
作者注意:该方法适用于任何允许您在通道中四处乱逛的图像编辑器,例如Photoshop或GIMP。 Photoshop Elements和Paint.NET不允许立即进行此类图像编辑。
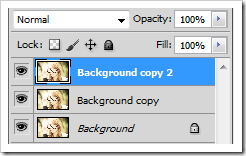
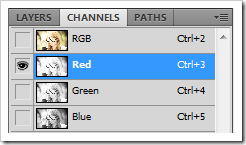
Start editing your image by making multiple copies of your photograph (left hand screenshot). One of the easiest ways to do this is by right clicking your “Background Layer” and picking “Duplicate Layer.” With two copies made, select the topmost one, and jump to your channels panel. You may have to show it by going to Window > Channels.
通过制作照片的多份副本开始编辑图像(左手屏幕截图)。 最简单的方法之一是右键单击“背景层”,然后选择“重复层”。 制作两份副本后,选择最上面的一份,然后跳到您的频道面板。 您可能必须通过转到窗口>频道来显示它。
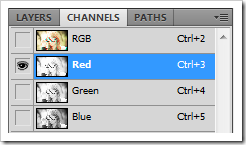
When you’ve reached your channels panel, pick your Red channel as shown above right.
进入频道面板后,请选择右上角的红色频道。

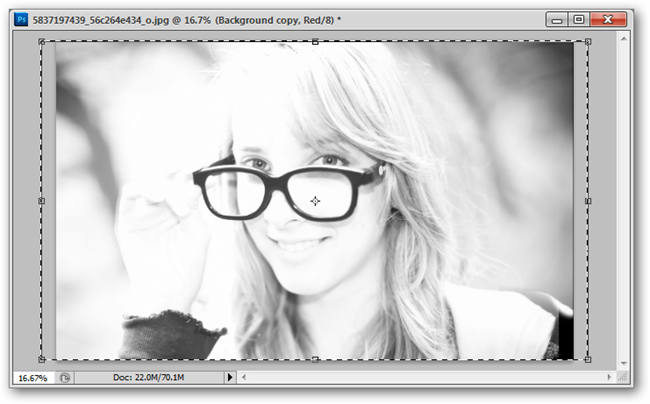
Press (same keyboard shortcut in Photoshop and GIMP) at this point to Select the entire canvas. Your isolated Red channel will look like an incomplete grayscale version of your image, so if your photo looks like the image above, you’re doing the right thing.
此时按(在Photoshop和GIMP中使用相同的键盘快捷键)以选择整个画布。 孤立的红色通道看起来像图像的灰度不完整,因此,如果您的照片看起来像上面的图像,则说明您做对了。
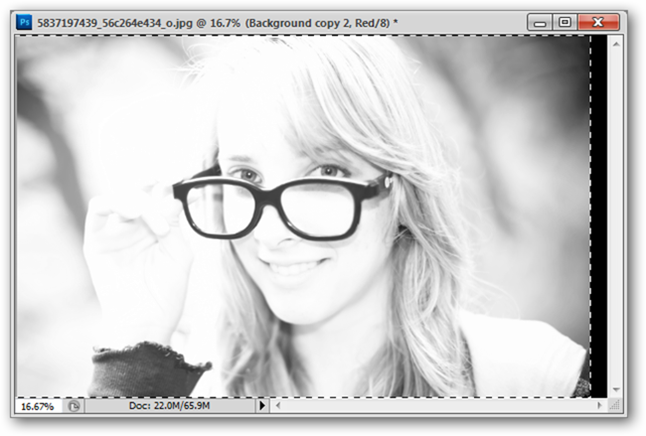
Press to select your Move Tool (GIMP shortcut key “M”) and move the red channel over to the left as shown.
按下以选择您的移动工具(GIMP快捷键“ M”),然后将红色通道移至左侧,如图所示。

| When moving your channel, you may want to make sure that your “background” color is black, as shown to the left. You can set it to black by clicking the background swatch in the tools panel and changing it in the color options dialog. GIMP users have a very similar tool, also in their Toolbox. It looks and functions very much like this one from Photoshop. |
| 移动频道时,您可能需要确保“背景”颜色为黑色,如左图所示。 您可以通过在工具面板中单击背景色板,然后在颜色选项对话框中对其进行更改来将其设置为黑色。 GIMP用户在其工具箱中也有一个非常相似的工具。 它的外观和功能非常类似于Photoshop中的这一功能。 |
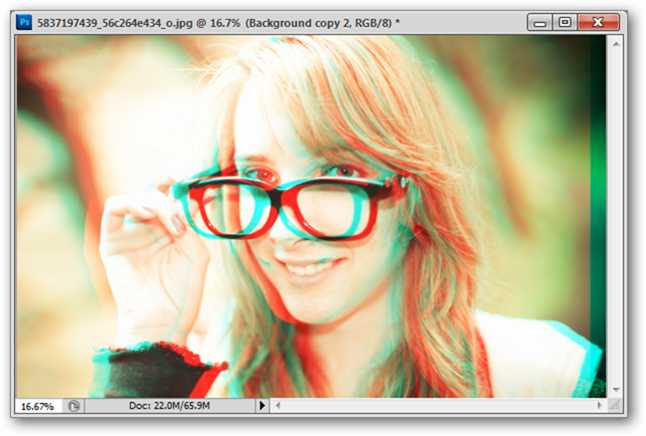

will return to your RGB in Photoshop CS5. In other versions, simply return to your layers panel and pick a new active layer. You may decide to stop at this point, as this, by itself, is a halfway decent 3D effect. But let’s take it one step further, and add some depth to our image.
将在Photoshop CS5中返回到RGB。 在其他版本中,只需返回到“图层”面板并选择一个新的活动图层即可。 您可能会决定在这一点上停止,因为这本身就是一个不错的3D效果。 但是,让我们更进一步,为我们的图像增加一些深度。
第2部分,高级:向3D图像添加深度 (Part 2, Advanced: Adding Depth to Our 3D Image)
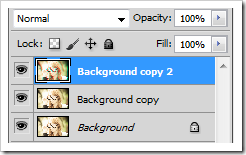

You should have several copies of your original photo layer at this point, so let’s return to the topmost layer in which we created our 3D effect.
此时,您应该具有原始照片图层的多个副本,因此让我们回到创建3D效果的最顶层。
Create a mask, as shown on the right, by selecting the layer and clicking the in the bottom of the layers panel. In GIMP, you can simply right click your layer and choose “Add Layer Mask,” choosing “White for Full Opacity.”
通过选择图层并单击“图层”面板底部的来创建遮罩,如右图所示。 在GIMP中,您只需在图层上单击鼠标右键,然后选择“添加图层蒙版”,然后选择“白色以实现完全不透明度”。

Grab the brush tool and a soft round brush to paint out the areas you want masked out of this topmost layer. Our goal is to return part of our image to the original appearance of the photo.
抓住画笔工具和柔软的圆形画笔,在最顶层上绘制要遮罩的区域。 我们的目标是使图像的一部分恢复到照片的原始外观。
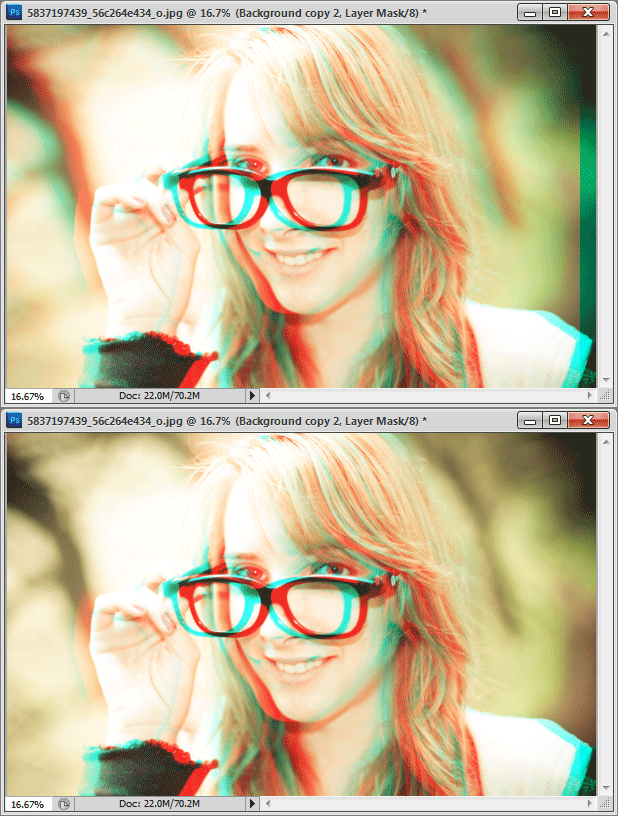
Here’s the before/after. The background is masked out of the layer with the 3d effect, reverting it to the copy below without the 3d effect.
这是之前/之后。 背景通过3d效果从图层中屏蔽出来,将其还原为没有3d效果的下面的副本。
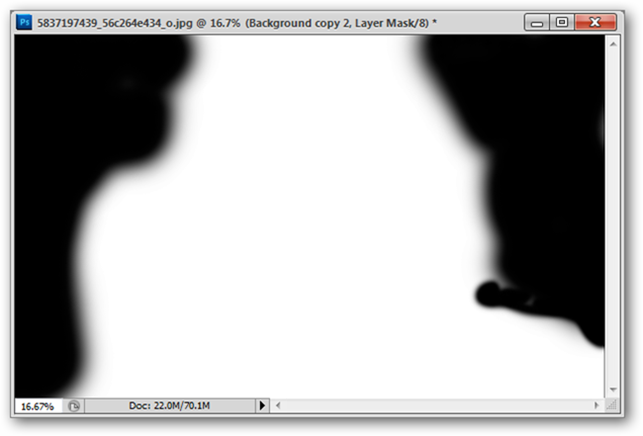
Here’s a shot of the areas that are painted out in the mask. The black represents the areas that are hidden, the white the areas that are shown.
这是蒙版中绘制的区域的快照。 黑色代表隐藏的区域,白色代表显示的区域。
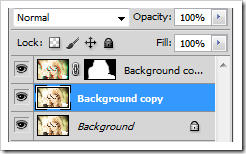
With your 3D effect layer masked off, you can safely jump to a lower layer for some additional editing. With that layer selected (shown left) jump to the channels panel and select the Red channel again.
屏蔽掉3D效果层后,您可以安全地跳到较低的层进行一些其他编辑。 选择该层(左图)后,跳到通道面板,然后再次选择红色通道。

This is probably looking very familiar. to select the entire canvas again, this time to add a slightly different effect to the background.
这看起来很熟悉。 以再次选择整个画布,这一次为背景添加了稍微不同的效果。
to select “Free Transform” in Photoshop. Enlarge the Red channel of this layer in some unusual way. In this example, it was stretched horizontally. You can scale it up, skew, rotate, or simply offset it as we did before. This will allow our foreground and background to look somewhat different from each other.
在Photoshop中选择“自由变换”。 以某种不同的方式放大此层的红色通道。 在此示例中,它是水平拉伸的。 您可以像以前一样放大,倾斜,旋转或简单地偏移它。 这将使我们的前景和背景看起来彼此有所不同。
In GIMP, you’ll want to use the “Scale Tool,” shortcut key Shift + T.
在GIMP中,您需要使用“缩放工具”,快捷键Shift +T。
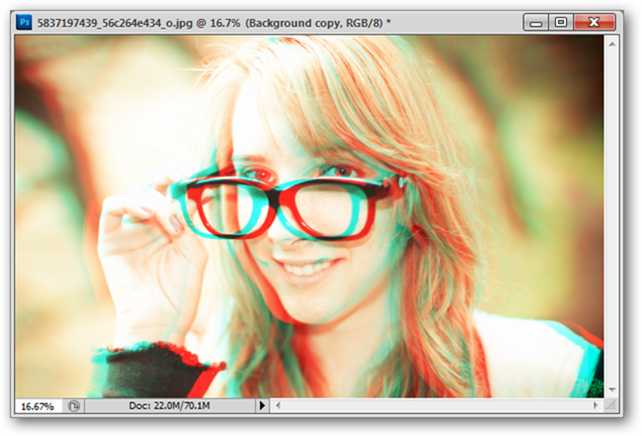
And our finely tuned image is complete, with our 3D effect applied separately to the foreground and background. If you have a pair of Cyan-Red glasses, you can test it for yourself, or just enjoy the effect for what it is. For those of us that don’t have a set of 3D glasses but want a pair, you can always check out youtube for some tutorials on how to make your own.
而且我们的微调图像是完整的,我们的3D效果分别应用于前景和背景。 如果您有一副蓝绿色眼镜,则可以自己进行测试,也可以仅享受其效果。 对于我们这些没有3D眼镜但想要一副眼镜的人,您可以随时在youtube上找到有关如何制作自己的眼镜的一些教程。
Have questions or comments concerning Graphics, Photos, Filetypes, or Photoshop? Send your questions to ericgoodnight@howtogeek.com, and they may be featured in a future How-To Geek Graphics article.
对图形,照片,文件类型或Photoshop有疑问或意见吗? 将您的问题发送到ericgoodnight@howtogeek.com ,它们可能会在以后的How-To Geek Graphics文章中介绍。
Pretty Teen with 3D Glasses by Chris Willis, via Flickr, available under Creative Commons.
克里斯·威利斯 ( Chris Willis) 配戴3D眼镜的《漂亮少年》 ,作者: Flickr ,可在“ 创作共用”中找到 。
翻译自: https://www.howtogeek.com/69368/how-to-make-3d-photos-out-of-any-image/
红色和青色叠加


 1273
1273

 被折叠的 条评论
为什么被折叠?


