
wordpress 数据库
We always recommend our users to make complete WordPress backups on a regular basis. But what if you unknowingly used one of the free plugins that only make database backups? In this article, we will show you how to restore a WordPress site with just a database backup. It will not be a complete restore, but we will show you how you can minimize the damage.
我们始终建议我们的用户定期进行完整的WordPress备份 。 但是,如果您在不知不觉中使用了只能进行数据库备份的免费插件之一怎么办? 在本文中,我们将向您展示如何仅通过数据库备份来还原WordPress网站。 这不是完整的还原,但是我们将向您展示如何最大程度地减少损坏。
入门 (Getting Started)
For the sake of this tutorial, we are assuming that you have your WordPress database backup in a zip file. If you do not have one yet, here is how to make a WordPress database backup manually.
为了本教程的缘故,我们假设您将WordPress数据库备份保存在一个zip文件中。 如果您还没有,请按以下步骤手动进行WordPress数据库备份 。
If you are recovering from a bad experience with your web hosting provider, then it is probably the time to find a better host. We have hand picked some of the best WordPress hosting providers. These are the companies that we have worked with and trust with our own projects.
如果您正在从与网络托管服务提供商的不良经历中恢复过来,那么可能是时候找到更好的主机了。 我们精选了一些最好的WordPress托管服务提供商。 这些是我们合作过并信任我们自己的项目的公司。
Also see: 7 Key Indicators when you should switch your WordPress hosting.
另请参阅: 7个关键指示器,您应该何时切换WordPress托管 。
准备还原WordPress数据库备份 (Preparing to Restore WordPress Database Backup)
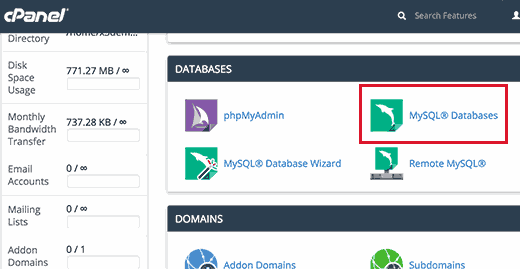
First, you will need to create a new database. Simply login to your cPanel account and click on MySQL Databases under the Database section.
首先,您将需要创建一个新的数据库 。 只需登录您的cPanel帐户,然后在“数据库”部分下单击“ MySQL数据库”。
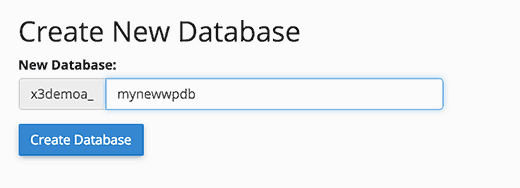
Next, provide a name for your database and then click on create database button.
接下来,为您的数据库提供一个名称,然后单击“创建数据库”按钮。
Now that you have created a database, you need a MySQL user who will be assigned all privileges to work on your newly created database.
现在,您已经创建了数据库,您需要一个MySQL用户,该用户将被分配所有特权以在新创建的数据库上工作。
On the same MySQL databases page, scroll down to MySQL users section and add a new user.
在同一MySQL数据库页面上,向下滚动至“ MySQL用户”部分并添加一个新用户。
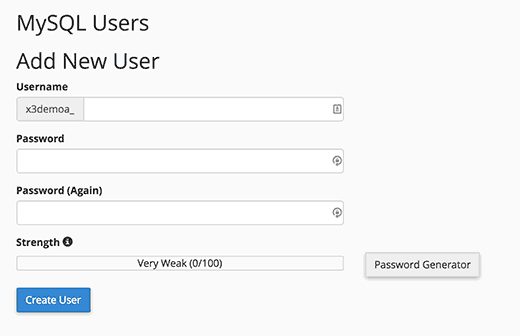
Provide a username and a strong password for your database user and then click on create user button.
为您的数据库用户提供用户名和强密码,然后单击“创建用户”按钮。
Next, you need to add this user to the MySQL database. Scroll down to ‘Add user to database’ section and select the user along with the database from the drop down menus and then click on the add button.
接下来,您需要将此用户添加到MySQL数据库。 向下滚动到“将用户添加到数据库”部分,然后从下拉菜单中选择用户以及数据库,然后单击添加按钮。
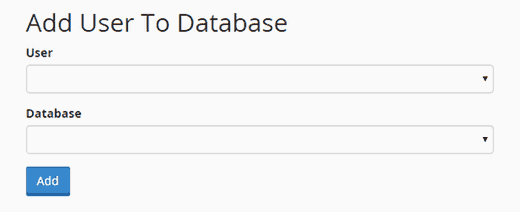
Your new database is now ready for WordPress.
现在,您的新数据库已经可以使用WordPress。
导入WordPress数据库备份 (Importing WordPress Database Backup)
First you need to visit the cPanel dashbaord. Under the databases section, you need to click on phpMyAdmin.
首先,您需要访问cPanel dashbaord。 在数据库部分下,您需要单击phpMyAdmin。

On then next step, select the database you created earlier on the phpMyAdmin page and then click on the Import button.
在接下来的下一步中,选择您先前在phpMyAdmin页面上创建的数据库,然后单击Import按钮。
Now you need to click on the choose file button to upload your WordPress database backup file. Simply click on the go button at the bottom of the page to start importing.
现在,您需要单击“选择文件”按钮以上传WordPress数据库备份文件。 只需单击页面底部的“开始”按钮即可开始导入。
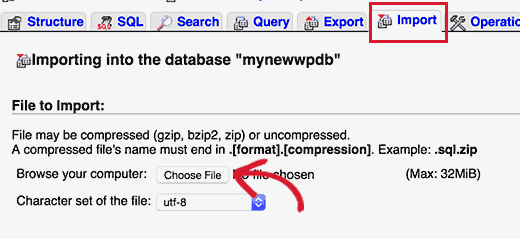
You will see a success message when the import job is finished.
导入作业完成后,您将看到一条成功消息。
You have successfully imported your WordPress database. Now the next step is to install WordPress using your new database.
您已成功导入WordPress数据库。 现在,下一步是使用新数据库安装WordPress。
恢复您的WordPress网站 (Restoring Your WordPress Site)
For a manual restore of WordPress, you will need to manually install WordPress on your server. Visit our step by step WordPress installation tutorial and jump to the section ‘how to install WordPress using FTP’ for detailed instructions.
对于WordPress的手动还原,您将需要在服务器上手动安装WordPress。 请访问我们的WordPress逐步安装教程,并跳至“如何使用FTP安装WordPress”部分以获取详细说明。
During the installation, when you reach ‘create a configuration file’ step. Enter the database name and user you created earlier.
在安装过程中,当您到达“创建配置文件”步骤时。 输入您先前创建的数据库名称和用户。
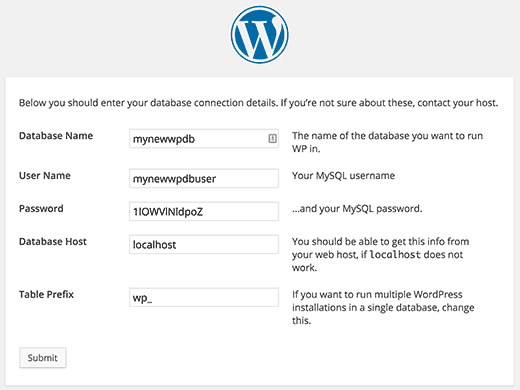
You will now see a message that WordPress can connect to your database, and you can run the installation now.
现在,您将看到一条消息,表明WordPress可以连接到您的数据库,并且您可以立即运行安装。
Clicking on the install button will now show you the ‘Already Installed’ message.
单击安装按钮现在将显示“已安装”消息。
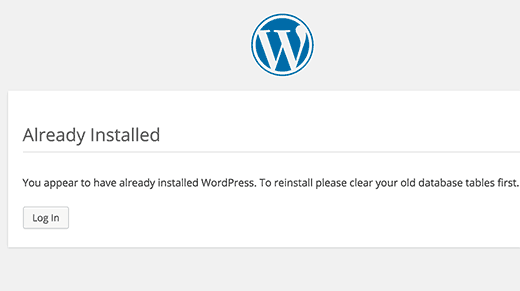
That’s all you can now proceed to login to your WordPress site.
这就是您现在可以继续登录到WordPress网站的全部。
恢复故障排除 (Restoration Troubleshooting)
Since you do not have your old WordPress files, there will be several things missing. Some of them can be easily restored while others will be a bit difficult. We will go through all of them one by one.
由于您没有旧的WordPress文件,因此将丢失几件事。 其中一些可以轻松恢复,而另一些则有些困难。 我们将一一介绍所有这些内容。
1. Theme
1.主题
Simply install a fresh copy of your old WordPress theme. If you made direct changes to your theme files, then all those changes will be gone.
只需安装旧WordPress主题的新副本即可。 如果直接更改主题文件,则所有这些更改都将消失。
You will have to go through theme options to set it up the way it was before.
您将必须通过主题选项才能以以前的方式进行设置。
2. Widgets
2.小部件
Widgets play an important role in WordPress themes. Luckily, they are stored in your WordPress database and switching to your old theme will restore some of your widgets.
小部件在WordPress主题中起着重要作用。 幸运的是,它们存储在您的WordPress数据库中,切换到您的旧主题将还原您的一些小部件。
You can always go to Appearance » Widgets to add and rearrange widgets in your sidebars.
您始终可以转到外观»小部件以在边栏中添加和重新排列小部件。
Some WordPress plugins come with their own widgets. In order to use those widgets, you will first need to install and activate those plugins.
一些WordPress插件带有它们自己的小部件。 为了使用这些小部件,您首先需要安装并激活这些插件。
3. Permalinks
3.永久链接
Your site’s permalink structure is also stored in database, and it will be automatically restored. However, if you are seeing 404 errors on front-end of your site, then you need to refresh permalink settings.
您网站的永久链接结构也存储在数据库中,并且将自动恢复。 但是,如果您在网站的前端看到404错误 ,则需要刷新永久链接设置。
Simply go to Settings » Permalinks and click on the save changes button without changing anything. This will refresh your WordPress url structure.
只需转到“设置”»“永久链接” ,然后单击“保存更改”按钮,而不进行任何更改。 这将刷新您的WordPress网址结构。
4. Plugins
4.插件
WordPress stores a record of your site’s active plugins. When you visit the plugins page for the first time, WordPress will show you a list of errors for each plugin that was in the database but is not installed anymore.
WordPress会存储您网站的活动插件的记录。 首次访问插件页面时,WordPress将为您显示数据库中已存在但尚未安装的每个插件的错误列表。
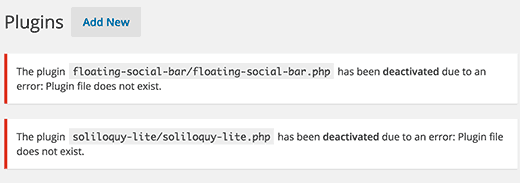
Copy all the plugin names and start installing and activating them one by one.
复制所有插件名称,然后开始一个接一个地安装和激活它们。
为您的WordPress网站恢复丢失的图像 (Recovering Lost Images for your WordPress Site)
Finding and replacing lost images on your website would be the trickiest part of the recovery. Depending on how much content and images you have, this can take a long time.
在您的网站上查找和替换丢失的图像将是恢复过程中最棘手的部分。 根据您拥有的内容和图像的数量,这可能需要很长时间。
Unfortunately, there is no easy way around it. You will have to use a variety of tools to extract your images from different sources. Your chances of recovering all images are fairly low.
不幸的是,没有简单的方法可以解决它。 您将必须使用各种工具从不同来源提取图像。 恢复所有图像的机会非常低。
1. Look in Your Browser Caches
1.查看您的浏览器缓存
If you have recently lost your website, then you can look into your browser cache.
如果您最近丢失了网站,则可以查看浏览器缓存。
Firefox users can download CacheViewer2 add-on to easily find images from their website stored in browser cache.
Firefox用户可以下载CacheViewer2加载项,以轻松地从他们的网站中找到存储在浏览器缓存中的图像。
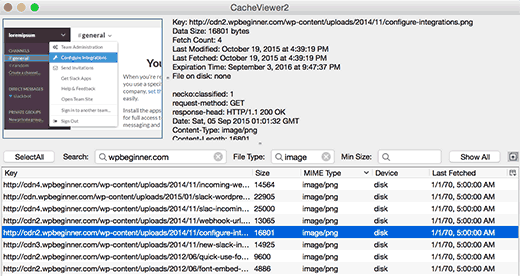
You can just right click on an image and select save as from the menu.
您可以右键单击图像,然后从菜单中选择另存为。
Google Chrome users on Windows can try Chrome Cache Viewer.
Windows上的Google Chrome浏览器用户可以尝试使用Chrome Cache Viewer 。
Google Chrome users on Mac will be out of luck. We were unable to find any reasonable solution to browse, preview, and save image from Google Chrome cache on Mac.
Mac上的Google Chrome浏览器用户将不走运。 我们找不到任何合理的解决方案来浏览,预览和保存Mac上Google Chrome缓存中的图像。
2. Look for Your Images in Web Caches
2.在Web缓存中查找图像
There are several web services that keep cached versions of websites. You can start by looking for your images in Google’s image search. Simply enter your site’s URL and you will be able to see images Google found on your website.
有几种Web服务保留网站的缓存版本。 您可以从在Google图片搜索中查找图片开始。 只需输入您网站的URL,您就可以看到Google在您的网站上找到的图像。
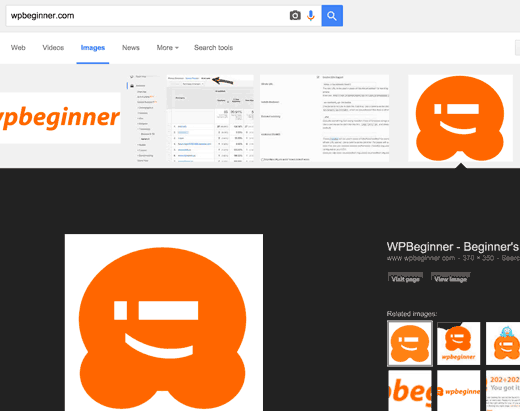
You can click on an image to see a larger preview and save the image.
您可以单击图像以查看更大的预览并保存图像。
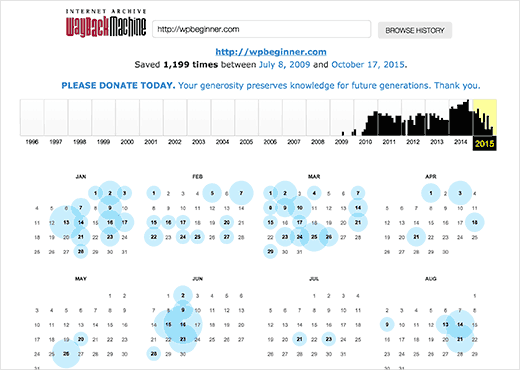
If you are restoring a much older site and can’t find images on Google or Bing, then you can try Archive.org. It is a non-profit organization that stores snapshots of websites for historical purposes.
如果您要恢复的网站要旧得多,而无法在Google或Bing上找到图像,则可以尝试Archive.org 。 这是一个非盈利性组织,出于历史目的存储网站的快照。
在您的网站上查找和替换图像 (Finding and Replacing Images on Your Website)
If you did not have much content on your old site, then you can manually replace images in your posts. However, if you have a lot of content then finding and replacing images manually will be difficult.
如果您的旧站点内容不多,则可以手动替换帖子中的图像。 但是,如果您有很多内容,那么手动查找和替换图像将很困难。
Here is how you can easily locate broken images and replace them.
这是您可以轻松找到损坏的图像并进行替换的方法。
First, you need to install and activate the Broken Link Checker plugin. Upon activation, simply go to Tools » Broken Links Checker page. The plugin will show you a list of all broken links on your site.
首先,您需要安装并激活Broken Link Checker插件。 激活后,只需转到工具»损坏的链接检查器页面。 该插件将显示您站点上所有断开的链接的列表。
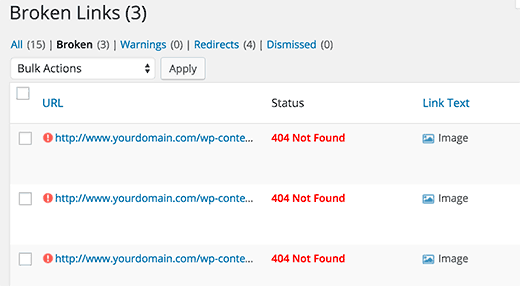
Broken images are also considered broken links, so they will appear in the list as well. You can click on the link text column to sort the broken links list to show images first.
损坏的图像也被视为断开的链接,因此它们也将出现在列表中。 您可以单击链接文本列以对断开的链接列表进行排序,以首先显示图像。
Now you can replace the images that you have recovered by editing posts. For the images that you were not able to recover, you can either try to recreate them or simply unlink them.
现在,您可以通过编辑帖子来替换已恢复的图像。 对于无法恢复的图像,您可以尝试重新创建它们,也可以直接取消链接。
奖金提示 (Bonus Tip)
It will be hard to recover all your lost data. Your site may even show errors and affect user experience. This is why you see many experts strongly urging you to set up automatic backups.
恢复所有丢失的数据将非常困难。 您的网站甚至可能显示错误并影响用户体验。 这就是为什么您会看到许多专家强烈敦促您设置自动备份的原因。
We recommend using BackupBuddy. It is a premium WordPress backup plugin with easy restore options and the ability to automatically create and save your backups on the cloud.
我们建议使用BackupBuddy 。 这是一个高级WordPress备份插件,具有轻松的还原选项,并且能够自动在云中创建和保存备份。
That’s all, we hope this article helped you restore your WordPress site from database backup. You may also want to see our list of 13 vital tips and hacks to protect your WordPress admin area.
仅此而已,我们希望本文能帮助您从数据库备份中还原WordPress网站。 您可能还需要查看我们的13个重要提示和黑客列表, 以保护WordPress管理区域 。
If you liked this article, then please subscribe to our YouTube Channel for WordPress video tutorials. You can also find us on Twitter and Facebook.
如果您喜欢这篇文章,请订阅我们的YouTube频道 WordPress视频教程。 您也可以在Twitter和Facebook上找到我们。
翻译自: https://www.wpbeginner.com/wp-tutorials/how-to-restore-a-wordpress-site-with-just-database-backup/
wordpress 数据库


 1970
1970

 被折叠的 条评论
为什么被折叠?


