I love dashboards. I love Raspberry Pis (tiny $35 computers the size of a set of playing cards). And I'm
cheap
frugal. I found a 24" old LCD at Goodwill (a local thrift shop) and bought it but it's been sitting unused in my garage.
我喜欢仪表板。 我喜欢Raspberry Pis(35美元的微型计算机,只有一套纸牌)。 我很
便宜的
节俭。 我在Goodwill(一家当地的旧货店)发现了一台24英寸旧的LCD显示器,并购买了它,但是它一直闲置在我的车库中。
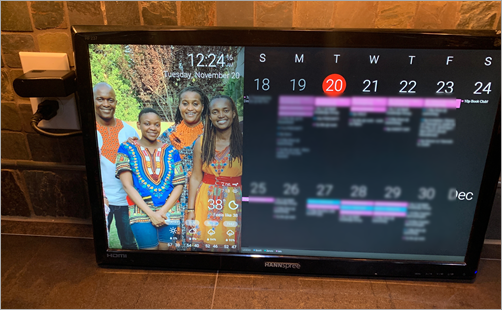
Then I stumbled on DakBoard. The idea is simple - A wifi connected wall display for your photos, calendar, news, weather and to-do.
然后我偶然发现了DakBoard 。 这个想法很简单-使用wifi连接的墙面显示器,用于存放您的照片,日历,新闻,天气和待办事项。
The implementation is simple genius. It's a browser that starts up full screen (kiosk mode) and just sits there and updates occasionally. DakBoard provides the private webpage and tools to make that happen. You can certainly build this yourself with any number of open source tools. I chose DakBoard because it was simple, beautiful, and I was able to get the whole thing done in less than an hour. I'm sure I'll spend many hours tweaking it through. There's also the very popular MagicMIrror platform, so lots of choice and power in this space!
实现是简单的天才。 它是一种浏览器,可以全屏(信息亭模式)启动,只是坐在那里偶尔更新。 DakBoard提供了专用网页和工具来实现这一目标。 您当然可以使用任何数量的开源工具自己构建它。 我选择DakBoard是因为它简单,美观,而且我能够在不到一个小时的时间内完成整个工作。 我确定我会花很多时间来调整它。 还有非常流行的MagicMIrror平台,因此在这个领域有很多选择和强大功能!
What are some considerations?
有哪些注意事项?
You may want to turn it off on a scheduled to save power and the screen
您可能希望按计划将其关闭以节省电源和屏幕
- cronjob - turn it off on a schedule cronjob-按计划将其关闭
- sensor - turn it on when something (your alarm, nest, thermostat motion detector attached to GPIO, etc) detects your presence)传感器-当某物(您的警报,嵌套,连接到GPIO的恒温器运动检测器等)检测到您的存在时将其打开
- It has to act like an appliance. If you are messing with it to keep it alive, it's not an appliance, it's another computer to manage. 它必须像设备一样工作。 如果您为了使它保持活动状态而烦恼,它不是设备,而是要管理的另一台计算机。
- It has to just work. If my Spouse doesn't like the idea or find its not reliable, the SAF (Spouse Acceptance Factor) will be low and they'll want to get rid of it. All it takes is one "why isn't this working" and I'm dead in the water. 它必须工作。 如果我的配偶不喜欢这个主意或发现它不可靠,那么SAF(配偶接受因子)将很低,他们将希望摆脱它。 只需要一个“为什么这不起作用”,我就死定了。
- Finally - What do you want to show? 最后-您想展示什么?
Someone asked me - "What would I want to put on my dashboard other than a calendar? I don't see why this is useful."
有人问我:“除了日历之外,我还想在仪表板上放什么?我不明白为什么这样做有用。”
您会在Glance-able显示器上放什么? (What would you put on a Glance-eable Display?)
Family Calendar(s), movie times, temperature, news, my blood sugar, disk free on my NAS, TV schedule, family photos, commute traffic, album releases, homework due soon, family events, trips, flight status, music playing now, literally anything you want as a glance-able display.
家庭日历,电影时间,温度,新闻,我的血糖,NAS上可用的磁盘,电视时间表,家庭照片,通勤交通,专辑发行,即将到期的家庭作业,家庭事件,旅行,航班状态,正在播放音乐,几乎任何您想要作为浏览显示的内容。

哲学 (Philosophy)
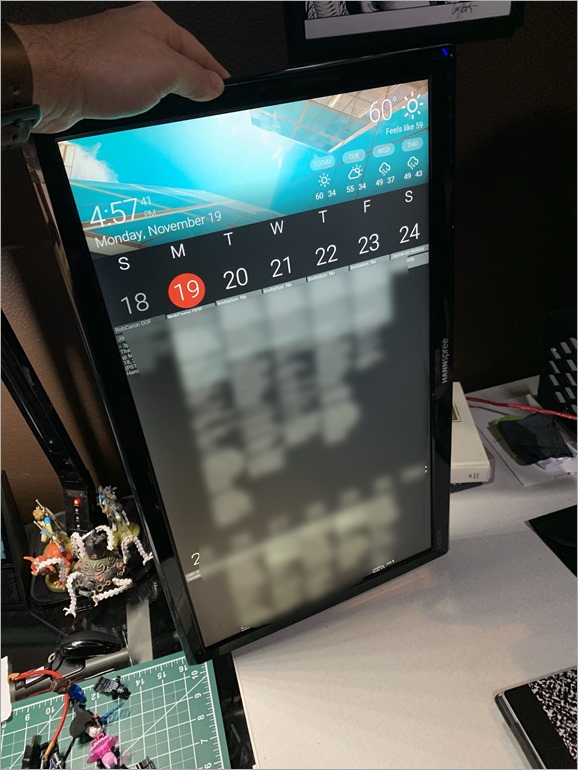
You'll want to ask yourself, is this just an iPad on the wall? I'd propose not. In fact, I'd say this is a Wall Mounted Glanceable Display - a personal dashboard - not an interactive thing. I want the family and kids to just stop by, note important information and move on.
您将要问自己,这只是墙上的iPad吗? 我不建议。 实际上,我会说这是壁挂式可视显示器-个人仪表板-而非交互式的东西。 我希望家人和孩子们停下来,注意重要信息并继续前进。
It's also worth pointing out the a horizontal monitor on the wall looks like, well, a monitor on the wall. But somehow when it's Portrait it's dramatic. It's not something we are (yet) used to seeing. I may try this out in a few ways, or even make a few of these displays!
还值得指出的是,墙上的水平监视器看起来就像墙上的监视器。 但是不知何故,当它是肖像时,它是戏剧性的。 这不是我们(现在)已经习惯的东西。 我可能会以几种方式进行尝试,甚至做一些这样的展示!
如何构建基于Raspberry Pi的家庭日历 (How to Build a Raspberry Pi-based Family Calendar)
更新-我编写了如何使用Raspberry Pi Zero W(更小更便宜)和只读文件系统(高级)执行此操作
It's pretty easy! I used the DakBoard Blog but I had most of the stuff already.
很简单! 我使用了DakBoard博客,但我已经掌握了大多数东西。
Get a $35 Raspberry Pi 3. The 3 is fast and includes Wifi so you don't need an extra adapter.
获得35美元的Raspberry Pi 3 。 3速度很快,并包含Wifi,因此您不需要额外的适配器。
I like a 2.5A powersupply but some folks say you can run the Raspberry Pi off the monitor's USB power - IF that power can put out at least 1A. 500mA will likely cause instability. It depends on if you want to try to get the whole thing down to one power cable.
我喜欢2.5A的电源,但有些人说您可以在显示器的USB电源上运行Raspberry Pi,前提是该电源至少可以输出1A。 500mA可能会导致不稳定。 这取决于您是否要尝试将整个事情分解为一根电源线。
Cheap Micro SD Card - 8 gigs is fine, but get whatever works for you. This doesn't need to be awesome.
便宜的Micro SD卡-8个演出就可以了,但是可以为您提供一切。 这不必太棒了。
A 1 foot HDMI cable. You're gonna mount the Raspberry Pi to the back of the monitor and hide it so you want the cable to be as small as possible.
1英尺的HDMI电缆。 您将把Raspberry Pi安装到显示器的背面并隐藏起来,以便您使电缆尽可能的小。
You might need a 90 degree or 270 degree adapter to avoid HDMI cables from sticking out or a short cable with this built in.
您可能需要一个90度或270度的适配器,以防止HDMI电缆伸出或内置的电缆短路。
A 1 foot HDMI cable. You're gonna mount the Raspberry Pi to the back of the monitor and hide it so you want the cable to be as small as possible.
1英尺的HDMI电缆。 您将把Raspberry Pi安装到显示器的背面并隐藏起来,以便您使电缆尽可能的小。
And finally - a 24" ish (smaller is fine) LCD (IPS is nice) monitor with smallish bezels and HDMI inputs that go out to the side (NOT directly out the back) as you want this flush on the wall.
最后-一台24英寸(较小的显示器)的LCD(IPS很好)显示器,带有较小的边框和HDMI输入,当您要在墙上齐平时,它可以向侧面(而不是直接从背面)出来。
Think about how you'll mount it. You can take the back off the monitor and use hanging wire OR use a flush VESA mount.
考虑一下如何安装它。 您可以从显示器上取下后盖,并使用吊线或使用齐平的VESA支架。
And finally - a 24" ish (smaller is fine) LCD (IPS is nice) monitor with smallish bezels and HDMI inputs that go out to the side (NOT directly out the back) as you want this flush on the wall.
最后-一台24英寸(较小的显示器)的LCD(IPS很好)显示器,带有较小的边框和HDMI输入,当您要在墙上齐平时,它可以向侧面(而不是直接从背面)出来。
Install Raspbian on the Raspberry Pi. I use Noobs to bootstrap my install as it's super fast and easy. Go through the standard setup. Make sure you've set up:
在Raspberry Pi上安装Raspbian。 我使用Noobs引导安装,因为它非常快捷,简便。 通过标准设置。 确保您已设置:
- Wifi login WiFi登录
- Timezone 时区
- Boot to Desktop automatically 自动启动到桌面
- install chromium via "sudo apt-get install -y rpi-chromium-mods"通过“ sudo apt-get install -y rpi-chromium-mods”安装Chrome
Then you make sure that Chromium starts up full screen, the mouse is hidden, and we're looking at the dashboard! It's super important you don't have to touch it. It's an appliance, right?
然后,确保Chromium可以全屏启动,鼠标被隐藏,并且我们正在看仪表板! 您不必触摸它,这非常重要。 是电器,对不对?
sudo nano ~/.config/lxsession/LXDE-pi/autostart
@xset s off
@xset -dpms
@xset s noblank
@chromium-browser --noerrdialogs --incognito --kiosk http://dakboard.com/app/?p=YOUR_PRIVATE_URL
Then you can set up a cronjob if you want to turn the Pi's screen on and off on a schedule. Using rpi-hdmi.sh you can make a crontab -e that looks like this:
然后,如果您想按计划打开和关闭Pi的屏幕,则可以设置cronjob。 使用rpi-hdmi.sh可以创建一个crontab -e,如下所示:
# Turn HDMI Off (22:00/10:00pm)
0 22 * * * /home/pi/rpi-hdmi.sh off

# Turn HDMI On (7:00/7:00am)
0 7 * * * /home/pi/rpi-hdmi.sh on
My family uses Google Calendar (GSuite) to manage hanselman.com, but I use Outlook at work. I also have a lot of business/work crap in my calendar that the family doesn't need to see. So I have two problems here, filtering, and appointment movement between Work and Home.
我的家人使用Google日历(GSuite)管理hanselman.com,但我在工作中使用Outlook。 我的日历中也有很多家庭不需要看的商务/工作垃圾。 所以我在这里有两个问题,过滤和工作与家庭之间的约会移动。
My wife and kids use Google Calendar and it's their authoritative source. My work calendar is MY authoritative source, so I want to sync Outlook->Google but ONLY including Personal/Podcasts/Travel categories. I categorize in Outlook at work, and then those appointments that are appropriate for the family calendar get moved over. Then the Family Calendar dashboard includes color coordinated items for Mom, Dad, Kid1, Kid2. The kids include homework that's due as appointments.
我的妻子和孩子使用Google日历,这是他们的权威资料。 我的工作日历是我的权威来源,因此我想同步Outlook-> Google,但仅包括个人/播客/旅行类别。 我在工作中对Outlook进行了分类,然后适合家庭日历的那些约会被移了。 然后,“家庭日历”仪表板包括用于妈妈,爸爸,Kid1,Kid2的颜色协调项。 孩子们包括应交的作业。
I use the Outlook Google Calendar Sync open source project to do this calendar movement for me. It does require Outlook and is a client solution so if you have a better idea let me know.
我使用Outlook Google Calendar Sync开源项目为我完成日历移动。 它确实需要Outlook,并且是一种客户端解决方案,所以如果您有更好的主意,请告诉我。
GOTCHA: I have been using Google Calendar for YEARS. I have also been using sync tools like this for years. As such, I was noticing that sometimes DakBoard would timeout asking for my Google Calendar's ICS file. It would take minutes. So I requested it myself and it was 26 megs. It's clear that Google calendar doesn't care deeply about iCal and that's disappointing. This could easily be solved if they'd support some kind of OData like URL-based query for fromdate=, todate=. In this case, the DakBoard was getting 26 megs over and over to just show a few weeks of appointments. I literally had appointments from 2005 in the calendar. I decided that since I'd declared Outlook my authoritative source for my calendar that I'd take an archive (one time snapshot) of my iCal and then delete all my calendar items from Google Calendar and re-sync, one way, from the authoritative source, going back 1 year. I'm likely a rare case but it's worth noting in case you bump into this.
GOTCHA:我一直在使用Google Calendar for YEARS。 多年来,我一直在使用类似的同步工具。 因此,我注意到DakBoard有时会超时,要求我的Google Calendar的ICS文件。 这需要几分钟。 所以我自己问了一下,那是26兆。 显然,Google日历并不十分关心iCal,这令人失望。 如果他们支持某种OData,例如fromdate =,todate =的基于URL的查询,则可以轻松解决。 在这种情况下,DakBoard一遍又一遍地获得了26兆的能量,仅显示了几个星期的约会。 从字面上看,我的约会时间是2005年。 我决定,由于已将Outlook声明为我的日历的权威来源,因此我将对iCal进行存档(一次快照),然后从Google日历中删除所有日历项,然后从一种方式重新同步权威来源,可以追溯到1年以前。 我可能是一种罕见的情况,但值得注意的是,如果您遇到这种情况。
All in all, this can easily be done in a short few hours if you have a Pi and a monitor. The time will be spent making it "sanitary." Making the cables perfect, hanging it on the wall, hiding the cables, then tweaking the screen to be perfect.
总而言之,如果您拥有Pi和显示器,则可以在短短几个小时内轻松完成此操作。 时间将花费在使其变得“卫生”上。 使电缆完美,将其挂在墙上,隐藏电缆,然后调整屏幕使其成为完美。

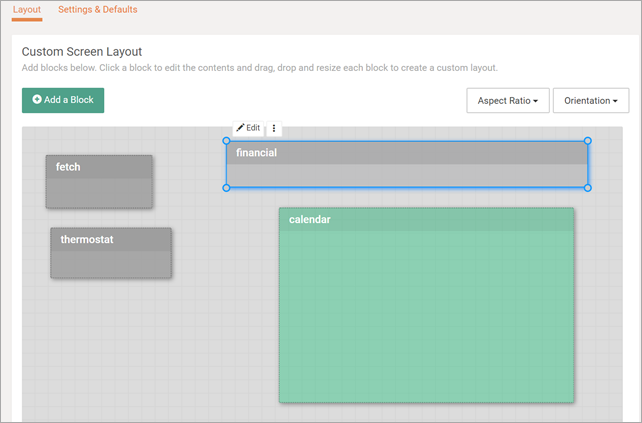
DakBoard has a free option that works great, or a Premium subscription that gives you even more control. Again, it depends on your web/art ability, and your patience. This is a fun new world that I'm excited to get involved with and my family is already stoked about this new display as we enter the holiday season.
DakBoard有一个效果很好的免费选项,或者是Premium订阅,它使您拥有更多控制权。 同样,这取决于您的网络/艺术能力和耐心。 这是一个有趣的新世界,我很高兴能参与其中,当我们进入假期时,我的家人已经对这种新的展示感到高兴。
Sponsor: Preview the latest JetBrains Rider with its Assembly Explorer, Git Submodules, SQL language injections, integrated performance profiler and more advanced Unity support.
赞助商:预览最新的JetBrains Rider,包括其Assembly Explorer,Git子模块,SQL语言注入,集成的性能分析器以及更高级的Unity支持。


 本文介绍了如何使用Raspberry Pi和便宜的显示器创建一个壁挂式家庭日历和仪表板。作者选择了DakBoard作为简单易用的解决方案,讨论了实施过程和注意事项,并分享了如何构建基于Raspberry Pi的家庭日历,包括所需设备和安装步骤。


 182
182

 被折叠的 条评论
为什么被折叠?


