


 本文详述了Apollo3.5的构建方法,包括安装GitLFS、下载源代码、编译及运行项目等步骤。特别介绍了如何解决编译过程中可能遇到的问题,如bazel缓存冲突、本地Docker镜像冲突等。
严正声明:本文系作者davidhopper原创,未经许可,不得转载。
2019年5月17日更新:因为Git LFS存在Bug,Apollo项目停用Git LFS服务,自即日起,本文前面两节内容作废,仍使用原来的Git工具下载源代码即可。具体见Apollo声明。
Apollo 3.5彻底摒弃ROS,改用自研的Cyber作为底层通讯与调度平台。另外,随着Apollo仓库中大文件数量增多,为提高代码更新效率,Apollo改用Git LFS来管理代码仓库。可以说,Apollo 3.5是一个全新的代码仓库,与之前的版本几乎不兼容。因此不能在原有代码的基础上更新,而必须重新从GitHub仓库重新下载代码。本文简介Apollo 3.5的构建方法,希望给感兴趣的同学带来一定的帮助。注意:本文假定Docker已正确安装(安装方法见Apollo帮助文档)
一、安装Git LFS
# Required for Ubuntu 14.04 / 16.04.
curl -s https://packagecloud.io/install/repositories/github/git-lfs/script.deb.sh | sudo bash

# Ubuntu 14.04 / 16.04 / 18.04.
sudo apt-get install -y git-lfs

# Ensure that git-lfs is setup correctly in your git configuration files.
# Run it only once.
git lfs install
二、下载Apollo源代码
使用如下命令下载Apollo源代码,可根据你的习惯使用Option 1或Option 2克隆Apollo仓库。
# Option 1: Clone the Apollo repository with SSH
git lfs clone git@github.com:ApolloAuto/apollo.git
# Option 2: Clone the Apollo repository with HTTPS
git lfs clone https://github.com/ApolloAuto/apollo.git
# Change to the "apollo" directory
cd apollo
# Checkout the "master" branch
git checkout master
# Set the environment variable "APOLLO_HOME"
echo "export APOLLO_HOME=$(pwd)" >> ~/.bashrc && source ~/.bashrc
注意:如果需要基于Apollo 3.5开发,则还需做如下操作(小提示:git@github.com:davidhopper2003/apollo.git是我在GitHub的仓库名,大家一定要替换为自己在GitHub上的仓库名):
# Remove the "origin" repository
git remote remove origin
# Set my own fork "git@github.com:davidhopper2003/apollo.git" to "origin" repository
# Please modify "git@github.com:davidhopper2003/apollo.git" to your fork
git remote add origin git@github.com:davidhopper2003/apollo.git
# Set "git@github.com:ApolloAuto/apollo.git" to "upstream" repository
git remote add upstream git@github.com:ApolloAuto/apollo.git
# Display updated repositories.
git remote -v

因为Apollo 3.5几乎是一个全新代码库,因此你自己的Fork仓库提交记录已完全更改,不要使用git pull --rebase命令去变基,而应该在备份你Fork仓库工作的前提下,使用如下命令,强行将你的Fork仓库与Apollo 3.5 master分支同步后,再进行后续开发(注意一定要先备份你的工作):
# It will take a long time
git lfs fetch --all
# Option 1: if the current branch is master, push it directly to the origin
git push -f origin master
# Option 2: if the current branch is a development branch such as dh_dev, update it to the origin's master branch
git push -f origin dh_dev:master
三、编译代码
使用如下命令编译Apollo源代码(小提示:启动Docker时,-C选项表示从国内服务器下载镜像,但有时会出现下载镜像失败的情形,如遇到该问题,可将-C选项去掉,直接从美国服务器下载镜像)。
# Start the docker.
bash docker/scripts/dev_start.sh -C
# Step into the docker.
bash docker/scripts/dev_into.sh
# Build the apollo project in the docker.
# -j 8 depends on the number of CPU cores on your machine.
bash apollo.sh build -j 8
四、运行Apollo项目
在Docker内部,使用如下命令运行Apollo项目:
bash scripts/bootstrap.sh
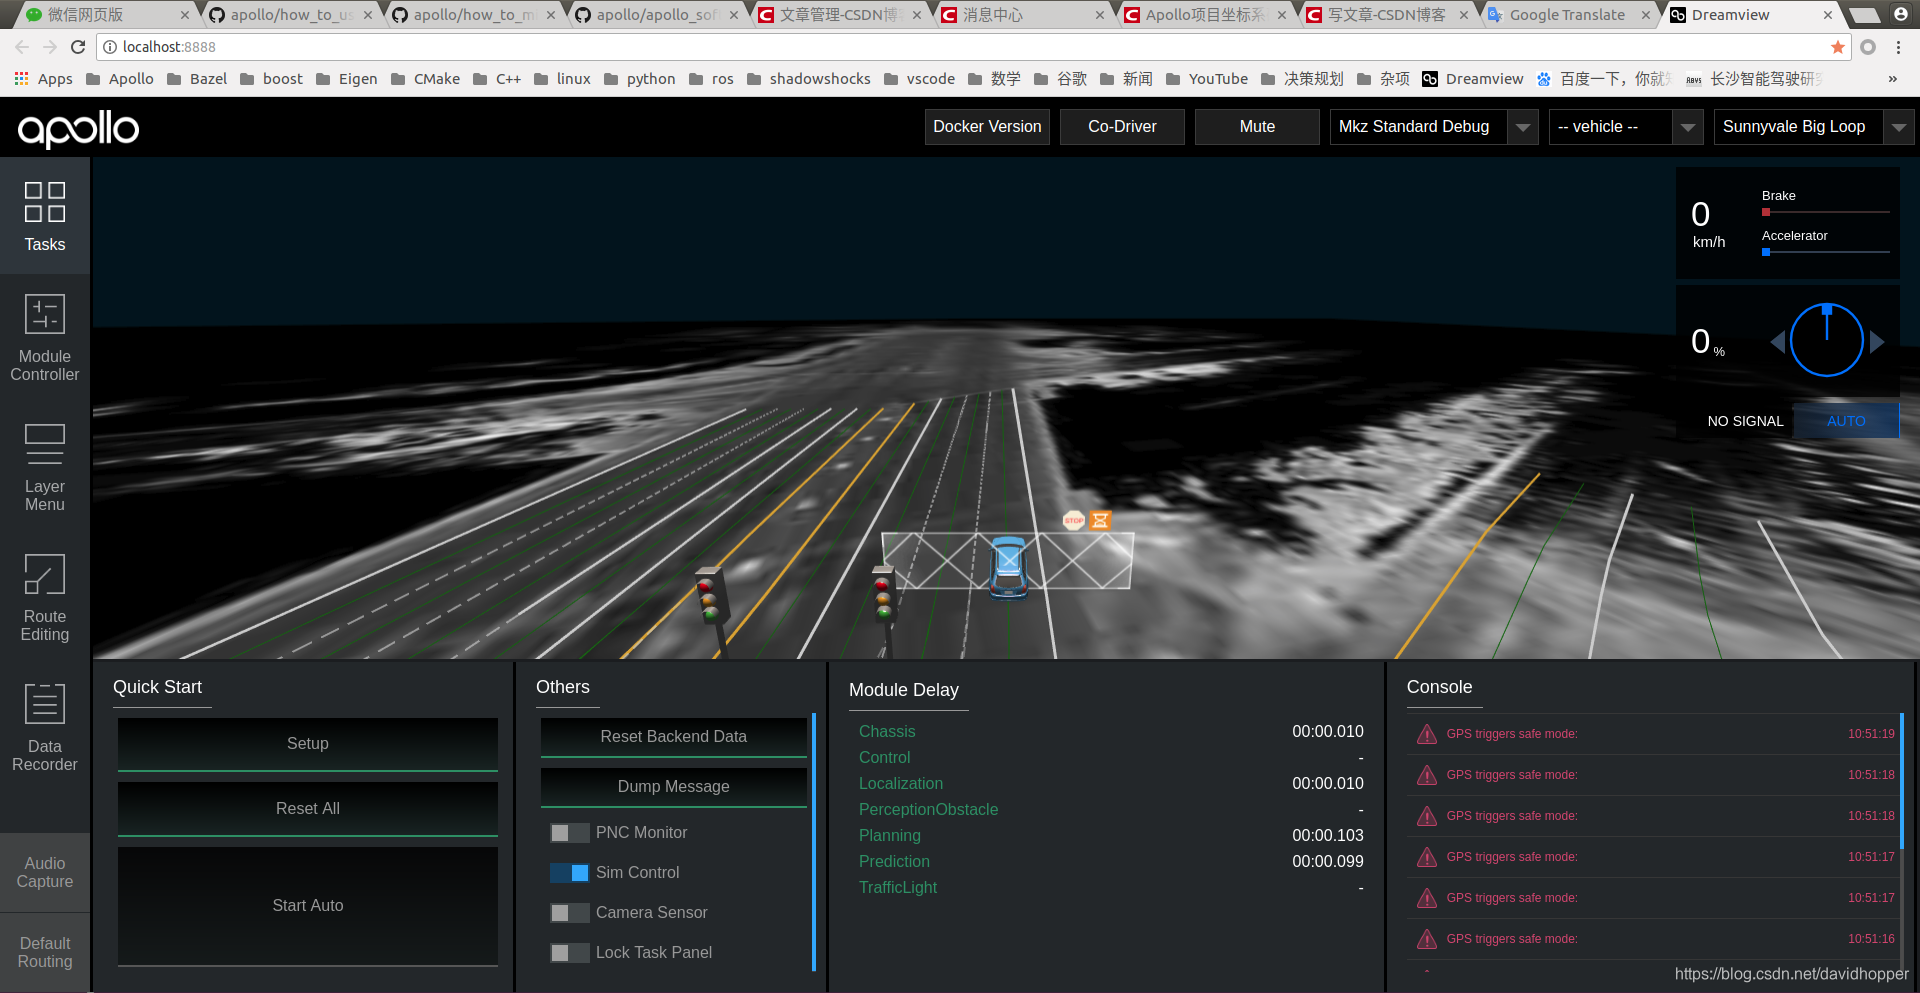
在Chrome或Firefox浏览器中打开网址http://localhost:8888/,如下图所示:

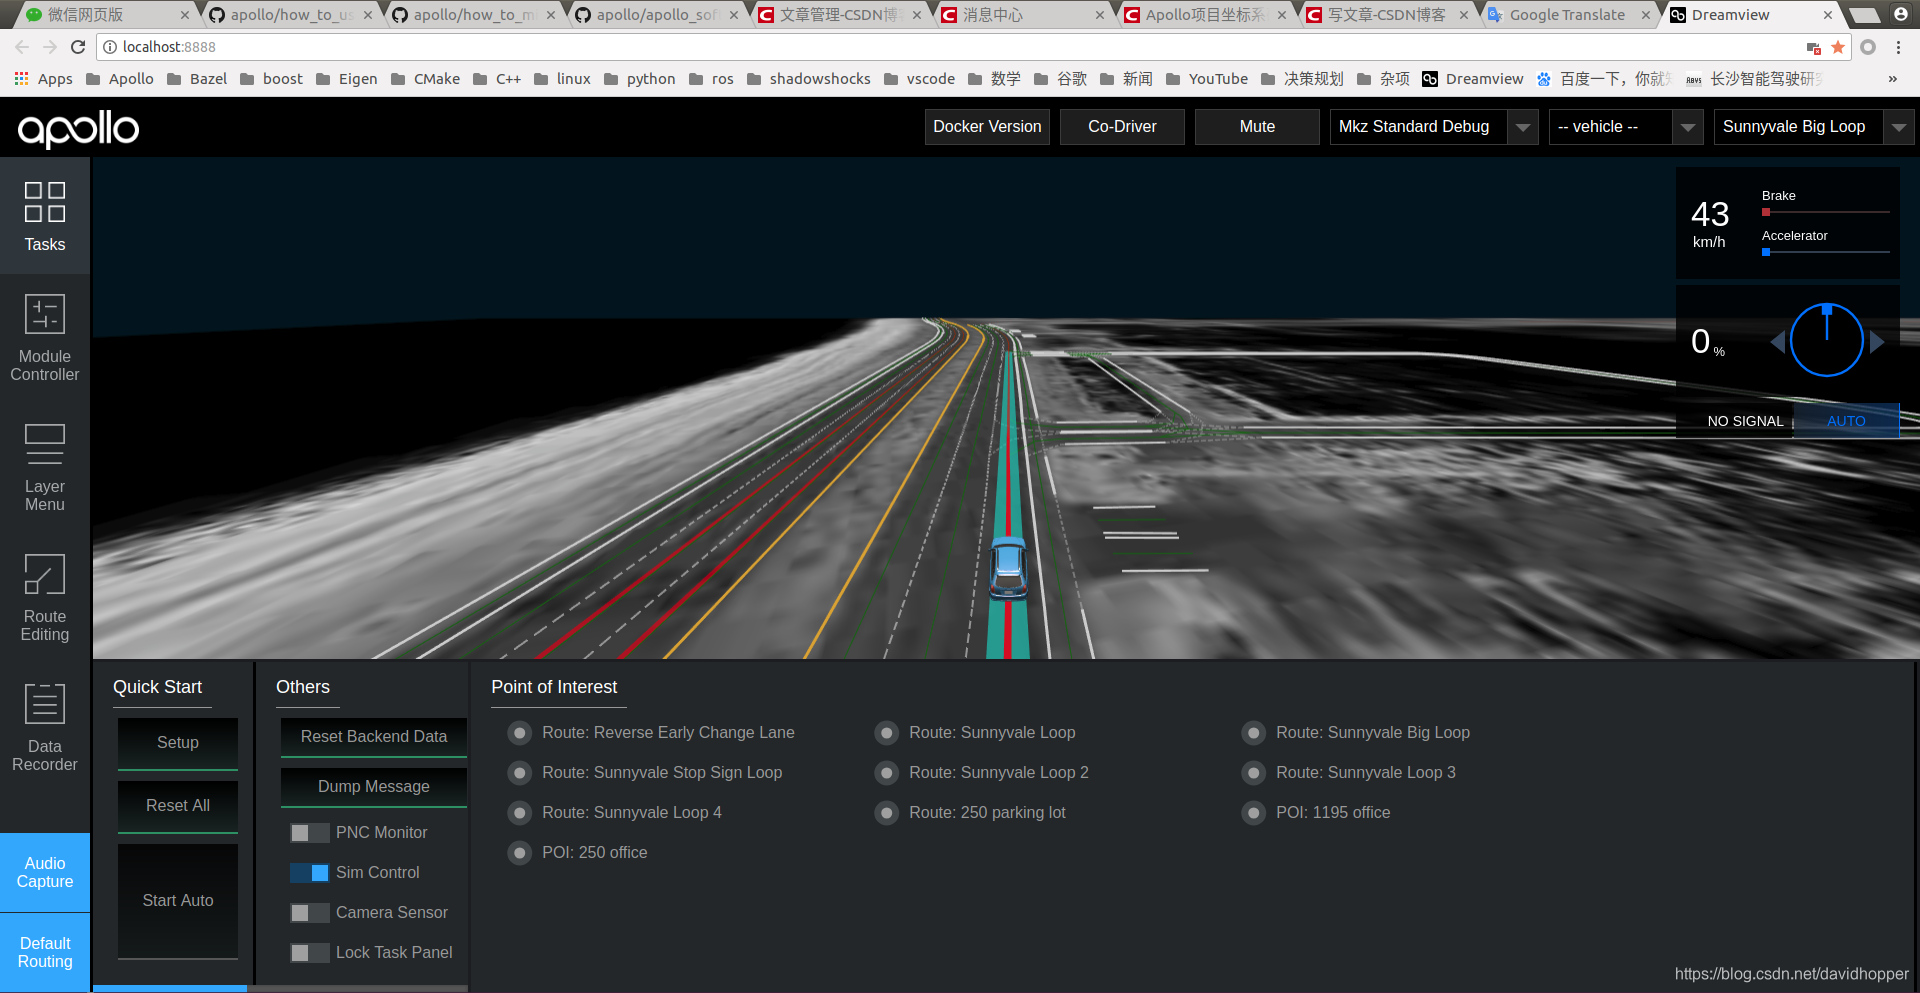
在Dreamview中打开Sim Control选项,并在右上侧选择“Sunnyvale Big Loop”地图,如下图所示:
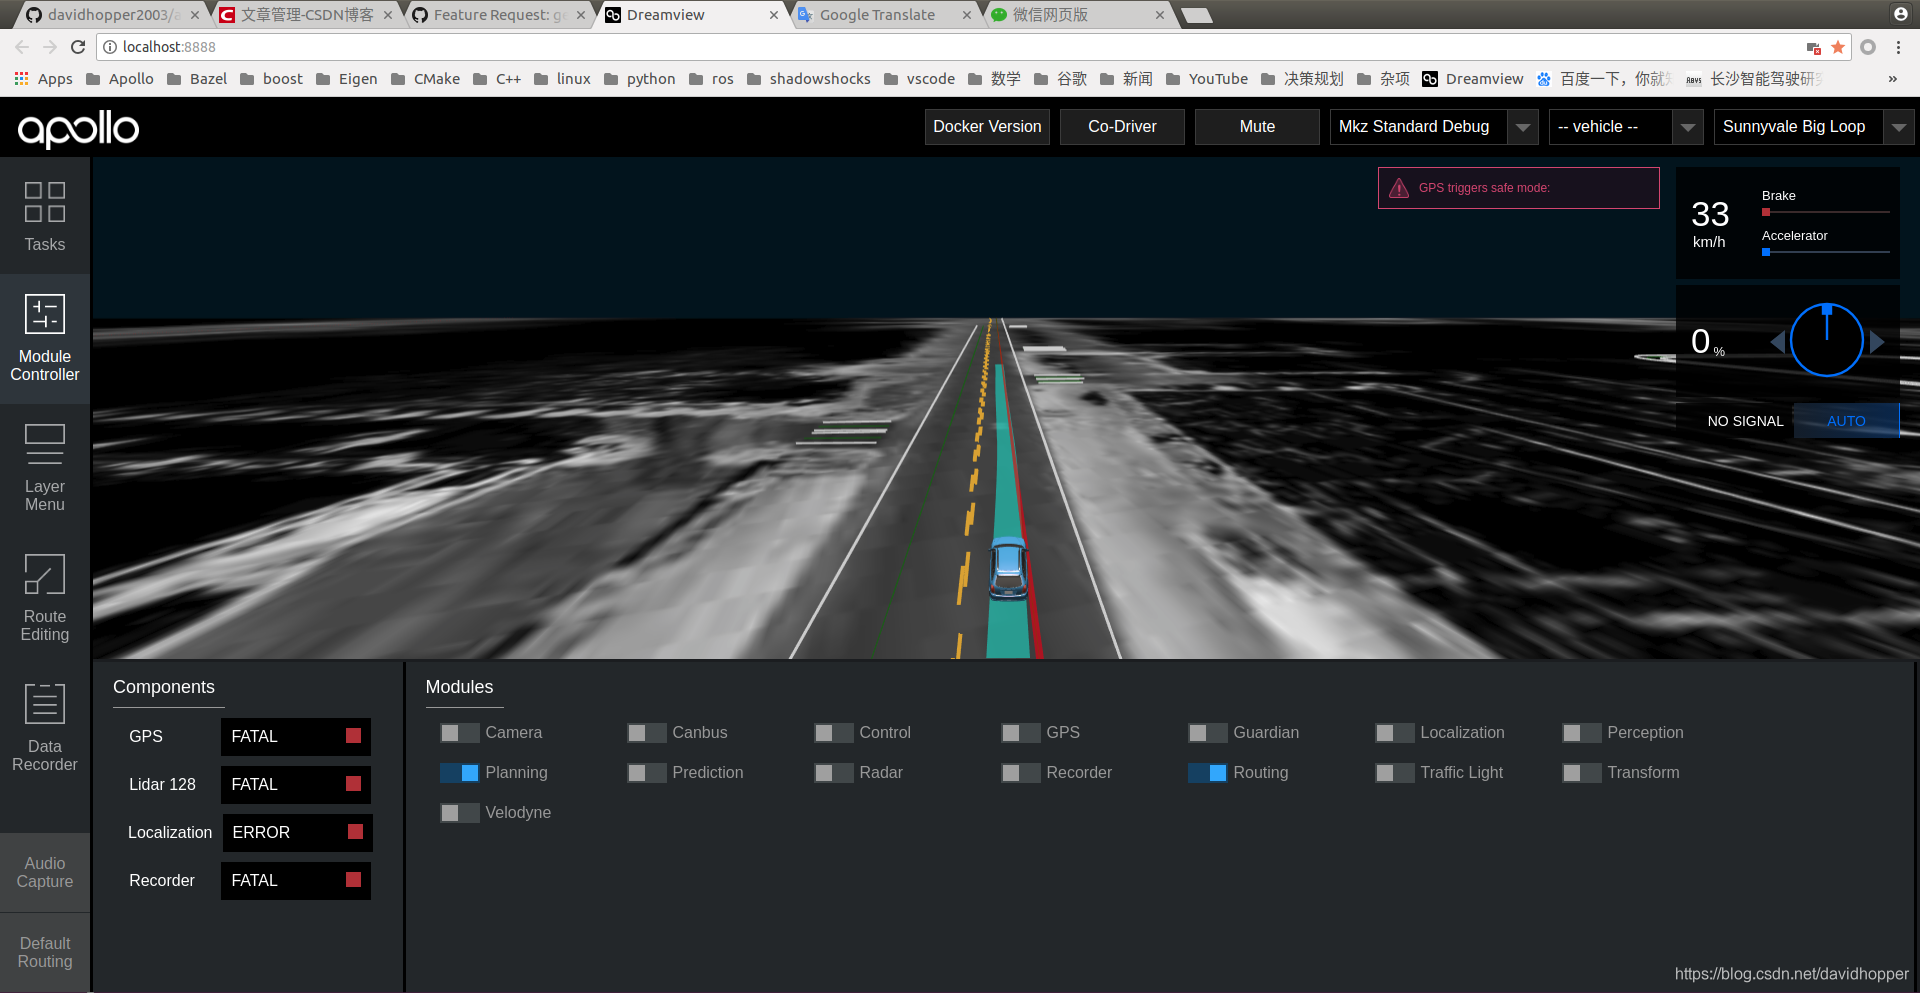
在Dreamview中切换左侧标签至“Module Controller”页,开启“Planning”与“Routing”模块,如下图所示:
在Dreamview中切换左侧标签至“Default Routing”页,选择“Route: Reverse Early Change Lane”,若看到道路输出车辆规划轨迹,并且车辆向前行驶,表明Apollo 3.5项目构建运行成功。
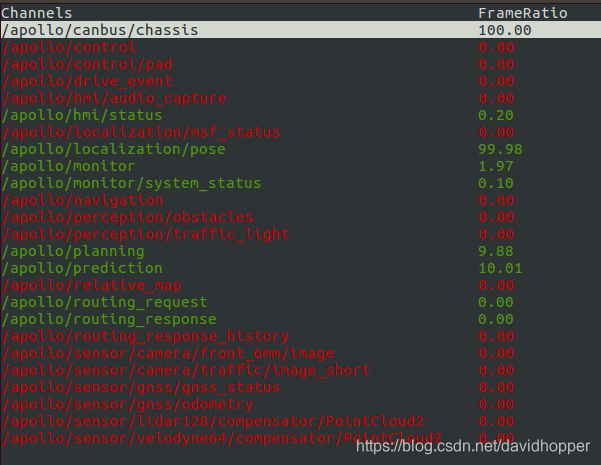
可以在Docker内部使用cyber_monitor监控各模块运行情况(取代原有的scripts/diagnostics.sh命令):
cyber_monitor
进入监控界面后,可以使用上下左右方向箭头调整所需监控的模块,按q键退出监控界面(操作方法与原有的scripts/diagnostics.sh命令相同):
五、可能存在的问题
5.1 bazel缓存冲突导致的编译错误
在Docker中出现类似如下的编译错误:
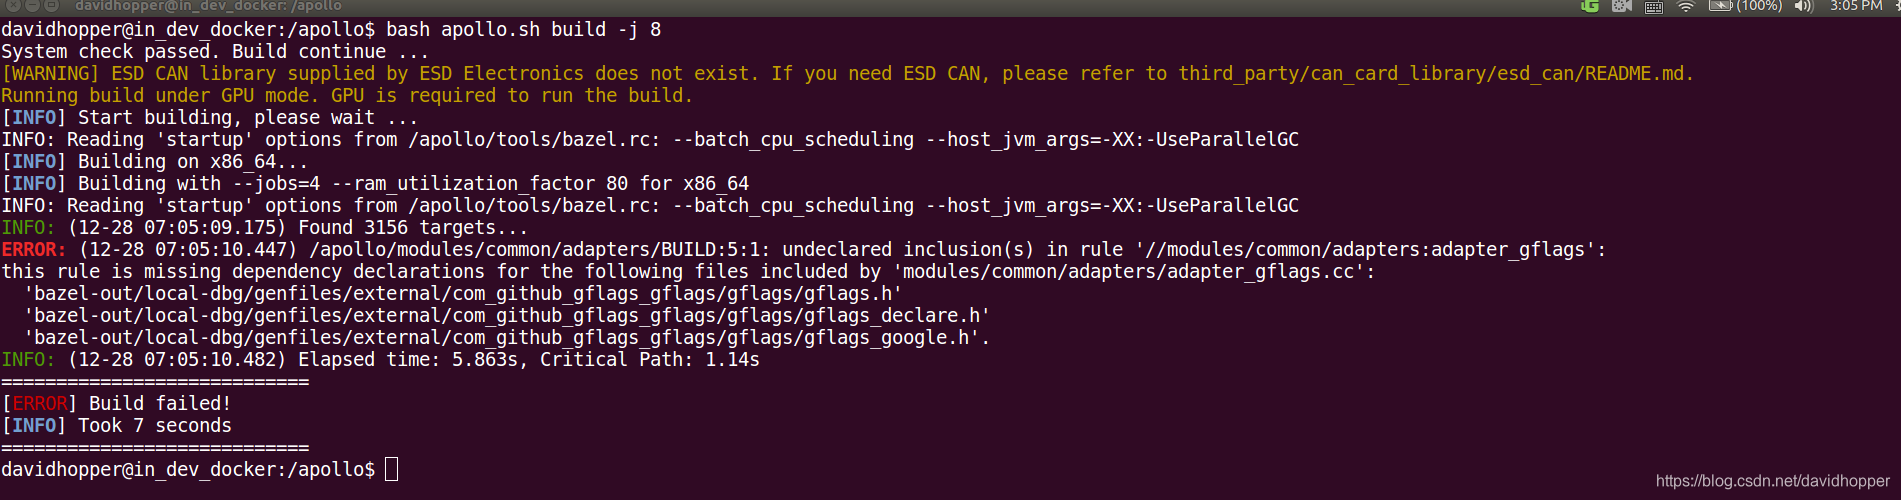
这是因为之前的bazel缓存冲突导致,解决办法是:退出并停止当前Docker,删除缓存,重新启动Docker,并编译之:
# exit the docker if you are in it.
exit
# Stop the docker.
bash docker/scripts/dev_start.sh stop
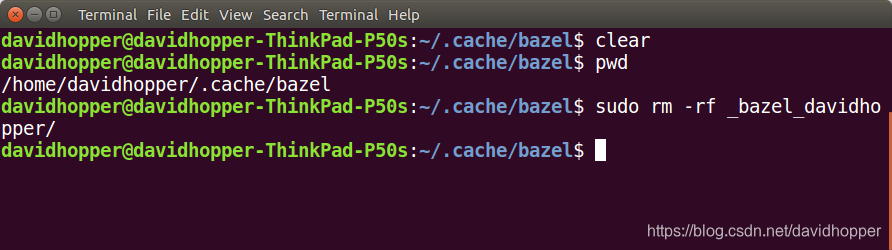
# delete all of the bazel cache files.
cd ~/.cache/bazel
sudo rm -rf _bazel_*
cd ~
sudo rm -rf .BRANCH_*
cd ~/code/apollo
# Start the docker.
bash docker/scripts/dev_start.sh -C
# Step into the docker.
bash docker/scripts/dev_into.sh
# Build the apollo project in the docker.
# -j 8 depends on the number of CPU cores on your machine.
bash apollo.sh build -j 8

5.2 本地Docker镜像冲突导致的编译错误
我经常保存本地Docker镜像(保存方法见我另一篇博客Apollo本地Docker image保存与加载的方法)。有一次基于本地镜像启动在Docker:
# Start the docker.
bash docker/scripts/dev_start.sh -C -l -t davidhopper_dev
# Step into the docker.
bash docker/scripts/dev_into.sh
# Build the apollo project in the docker.
# -j 8 depends on the number of CPU cores on your machine.
bash apollo.sh build -j 8
在Docker中编译出现如下错误:
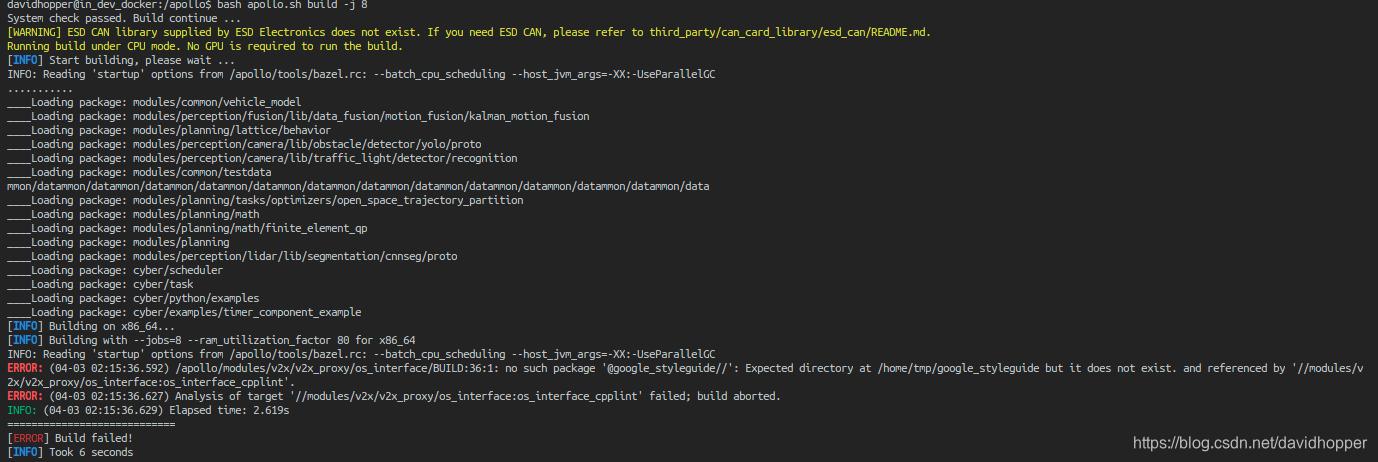
按照5.1节方法操作仍然出现编译错误,我意识到是本地Docker镜像冲突引起,于是基于最新的Docker镜像重新启动并进入Docker,再次编译,问题得到解决:
# Start the docker.
bash docker/scripts/dev_start.sh
# Step into the docker.
bash docker/scripts/dev_into.sh
# Build the apollo project in the docker.
# -j 8 depends on the number of CPU cores on your machine.
bash apollo.sh build -j 8
5.3 编译时系统界面卡死
我有一台机器,只有8GB内存、1GB交换区文件,使用一般的bash apollo.sh build命令构建Apollo 3.5。 我发现系统界面经常卡住,按Ctrl + Alt + F1键也无法打开文本终端,我不得不强行关闭电源并重新启动,但重启后再次编译界面仍然卡住不动。后来发现是Bazel消耗了太多的内存资源,另外交换区文件也设置得太小,具体描述见我在Apollo GitHub网站上提出的一个Issue。
添加另一条8 GB内存卡后,编译顺利通过。 因此,在内存少于16 GB的计算机上最好使用两个工作进程来编译构建Apollo 3.5或更高版本:
bash apollo.sh build -j 2
5.4 无法从国内服务器拉取Docker镜像
使用如下命令从国内服务器启动Docker时:
# Start the docker.
bash docker/scripts/dev_start.sh -C
出现下图错误:

2019年以来,经常出现无法从国内服务器拉取Docker镜像的错误,解决办法也很无奈,直接从美国服务器拉取镜像,速度慢是慢点,但至少还能正常启动:
# Start the docker.
bash docker/scripts/dev_start.sh


 919
919

 被折叠的 条评论
为什么被折叠?
被折叠的 条评论
为什么被折叠?
 到【灌水乐园】发言


