


说明:本人就是个有点转专业的准研一,刚接触这块东西,python的功底也不是很好,就是想把看code的过程记录下来,有什么错误也希望大家能帮忙指正。
首先看code的第一步,看README.md
Code Usage
Our codes support the adversarial search of RSTs and finetune RSTs with inherited/re-initialized model weights. Basic settings are listed in
.ymlfiles as shown in the dirconfig_rstwhich is specified by the arg--config. Most settings in.ymlfiles can be overrided by specifying other args, e.g.,--data path-to-dataset.
在这一段中可以看出,code的基本任务是什么。并且,我们可以在config_rst中的.yml文件中查看到基本的设置。
Prerequisites
-See
env.ymlfor the complete conda environment. Create a new conda environment:conda env create -f env.yml conda activate pytorch
这一段是在配置环境并激活配置的环境,如果自己已经配置好环境了,可以不run第一步,直接run第二句激活环境
Search/Finetune RSTs on CIFAR-10/100
-To search an RST from a randomly initialized PreActResNet18 on CIFAR-10:
python main.py --config config_rst/resnet18-usc-unsigned-cifar.yaml --multigpu 0 --set CIFAR10 --data path-to-data --lr_policy cifar_piecewise --epochs 160 --prune-rate target-prune-rate --name exp_name --attack_type pgd --task searchNote that
--prune-rateis the ratio of remaining weights as reported in the paper.
这一段是在随机初始化的PreActResNet18(network) on CIFAR-10(dataset)上搜索RST。我们大致可得到的信息有:
- run了main.py(等下第一个看这个文件code)
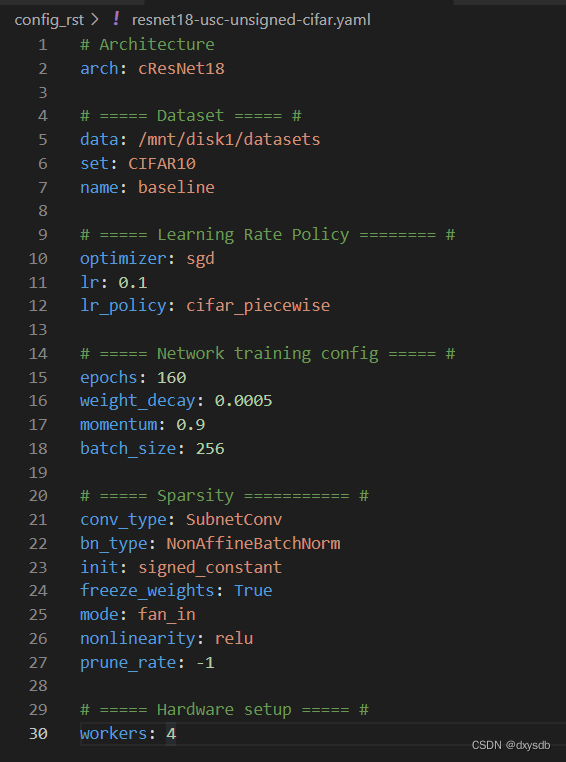
- 基本的设置可在文件config_rst/resnet18-usc-unsigned-cifar.yaml中查看,直接点进去瞅了眼(如下图),也不长,大概整个交代的挺明白的。
- GPU选择的是0(可修改)、set后面跟dataset(这里就是CIFAR-10了)、data后面是路径…(留坑,大概是这样,本小白也不太清楚)
我是想先把这块具体搞明白,所以就溜去看main.py了,后面的README之后来补…


 1760
1760


 被折叠的 条评论
为什么被折叠?
被折叠的 条评论
为什么被折叠?
 到【灌水乐园】发言


