


前言
记录一下从零开始的基于MaskRCNN的深度学习,希望对大家也有所帮助
一、配置环境
tensorflow 1.13.1
pyYAML 6.0
keras 2.1.6
pillow 8.4.0
CUDA 10.0
CUDNN 7.4.1
python 3.6
tensorflow配置与环境的配置具体可以参考这篇文章:https://blog.csdn.net/qq_43215538/article/details/123852028
二、使用步骤
1.下载MaskRCNN包
MaskRCNN下载链接:https://github.com/matterport/Mask_RCNN/releases

下载ballon数据集,coco数据集以及MaskRCNN的源码:
ballon_dataset.zip
mask_rcnn_ballon.h5
Source code
mask_rcnn_coco.h5
2.安装labelme
(1)打开Anaconda prompt
(2)依次安装labelme、pyqt5、pillow,输入命令如下:
pip install labelme
pip install pyqt5
pip install pillow==8.4.0
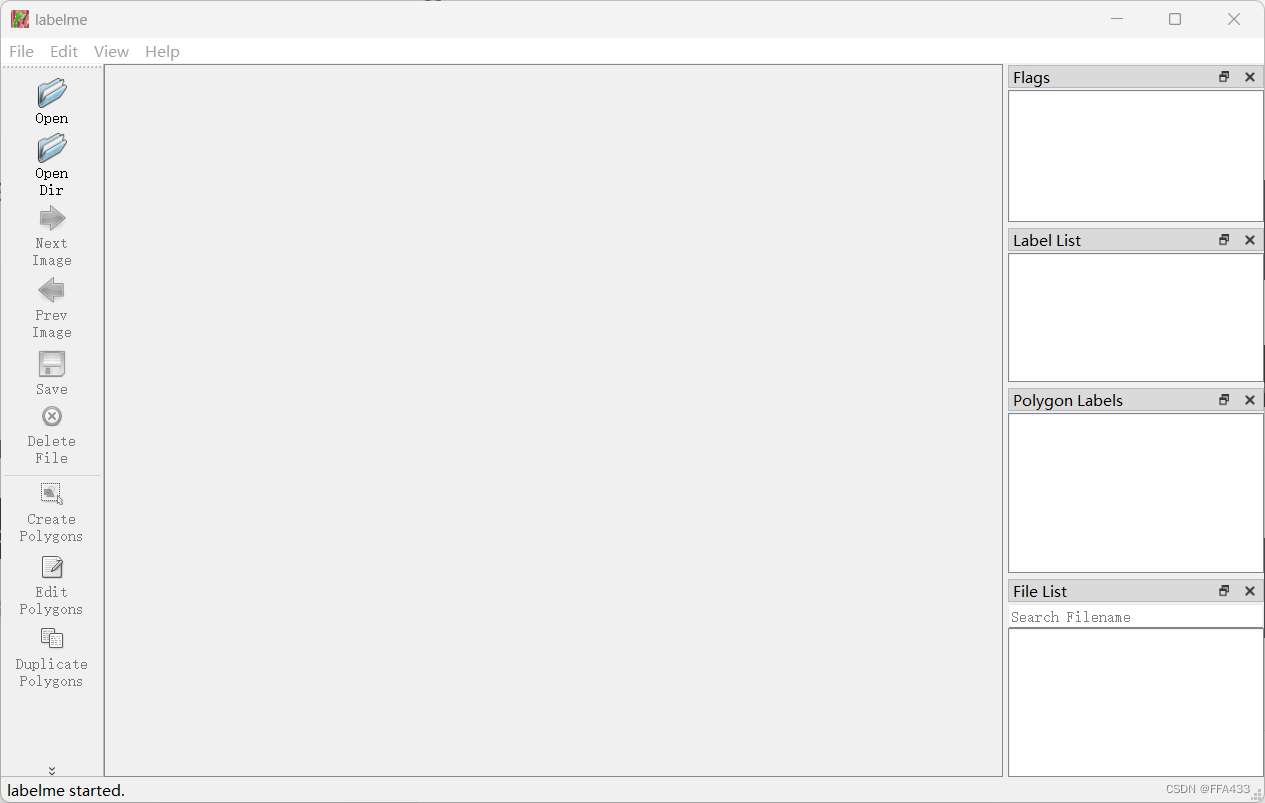
(3)安装完成后在Anaconda prompt输入labelme即可打开

3.准备训练数据
将标注好生成的json文件放入一个文件夹中,将json文件批量转换
json文件批量转换的代码:
import json
import os
import os.path as osp
import warnings
from shutil import copyfile
import PIL.Image
import yaml
from labelme import utils
import time


def main():
    json_file = r'E:\Master of ME\bashouxiangmu\test\train_json'    # 根据存放的json文件位置进行修改

    list = os.listdir(json_file)
    if not os.path.exists(json_file + '/' + 'pic'):
        os.makedirs(json_file + '/' + 'pic')
    if not os.path.exists(json_file + '/' + 'cv_mask'):
        os.makedirs(json_file + '/' + 'cv_mask')
    if not os.path.exists(json_file + '/' + 'labelme_json'):
        os.makedirs(json_file + '/' + 'labelme_json')
    if not os.path.exists(json_file + '/' + 'json'):
        os.makedirs(json_file + '/' + 'json')

    for i in range(0, len(list)):

        path = os.path.join(json_file, list[i])
        if os.path.isfile(path):

            copyfile(path, json_file + '/json/' + list[i])
            data = json.load(open(path))
            img = utils.img_b64_to_arr(data['imageData'])
            lbl, lbl_names = utils.labelme_shapes_to_label(img.shape, data['shapes'])

            captions = ['%d: %s' % (l, name) for l, name in enumerate(lbl_names)]
            lbl_viz = utils.draw_label(lbl, img, captions)
            out_dir = osp.basename(list[i]).replace('.', '_')
            out_dir = osp.join(osp.dirname(list[i]), out_dir)

            filename = out_dir[:-5]

            out_dir = json_file + "/" + 'labelme_json' + "/" + out_dir
            out_dir1 = json_file + "/" + 'pic'
            out_dir2 = json_file + "/" + 'cv_mask'

            if not osp.exists(out_dir):
                os.mkdir(out_dir)

            PIL.Image.fromarray(img).save(osp.join(out_dir, 'img' + '.png'))
            PIL.Image.fromarray(img).save(osp.join(out_dir1, str(filename) + '.png'))

            utils.lblsave(osp.join(out_dir, 'label.png'), lbl)
            utils.lblsave(osp.join(out_dir2, str(filename) + '.png'), lbl)

            PIL.Image.fromarray(lbl_viz).save(osp.join(out_dir, 'label_viz.png'))

            with open(osp.join(out_dir, 'label_names' + '.txt'), 'w') as f:
                for lbl_name in lbl_names:
                    f.write(lbl_name + '\n')

            warnings.warn('info.yaml is being replaced by label_names.txt')
            info = dict(label_names=lbl_names)
            with open(osp.join(out_dir, 'info.yaml'), 'w') as f:
                yaml.dump(info, f, default_flow_style=False)

            fov = open(osp.join(out_dir, 'info' + '.yaml'), 'w')
            for key in info:
                fov.writelines(key)
                fov.write(':\n')
            for k, v in lbl_names.items():
                fov.write('-')
                fov.write(' ')
                fov.write(k)
                fov.write('\n')

            fov.close()
            print('Saved to: %s' % out_dir)


if __name__ == '__main__':
    start = time.time()
    main()
    spend = time.time() - start
    print(spend)
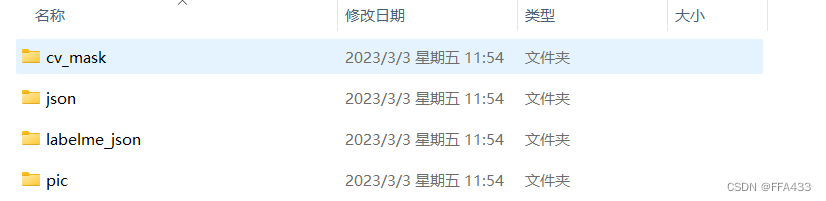
最终会生成四种文件cv2_mask, labelme_sjon ,pic, json
4.加载MaskRCNN源码
保留结果如下:
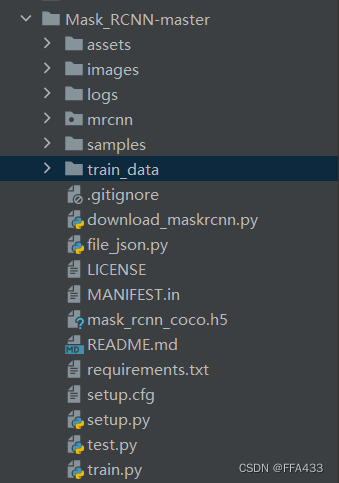
其中logs是训练完毕后生成的模型,
train_data是准备后的训练数据,里面包含四种文件cv2_mask, labelme_sjon ,pic, json
mask_rcnn_coco.h5是下载好的coco数据集
train,test是分别要来运行的训练和测试源码
5.开始训练
train.py源码:
# -*- coding: utf-8 -*-
import os   # 操作系统接口模块
import numpy as np
import cv2  # opencv模块
import matplotlib.pyplot as plt
import tensorflow as tf
from mrcnn.config import Config
from mrcnn import model as modellib, utils
import yaml
from PIL import Image
config = tf.ConfigProto()
# config = tf.compat.v1.ConfigProto    # tensorflow2版本需使用该语句替换上一行
config.gpu_options.allow_growth = True
sess = tf.Session(config=config)

os.environ["CUDA_VISIBLE_DEVICES"] = "0"
ROOT_DIR = os.getcwd()

MODEL_DIR = os.path.join(ROOT_DIR, "logs")

iter_num = 0

COCO_MODEL_PATH = os.path.join(ROOT_DIR, "mask_rcnn_coco.h5")  # 之前下载过的mask-rcnn-coco model

if not os.path.exists(COCO_MODEL_PATH):
    utils.download_trained_weights(COCO_MODEL_PATH)


# 配置文件
class ShapesConfig(Config):
    NAME = "shapes"
    GPU_COUNT = 1  # 表示用几块GPU
    IMAGES_PER_GPU = 1  # 4 一次处理的数量,batch_size=GPU_COUNT * IMAGES_PER_GPU(在源码当中表示了)
    NUM_CLASSES = 1 + 2  # 类别,背景+你数据的分类

    IMAGE_MIN_DIM = 320 	# 将图片大小作为多大的去处理
    IMAGE_MAX_DIM = 384

    RPN_ANCHOR_SCALES = (8 * 6, 16 * 6, 32 * 6, 64 * 6, 128 * 6)

    TRAIN_ROIS_PER_IMAGE = 32

    STEPS_PER_EPOCH = 100          # 100

    VALIDATION_STEPS = 50           # 5


config = ShapesConfig()
config.display()


class DrugDataset(utils.Dataset):
    # 得到该图中有多少个实例(物体)
    def get_obj_index(self, image):
        n = np.max(image)
        return n

    # 解析labelme中得到的yaml文件,从而得到mask每一层对应的实例标签
    def from_yaml_get_class(self, image_id):
        info = self.image_info[image_id]
        with open(info['yaml_path']) as f:
            temp = yaml.load(f.read(), Loader=yaml.FullLoader)
            labels = temp['label_names']
            del labels[0]
        return labels

    def draw_mask(self, num_obj, mask, image, image_id):
        info = self.image_info[image_id]
        for index in range(num_obj):
            for i in range(info['width']):
                for j in range(info['height']):
                    at_pixel = image.getpixel((i, j))
                    if at_pixel == index + 1:
                        mask[j, i, index] = 1
        return mask

    # 需要修改:分类
    def load_shapes(self, count, img_floder, mask_floder, imglist, dataset_root_path):
        self.add_class("shapes", 1, "handleH")
        self.add_class("shapes", 2, "handleV")
        for i in range(count):
            # 解析之间生成的四个文件夹,得到路径
            filestr = imglist[i].split(".")[0]
            mask_path = mask_floder + "/" + filestr + ".png"
            yaml_path = dataset_root_path + "labelme_json/" + filestr + "_json/info.yaml"
            print(dataset_root_path + "labelme_json/" + filestr + "_json/img.png")
            cv_img = cv2.imread(dataset_root_path + "labelme_json/" + filestr + "_json/img.png")

            self.add_image("shapes", image_id=i, path=img_floder + "/" + imglist[i],
                           width=cv_img.shape[1], height=cv_img.shape[0], mask_path=mask_path, yaml_path=yaml_path)

    def load_mask(self, image_id):

        global iter_num
        print("image_id", image_id)
        info = self.image_info[image_id]
        count = 1
        img = Image.open(info['mask_path'])
        num_obj = self.get_obj_index(img)
        mask = np.zeros([info['height'], info['width'], num_obj], dtype=np.uint8)
        mask = self.draw_mask(num_obj, mask, img, image_id)
        occlusion = np.logical_not(mask[:, :]).astype(np.uint8)
        for i in range(count - 2, -1, -1):
            mask[:, :, i] = mask[:, :, i] * occlusion

            occlusion = np.logical_and(occlusion, np.logical_not(mask[:, :, i]))
        labels = self.from_yaml_get_class(image_id)
        labels_form = []
        # 需要修改:添加了多少个类别,就在这里写多少个elif
        for i in range(len(labels)):
            if labels[i].find("handleH") != -1:
                labels_form.append("handleH")

            elif labels[i].find("handleV") != -1:
                labels_form.append("handleV")

        class_ids = np.array([self.class_names.index(s) for s in labels_form])
        return mask, class_ids.astype(np.int32)


def get_ax(rows=1, cols=1, size=8):

    _, ax = plt.subplots(rows, cols, figsize=(size * cols, size * rows))
    return ax


# 基础设置
dataset_root_path = "train_data/"
img_floder = dataset_root_path + "pic"
mask_floder = dataset_root_path + "cv_mask"
# yaml_floder = dataset_root_path
imglist = os.listdir(img_floder)
count = len(imglist)
print(count)
# train与val数据集准备
dataset_train = DrugDataset()
dataset_train.load_shapes(count, img_floder, mask_floder, imglist, dataset_root_path)
dataset_train.prepare()

dataset_val = DrugDataset()
dataset_val.load_shapes(int(count * 0.2), img_floder, mask_floder, imglist, dataset_root_path)
dataset_val.prepare()

model = modellib.MaskRCNN(mode="training", config=config,
                          model_dir=MODEL_DIR)


init_with = "coco"

if init_with == "imagenet":
    model.load_weights(model.get_imagenet_weights(), by_name=True)
elif init_with == "coco":

    model.load_weights(COCO_MODEL_PATH, by_name=True,
                       exclude=["mrcnn_class_logits", "mrcnn_bbox_fc",
                                "mrcnn_bbox", "mrcnn_mask"])
elif init_with == "last":

    model.load_weights(model.find_last()[1], by_name=True)


# 源码当中有两种模式训练,这里写的是all,即对模型所有层进行微调,如果你的数据类别与coco数据集中差异较大,可以用这种模式,如果差异较小,把all改成heads即可。
model.train(dataset_train, dataset_val,
            learning_rate=config.LEARNING_RATE,
            epochs=10,
            layers='all')

print("Successful Training !")
test.py源码:
import os
import random
import sys
import skimage.io
from mrcnn.config import Config
# Root directory of the project
ROOT_DIR = os.getcwd()
# import MaskRCNN
sys.path.append(ROOT_DIR)
from mrcnn import utils
import mrcnn.model as modellib
from mrcnn import visualize
# import coco config
sys.path.append(os.path.join(ROOT_DIR, "samples/coco/"))


# Directory to save logs and trained model
MODEL_DIR = os.path.join(ROOT_DIR, "logs")
MODEL_WEIGHT = './logs/shapes20230306T0938/mask_rcnn_shapes_0010.h5'

# 你训练好的模型
# COCO_MODEL_PATH = os.path.join(MODEL_DIR, "mask_rcnn_shapes_0010.h5")

# 测试图片的地址
IMAGE_DIR = os.path.join(ROOT_DIR, "images")


class ShapesConfig(Config):
    # NAME = "shapes"
    #
    # GPU_COUNT = 1
    # IMAGES_PER_GPU = 1
    # NUM_CLASSES = 1 + 2  # 和训练处修改一样
    NAME = "shapes"
    GPU_COUNT = 1  # 表示用几块GPU
    IMAGES_PER_GPU = 4  # 4 一次处理的数量,batch_size=GPU_COUNT * IMAGES_PER_GPU(在源码当中表示了)
    NUM_CLASSES = 1 + 2  # 类别,背景+你数据的分类

    IMAGE_MIN_DIM = 320  # 将图片大小作为多大的去处理
    IMAGE_MAX_DIM = 384

    RPN_ANCHOR_SCALES = (8 * 6, 16 * 6, 32 * 6, 64 * 6, 128 * 6)

    TRAIN_ROIS_PER_IMAGE = 32

    STEPS_PER_EPOCH = 100  # 100

    VALIDATION_STEPS = 5  # 5


class InferenceConfig(ShapesConfig):

    GPU_COUNT = 1
    IMAGES_PER_GPU = 1


config = InferenceConfig()

model = modellib.MaskRCNN(mode="inference", model_dir=MODEL_DIR, config=config)

model.load_weights(MODEL_WEIGHT, by_name=True)
# 你训练的数据集类别,一定要加背景,要不然会出现识别不准
class_names = ['bj', 'handleH', 'handleV']

file_names = next(os.walk(IMAGE_DIR))[2]
# image = skimage.io.imread(os.path.join(IMAGE_DIR, random.choice(file_names)))

for x in range(len(file_names)):
    image = skimage.io.imread(os.path.join(IMAGE_DIR, file_names[x]))
    results = model.detect([image], verbose=1)
    print(results)
    r = results[0]
    visualize.display_instances(image, r['rois'], r['masks'], r['class_ids'],class_names, r['scores'])
三 常见错误
AttributeError: module ‘tensorflow.compat.v2‘ has no attribute ‘__internal__‘
原因:tensorflow和keras版本不对应问题
解决:pip list查看tensorflow和keras版本
下载对应版本的tensorflow和keras:
# keras、tensorflow、h5py版本替换
pip uninstall keras -y
pip uninstall keras-nightly -y
pip uninstall keras-Preprocessing -y
pip uninstall keras-vis -y
pip uninstall tensorflow -y
pip uninstall h5py -y

pip install tensorflow-gpu==1.13.1
pip install keras==2.1.6
pip install h5py==2.10.0
- 实现labelme批量json_to_dataset方法中出现:
AttributeError: module ‘labelme.utils’ has no attribute 'draw_label’
由于labelme.utils中没有draw_label这个模块:lbl_viz = utils.draw_label(lbl, img, captions)
如果出现AttributeError: module ‘labelme.utils’ has no attribute 'draw_label’这个错误,原因应该在于import中没有导入进来这个模块,所以,需要找到labelme.utils
我的安装路径:E:\ProgramData\Anaconda3\Lib\site-packages\labelme\utils
此文件夹下添加一个draw.py文件
draw.py源码:
import io

import numpy as np
import PIL.Image
import PIL.ImageDraw


def label_colormap(N=256):
    def bitget(byteval, idx):
        return (byteval & (1 << idx)) != 0

    cmap = np.zeros((N, 3))
    for i in range(0, N):
        id = i
        r, g, b = 0, 0, 0
        for j in range(0, 8):
            r = np.bitwise_or(r, (bitget(id, 0) << 7 - j))
            g = np.bitwise_or(g, (bitget(id, 1) << 7 - j))
            b = np.bitwise_or(b, (bitget(id, 2) << 7 - j))
            id = (id >> 3)
        cmap[i, 0] = r
        cmap[i, 1] = g
        cmap[i, 2] = b
    cmap = cmap.astype(np.float32) / 255
    return cmap


# similar function as skimage.color.label2rgb
def label2rgb(lbl, img=None, n_labels=None, alpha=0.5, thresh_suppress=0):
    if n_labels is None:
        n_labels = len(np.unique(lbl))

    cmap = label_colormap(n_labels)
    cmap = (cmap * 255).astype(np.uint8)

    lbl_viz = cmap[lbl]
    lbl_viz[lbl == -1] = (0, 0, 0)  # unlabeled

    if img is not None:
        img_gray = PIL.Image.fromarray(img).convert('LA')
        img_gray = np.asarray(img_gray.convert('RGB'))
        # img_gray = cv2.cvtColor(img, cv2.COLOR_RGB2GRAY)
        # img_gray = cv2.cvtColor(img_gray, cv2.COLOR_GRAY2RGB)
        lbl_viz = alpha * lbl_viz + (1 - alpha) * img_gray
        lbl_viz = lbl_viz.astype(np.uint8)

    return lbl_viz


def draw_label(label, img=None, label_names=None, colormap=None):
    import matplotlib.pyplot as plt
    backend_org = plt.rcParams['backend']
    plt.switch_backend('agg')

    plt.subplots_adjust(left=0, right=1, top=1, bottom=0,
                        wspace=0, hspace=0)
    plt.margins(0, 0)
    plt.gca().xaxis.set_major_locator(plt.NullLocator())
    plt.gca().yaxis.set_major_locator(plt.NullLocator())

    if label_names is None:
        label_names = [str(l) for l in range(label.max() + 1)]

    if colormap is None:
        colormap = label_colormap(len(label_names))

    label_viz = label2rgb(label, img, n_labels=len(label_names))
    plt.imshow(label_viz)
    plt.axis('off')

    plt_handlers = []
    plt_titles = []
    for label_value, label_name in enumerate(label_names):
        if label_value not in label:
            continue
        if label_name.startswith('_'):
            continue
        fc = colormap[label_value]
        p = plt.Rectangle((0, 0), 1, 1, fc=fc)
        plt_handlers.append(p)
        plt_titles.append('{value}: {name}'
                          .format(value=label_value, name=label_name))
    plt.legend(plt_handlers, plt_titles, loc='lower right', framealpha=.5)

    f = io.BytesIO()
    plt.savefig(f, bbox_inches='tight', pad_inches=0)
    plt.cla()
    plt.close()

    plt.switch_backend(backend_org)

    out_size = (label_viz.shape[1], label_viz.shape[0])
    out = PIL.Image.open(f).resize(out_size, PIL.Image.BILINEAR).convert('RGB')
    out = np.asarray(out)
    return out
并且在_init_.py里加上:
from .draw import label_colormap
from .draw import label2rgb
from .draw import draw_label
pip install opencv-python报错。
  Please check the install target is valid and see CMake's output for more information.
  ----------------------------------------
  ERROR: Failed building wheel for opencv-python
Failed to build opencv-python
ERROR: Could not build wheels for opencv-python, which is required to install pyproject.toml-based projects
原因是使用pip install opencv-python命令安装的是最新版本,python3.6不支持。所以找一个python3.6支持的版本。如opencv-python==4.3.0.38。
pip install -i https://pypi.douban.com/simple/ pip install opencv-python==4.3.0.38
- 在用yaml的时候出现了下面的错误:
---------------------------------------------------------------------------
AttributeError                            Traceback (most recent call last)
<ipython-input-8-e2164f893693> in <module>
      1 with open(config, 'r') as f:
----> 2     params = yaml.load(f, Loader=yaml.FullLoader)

AttributeError: module 'yaml' has no attribute 'FullLoader'
原因:PyYAML版本不对
解决方法:
pip install --ignore-installed PyYAML
四 参考文献
tensorflow-gpu版本安装教程(过程详细)
Tensorflow训练maskrcnn
labelme的安装
利用Tensorflow打造自己数据集的mask rcnn


 2551
2551


 被折叠的 条评论
为什么被折叠?
被折叠的 条评论
为什么被折叠?
 到【灌水乐园】发言


