


win10,python,opencv,MediaPipe
代码参考地址:https://google.github.io/mediapipe/solutions/face_mesh
MediaPipe :https://google.github.io/mediapipe/
参考文献:Real-time Facial Surface Geometry from Monocular Video on Mobile GPUs
地址:https://arxiv.org/abs/1907.06724
代码功能简介:
1. 打开摄像头
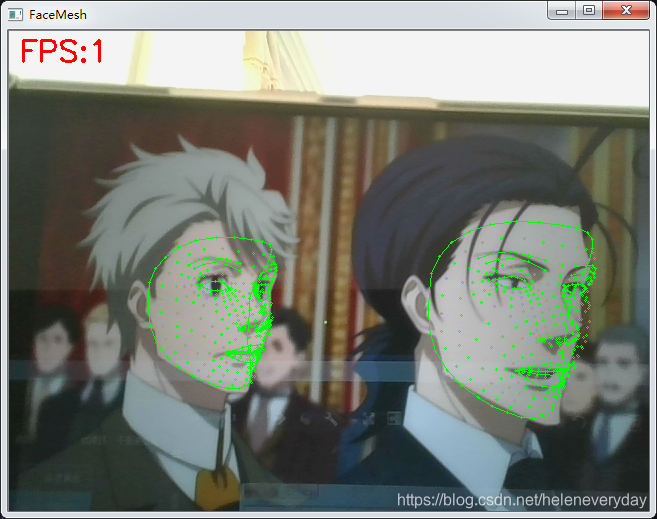
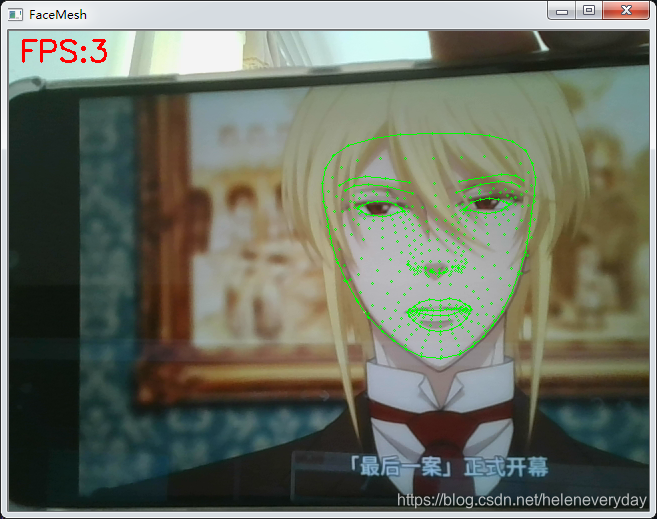
2. 显示每一帧图像;每帧检测两张人脸;图像附加显示帧率(左上角)、人脸468个特征点;在输出窗口打印468个点的坐标(id,x,y,z)
3. 按Esc退出
-------------------------
第一步:安装opencv,MediaPipe模块:
pip install opencv-python
pip install mediapipe
第二步:
创建facemesh.py文件,代码如下:
import cv2
import mediapipe as mp
import time


mp_drawing = mp.solutions.drawing_utils
mp_face_mesh = mp.solutions.face_mesh


# For webcam input:
drawing_spec = mp_drawing.DrawingSpec(thickness=1, circle_radius=1)
cap = cv2.VideoCapture(0)
pTime = 0

with mp_face_mesh.FaceMesh(
    max_num_faces=2,
    min_detection_confidence=0.5,
    min_tracking_confidence=0.5) as face_mesh:
  while cap.isOpened():
    success, image = cap.read()
    if not success:
      print("Ignoring empty camera frame.")
      # If loading a video, use 'break' instead of 'continue'.
      continue

    # Flip the image horizontally for a later selfie-view display, and convert
    # the BGR image to RGB.
    image = cv2.cvtColor(cv2.flip(image, 1), cv2.COLOR_BGR2RGB)
    # To improve performance, optionally mark the image as not writeable to
    # pass by reference.
    image.flags.writeable = False
    results = face_mesh.process(image)

    # Draw the face mesh annotations on the image.
    # and print landmarks' id, x, y, z
    image.flags.writeable = True
    image = cv2.cvtColor(image, cv2.COLOR_RGB2BGR)
    if results.multi_face_landmarks:
      for face_landmarks in results.multi_face_landmarks:
        # Draw landmarks on the image.
        mp_drawing.draw_landmarks(
            image=image,
            landmark_list=face_landmarks,
            connections=mp_face_mesh.FACE_CONNECTIONS,
            landmark_drawing_spec=drawing_spec,
            connection_drawing_spec=drawing_spec)
        # print id, x, y, z
        # time cost
        """
        for id,lm in enumerate(face_landmarks.landmark):
            ih, iw, ic = image.shape
            x,y = int(lm.x*iw), int(lm.y*ih)
            print(id, x,y,lm.z)
        """

    cTime = time.time()
    fps = 1/(cTime-pTime)
    pTime = cTime
    cv2.putText(image, f'FPS:{int(fps)}', (10,30), cv2.FONT_HERSHEY_SIMPLEX, 1, (0,0,255), 2)

    cv2.imshow('MediaPipe FaceMesh', image)
    if cv2.waitKey(1) & 0xFF == 27:
      cv2.destroyAllWindows()
      cap.release()
      break
第三步:运行。结果如下:
输出窗口:(id, x, y, z)
(0-467共468个点,x,y已转换成像素坐标)

第四步:按Esc键退出。


 1873
1873

 被折叠的 条评论
为什么被折叠?
被折叠的 条评论
为什么被折叠?
 到【灌水乐园】发言


