


第P2周:CIFAR10彩色图片识别
- 🍨 本文为🔗365 天深度学习训练营 中的学习记录博客
- 🍖 原作者:K 同学啊
📌第P2周:彩色图片识别📌
难度:小白入门⭐
语言:Python3、Pytorch
🍺 要求:
学习如何编写一个完整的深度学习程序
手动推导卷积层与池化层的计算过程
🔔 本次的重点在于学会构建CNN网络
🏡 我的环境:
-
语言环境:Python3.8
-
编译器:jupyter notebook
-
深度学习环境:Pytorch
一、 前期准备
1. 设置GPU
如果设备上支持GPU就使用GPU,否则使用CPU
import torch
import torch.nn as nn
import matplotlib.pyplot as plt
import torchvision

device = torch.device("cuda" if torch.cuda.is_available() else "cpu")

device
device(type='cuda')
2. 导入数据
使用dataset下载CIFAR10数据集,并划分好训练集与测试集
使用dataloader加载数据,并设置好基本的batch_size
train_ds = torchvision.datasets.CIFAR10('data',
                                      train=True,
                                      transform=torchvision.transforms.ToTensor(), # 将数据类型转化为Tensor
                                      download=True)

test_ds  = torchvision.datasets.CIFAR10('data',
                                      train=False,
                                      transform=torchvision.transforms.ToTensor(), # 将数据类型转化为Tensor
                                      download=True)

# 如已经下载过
# Files already downloaded and verified
# Files already downloaded and verified

batch_size = 32

train_dl = torch.utils.data.DataLoader(train_ds,
                                       batch_size=batch_size,
                                       shuffle=True)

test_dl  = torch.utils.data.DataLoader(test_ds,
                                       batch_size=batch_size)
# 取一个批次查看数据格式
# 数据的shape为:[batch_size, channel, height, weight]
# 其中batch_size为自己设定,channel,height和weight分别是图片的通道数,高度和宽度。
imgs, labels = next(iter(train_dl))

print("img shape: ", imgs.shape)
print("labels shape: ", labels.shape)

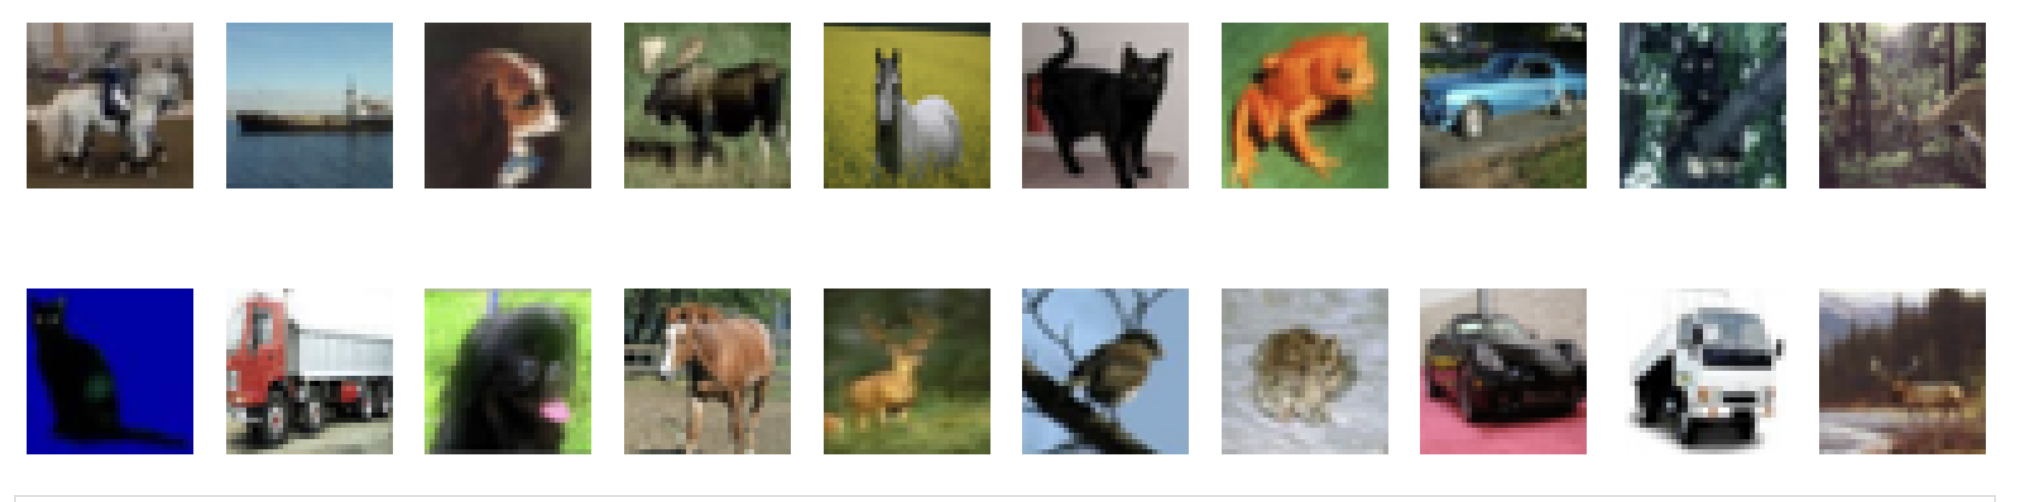
3. 数据可视化
squeeze()函数的功能是从矩阵shape中,去掉维度为1的。例如一个矩阵是的shape是(5, 1),使用过这个函数后,结果为(5, )。
import numpy as np

 # 指定图片大小,图像大小为20宽、5高的绘图(单位为英寸inch)
plt.figure(figsize=(20, 5))
for i, imgs in enumerate(imgs[:20]):
    # 维度缩减
    npimg = imgs.numpy().transpose((1, 2, 0))
    # 将整个figure分成2行10列,绘制第i+1个子图。
    plt.subplot(2, 10, i+1)
    plt.imshow(npimg, cmap=plt.cm.binary)
    plt.axis('off')

#plt.show()  如果你使用的是Pycharm编译器,请加上这行代码
matplot.lib 简单使用
# 1 通过figure创建画布
plt.figure(num=1, figsize=(10,10),dpi=200,facecolor='gray',edgecolor=
 最低0.47元/天 解锁文章


 1333
1333

 被折叠的 条评论
为什么被折叠?
被折叠的 条评论
为什么被折叠?
 到【灌水乐园】发言


