


理论概述
理解UI
常用的UI布局
UI布局的作用
布是指布置安排规范, 而局就是指局面, 全局所以布局的话, 其实就是指我们对于事物全局的规范和安排, 在Android中, 布局就是指对于节目结构的全面规划和安排
添加布局的方式
UI布局的种类
线性布局(LinearLayout)
参考文档: 2.2.1 LinearLayout(线性布局) - Android在线手册
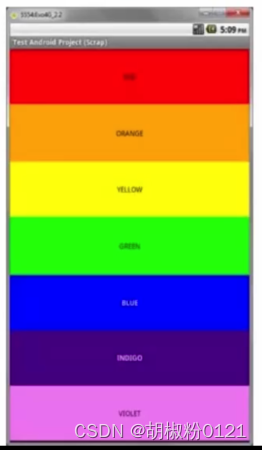
线性布局分为垂直(从上到下)或者水平布局(从左到右)
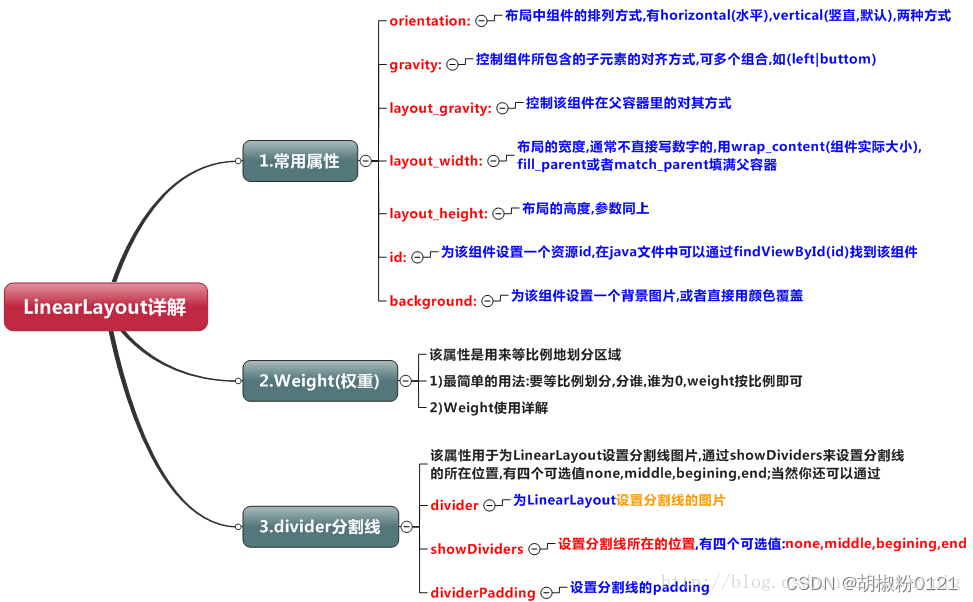
weight(权重)属性详解
<LinearLayout xmlns:android="http://schemas.android.com/apk/res/android"
xmlns:tools="http://schemas.android.com/tools"
android:id="@+id/LinearLayout1"
android:layout_width="match_parent"
android:layout_height="match_parent"
android:orientation="horizontal">
<LinearLayout
android:layout_width="0dp"
android:layout_height="fill_parent"
android:background="#ADFF2F"
android:layout_weight="1"/>
<LinearLayout
android:layout_width="0dp"
android:layout_height="fill_parent"
android:background="#DA70D6"
android:layout_weight="2"/>
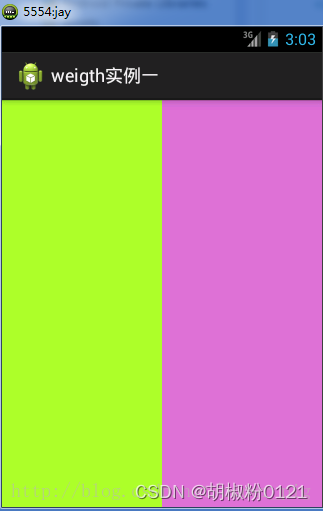
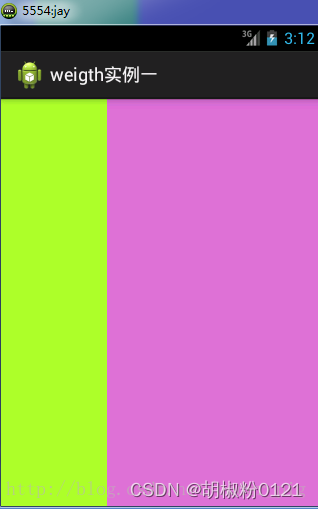
</LinearLayout> 要实现第一个的1:1的效果,只需要分别把两个LinearLayout的weight改成1和1就可以了
用法归纳: 按比例划分水平方向:将涉及到的View的android:width属性设置为0dp,然后设置为android weight属性设置比例即可;
类推,竖直方向,只需设android:height为0dp,然后设weight属性即可!
weight属性详解
当然,如果我们不适用上述那种设置为0dp的方式,直接用wrap_content和match_parent的话, 则要接着解析weight属性了,分为两种情况,wrap_content与match_parent!另外还要看 LinearLayout的orientation是水平还是竖直,这个决定哪个方向等比例划分
<LinearLayout xmlns:android="http://schemas.android.com/apk/res/android"
    xmlns:tools="http://schemas.android.com/tools"
    android:id="@+id/LinearLayout1"
    android:layout_width="match_parent"
    android:layout_height="match_parent"
    android:orientation="horizontal" >

    <TextView
        android:layout_weight="1"
        android:layout_width="wrap_content"
        android:layout_height="fill_parent"
        android:text="one"
        android:background="#98FB98"
     />
     <TextView
        android:layout_weight="2"
        android:layout_width="wrap_content"
        android:layout_height="fill_parent"
        android:text="two"
        android:background="#FFFF00"
     />
     <TextView
        android:layout_weight="3"
        android:layout_width="wrap_content"
        android:layout_height="fill_parent"
        android:text="three"
        android:background="#FF00FF"
     />

</LinearLayout> 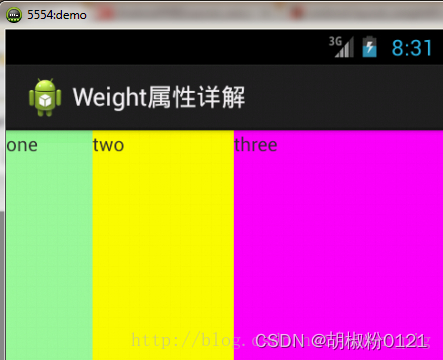
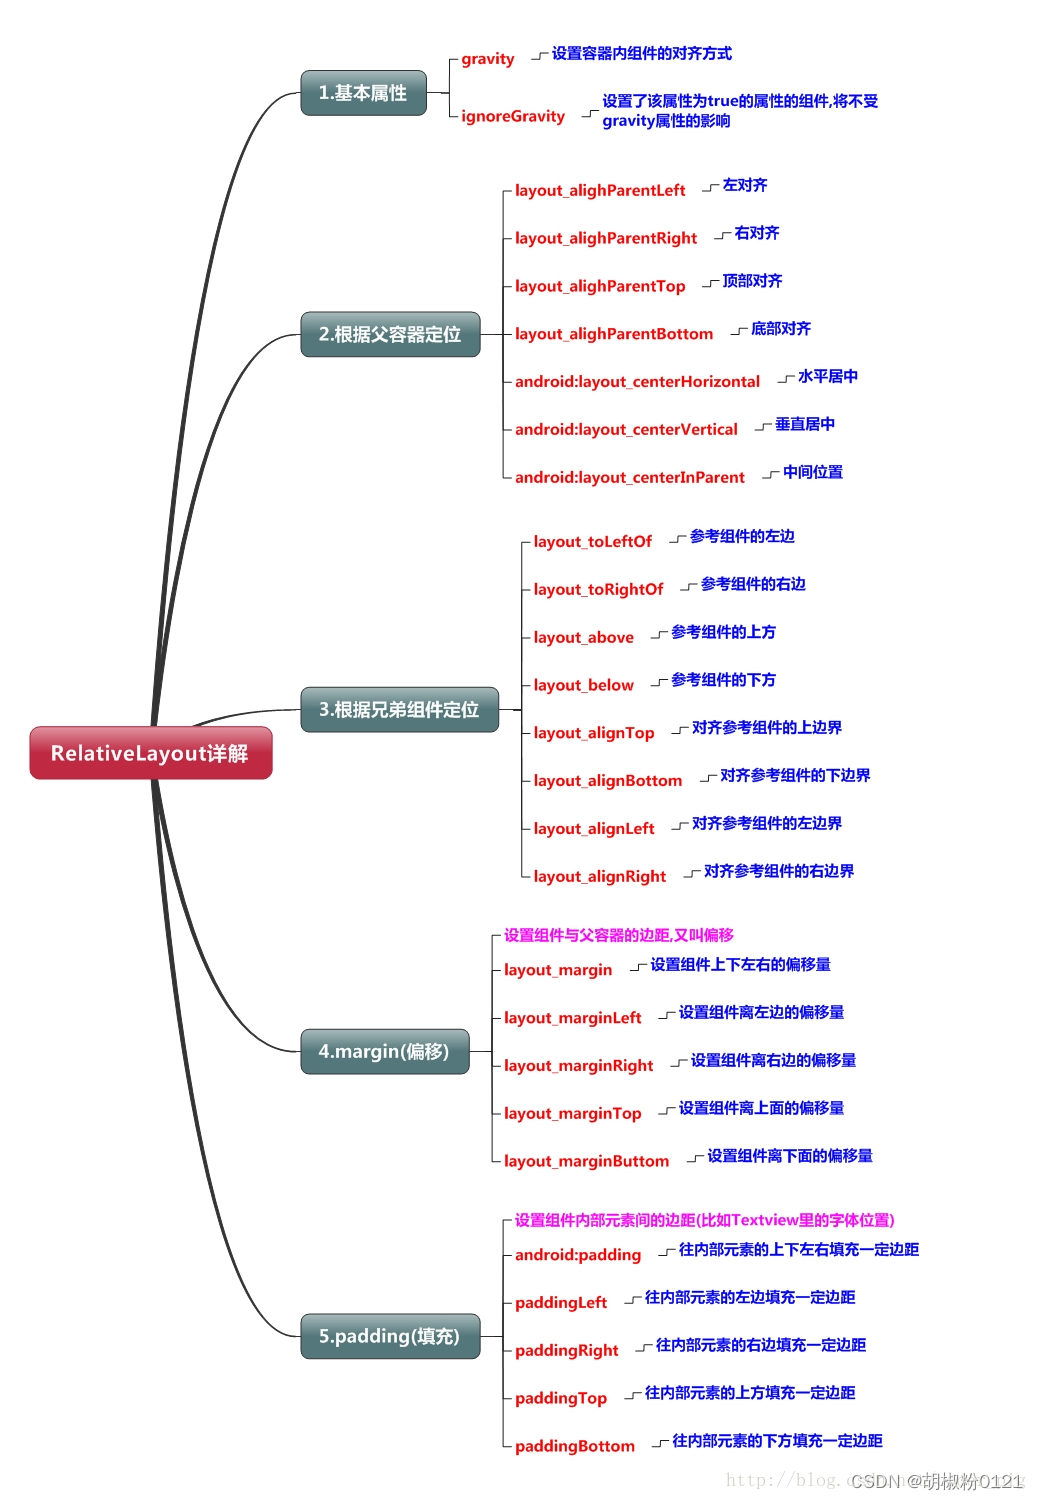
相对布局(RelativeLayout)
参考文档: 2.2.2 RelativeLayout(相对布局) - Android在线手册
我们更多的时候更钟情于他的weight(权重)属性,等比例划分,对屏幕适配还是 帮助蛮大的;但是使用LinearLayout的时候也有一个问题,就是当界面比较复杂的时候,需要嵌套多层的 LinearLayout,这样就会降低UI Render的效率(渲染速度),而且如果是listview或者GridView上的 item,效率会更低,另外太多层LinearLayout嵌套会占用更多的系统资源,还有可能引发stackoverflow; 但是如果我们使用RelativeLayout的话,可能仅仅需要一层就可以完成了,以父容器或者兄弟组件参考+margin +padding就可以设置组件的显示位置,是比较方便的!当然,也不是绝对的,具体问题具体分析吧! 总结就是:尽量使用RelativeLayout + LinearLayout的weight属性搭配使用吧!
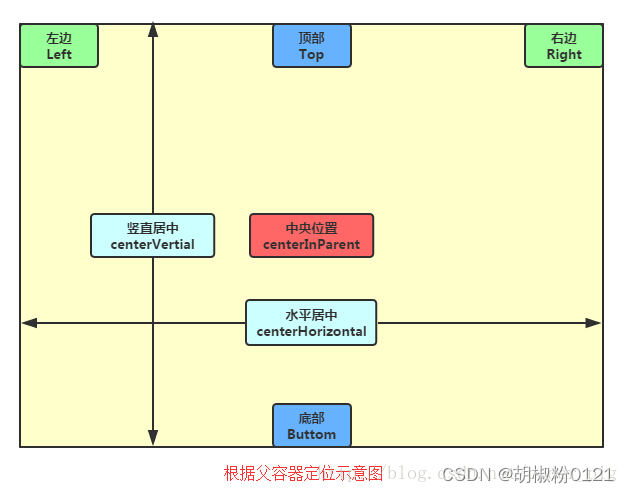
父容器定位属性示意图
<RelativeLayout xmlns:android="http://schemas.android.com/apk/res/android"
xmlns:tools="http://schemas.android.com/tools"
android:id="@+id/RelativeLayout1"
android:layout_width="match_parent"
android:layout_height="match_parent" >
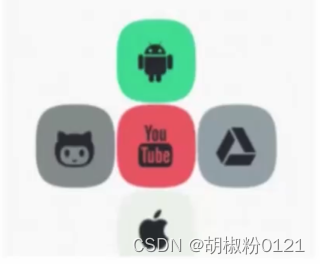
<!-- 这个是在容器中央的 -->
<ImageView
android:id="@+id/img1"
android:layout_width="80dp"
android:layout_height="80dp"
android:layout_centerInParent="true"
android:src="@drawable/pic1"/>
<!-- 在中间图片的左边 -->
<ImageView
android:id="@+id/img2"
android:layout_width="80dp"
android:layout_height="80dp"
android:layout_toLeftOf="@id/img1"
android:layout_centerVertical="true"
android:src="@drawable/pic2"/>
<!-- 在中间图片的右边 -->
<ImageView
android:id="@+id/img3"
android:layout_width="80dp"
android:layout_height="80dp"
android:layout_toRightOf="@id/img1"
android:layout_centerVertical="true"
android:src="@drawable/pic3"/>
<!-- 在中间图片的上面-->
<ImageView
android:id="@+id/img4"
android:layout_width="80dp"
android:layout_height="80dp"
android:layout_above="@id/img1"
android:layout_centerHorizontal="true"
android:src="@drawable/pic4"/>
<!-- 在中间图片的下面 -->
<ImageView
android:id="@+id/img5"
android:layout_width="80dp"
android:layout_height="80dp"
android:layout_below="@id/img1"
android:layout_centerHorizontal="true"
android:src="@drawable/pic5"/>
</RelativeLayout>帧布局(FrameLayout), 表格布局(TableLayout), 网格布局(GridLayout), 约束布局(ConstrantLayout)


 7989
7989


 被折叠的 条评论
为什么被折叠?
被折叠的 条评论
为什么被折叠?
 到【灌水乐园】发言


