


Floorplan分两部分, block level 和 Chip level
今天先写 block level的大致流程
>>Scale
>>Ratio
>>True Length 实际长度
>>Core Utilization 确定core的使用率
>>Choice 几种形状的选择
Enter Boundary
--------------------------------------------
Row's direction 选择垂直还是水平
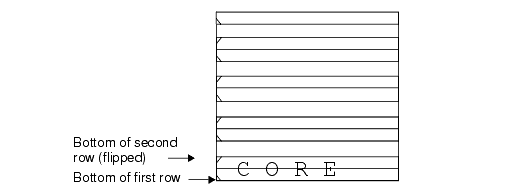
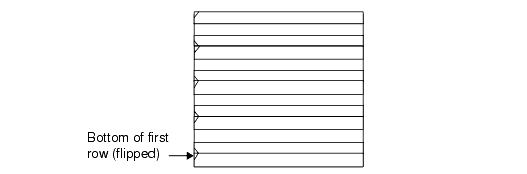
Double Back 选择这个会使得你的两个ROW背靠背
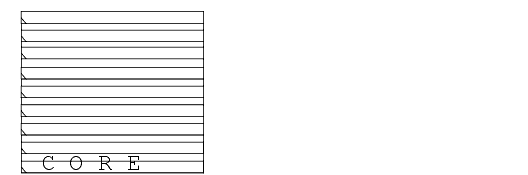
如果你不要背靠背(back to back),会出现如下的效果
Start from First Row
当选择了 Double Back时,如果选择了这个选项,则对于水平的ROW会从最底的那一层ROW就是背靠背的,对于垂直的ROW则会从最左边的ROW开始就是背靠背的
Flip First Row 将 ROW反转,效果如图 (对比之前的图)
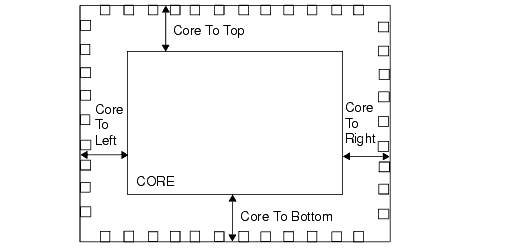
Core to Top
效果如图
今天先写 block level的大致流程
- 1. Execute the
axgRectiPlannercommand to ensure that the floorplan is ready and that all of the pins are on the origin except for "boundary" mode. - 选项有
- Shape-based
>>Ratio
>>True Length 实际长度
>>Core Utilization 确定core的使用率
>>Choice 几种形状的选择
Enter Boundary
--------------------------------------------
Row's direction 选择垂直还是水平
Double Back 选择这个会使得你的两个ROW背靠背
如果你不要背靠背(back to back),会出现如下的效果
Start from First Row
当选择了 Double Back时,如果选择了这个选项,则对于水平的ROW会从最底的那一层ROW就是背靠背的,对于垂直的ROW则会从最左边的ROW开始就是背靠背的
Flip First Row 将 ROW反转,效果如图 (对比之前的图)
- Core to Left
- Core to Right
- Core to Bottom
效果如图
- 2. Load the Top Design Format (TDF) constraints for the rectilinear pins. The syntax is
The side number is a positive integer and starts from 1. Given a rectangular shape, the lower left-most edge is the starting edge (side number 1). The side number of the next edge, going clockwise, is 2, and so forth.
- 3. Execute the axRectiPinPlacement command to place the pins according to the TDF constraints.


 319
319


 被折叠的 条评论
为什么被折叠?
被折叠的 条评论
为什么被折叠?
 到【灌水乐园】发言


