


RectTransform布局瞎探索
1. 预备工作
为了方便观察RectTransform内在变量之间的关系,做一些预备工作,把根据文档最显易见的东西在Edtior中画出来(纯粹是为了验证自己看官方文档所理解的是否与Unity实现的相一致)。
1.1 anchoredMin和anchoredMax
先来看下anchoredMin和anchoredMax,因为在Unity5中摆过几次UI布局的,对它们肯定都不陌生,也好理解。
看一下官方文档对它们的解释:
| 属性 | 官方描述 |
|---|---|
| anchoredMin | The normalized position in the parent RectTransform that the upper right corner is anchored to. |
| anchoredMax | The normalized position in the parent RectTransform that the lower left corner is anchored to. |
对官方描述的理解:
* normalized position : 归一化的位置?那说明它是一个范围在0到1之间的位置值。
* in the parent RectTransform : 一个孤立的归一化位置根本无法标出是什么位置,那这一句是不是指明它是相对于Parent的一个归一化位置呢? 又是与parent的什么属性相对呢?
* 另一方面,很明显的,这两个位置,一个指示的是右上(upper right corner)的位置,一个指示的是左下(lower left corner)的位置。既然是左下和右上两个点,那知道这两个就可以再构造出另外两个点:左上和右下。凑成四个点组成一个矩形。
很明显,得到的这四个点是相对于parent的某个属性的。虽然我们并不知道这四个点相对于parent的什么属性,但它们看起来就是相对于parent的矩形框似的。而且刚好RectTransform有提供rect的方法,让我们在不知道它们内部工作原理的情况下直接获取最终的矩形框。那我们就先假设它们就是相对于parent的矩形框好了。
我们可以先来验证一下这个假设。
先摆一个最简单的UI出来看看:
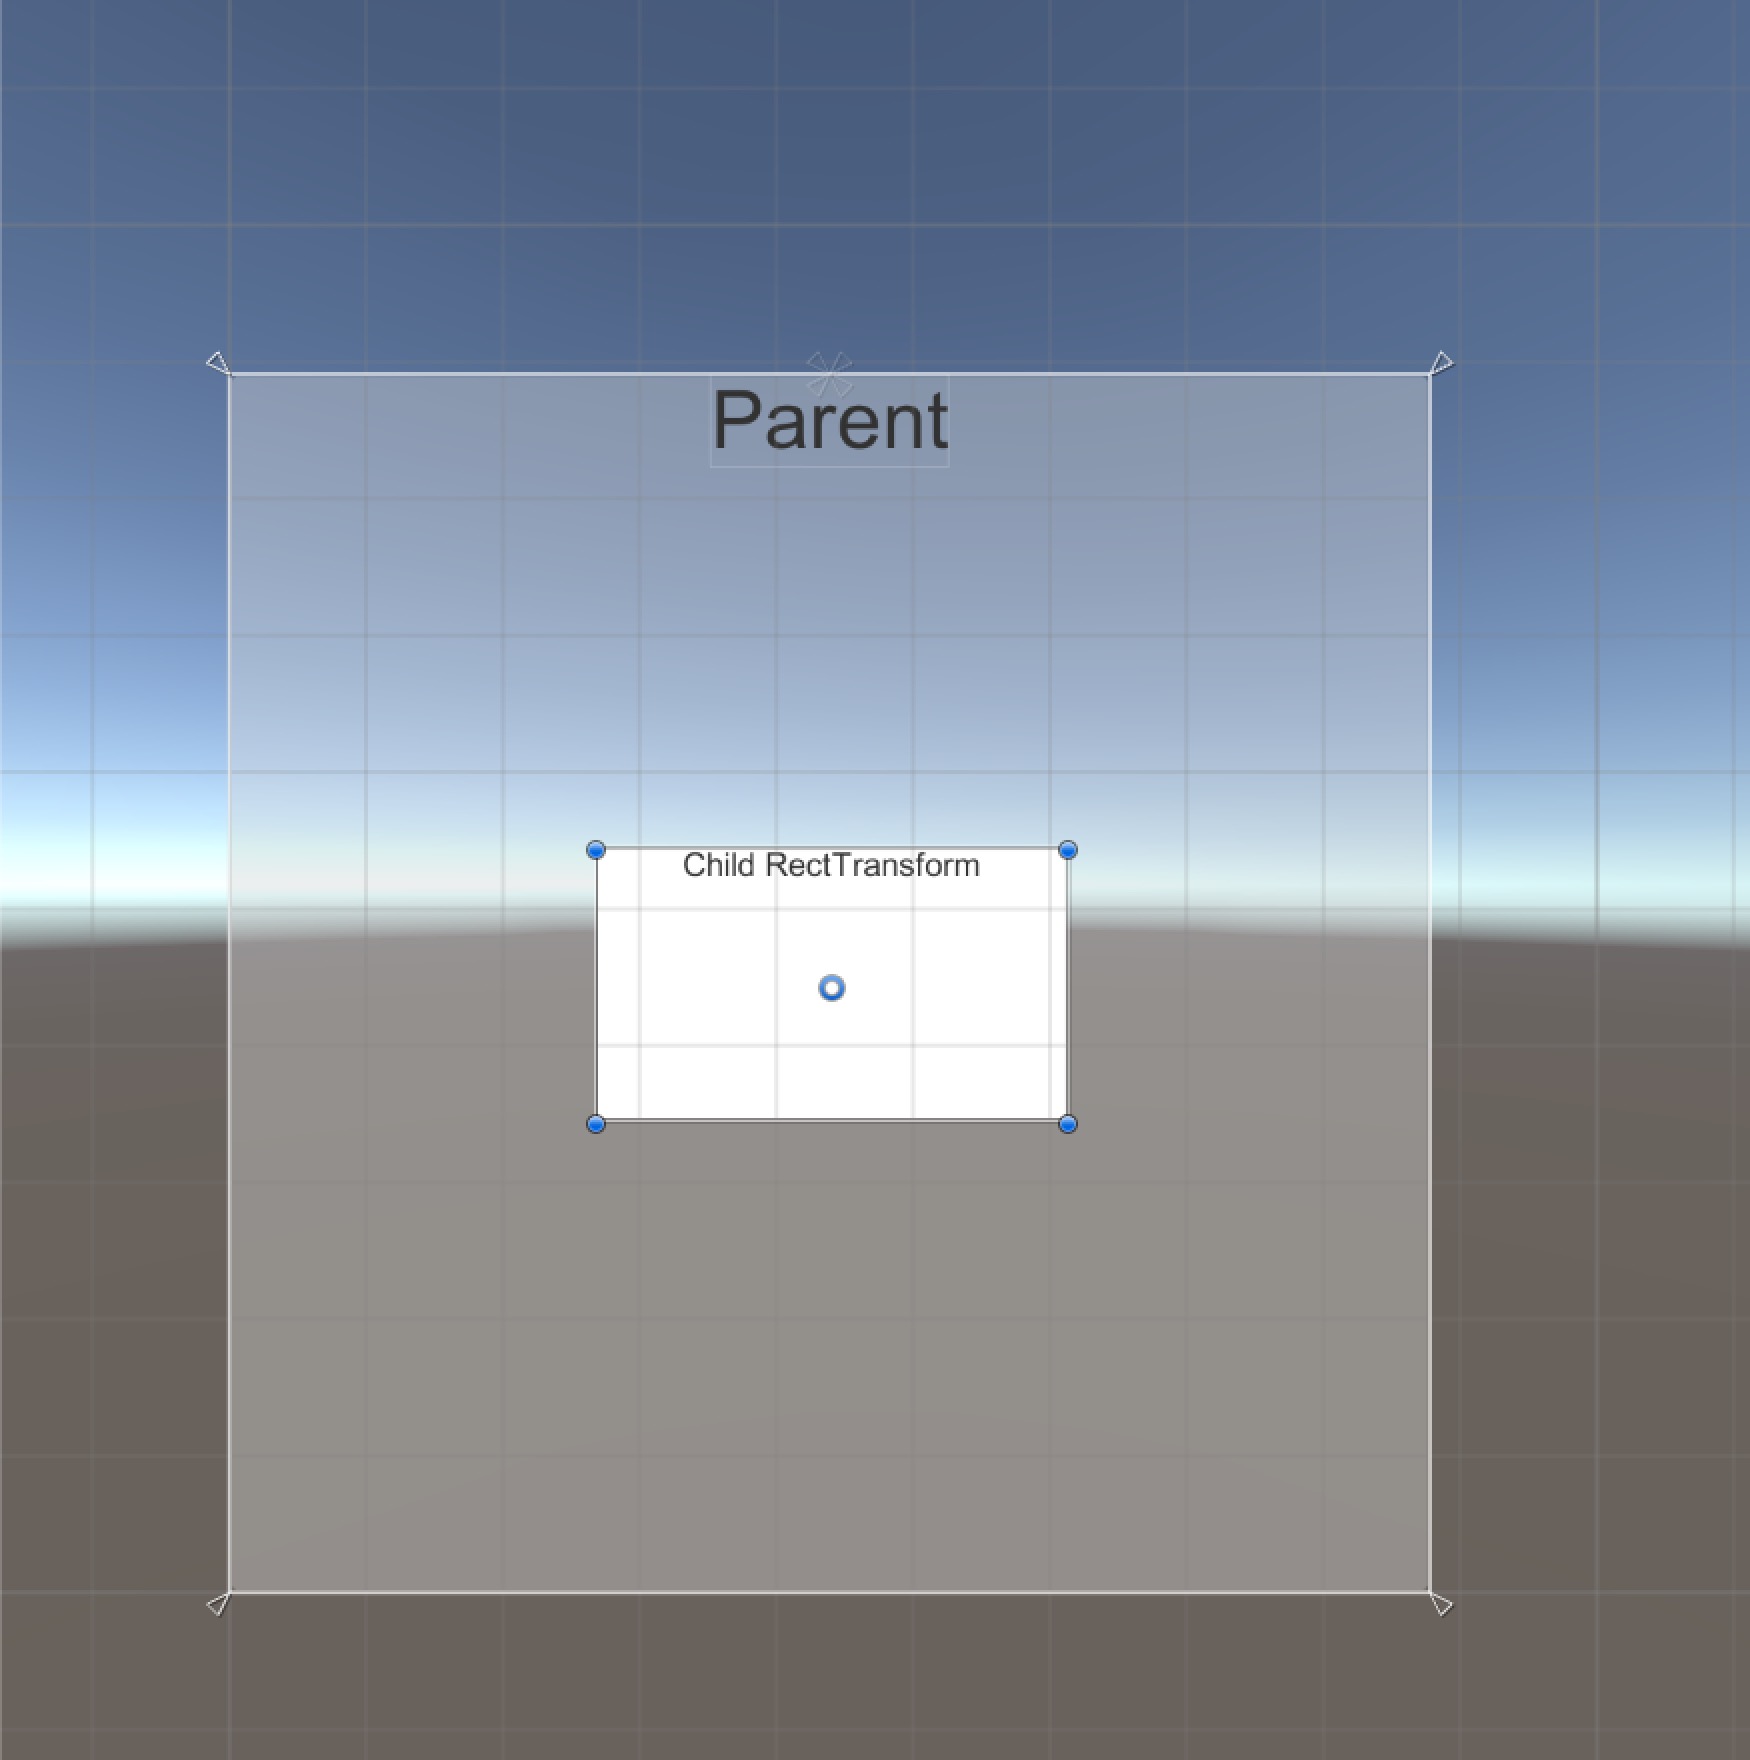
可以看到四个anchorPoint在四个角落处。
为了验证我们的猜想,我们放四个红色小圆圈到Parent下面,位置由我们自己算出来。
代码如下:
void DrawAnchors()
{
    if (parentRectTransform == null) {
        return;
    }
    Vector2[] anchored_corner = new Vector2[4];
    //** 用anchorMin和anchorMax算出四个anchor点
    anchored_corner[0] = rectTransform.anchorMin;
    anchored_corner[1] = new Vector2(rectTransform.anchorMax.x,rectTransform.anchorMin.y);
    anchored_corner[2] = rectTransform.anchorMax;
    anchored_corner[3] = new Vector2(rectTransform.anchorMin.x,rectTransform.anchorMax.y);
    //** 使用Unity内置方法rect算出parent的矩形框
    var rect_parent = parentRectTransform.rect;
    for(int idx = 0;idx < 4;++idx){
        //** 因为四个anchor点是相对于parent的归一化坐标
        //** 所以将四个anchor点根据parent的size放大值并根据左下角进行偏移
        anchored_corner[idx].Scale(rect_parent.size);
        anchored_corner[idx] += rect_parent.min;
        if(m_anchors[idx]){
            //** 因为设置position设置的是世界坐标,而我们算出来的是parent下的局部坐标,因此使用parent的转换矩阵将坐标转换到世界坐标中
            m_anchors[idx].position = parentRectTransform.localToWorldMatrix.MultiplyPoint(anchored_corner[idx]);
        }
    }
}

void OnDrawGizmos ()
{
    DrawAnchors ();
}
PS : m_anchors类内成员变量,方便观察计算结果,就是图里四个红色圆圈(A0、A1、A2、A3)
运行结果如图:
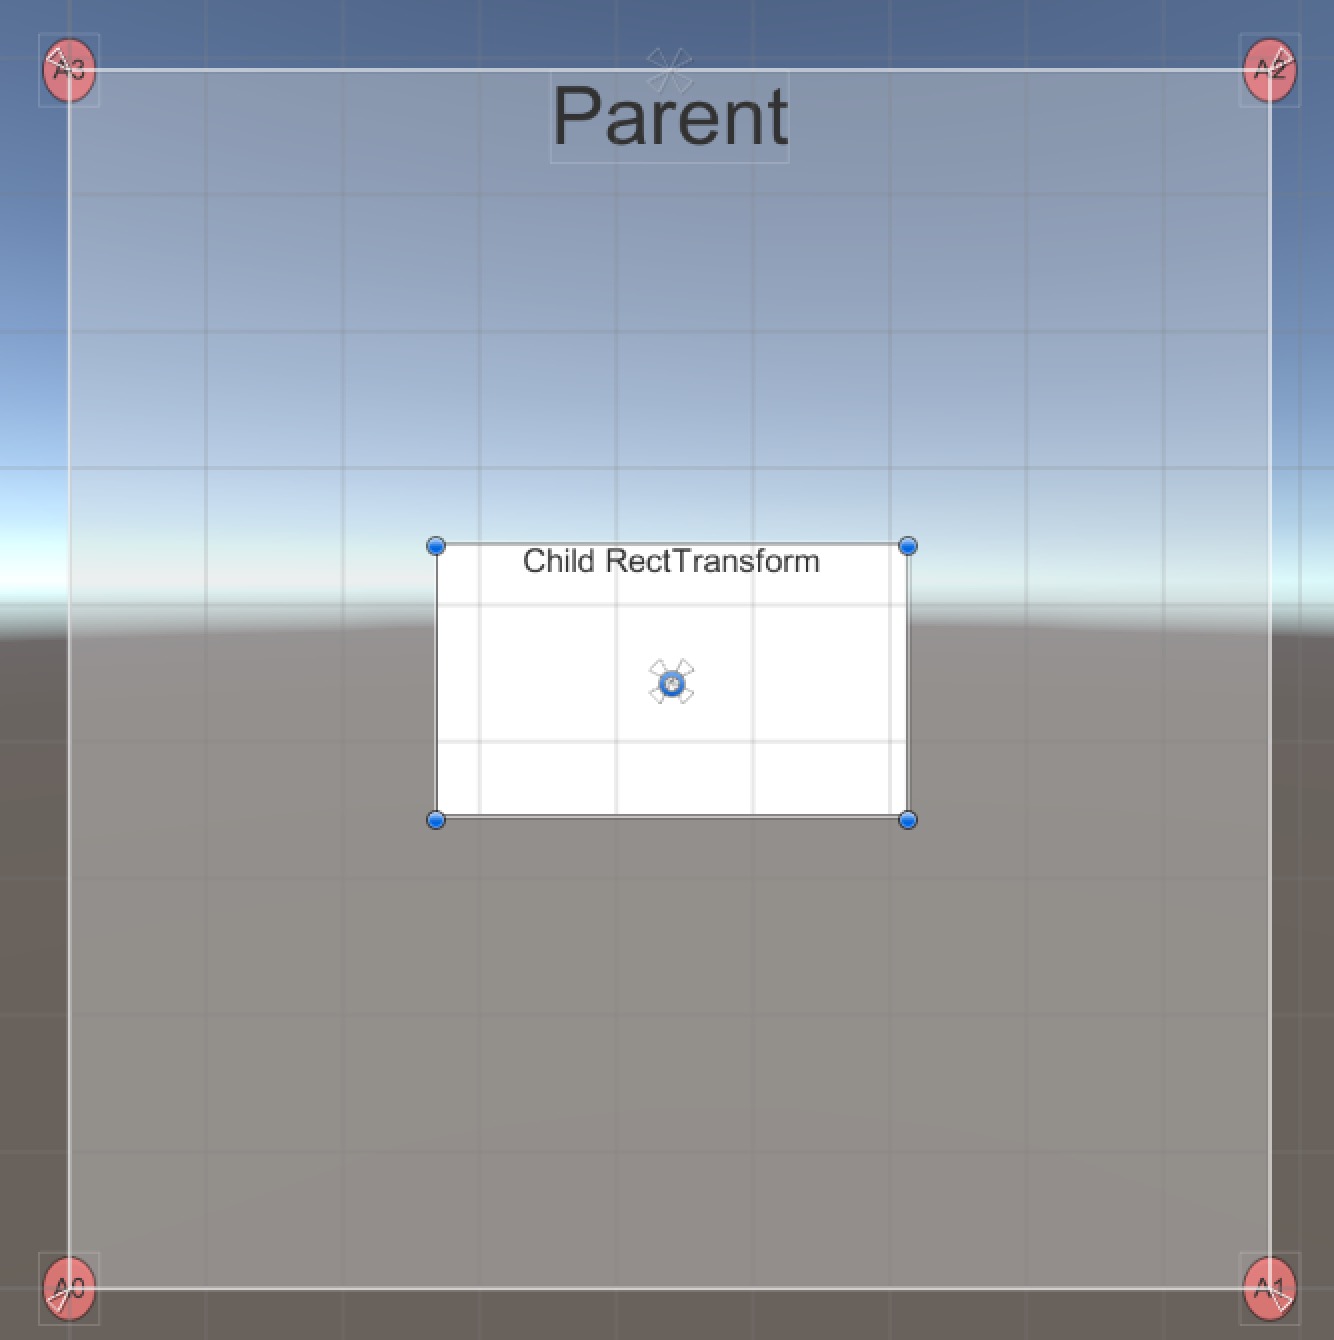
四个红点正是我们所计算出来的anchorPoint的位置,与Editor显示的保持了时候同步,Good Job!
1.2 pivot
接下来让我们看看另外一个更加显而易见的RectTransform的内在变量:pivot。
先是照旧看一下它的官方说明:
| 属性 | 官方文档 |
|---|---|
| pivot | The normalized position in this RectTransform that it rotates around. |
* 看说明,这个属性又是一个归一化的位置。看来又要寻找与它归一化相关的属性了。
* that it rotates around。这个pivot是该RectTransform旋转的中心点。这旋转暂时与我们探索的主题无关,先忽略。
那接下来,我们来看看这个pivot是关于哪个属性的归一化位置。
我们在Inspector中调整一下piovt的值试试看
| pivot值 | 产生的变化 |
|---|---|
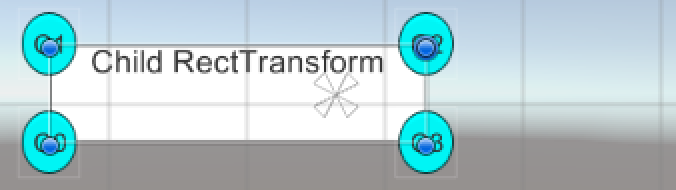
| 0.5,0.5 |  |
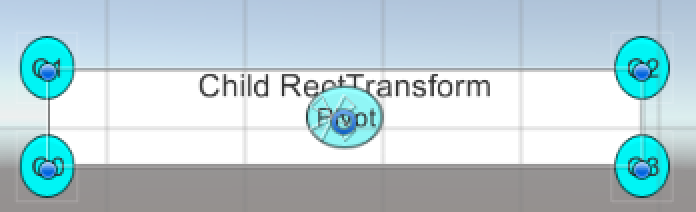
| 0.75,0.2 | 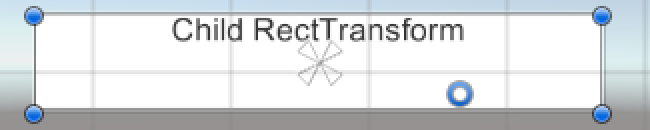 |
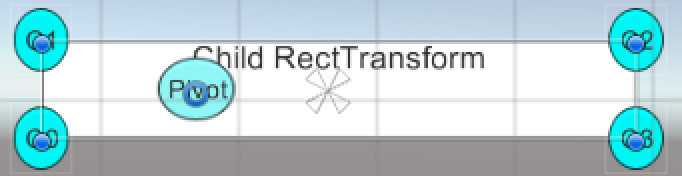
| 0.0,0.0 | 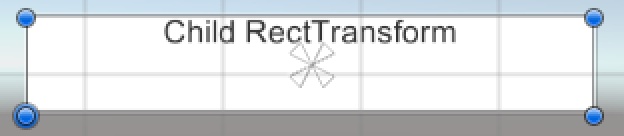 |
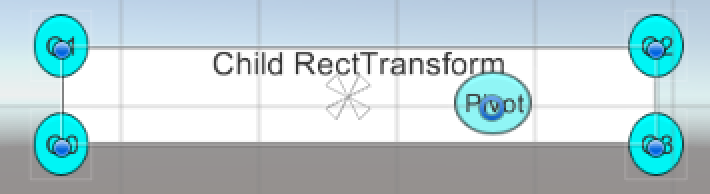
| 1.0,1.0 |  |
从上面四张图可以看到,中心那个圆圈指示的正是会随pivot变换的点
1. 当pivot为(0,0)时,pivot在矩形框的左下角
2. 当pivot为(1,1)时,pivot在矩形框的右上角
3. 当pivot为(0.5,0.5)时,pivot在矩形框的中心
4. 当pivot为(0.7,0.2)时,pivot在0.7个矩形宽、0.2个矩形高的地方
很好,那很明显,pivot是相对于这个矩形框的归一化位置。
但现在我们还不知道这个矩形框是怎么算出来的,有没有内置的函数可以算出这个矩形框呢?
查阅一下官方文档,发现了以下两个函数
| 函数 | 官方文档 |
|---|---|
| GetLocalCorners | Get the corners of the calculated rectangle in the local space of its Transform. |
| GetWorldCorners | Get the corners of the calculated rectangle in world space. |
* 看说明,貌似这两个函数都是给出矩形四个角的位置的,只是一个是局部坐标、一个是世界坐标。
因为我们给某个Transform设置位置时,都是设置的世界坐标系。所以我们就试验下用GetWorldCorners定位出来的四个点是不是我们想要的四个点吧。
照旧的,为了试验,给出代码:
void DrawCorners()
{
    Vector3[] corners = new Vector3[4];
    rectTransform.GetWorldCorners (corners);
    for (int idx = 0; idx < 4; ++idx) {
        if(m_corners[idx]){
            m_corners[idx].position = corners[idx];
        }
    }
}

void OnDrawGizmos ()
{
    DrawAnchors ();
    DrawCorners ();
}
PS : m_corners类内成员变量,方便观察计算结果,就是图里四个蓝色色圆圈(C0、C1、C2、C3)
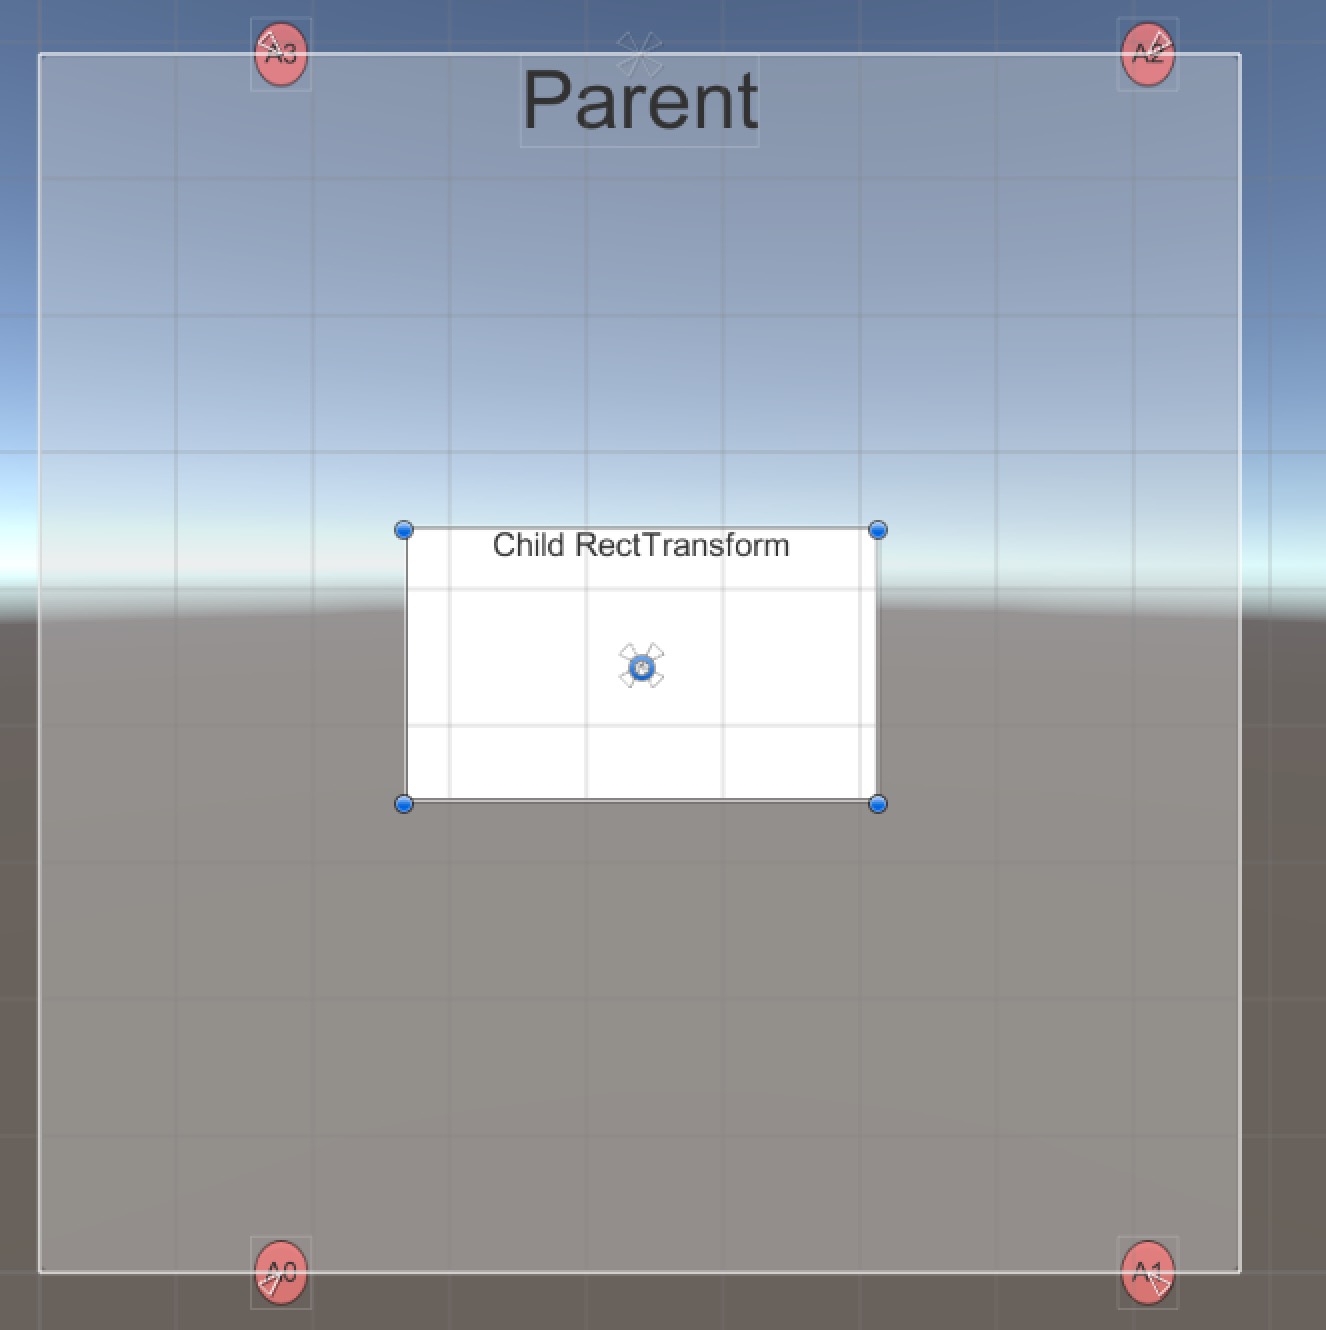
运行结果如图:
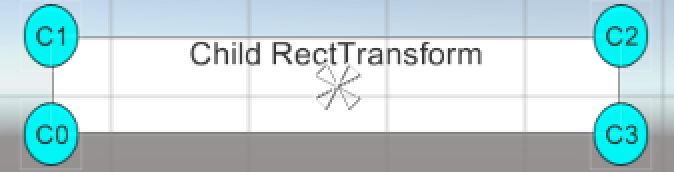
看起来不错,GetWorldCorners得到的正是我们想要的矩形框的四个点了。
有了这四个点,那我们要根据pivot算出最终的pivot的位置就简单了。
既然piovt是归一化的位置,那我们用图形学里面最常用的线性插值对C0(左下,最小)、C2(右上,最大)的x、y分别进行插值就能得到我们想要的pivot位置了。
用代码试验下:
void DrawCornersAndPivot()
{
Vector3[] corners = new Vector3[4];
rectTransform.GetWorldCorners (corners);
for (int idx = 0; idx < 4; ++idx) {
if(m_corners[idx]){
m_corners[idx].position = corners[idx];
}
}
if (m_pivot) {
var pivot_position = Vector2.zero;
pivot_position.x = corners[0].x * (1 - rectTransform.pivot.x) + corners[2].x * rectTransform.pivot.x;
pivot_position.y = corners[0].y * (1 - rectTransform.pivot.y) + corners[2].y * rectTransform.pivot.y;
m_pivot.position = pivot_position;
}
}
void OnDrawGizmos ()
{
DrawAnchors ();
DrawCornersAndPivot ();
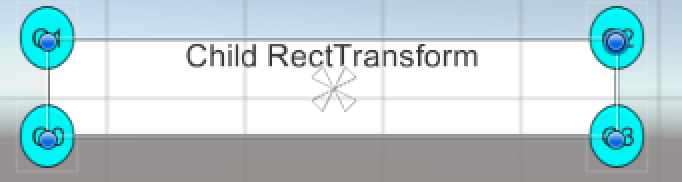
}运行结果,如图:
哎哟,不错啊,看起来我们定的位置与Editor显示的完全同步嘛。
1.3 offsetMin、offsetMax和sizeDelta
这三个属性官方说明如下:
| 属性 | 官方文档 |
|---|---|
| offsetMin | The offset of the lower left corner of the rectangle relative to the lower left anchor. |
| offsetMax | The offset of the upper right corner of the rectangle relative to the upper right anchor. |
| sizeDelta | The size of this RectTransform relative to the distances between the anchors. |
看着挺简易明了的,直译过来差不多就是:
* offsetMin是左下corner对左下anchor的偏移
* offsetMax是右上corner对右上anchor的偏移
* sizeDelta是这个RectTransform到四个anchors的距离
这么解释不是很直观,也不确定对不对。
鉴于这三个属性都是距离相关的属性,不好在界面上显示出来,所以我们就单纯地输出它们的值,方便观察它们的变换。
输出值很简单,因此,代码:略。
1.4 anchoredPosition
终于来到这最后一个我们想探索的属性了。
照旧,先贴上官方文档说明:
| 属性 | 官方文档 |
|---|---|
| anchoredPosition | The position of the pivot of this RectTransform relative to the anchor reference point. The anchor reference point is where the anchors are. If the anchors are not together, the four anchor positions are interpolated according to the pivot placement. |
这个看起来就比较晕了。
* 首先这是一个跟pivot有关的位置。
* 其次,这是pivot相对于anchor reference point的位置。这个anchor reference point是个什么东西呢?
Anchor reference point:
对官方文档解释的理解:
1. 它是anchors所在的位置
2. 如果四个anchors不在同一位置时,它是四个anchors的插值。
3. 而且这个插值是根据pivot的位置摆放来进行插值的。这时就比较郁闷了,根据pivot的位置对四个anchors进行插值,从而得出anchored refrenced point的位置。
然后Unity又会根据这个anchored refrenced point 和 anchoredPosition来确定出pivot的位置。PS: 一个错误的流程图~~~
 最低0.47元/天 解锁文章


 216
216


 被折叠的 条评论
为什么被折叠?
被折叠的 条评论
为什么被折叠?
 到【灌水乐园】发言


