


一、设备树
在pinctrl中添加:
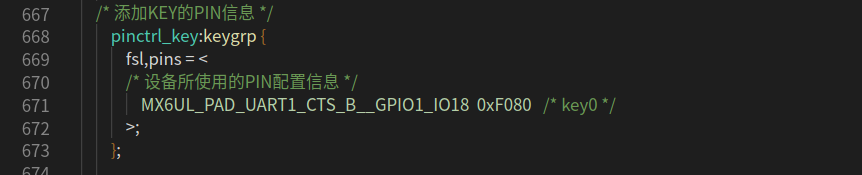
	/* 添加KEY的PIN信息 */
		pinctrl_key:keygrp {
			fsl,pins = <
			/* 设备所使用的PIN配置信息 */
				MX6UL_PAD_UART1_CTS_B__GPIO1_IO18  0xF080   /* key0 */
			>;
		};
在/节点中添加:
	/* key  设备节点 */
	key{
		#address-cells = <1>;
		#size-cells = <1>;
		compatible = "luatao-key"; /* 匹配值 以后写的key驱动里面要匹配这个字符串 */

		/* 使用pinctrl + gpios */
		pinctrl-names = "default";
		pinctrl-0 = <&pinctrl_key>;   // 表示使用pinctrl_key这个节点的pin信息

		key-gpio = <&gpio1 18 GPIO_ACTIVE_LOW>;   // GPIO1 的 IO018,低电平有效。
		status = "okay";
	};

二、驱动程序
key.c
#include <linux/types.h>
#include <linux/kernel.h>
#include <linux/delay.h>
#include <linux/ide.h>
#include <linux/init.h>
#include <linux/module.h>

#include <linux/errno.h>
#include <linux/gpio.h>
#include <asm/mach/map.h>
#include <asm/uaccess.h>
#include <asm/io.h>

#include <linux/cdev.h>

#include <linux/device.h>
#include <linux/of.h>
#include <linux/of_address.h>

#include <linux/of_gpio.h>


/**
 * file name:key
 * date: 2021-08-13  19:32
 * version:1.0
 * author:luatao
 * describe:key device drive
 */


#define GPIOKEY_CNT  1     /* 设备号个数 */
#define GPIOKEY_NAME        "key"      /* 设备名*/

/* 定义按键值 */
#define KEY0VALUE  0xF0
#define INVAKEY     0x00 /* 无效的按键值 */


/* 设备结构体 自定义 */
struct gpiokey_dev{
    dev_t devid;     /*设备号  */
    struct cdev cdev;  /* cdev */
    struct class *class;  /* 类*/
    struct device *device;  /* 设备 */
    int major;   /* 主设备号 */
    int minor;  /* 次设备号 */

    struct device_node *nd;  /* 设备节点 */
    int key_gpio;    /* key所使用的GPIO编号 */

    atomic_t keyvalue;   /* 原子变量 按键值 */
 };

/* 定义一个设备结构体 */
struct gpiokey_dev gpiokey;   /* key 设备 */


/* 打开设备 */
static int key_open(struct inode *inode, struct file *filp)
{

    filp->private_data = &gpiokey;  /* 设置私有数据 */
    printk("key open!\r\n");
    return 0;
}

/* 从设备读取数据 */
static ssize_t key_read(struct file *filp, char __user *buf, size_t cnt, loff_t *offt)
{
    int ret = 0;
    int value;

    struct gpiokey_dev *dev = filp->private_data;

    if(gpio_get_value(dev->key_gpio) == 0){  // 有按键按下
        while(!gpio_get_value(dev->key_gpio));  /* 等待按键释放 */
        atomic_set(&dev->keyvalue, KEY0VALUE);   // 原子操作设置按键值
    }else{
         atomic_set(&dev->keyvalue, INVAKEY);   // 原子操作设置无效值
    }

    value = atomic_read(&dev->keyvalue);
    ret = copy_to_user(buf, &value, sizeof(value)); // 传递给用户空间

    //printk("key read !\r\n");
    return 0;
}

/* 往设备写数据 */
static ssize_t key_write(struct file *filp, const char __user *buf, size_t cnt, loff_t *offt)
{
    printk("key write !\r\n");
    return 0;
}

/* 释放设备 */
static int key_release(struct inode *inode, struct file *filp)
{
    //printk("key release!\r\n");
    return 0;
}


/* 设备操作函数结构体  */
static struct file_operations gpiokey_fops = {
    .owner = THIS_MODULE,
    .open = key_open,
    .read = key_read,
    .write = key_write,
    .release = key_release,
};

/* 驱动入口函数 */
static int __init mkey_init(void)
{
    int ret;  // 返回值

    /* 初始化原子变量 */
    atomic_set(&gpiokey.keyvalue, INVAKEY);  // 原子变量初始值为无效的按键值

    /* 获取设备数中的属性数据  */
    /* 1. 获取设备节点 /key*/
    gpiokey.nd = of_find_node_by_path("/key");  // 通过绝对路径查找设备节点
    if(gpiokey.nd == NULL){
        printk("key node no find!\r\n");
        return -EINVAL;  /* 无效参数 不知道这个返回值是啥意思,我觉得返回一个负数就可以,这个值是23,不知道有没有处理*/
    }

    /* 2. 获取设备树中的gpio属性 得到key所使用的gpio编号 */
    gpiokey.key_gpio = of_get_named_gpio(gpiokey.nd, "key-gpio", 0);
    if(gpiokey.key_gpio < 0 ){
         printk("can't get key-gpio\r\n");
        return -EINVAL;  /* 无效参数 不知道这个返回值是啥意思,我觉得返回一个负数就可以,这个值是23,不知道有没有处理*/
    }
    printk("key-gpio num = %d \r\n", gpiokey.key_gpio);  // 打印获取的key-gpio属性值

    /* 3. 请求GPIO   */
    ret = gpio_request(gpiokey.key_gpio, "key0");
    if(ret !=  0){
        printk("request gpio failed!\r\n");
    }

    /* 4. 设置为输入 */
    ret = gpio_direction_input(gpiokey.key_gpio);
    if(ret < 0){
        printk("can't set gpio!\r\n");
    }

    /* 注册字符设备驱动 */

    /* 1. 创建设备号 */
    if(gpiokey.major){  // 定义了设备号
        gpiokey.devid = MKDEV(gpiokey.major, 0 );  // 根据主设备号和次设备号合成设备号
        register_chrdev_region(gpiokey.devid, GPIOKEY_CNT, GPIOKEY_NAME);  // 注册设备号
    }else{  // 没有定义设备号 动态生成
        alloc_chrdev_region(&gpiokey.devid,0,GPIOKEY_CNT, GPIOKEY_NAME ); // 申请设备号
        gpiokey.major = MAJOR(gpiokey.devid);  // 获取主设备号
        gpiokey.minor = MINOR(gpiokey.devid);  // 获取次设备号
    }
    printk("gpiokey major = %d,minor = %d\r\n",gpiokey.major, gpiokey.minor);  // 打印主设备号和次设备号

    /* 2. 初始化 cdev */
    gpiokey.cdev.owner = THIS_MODULE;
    cdev_init(&gpiokey.cdev, &gpiokey_fops);  // 初始化cdev
    /* 3. 添加cdev */
    cdev_add(&gpiokey.cdev, gpiokey.devid, GPIOKEY_CNT ); // 向linux系统添加cdev

     /* 自动创建设备节点文件 */
    /* 4. 创建类 */
    gpiokey.class = class_create(THIS_MODULE, GPIOKEY_NAME);  // 创建类
    if(IS_ERR(gpiokey.class)){
        return PTR_ERR(gpiokey.class);
    }
    /* 创建设备 */
    gpiokey.device = device_create(gpiokey.class, NULL, gpiokey.devid, NULL, GPIOKEY_NAME);
      if(IS_ERR(gpiokey.device)){
        return PTR_ERR(gpiokey.device);
    }

    return 0;
}


/* 驱动出口函数 */
static void __exit mkey_exit(void)
{

    /* 释放IO */
    gpio_free(gpiokey.key_gpio);


    /*  注销字符设备驱动 */
    cdev_del(&gpiokey.cdev);  /* 删除 cdev */
    unregister_chrdev_region(gpiokey.devid, GPIOKEY_CNT ); /* 注销设备号 */

    device_destroy(gpiokey.class, gpiokey.devid);  /* 注销设备  */
    class_destroy(gpiokey.class);  /* 注销类 */


    printk("key drive unregsister ok !\r\n");
}

/* 加载驱动入口和出口函数 */
module_init(mkey_init);
module_exit(mkey_exit);

/* LICENSE 和 AUTHOR 信息*/
MODULE_LICENSE("GPL");
MODULE_AUTHOR("luatao");
三、应用程序
keyApp.c
#include <stdio.h>
#include <unistd.h>
#include <sys/types.h>
#include <sys/stat.h>
#include <fcntl.h>
#include <stdlib.h>
#include <string.h>

/**
 * file name:keyApp
 * date: 2021-08-13  19:54
 * version:1.0
 * author:luatao
 * describe:按键测试APP
 * 执行命令:./keyApp 读取按键值
 */


#define KEY0VALUE  0xF0 // 有效的按键值
#define INVAKEY   0x00  // 无效的按键值

/* 主程序 */
int main(int argc, char *argv[])
{
    char *filename;  // 可执行文件名
    int fd,ret;  //  fd: 文件句柄 ret:函数操作返回值
    int keyvalue; // 按键值


    /* 先判断输入的参数 */
    if(argc !=  2){  // 本身文件名带1个 执行文件1个
       printf("parameter error!\r\n");
       return -1;
    }

    /* 分析参数 ,提取有用的信息 */
    filename = argv[1];  // 可执行文件名

    /* 打开key文件 */
    fd = open(filename, O_RDWR);  // 可读可写
    if(fd < 0){
        printf("can't open file:%s\r\n",filename);
        return -1;
    }

    /* 循环读取按键值 */
    while(1){
        read(fd, &keyvalue, sizeof(keyvalue));
        if(keyvalue == KEY0VALUE){   /* key0 按下 */
            printf("key0 press, value = %#X\r\n", keyvalue);  // 打印出按键值
        }
    }

    /* 关闭文件 */
    ret = close(fd);
    if(ret < 0){
        printf("can't close file %s \r\n", filename);
        return -1;
    }

    return 0;
}
四、测试
加载驱动:
执行命令:
卸载:


 4117
4117


 被折叠的 条评论
为什么被折叠?
被折叠的 条评论
为什么被折叠?
 到【灌水乐园】发言


