


Unity DOTS 一文开启ECS大门
- 前言
- 环境
- 过程
-
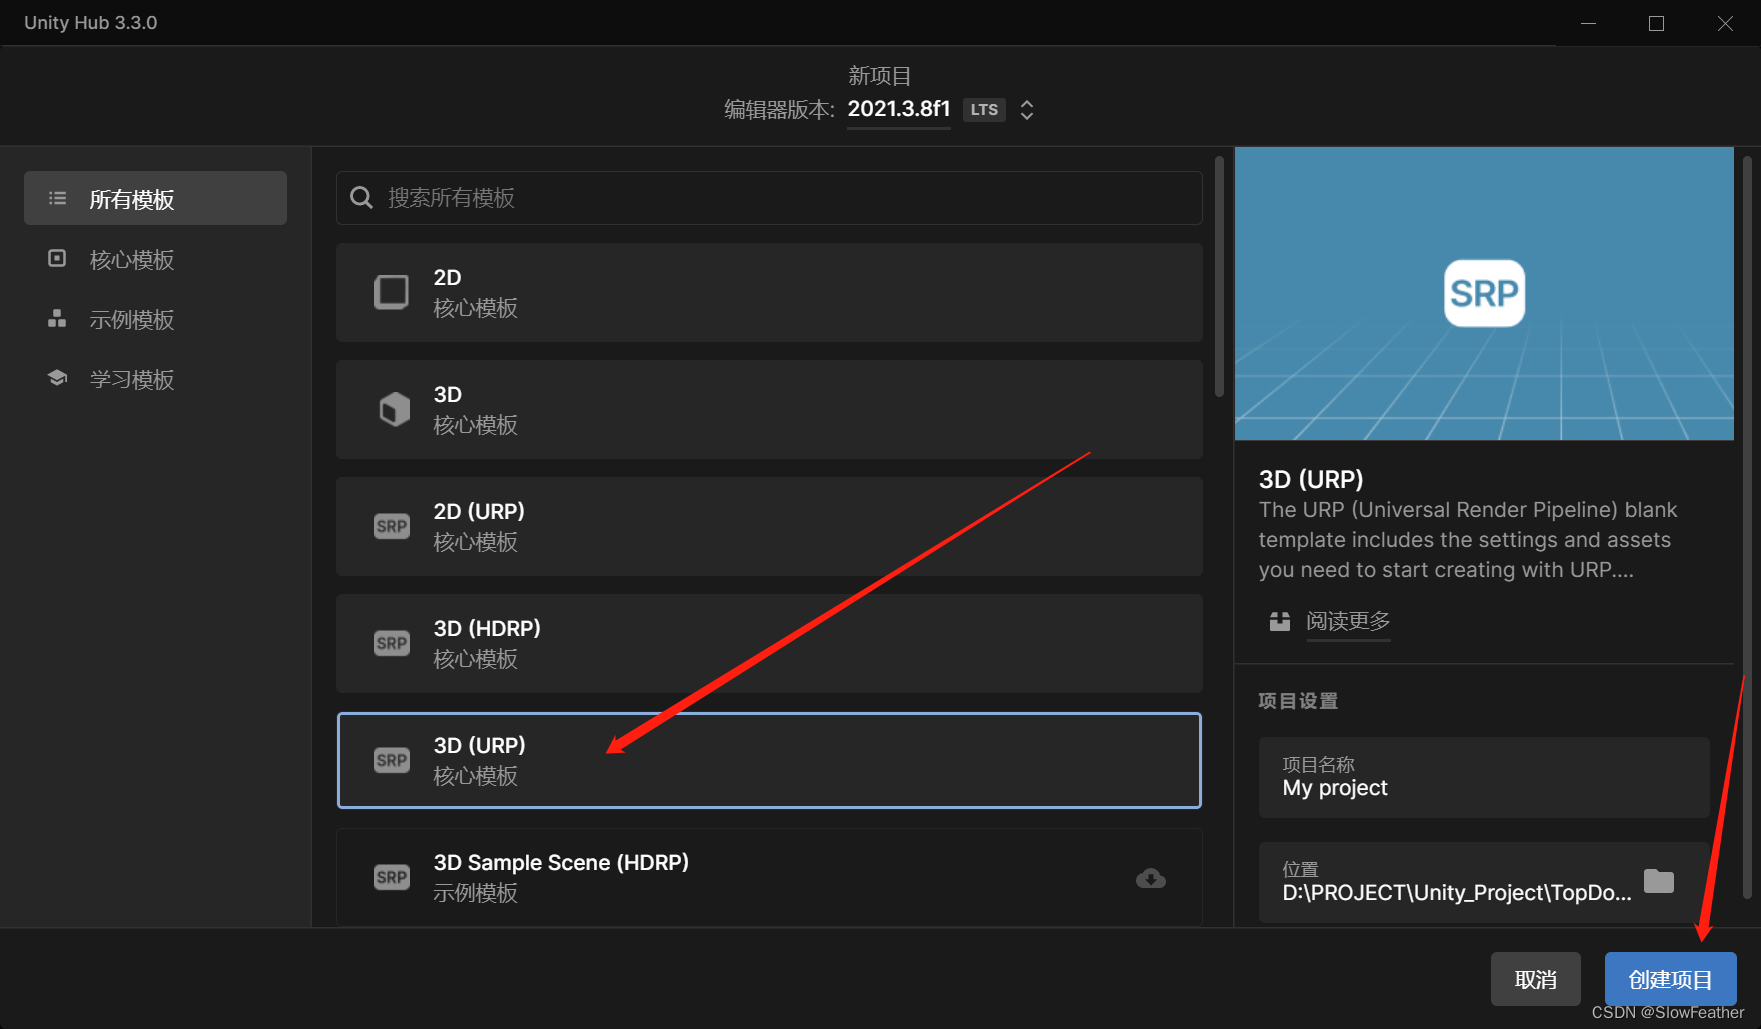
- 新建URP项目
- 导入Entity等插件包
- 开启Entity Debugger窗口
- 编写第一个Entity脚本
- 为Entity添加Component
- 创建一个System
- 参考
-
前言
Unity DOTS 已经迎来1.0版本更新,但是目前开发DOTS还得用Entity 0.51.0版本比较合适,资料相对较多,Bug相对较少。下文就从最基本的开始,创建一个Entity+Component+System。
环境
-
软件 版本 Unity 2021.3.8f1 Visual Studio 2019 软件包 版本 URP 12.1.7 Entity 0.51.1-preview.21 Rendering.Hybrid 0.51.1-preview.21 physics 0.51.1-preview.21 过程
新建URP项目
导入Entity等插件包
项目创建完成后,在任务管理器中打开工程目录,找到Packages文件夹,打开文件夹,找到manifest.json文件,然后添加:
 "com.unity.entities": "0.51.1",
    "com.unity.physics": "0.51.1",
"com.unity.rendering.hybrid": "0.51.1", 保存后回到Unity,打开PackageManager
点击Advanced Project Settings
更改Enable Pre-release PackagesShow Despendencies
两项的设置
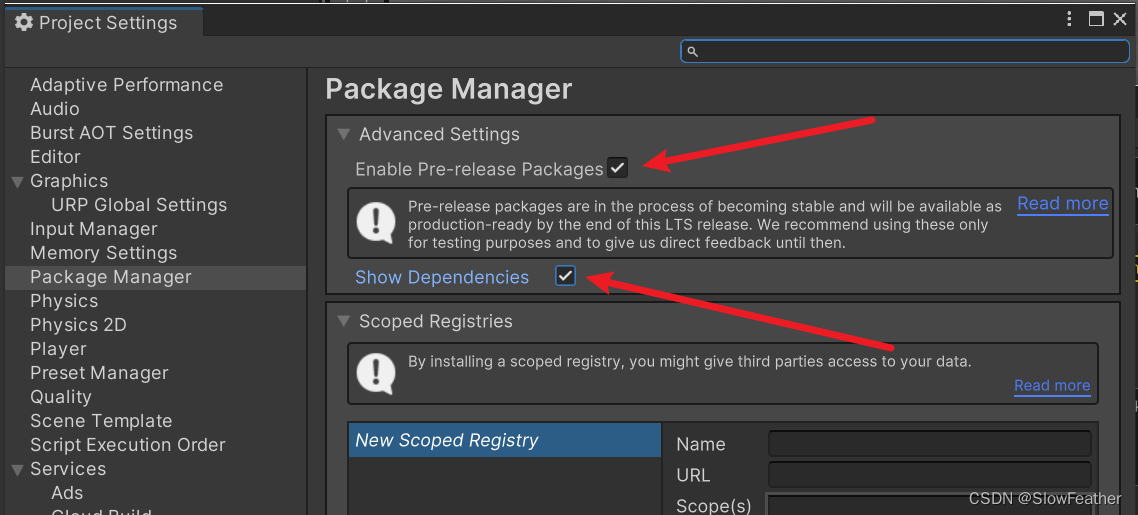
关闭设置
升级包

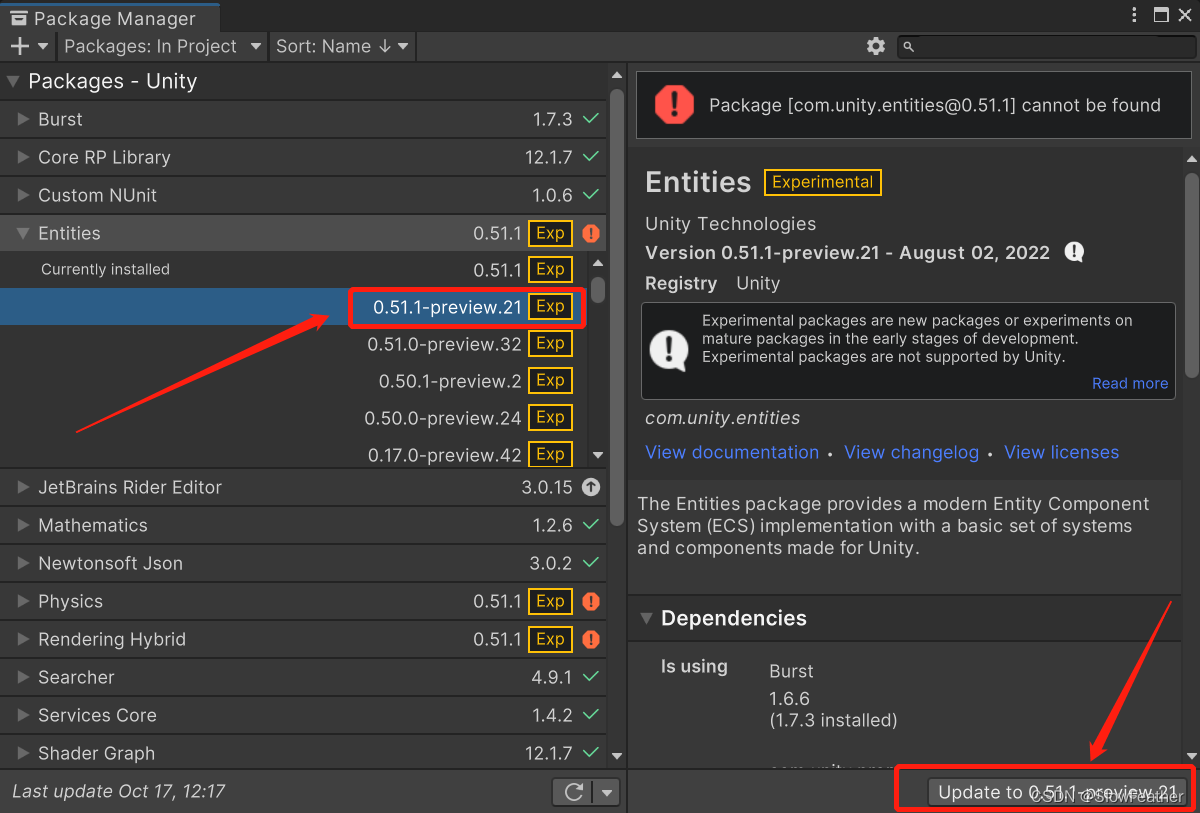
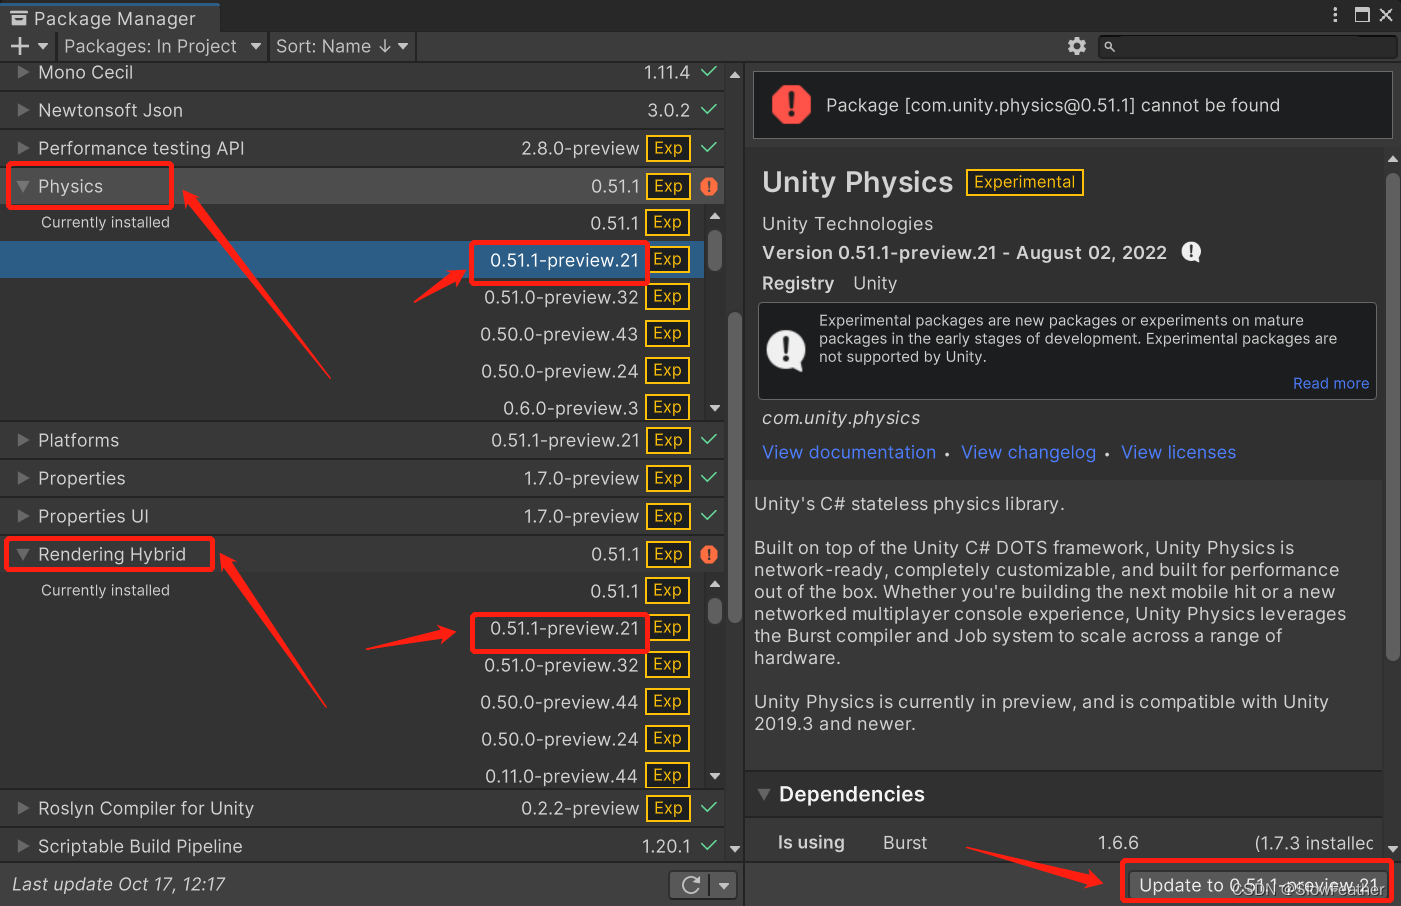
确保三个包都升级完毕,关闭PackageManager窗口
开启Entity Debugger窗口
开启Entity Debugger窗口便于查看。
编写第一个Entity脚本
创建脚本Spawer并挂载
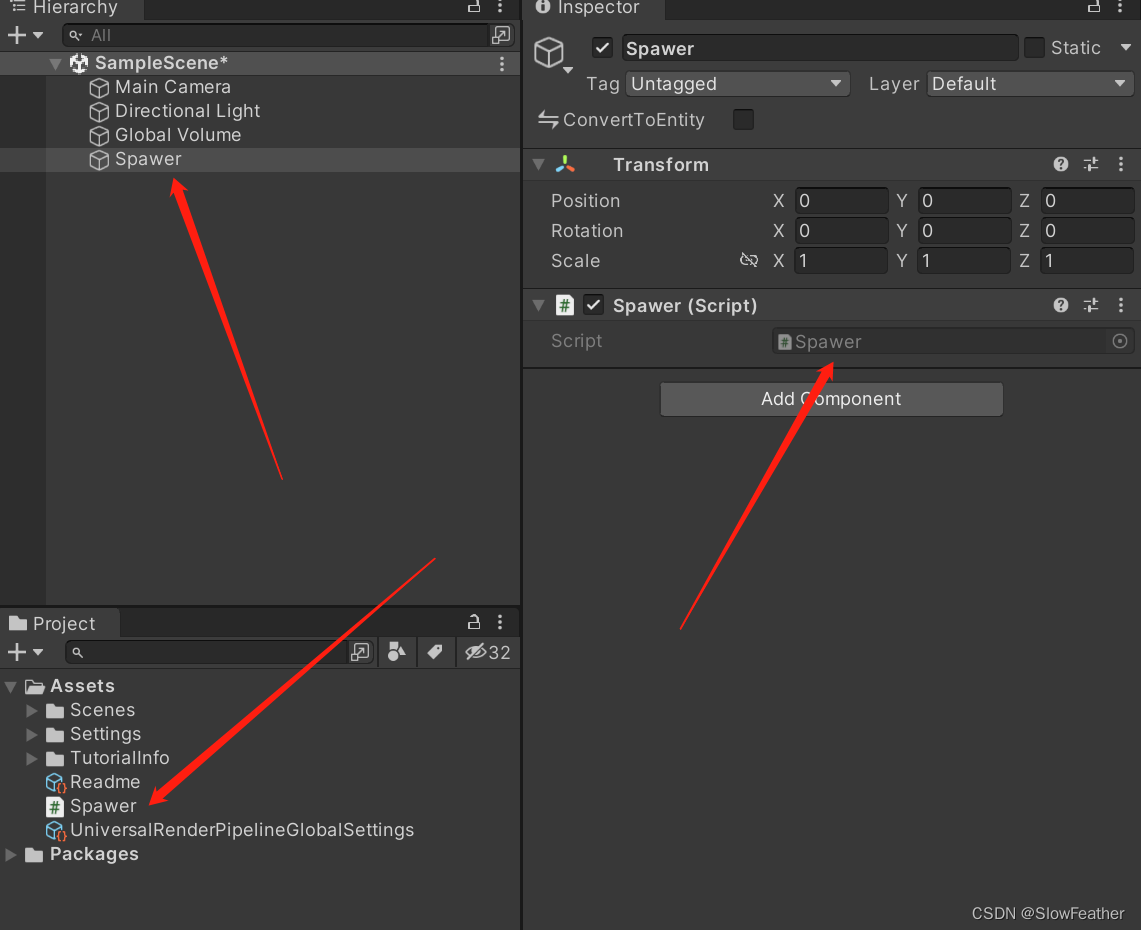
在脚本中编写以下代码 :
using System.Collections;
using System.Collections.Generic;
using UnityEngine;
using Unity.Entities;
using Unity.Transforms;
using Unity.Rendering;
using Unity.Mathematics;

public class Spawer : MonoBehaviour
{
    void Start()
    {
        MakeEntities();
    }
    private void MakeEntities()
    {
        //拿到默认世界中的实体管理器
        EntityManager entityManager = World.DefaultGameObjectInjectionWorld.EntityManager;

        //创建一个实体
        Entity myEntity = entityManager.CreateEntity();
    }
}
保存并回到Unity,点击运行
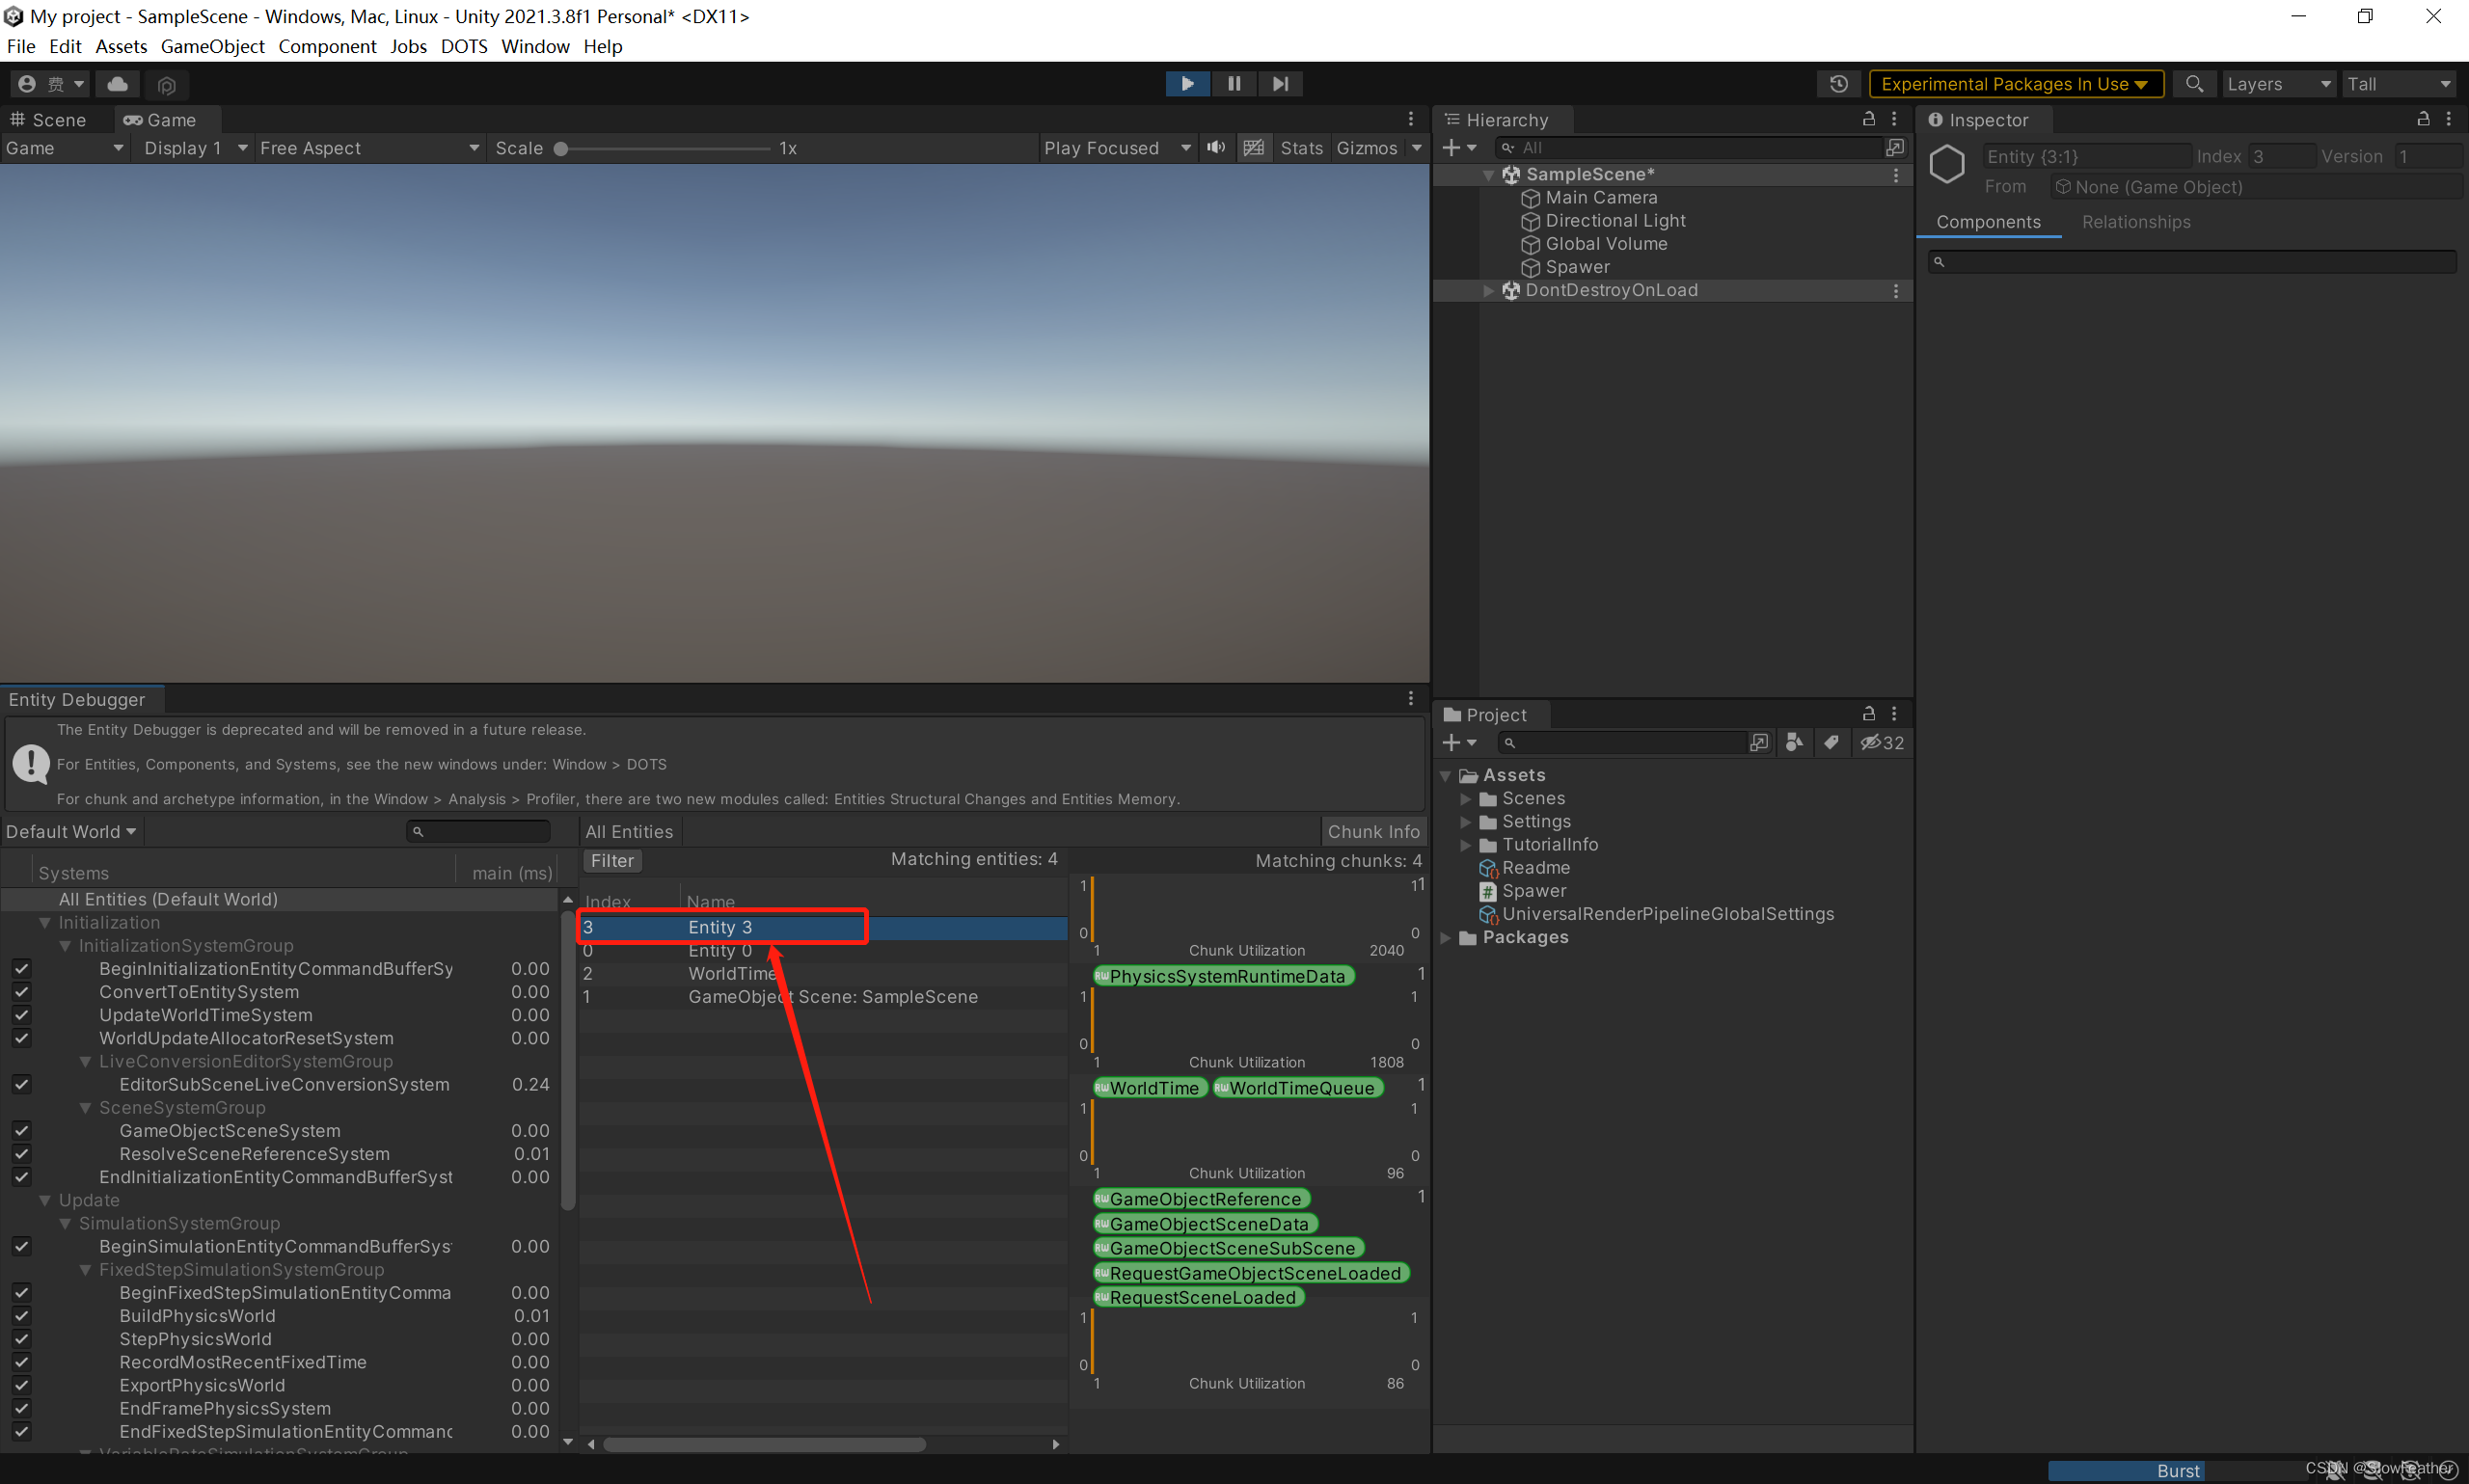
可以在Debugger窗口中看到我们刚创建的Entity
其中
Entity 0 为 PhysicsSystem
WorldTime 为 游戏时间
GameObject Scene 为 游戏场景
为Entity添加Component
创建脚本LevelComponent并添加以下代码
Tip:不需要拖拽到场景物体上
using System.Collections;
using System.Collections.Generic;
using UnityEngine;
using Unity.Entities;
public struct LevelComponent : IComponentData
{
    public float level;
}
修改Spawer脚本
using System.Collections;
using System.Collections.Generic;
using UnityEngine;
using Unity.Entities;
using Unity.Transforms;
using Unity.Rendering;
using Unity.Mathematics;

public class Spawer : MonoBehaviour
{
    void Start()
    {
        MakeEntities();
    }
    private void MakeEntities()
    {
        //拿到默认世界中的实体管理器
        EntityManager entityManager = World.DefaultGameObjectInjectionWorld.EntityManager;

        //创建一个原型 用来给实体分配数据
        EntityArchetype archetype = entityManager.CreateArchetype(
            //移动
            typeof(Translation),
            //旋转
            typeof(Rotation),

            //关卡组件
            typeof(LevelComponent)
            );

        //根据原型创建一个实体
        Entity myEntity = entityManager.CreateEntity(archetype);
    }
}
运行场景
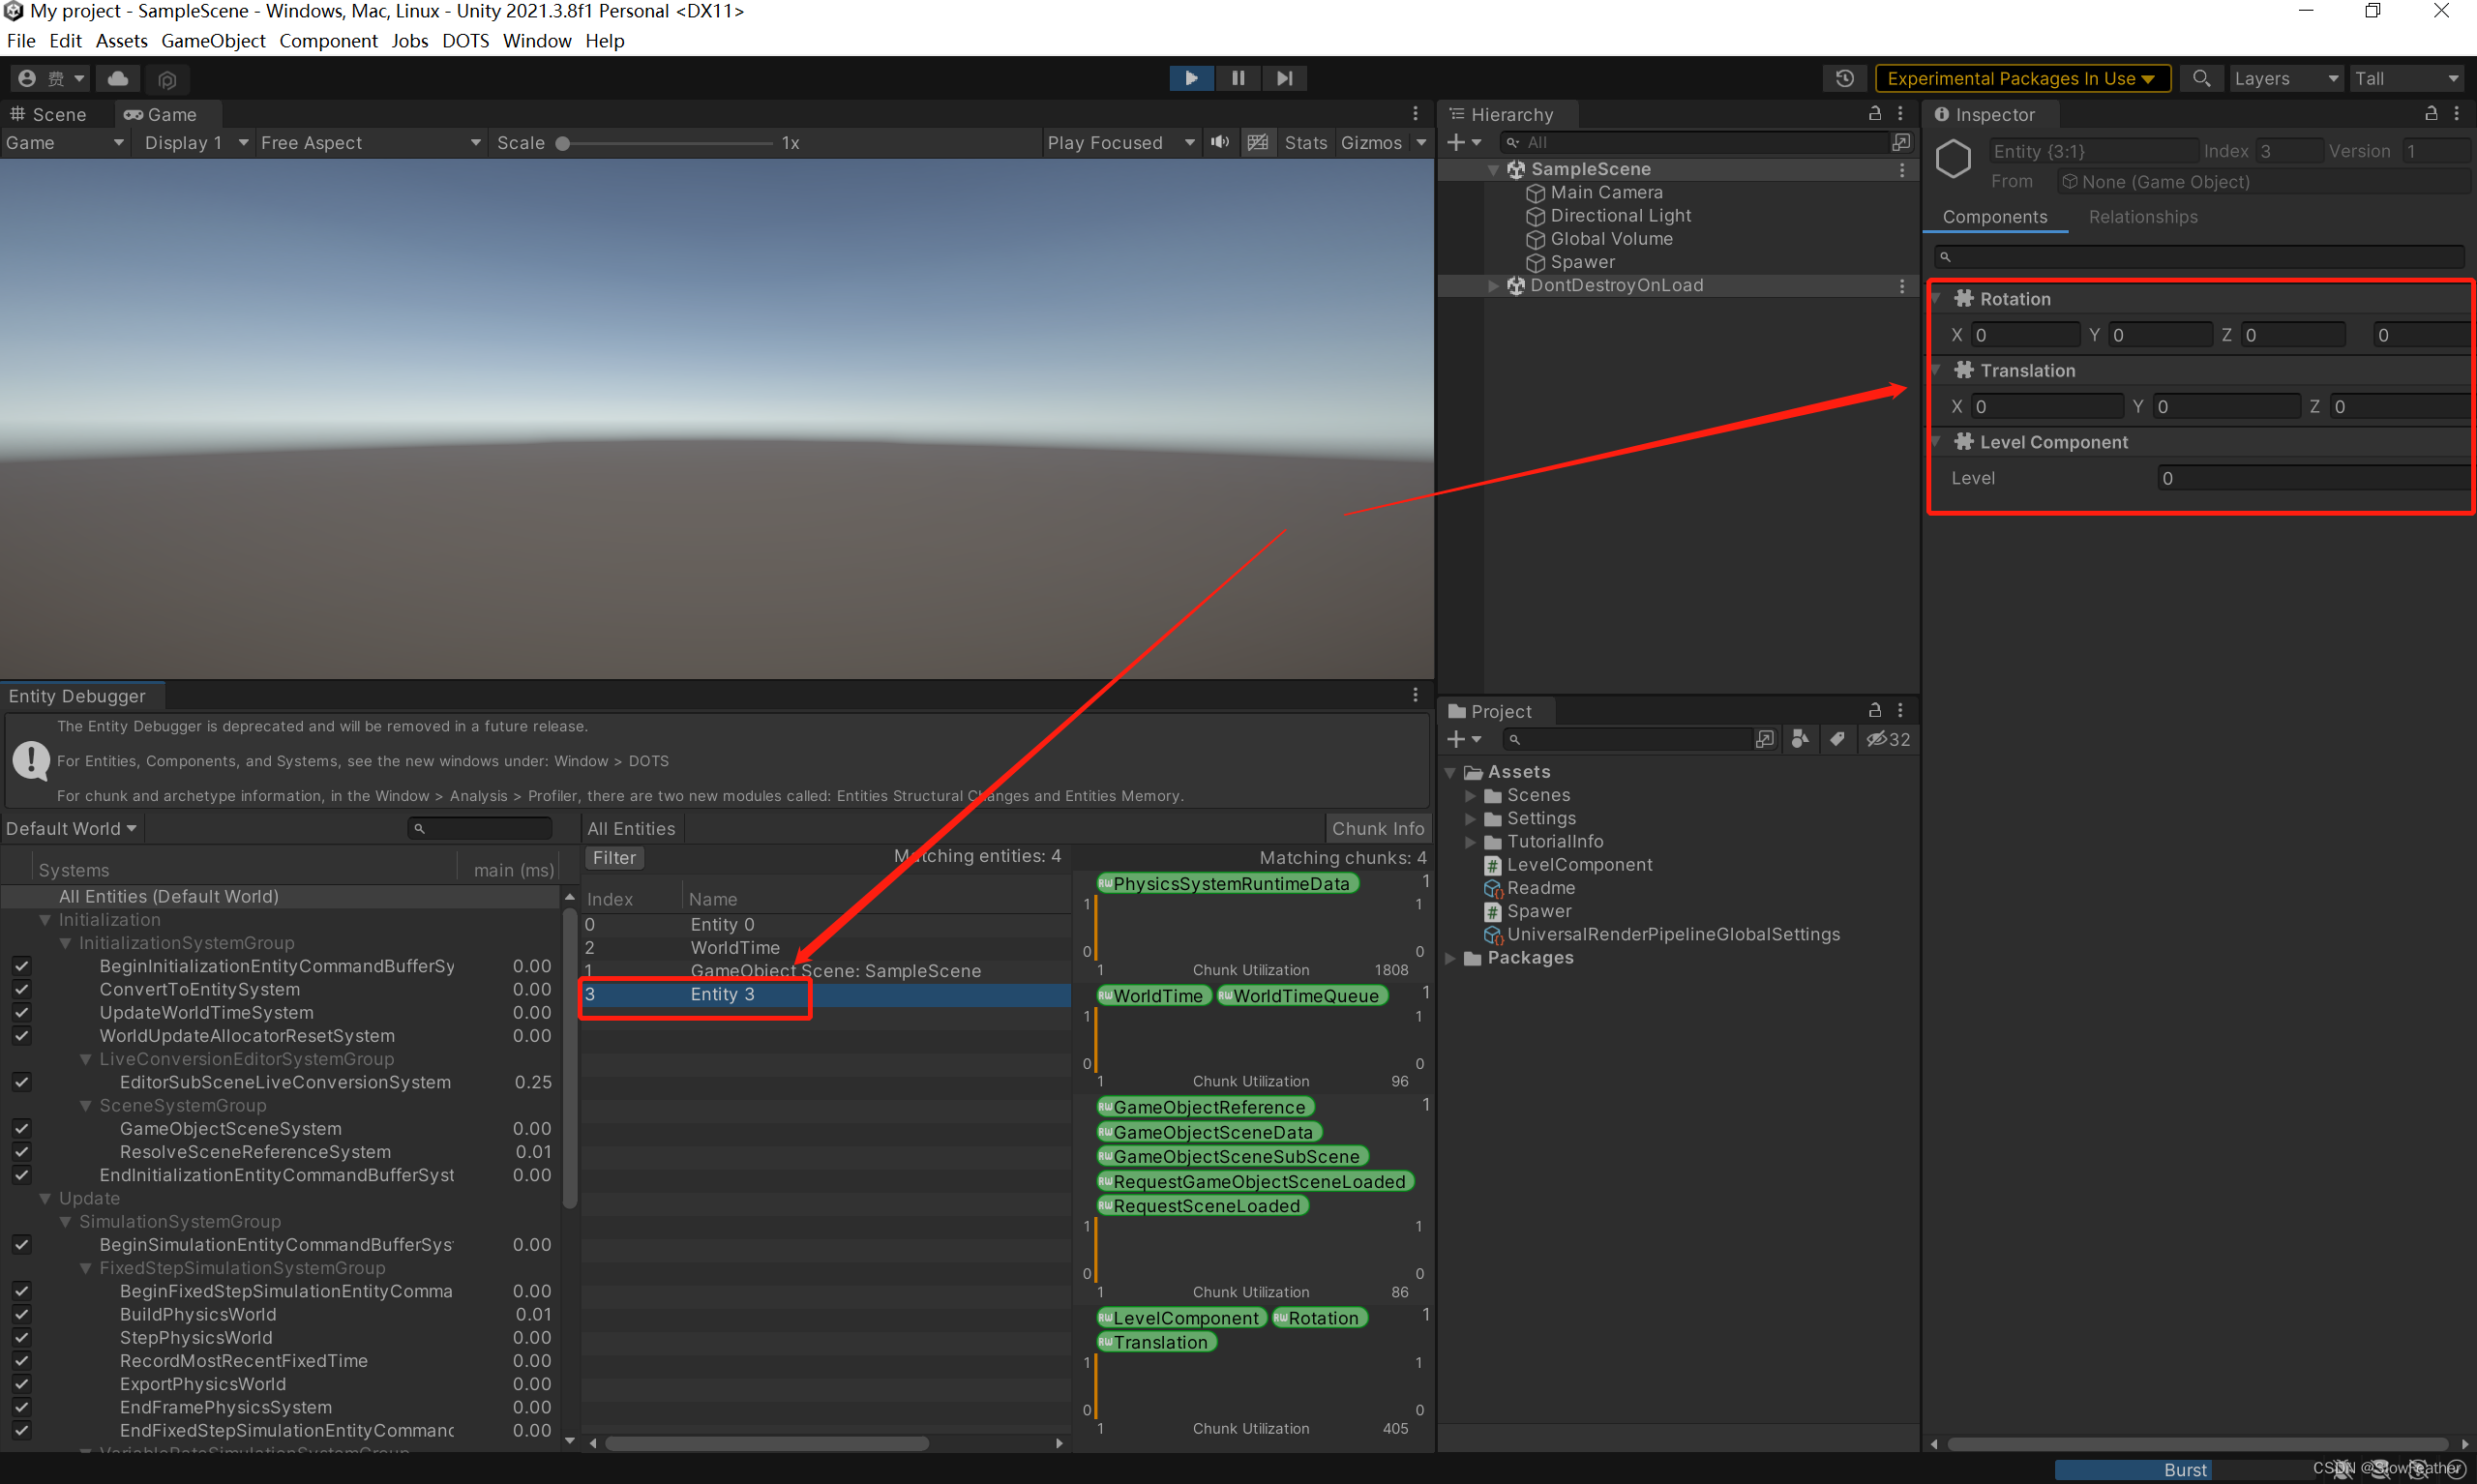
可以看到我们创建的Entity已经挂载了LevelComponent
创建一个System
创建一个System来控制LevelComponent中的值
创建LevelSystem脚本,并添加以下内容
using System.Collections;
using System.Collections.Generic;
using UnityEngine;
using Unity.Entities;
public class LevelSystem : ComponentSystem
{
    protected override void OnUpdate()
    {
        Entities.ForEach((ref LevelComponent levelComponent) => {
            levelComponent.level += 1f * Time.DeltaTime;
        });
    }
}
保存并运行场景
可以看到Level的值在不断变化
至此Entity Component System系统全部正常运行。
参考
-
https://docs.unity3d.com/Packages/com.unity.entities@0.51/manual/index.html
-
https://docs.unity3d.com/Packages/com.unity.rendering.hybrid@0.51/manual/requirements-and-compatibility.html


 5339
5339


 被折叠的 条评论
为什么被折叠?
被折叠的 条评论
为什么被折叠?
 到【灌水乐园】发言


