


实现目标
1、在本地部署大语言模型,实现本地的聊天机器人;
2、适应本地较低计算力的计算机;
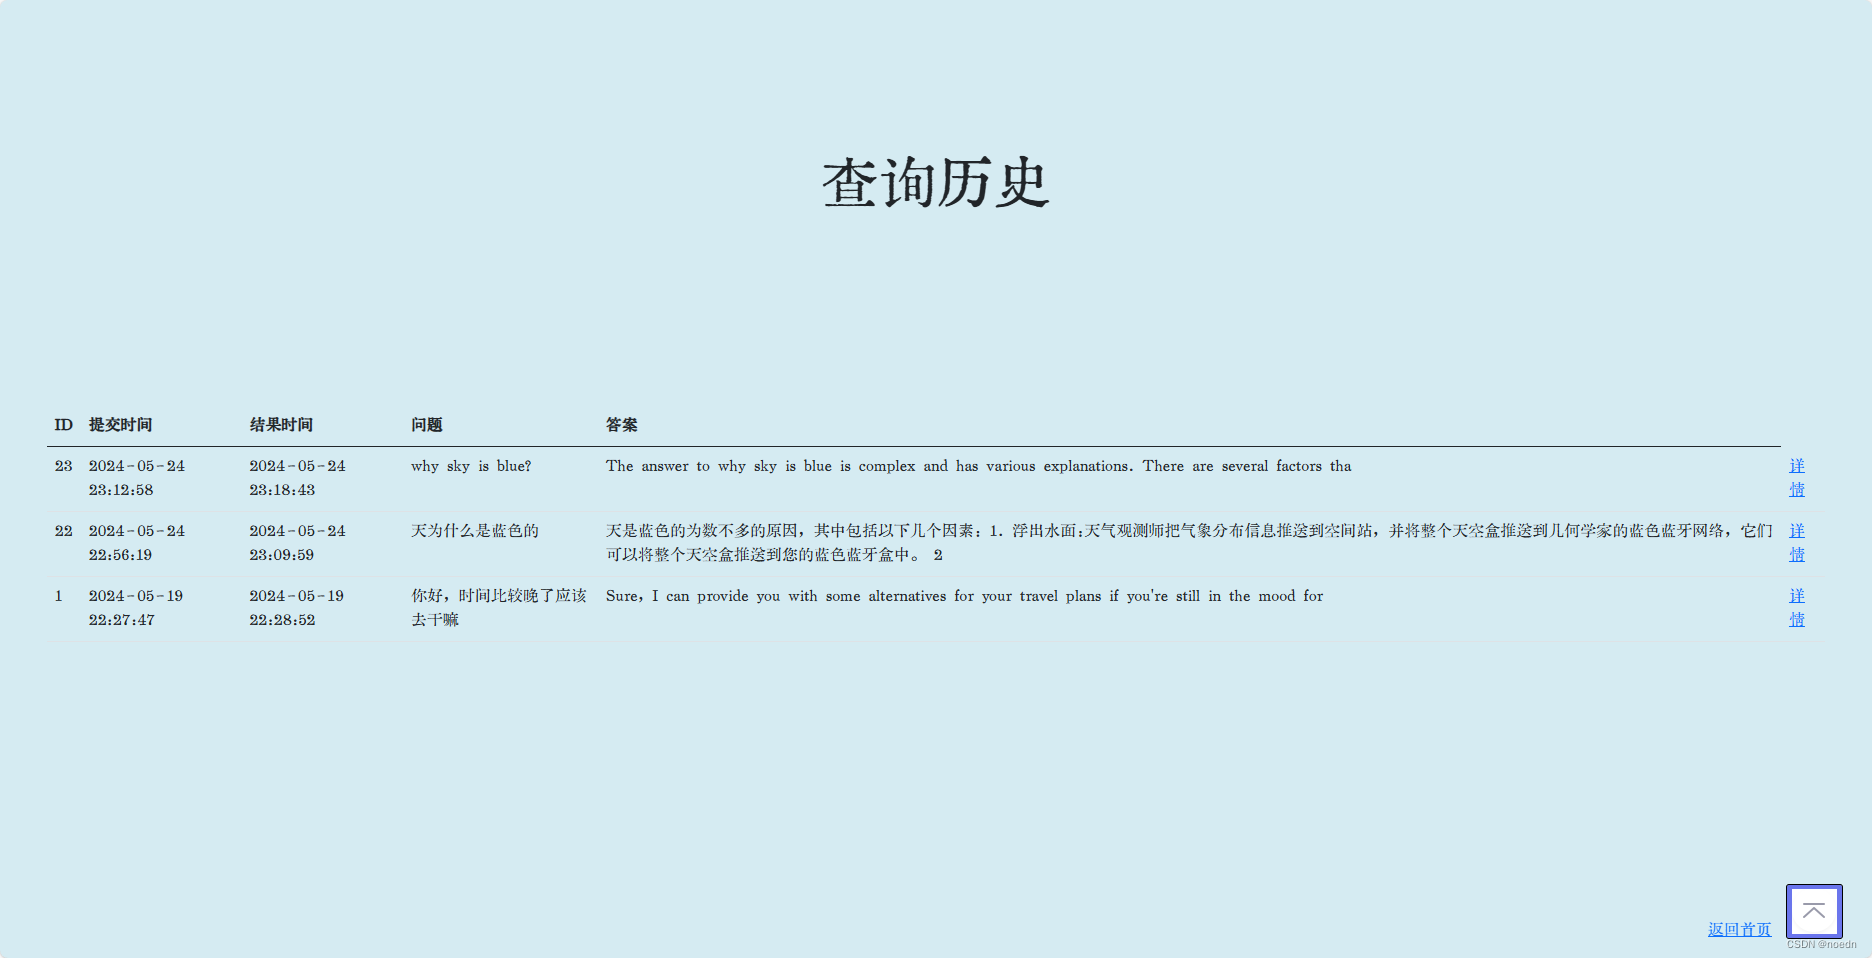
3、支持查看与机器人聊天的历史记录;
进阶(未实现):
4、经过测试,发现问答是纯英语时的问答比较正常。如果是中文提问,机器人可能会胡言乱语。因此,需要增加翻译模块,将问题转为英语,并将回答转为中文;
5、使用完整的部署框架,比如nginx+uWSGI+flask等方式将此机器人部署到云服务器中。
环境
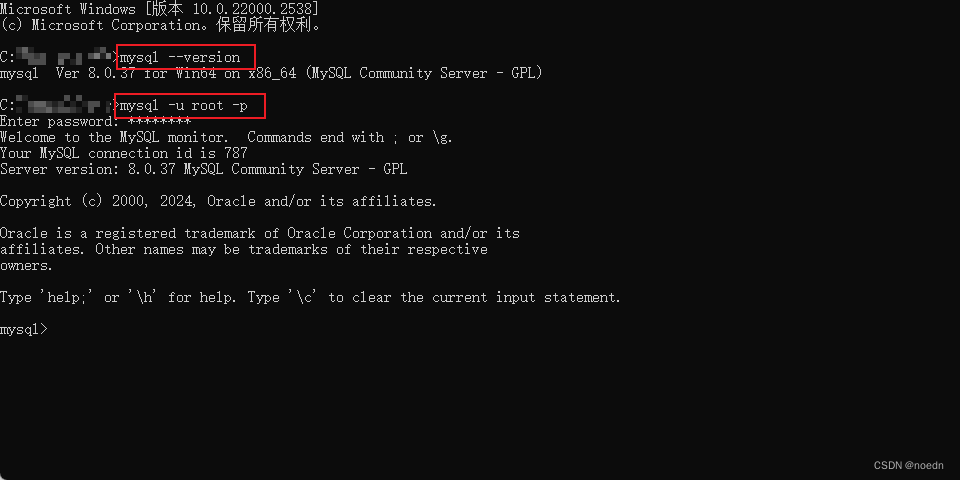
mysql 8.0.37
python 3.11.2
poetry 1.7.1
Flask 3.0.3
torch 2.3.0
transformers 4.41.0
accelerate 0.30.1
mysql-connector-python 8.4.0
在运行整个项目前还需要保证mysql数据库已经安装完毕,并且root用户的密码为abc12345,否则需要修改代码当中的访问用户名与用户名密码。
实现过程
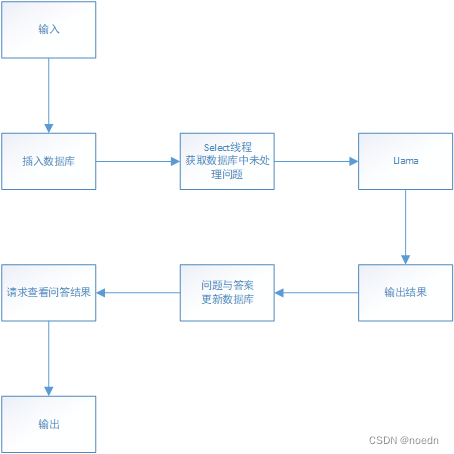
为了完成预定好的功能,首先本地完成MySQL数据库在本地的实现。创建的数据库包含的列包含主键id、问题插入数据库时间、结果插入数据库时间、问题、结果和问题是否处理的标记位。
    CREATE TABLE IF NOT EXISTS process_bot(
        id BIGINT AUTO_INCREMENT PRIMARY KEY,	# 主键
        get_data_time DATETIME NOT NULL,		# 问题插入数据库时间
        result_time DATETIME NULL,				# 结果插入数据库时间
        process_data TEXT NULL,					# 问题
        process_data_sha256 CHAR(64) NULL,		# 问题的sha256值,用于查询
        result_data TEXT NULL,					# 结果
        processed_flag TINYINT(1) DEFAULT 0 NOT NULL	# 问题是否已经处理的标记位
    )
在测试数据库实现中,防止作为主键的id的值用尽,使用BIGINT数据类型,基本不用担心id用尽。同时,为了解决问题插入数据库时,问题字符串当中存在的换行导致的数据库语法错误。将所有字符串使用base64编码,并在从数据库中取出时使用base64解码,解决由于换行等字符导致的插入数据库时的语法报错问题。
所有源代码
一、项目代码目录结构:
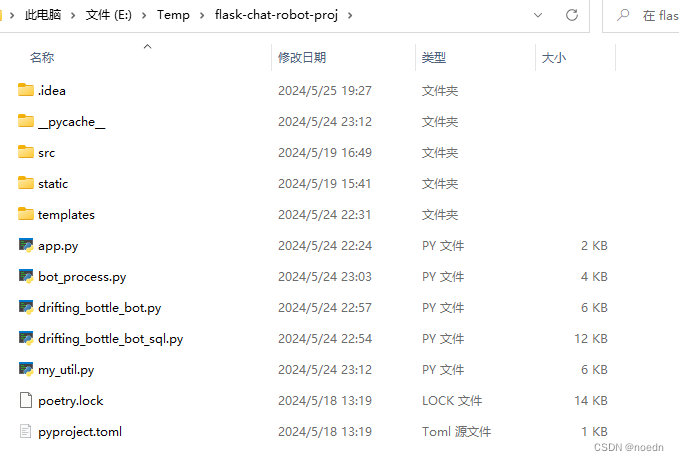
目录文件夹和文件作用说明:
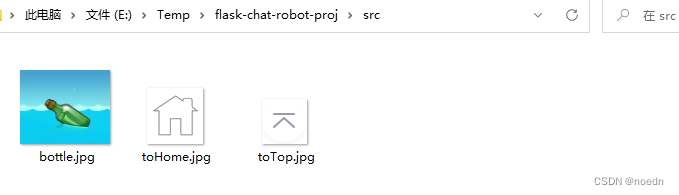
1、src文件夹:web页面图片资源;
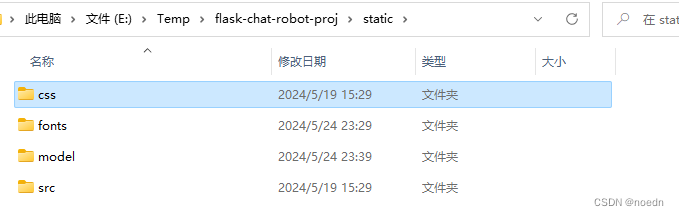
2、static文件夹:css文件夹是boostrap框架的静态文件,用于控制web页面的样式;fonts文件夹是字体文件夹;model文件夹是聊天机器人的模型参数文件夹,模型来源【 https://gitee.com/link?target=https%3A%2F%2Fhf-mirror.com%2FTinyLlama%2FTinyLlama-1.1B-Chat-v1.0 】;src文件夹其他(不需要)。
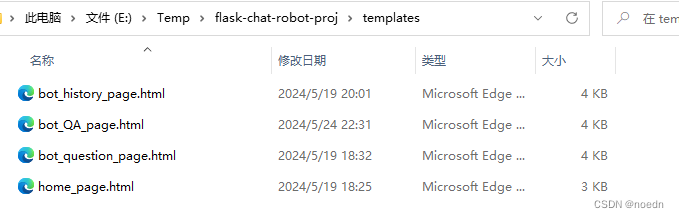
3、templates文件夹是web页面的html文件保存目录;
4、app.py文件是flask程序的入口函数文件;
5、bot_process.py文件是机器人web页面响应实现;
6、drifting_bottle_bot.py文件是机器人处理问题实现;
7、drifting_bottle_bot_sql.py文件是数据库处理实现;
8、mu_util.py文件是本人收集实现的一些工具函数文件。
二、src文件夹
三、templates文件夹
bot_history_page.html
<!DOCTYPE html>
<html lang="zh-CN">
<head>
    <meta charset="UTF-8">
    <title>历史结果</title>
    <link rel="stylesheet" href="/static/css/bootstrap.css">
  <style>
    /*static 文件夹是默认用于存放静态文件的,比如 CSS、JavaScript、图片和字体文件等。
    Flask 会自动为 static 文件夹下的所有文件提供静态文件的路由,使得这些文件可以被直接访问,
    而不需要你为每个文件单独编写路由。*/
    @font-face {
        font-family: 'KingHwa'; /* 自定义字体名称 */
        /*此处将字体文件加入到static文件夹当中,就省去了编写路由的工作,ttf文件对应路由格式truetype*/
        src: url('../static/fonts/KingHwa_OldSong.ttf') format('truetype');/* 字体文件路径和格式 */
        font-weight: normal;
        font-style: normal;
    }
    body {
      background-color: rgba(173, 216, 230, 0.5); /*设置页面背景颜色*/
      font-family: "KingHwa", sans-serif; /*设置字体*/
    }
    .center-image {
      /*position: fixed;*/
      display: block;
      margin-top: 4%;
      margin-left: 40%;
      margin-right: 40%;
      border-radius: 4%; /* 设置圆角大小 */
      width: 20%; /* 你可以根据需要调整宽度 */
    }
    .center-bnt {
      /*position: fixed;*/
      display: block;
      {#margin-top: 10%;#}
      margin-top: 5%;
      margin-left: 45%;
      margin-right: 45%;
      width: 10%; /* 你可以根据需要调整宽度 */
    }
    .rounded-font {
      display: block;
      margin-top: 8%;
      border-radius: 2%; /* 设置圆角大小 */
      font-size: 360%; /* 设置字体大小 */
      text-align: center; /* 将文本居中 */
    }
    #backToTop {
      position: fixed;
      bottom: 20px;
      right: 30px;
      z-index: 99;
      border: none;
      outline: 1px solid black;/*设置轮廓*/
      background-color: rgba(0, 0, 230, 0.5);
      color: white;
      cursor: pointer;
      padding: 4px 5px;
      border-radius: 2px;/*设置圆角*/
    }
    .default-img {
      /*position: fixed;*/
      display: block;
      {#margin-top: 10%;#}
      {#margin-top: 5%;#}
      margin-left: 30%;
      margin-right: 30%;
      width: 20%; /* 你可以根据需要调整宽度 */
      border-radius: 2%;/*设置圆角*/
    }
    .back-home {
        position: fixed;
        bottom: 15px; /* 初始时,将元素移出视口 */
        right: 100px;
        /* 其他样式 */
    }
  </style>
</head>
<h1 class="rounded-font">查询历史</h1>
<body>
<table class="table" style="width: 95%;margin:10% auto;">
  <thead>
    <tr>
      <th scope="col">ID</th>
      <th scope="col">提交时间</th>
      <th scope="col">结果时间</th>
      <th scope="col">问题</th>
      <th scope="col">答案</th>
    </tr>
  </thead>
  <tbody>
  {% for bot in data %}
    <tr>
      <td>{{ bot.id }}</td>
      <td>{{ bot.atime }}</td>
      <td>{{ bot.qtime }}</td>
      <td>{{ bot.question }}</td>
      <td>{{ bot.answer }}</td>
        <td><a href="/botQA?id={{ bot.id }}">详情</a></td>
    </tr>
  {% endfor %}
  </tbody>
</table>
    <a href="{{ url_for('bot_process.bot_submit')}}" class="back-home">返回首页</a>
  <button onclick="topFunction()" id="backToTop" title="回到顶部">
    <img src="{{ url_for('send_image', path='src/toTop.jpg') }}" alt="返回顶部">
  </button>
  <script>
    function topFunction() {
      window.scrollTo(0, 0);
    }
  </script>
</body>
</html>
bot_QA_page.html
<!DOCTYPE html>
<html lang="zh-CN">
<head>
    <meta charset="UTF-8">
    <title>问答结果</title>
    <link rel="stylesheet" href="/static/css/bootstrap.css">
  <style>
    /*static 文件夹是默认用于存放静态文件的,比如 CSS、JavaScript、图片和字体文件等。
    Flask 会自动为 static 文件夹下的所有文件提供静态文件的路由,使得这些文件可以被直接访问,
    而不需要你为每个文件单独编写路由。*/
    @font-face {
        font-family: 'KingHwa'; /* 自定义字体名称 */
        /*此处将字体文件加入到static文件夹当中,就省去了编写路由的工作,ttf文件对应路由格式truetype*/
        src: url('../static/fonts/KingHwa_OldSong.ttf') format('truetype');/* 字体文件路径和格式 */
        font-weight: normal;
        font-style: normal;
    }
    body {
      background-color: rgba(173, 216, 230, 0.5); /*设置页面背景颜色*/
      font-family: "KingHwa", sans-serif; /*设置字体*/
    }
    .center-image {
      /*position: fixed;*/
      display: block;
      margin-top: 4%;
      margin-left: 40%;
      margin-right: 40%;
      border-radius: 4%; /* 设置圆角大小 */
      width: 20%; /* 你可以根据需要调整宽度 */
    }
    .center-bnt {
      /*position: fixed;*/
      display: block;
      {#margin-top: 10%;#}
      margin-top: 5%;
      margin-left: 45%;
      margin-right: 45%;
      width: 10%; /* 你可以根据需要调整宽度 */
    }
    .rounded-font {
      display: block;
      margin-top: 8%;
      border-radius: 2%; /* 设置圆角大小 */
      font-size: 360%; /* 设置字体大小 */
      text-align: center; /* 将文本居中 */
    }
    #backToTop {
      position: fixed;
      bottom: 20px;
      right: 30px;
      z-index: 99;
      border: none;
      outline: 1px solid black;/*设置轮廓*/
      background-color: rgba(0, 0, 230, 0.5);
      color: white;
      cursor: pointer;
      padding: 4px 5px;
      border-radius: 2px;/*设置圆角*/
    }
    .default-img {
      /*position: fixed;*/
      display: block;
      {#margin-top: 10%;#}
      {#margin-top: 5%;#}
      margin-left: 30%;
      margin-right: 30%;
      width: 20%; /* 你可以根据需要调整宽度 */
      border-radius: 2%;/*设置圆角*/
    }
    .back-home {
        position: fixed;
        bottom: 15px; /* 初始时,将元素移出视口 */
        right: 100px;
        /* 其他样式 */
    }
    .bottom_left {
        position: fixed;
        bottom: 15px; /* 初始时,将元素移出视口 */
        left: 100px;
        /* 其他样式 */
    }
  </style>
</head>
<h1 class="rounded-font">问答结果</h1>
<body>
    <form action="/procs" method="post" enctype = "multipart/form-data">
      <div class="row">
        <div class="mb-3">
          <label for="inputQuestion" class="form-label">问题:</label>
          <textarea class="form-control" id="inputQuestion" rows="10" readonly>{{ data.question }}</textarea>
        </div>
        <div class="mb-3">
          <label for="inputQuestion" class="form-label">答案:</label>
          <textarea class="form-control" id="inputQuestion" rows="10" readonly>{{ data.answer }}</textarea>
        </div>
      </div>
    </form>
    <br/>
    <br/>
    <br/>
    <br/>
    <a href="{{ url_for('bot_process.bot_history')}}" class="bottom_left">历史数据</a>
    <a href="{{ url_for('bot_process.bot_submit')}}" class="back-home">返回首页</a>
{#  <button onclick="topFunction()" id="backToTop" title="回到顶部">#}
{#    <img src="{{ url_for('send_image', path='src/toTop.jpg') }}" alt="返回顶部">#}
{#  </button>#}
  <script>
    function topFunction() {
      window.scrollTo(0, 0);
    }
  </script>
</body>
</html>
bot_question_page.html
<!DOCTYPE html>
<html lang="zh-CN">
<head>
    <meta charset="UTF-8">
    <title>提交问题</title>
    <link rel="stylesheet" href="/static/css/bootstrap.css">
  <style>
    /*static 文件夹是默认用于存放静态文件的,比如 CSS、JavaScript、图片和字体文件等。
    Flask 会自动为 static 文件夹下的所有文件提供静态文件的路由,使得这些文件可以被直接访问,
    而不需要你为每个文件单独编写路由。*/
    @font-face {
        font-family: 'KingHwa'; /* 自定义字体名称 */
        /*此处将字体文件加入到static文件夹当中,就省去了编写路由的工作,ttf文件对应路由格式truetype*/
        src: url('../static/fonts/KingHwa_OldSong.ttf') format('truetype');/* 字体文件路径和格式 */
        font-weight: normal;
        font-style: normal;
    }
    body {
      background-color: rgba(173, 216, 230, 0.5); /*设置页面背景颜色*/
      font-family: "KingHwa", sans-serif; /*设置字体*/
    }
    .center-image {
      /*position: fixed;*/
      display: block;
      margin-top: 4%;
      margin-left: 40%;
      margin-right: 40%;
      border-radius: 4%; /* 设置圆角大小 */
      width: 20%; /* 你可以根据需要调整宽度 */
    }
    .center-bnt {
      /*position: fixed;*/
      display: block;
      {#margin-top: 10%;#}
      margin-top: 5%;
      margin-left: 45%;
      margin-right: 45%;
      width: 10%; /* 你可以根据需要调整宽度 */
    }
    .rounded-font {
      display: block;
      margin-top: 8%;
      border-radius: 2%; /* 设置圆角大小 */
      font-size: 360%; /* 设置字体大小 */
      text-align: center; /* 将文本居中 */
    }
    #backToTop {
      position: fixed;
      bottom: 20px;
      right: 30px;
      z-index: 99;
      border: none;
      outline: 1px solid black;/*设置轮廓*/
      background-color: rgba(0, 0, 230, 0.5);
      color: white;
      cursor: pointer;
      padding: 4px 5px;
      border-radius: 2px;/*设置圆角*/
    }
    .default-img {
      /*position: fixed;*/
      display: block;
      {#margin-top: 10%;#}
      {#margin-top: 5%;#}
      margin-left: 30%;
      margin-right: 30%;
      width: 20%; /* 你可以根据需要调整宽度 */
      border-radius: 2%;/*设置圆角*/
    }
    .back-home {
        position: fixed;
        bottom: 15px; /* 初始时,将元素移出视口 */
        right: 100px;
        /* 其他样式 */
    }
    .bottom_left {
        position: fixed;
        bottom: 15px; /* 初始时,将元素移出视口 */
        left: 100px;
        /* 其他样式 */
    }
  </style>
</head>
<h1 class="rounded-font">提交问题</h1>
<body>
    <div class="container">
    <form action="/procs" method="post" enctype = "multipart/form-data">
      <div class="row">
        <div class="mb-3">
          <label for="inputQuestion" class="form-label">问题:{{ status }}</label>
          <textarea class="form-control" id="inputQuestion" rows="20" placeholder="输入" name="questionTxt"></textarea>
        </div>
        <div style="display: grid; justify-content: end;">
            <button type="submit" class="btn btn-primary">提交</button>
        </div>
      </div>
    </form>
    <a href="{{ url_for('bot_process.bot_history')}}" class="bottom_left">历史数据</a>
    </div>
    <a href="{{ url_for('welcome')}}" class="back-home">退出</a>
  </button>
  <script>
    function topFunction() {
      window.scrollTo(0, 0);
    }
  </script>
</body>
</html>
home_page.html
<!DOCTYPE html>
<html lang="zh-CN">
<head>
    <meta charset="UTF-8">
    <title>开始页面</title>
    <link rel="stylesheet" href="/static/css/bootstrap.css">
  <style>
    /*static 文件夹是默认用于存放静态文件的,比如 CSS、JavaScript、图片和字体文件等。
    Flask 会自动为 static 文件夹下的所有文件提供静态文件的路由,使得这些文件可以被直接访问,
    而不需要你为每个文件单独编写路由。*/
    @font-face {
        font-family: 'KingHwa'; /* 自定义字体名称 */
        /*此处将字体文件加入到static文件夹当中,就省去了编写路由的工作,ttf文件对应路由格式truetype*/
        src: url('../static/fonts/KingHwa_OldSong.ttf') format('truetype');/* 字体文件路径和格式 */
        font-weight: normal;
        font-style: normal;
    }
    body {
      background-color: rgba(173, 216, 230, 0.5); /*设置页面背景颜色*/
      font-family: "KingHwa", sans-serif; /*设置字体*/
    }
    .center-image {
      /*position: fixed;*/
      display: block;
      margin-top: 4%;
      margin-left: 40%;
      margin-right: 40%;
      border-radius: 4%; /* 设置圆角大小 */
      width: 20%; /* 你可以根据需要调整宽度 */
    }
    .center-bnt {
      /*position: fixed;*/
      display: block;
      {#margin-top: 10%;#}
      margin-top: 5%;
      margin-left: 45%;
      margin-right: 45%;
      width: 10%; /* 你可以根据需要调整宽度 */
    }
    .rounded-font {
      display: block;
      margin-top: 8%;
      border-radius: 2%; /* 设置圆角大小 */
      font-size: 360%; /* 设置字体大小 */
      text-align: center; /* 将文本居中 */
    }
    #backToTop {
      position: fixed;
      bottom: 20px;
      right: 30px;
      z-index: 99;
      border: none;
      outline: 1px solid black;/*设置轮廓*/
      background-color: rgba(0, 0, 230, 0.5);
      color: white;
      cursor: pointer;
      padding: 4px 5px;
      border-radius: 2px;/*设置圆角*/
    }
  </style>
</head>
<h1 class="rounded-font">漂流瓶机器人</h1>
<img src="{{ url_for('send_image', path='src/bottle.jpg') }}" alt="标题图片" class="center-image">
<body>
    <form style="width:100%;margin:2% auto;" method="post">
      <button type="submit"  class="btn btn-primary center-bnt" style="font-size: 150%">进入聊天</button>
    </form>
  </button>
  <script>
    function topFunction() {
      window.scrollTo(0, 0);
    }
  </script>
</body>
</html>
四、各个python实现文件
app.py
from flask import Flask, render_template, request, redirect, send_file
import requests
import os
import bot_process
from drifting_bottle_bot import bot_init, bot_quit
from drifting_bottle_bot_sql import bot_sql_init, bot_sql_quit
import signal
import sys

app = Flask(__name__)  # 创建app对象

# 设置配置
SOURCE_FOLDER = os.path.join(app.root_path, 'static', 'src')    # 图片资源
app.config['SOURCE_FOLDER'] = SOURCE_FOLDER
BOT_MODEL_FOLDER = os.path.join(app.root_path, 'static', 'model')   # 漂流瓶机器人模型
app.config['BOT_MODEL_FOLDER'] = BOT_MODEL_FOLDER
# 注册路由和其他配置
app.register_blueprint(bot_process.blueprint)  # 图片识别蓝图注册

# 初始化后端
bot_sql_init()
bot_init()

@app.route('/src/<path:path>')#网页的所有文件都是来自服务器
def send_image(path):
    return send_file(path, mimetype='image/jpeg')

@app.route('/')#访问的路径
def hello_world():
    return redirect('/welcome')#根路径开始,跳转登陆
    return 'Hello system!'

@app.route('/welcome', methods=['GET', 'POST'])#访问的路径
def welcome():
    if request.method == 'POST':
        return redirect('/procs')#未实现返回功能选项首页
    return render_template('home_page.html')


# 释放资源清理函数
def cleanup():
    # 释放资源
    print("退出,释放资源...")
    bot_quit()
    bot_sql_quit()
    print("成功退出!")
    pass

# 注册信号处理函数
def signal_handler(sig, frame):
    print(f'收到信号: {sig}, 关闭 Flask 应用')
    cleanup()  # 释放资源清理函数
    sys.exit(0)  # 退出程序

# 设置信号处理函数
signal.signal(signal.SIGINT, signal_handler)  # SIGINT 对应 Ctrl+C
signal.signal(signal.SIGTERM, signal_handler)  # SIGTERM 通常用于优雅地关闭程序

if __name__ == '__main__':
    app.run(debug=False)     # 阻塞
bot_process.py
from flask import request, url_for, render_template, redirect, Blueprint, current_app
from datetime import datetime
from drifting_bottle_bot import data_to_bot
from drifting_bottle_bot_sql import select_table_opt
from my_util import Logger, decode_base64

# initialize our Flask application and the lpr object
blueprint = Blueprint('bot_process', __name__)

lprObject = None
loger = Logger()
default_pic_name = "defaultPlate.jpg"

MAX_SHOW_LEN = 50    # 历史页面展示的列最大长度

@blueprint.route('/procs', methods=['GET', 'POST'])  # 访问的路径
def bot_submit():
    status = '未提交'
    if request.method == 'POST':
        # 获取textarea提交的文本
        question = request.form.get("questionTxt")
        if question:
            loger.info("get question " + question)
            data_to_bot(question)
            status = '已提交'
        else:
            loger.warning("none")

    return render_template('bot_question_page.html', status=status)


@blueprint.route('/history', methods=['GET', 'POST'])  # 访问的路径
def bot_history():
    result = select_table_opt(datetime.now(), 9999)
    data = []
    for row in result:
        if row[2] is not None and row[5] is not None:
            res_exchange = {'id': int(row[0]), 'atime': row[1], 'qtime': row[2],
                            'question': decode_base64(row[3])[:MAX_SHOW_LEN], 'answer': decode_base64(row[5])[:2*MAX_SHOW_LEN]}
        elif row[2] is not None:
            res_exchange = {'id': int(row[0]), 'atime': row[1], 'qtime': row[2],
                            'question': decode_base64(row[3])[:MAX_SHOW_LEN], 'answer': '未处理'}
        else:
            res_exchange = {'id': int(row[0]), 'atime': row[1], 'qtime': '未处理',
                            'question': decode_base64(row[3])[:MAX_SHOW_LEN], 'answer': '未处理'}
        loger.debug(res_exchange)
        data.append(res_exchange)

    return render_template('bot_history_page.html', data=data)


@blueprint.route('/botQA', methods=['GET', 'POST'])  # 访问的路径
def bot_QA():
    id = request.args.get('id')
    loger.debug(f"get id is {id}")
    data1 = []
    data = select_table_opt(datetime.now(), 9999)
    for res in data:
        if res[0] == int(id):
            data1 = res
            loger.debug(f"bot Q/A :{data1}")
            break

    if data1[2] is not None and data1[5] is not None:
        res_exchange = {'id': int(data1[0]), 'atime': data1[1], 'qtime': data1[2],
                        'question': decode_base64(data1[3]), 'answer': decode_base64(data1[5])}
    elif data1[2] is not None:
        res_exchange = {'id': int(data1[0]), 'atime': data1[1], 'qtime': data1[2],
                        'question': decode_base64(data1[3]), 'answer': '未处理'}
    else:
        res_exchange = {'id': int(data1[0]), 'atime': data1[1], 'qtime': '未处理',
                        'question': decode_base64(data1[3]), 'answer': '未处理'}

    loger.info(f"res_exchange is {res_exchange}")
    return render_template('bot_QA_page.html', data=res_exchange)
drifting_bottle_bot.py
'''
https://hf-mirror.com/TinyLlama/TinyLlama-1.1B-Chat-v1.0
测试tinyLlama 1.1B效果不错,比Qwen1.8B经过量化的都好很多
'''

# Install transformers from source - only needed for versions <= v4.34
# pip install git+https://github.com/huggingface/transformers.git
# pip install accelerate

import os
from datetime import datetime
import queue
import time
import threading
import torch
from my_util import Logger, end_sentence, decode_base64

os.environ['TF_ENABLE_ONEDNN_OPTS'] = '0'
from transformers import pipeline
from drifting_bottle_bot_sql import insert_table_opt, update_table_opt, select_table_opt

MAX_QUEUE_SIZE = 10    # 问题消息队列当中最大问题数量
MAX_ANSWER_LEN = 1024    # 机器人回答问题的最大长度

loger = Logger()

def get_substring_after_split(main_string, delimiter):
    parts = main_string.split(delimiter)
    if len(parts) > 1:  # 确保有多个部分
        return parts[1].lstrip('\n')  # 返回第一个分隔符后面的部分
    else:
        return None

def load_pipeline():
    Q_pipe = pipeline("text-generation", model=os.path.join(os.getcwd(),
                    "static", "model",
                    "TinyLlama", "TinyLlama-1.1B-Chat-v1.0"),
                    torch_dtype=torch.bfloat16,
                    device_map="auto")
    return Q_pipe

def generate_text(content, max_len=MAX_ANSWER_LEN):
    """
    根据给定的prompt生成文本
    """
    messages = [
        {
            "role": "提示",
            "content": "这是个友好的聊天机器人...",
        },
        {"role": "user", "content": content},
    ]
    # insert_table_opt(content)
    prompt = Q_pipe.tokenizer.apply_chat_template(messages, tokenize=False, add_generation_prompt=True)
    datetime1 = datetime.now()
    outputs = Q_pipe(prompt, max_new_tokens=max_len, do_sample=True, temperature=0.7, top_k=50, top_p=0.95)
    datetime2 = datetime.now()
    time12_interval = datetime2 - datetime1
    loger.info(f"耗时 {time12_interval}s")

    '''
    结论:修改top_p不会显著降低推理时间,并且中英文相同的问题,中文问题推理时间是英文的两倍
    do_sample修改成False基本不会降低推理时间
    只有max_new_tokens才能显著降低推理时间,但是max_new_tokens与推理时间不是呈线性关系
    比如max_new_tokens=256,推理时间2分钟
    当max_new_tokens=32的时候,推理时间才会变成约1分钟
    因此,不如将max_new_tokens设置大些用于获取比较完整的答案
    '''

    return outputs

# 消费者
def loop_process_bot():
    while True:
        get_from_db = select_table_opt(datetime.now(), 1, 0)
        if not get_from_db:
            time.sleep(1)   # 如果没有数据则挂起一会
            continue
        question = decode_base64(get_from_db[0][3])
        loger.info(f'[Consuming]: {question}')
        loger.info(f"Reading process questions: {question}")
        try:
            gen_text = generate_text(question)
            res = gen_text[0]["generated_text"]
            answer = get_substring_after_split(res, "<|assistant|>")
            if len(answer):
                loger.debug(f"Answer: {answer}")
            else:
                answer = "I don't know"
                loger.error(f"No answer: {answer}")
            update_table_opt(question, answer)
            res = end_sentence(res, len(res))
            loger.debug(f"生成的文本:{res}")
        except Exception as e:
            loger.error(f"Exception error: {e}")

# 生产者
def question_to_bot(question):
    loger.info(f'[Producing]: {question}')
    bot_queue.put(question)  # 将消息放入队列

# 消费者
def question_to_db():
    while True:
        question = bot_queue.get()  # 从队列中获取消息
        if question is None:  # 假设None是停止信号
            time.sleep(1/1000)
            continue
        else:
            loger.debug(f"get question from queue: {question}")
            insert_table_opt(question)
            bot_queue.task_done()  # 告诉队列该任务已完成

def bot_init():
    '''
    初始化机器人
    :return:
    '''
    global Q_pipe
    Q_pipe = load_pipeline()

    loger.info('load pipe ok')

    # 创建一个消息队列
    global bot_queue
    bot_queue = queue.Queue()

    loger.info('create bot queue ok')

    # 创建消息队列守护线程,使用消息队列控制插入数据库的速度(可以不使用)
    global daemon_db_thread
    daemon_db_thread = threading.Thread(target=question_to_db)
    daemon_db_thread.daemon = True  # 设置为守护线程
    daemon_db_thread.start()  # 启动线程

    # 创建聊天机器人守护线程
    global daemon_thread
    daemon_thread = threading.Thread(target=loop_process_bot)
    daemon_thread.daemon = True  # 设置为守护线程
    daemon_thread.start()  # 启动线程

def data_to_bot(question):
    '''
    传数据给聊天机器人
    :param question: 问题
    :return:
    '''
    if len(question) == 0:
        return
    elif bot_queue.qsize() >= MAX_QUEUE_SIZE:
        loger.warning(f"having {MAX_QUEUE_SIZE} questions in queue, waiting ...")
        return
    else:
        loger.info(f"get quesiont {question}")

    try:
        question_to_bot(question)
    except Exception as e:
        loger.error("发生错误:", e)

def bot_quit():
    '''
    退出聊天机器人
    :return:
    '''
    # 等待消费者线程完成所有任务
    loger.info("ready to quit bot ...")
    bot_queue.join()  # 等待队列中所有任务完成
    loger.info("queue join ok!")
    daemon_thread.join()
    loger.info("quit bot ok!")
    daemon_db_thread.join()
    loger.info("quit queue ok!")
drifting_bottle_bot_sql.py
'''
测试mysql数据库,用于后续使用数据库
'''
import mysql.connector
from mysql.connector import Error
from datetime import datetime
import hashlib
from my_util import Logger, encode_base64


loger = Logger()

mysql_server_ip = 'localhost'
username = 'root'
password = 'abc12345'
database_name = 'test_mysql'
datatable_name = 'process_bot'  # 测试漂流瓶机器人数据表

def string_to_sha256(input_string):
    # 创建一个新的sha256 hash对象
    sha_signature = hashlib.sha256()
    # 更新你要哈希的数据(字符串需要被编码为字节)
    sha_signature.update(input_string.encode('utf-8'))
    # 获取哈希值的十六进制表示
    hex_dig = sha_signature.hexdigest()
    return hex_dig

def get_database_connection(host, user, password, database):
    '''
    连接到数据库
    :param host: 数据库服务ip地址
    :param user: 用户名(须知mysql数据库服务默认root)
    :param password: 用户密码
    :param database: 数据库名称
    :return: 数据库连接对象
    '''

    connection = None

    try:
        # 连接到MySQL数据库
        connection = mysql.connector.connect(
            host=host,
            user=user,
            password=password,
            database=database
        )

    except mysql.connector.Error as err:
        loger.error(f"Failed to create table: {err}")

    finally:
        return connection


def create_database(host, user, password, database):
    '''
    创建数据库
    :param host: 数据库服务ip地址
    :param user: 用户名(须知mysql数据库服务默认root)
    :param password: 用户密码
    :param database: 数据库名称
    :return: None
    '''
    try:
        # 连接到MySQL服务器
        connection = mysql.connector.connect(
            host=host,
            user=user,
            password=password
        )

        if connection.is_connected():
            # 创建一个游标对象
            cursor = connection.cursor()
            # 检查数据库是否存在
            cursor.execute("SHOW DATABASES LIKE %s", (database,))
            if cursor.rowcount < 1:
                while cursor.nextset():     # 处理所有结果集,否则会cursor.close游标会报错
                    loger.debug(cursor.fetchall())
                # 创建数据库
                sql_query = f"CREATE DATABASE {database}"
                cursor.execute(sql_query)
                loger.info(f"Database {database} created successfully")
            else:
                loger.warning(f"Database {database} already exists")

    except Error as e:
        loger.warning(f"Error while connecting to MySQL {e}")

    finally:
        # 关闭连接
        if cursor:
            while cursor.nextset():     # 处理所有结果集,否则会cursor.close游标会报错
                loger.debug(cursor.fetchall())
            cursor.close()
        if connection.is_connected():
            connection.close()

    return

def create_datatable(host, user, password, database, create_table_query):
    '''
    创建数据表
    :param host: 数据库服务ip地址
    :param user: 用户名(须知mysql数据库服务默认root)
    :param password: 用户密码
    :param database: 数据库名称
    :return: None
    '''

    try:
        # 连接到MySQL数据库
        connection = get_database_connection(
            host=host,
            user=user,
            password=password,
            database=database
        )

        if connection is not None:
            # 创建一个游标对象
            cursor = connection.cursor()

            # 执行SQL语句
            cursor.execute(create_table_query)
            loger.debug("Table created successfully")
        else:
            loger.info("Failed to get connection")

    except mysql.connector.Error as err:
        loger.warning(f"Failed to create table: {err}")

    finally:
        # 关闭连接
        if cursor:
            cursor.close()
        if connection.is_connected():
            connection.close()

    return


def insert_table_opt(text_data, table_name=datatable_name):
    '''
    插入数据表
    :param table_name: 表名
    :param text_data: 待处理数据文本
    :return:
    '''
    # 插入数据表
    insert_table_format = """
    INSERT INTO {} (get_data_time, process_data, process_data_sha256, processed_flag)
    VALUES (NOW(), '{}', '{}', 0)
    """
    insert_query = insert_table_format.format(table_name, encode_base64(text_data), string_to_sha256(text_data))

    loger.debug(f"insert query: {insert_query}")

    try:
        # 创建一个游标对象
        cursor = bot_connection.cursor()
        # 执行SQL语句
        cursor.execute(insert_query)
        # 事务提交,否则数据表当中可能没有变化
        bot_connection.commit()

    except mysql.connector.Error as err:
        loger.error(f"Failed to create table: {err}")

    finally:
        # 关闭游标
        if cursor:
            cursor.close()

    return

def select_table_opt(select_time, max_rows, processed_flag=-1, table_name=datatable_name):
    '''
    插入数据表
    :param table_name: 表名
    :param select_time: 查询时间
    :processed_flag: 是否经过分析,如果是-1则不区分(默认-1)
    :param max_rows: 最大查询返回行数
    :return:
    '''
    if processed_flag == -1:
        # 插入数据表
        insert_table_format = """
        SELECT * FROM {}
        WHERE get_data_time <= '{}'
        ORDER BY id desc
        LIMIT {}
        """
        select_query = insert_table_format.format(table_name, select_time, max_rows)
    elif processed_flag == 1 or processed_flag == 0:
        # 插入数据表
        insert_table_format = """
        SELECT * FROM {}
        WHERE get_data_time <= '{}' AND processed_flag = {}
        ORDER BY id desc
        LIMIT {}
        """
        select_query = insert_table_format.format(table_name, select_time, processed_flag, max_rows)
    else:
        loger.error(f"not support processed flag {processed_flag}")
        return []


    loger.debug(f"select query: {select_query}")

    result = []

    try:
        # 创建一个游标对象
        cursor = bot_connection.cursor()
        # 执行SQL语句
        cursor.execute(select_query)
        if cursor:
            result = cursor.fetchall()    # 处理所有结果集,否则会cursor.close游标会报错
            for res in result:
                loger.debug(res)

    except mysql.connector.Error as err:
        loger.error(f"Failed to select table: {err}")

    finally:
        # 关闭游标
        if cursor:
            while cursor.nextset():     # 处理所有结果集,否则会cursor.close游标会报错
                loger.debug(cursor.fetchall())
            cursor.close()

    return result

def update_table_opt(question, answer, table_name=datatable_name):
    '''
    更新数据表
    :param table_name: 表名
    :param question: 问题
    :param answer: 答案
    :return:
    '''
    # 更新数据表
    update_table_format = """
    UPDATE {} AS t1
    JOIN(
        SELECT MIN(id) AS min_id
        FROM {}
        WHERE process_data_sha256 = '{}' AND processed_flag = 0
    ) AS t2 ON t1.id = t2.min_id
    SET t1.result_data = '{}' , t1.processed_flag = 1, t1.result_time = NOW()
    """
    print(f"answer {answer}")
    update_query = update_table_format.format(table_name, table_name, string_to_sha256(question), encode_base64(answer))

    loger.debug(f"update query: {update_query}")

    try:
        # 创建一个游标对象
        cursor = bot_connection.cursor()
        # 执行SQL语句
        cursor.execute(update_query)
        # 事务提交,否则数据表当中可能没有变化
        bot_connection.commit()

    except mysql.connector.Error as err:
        loger.error(f"Failed to update table: {err}")

    finally:
        # 关闭游标
        if cursor:
            cursor.close()

    return

def delete_table_opt(table_name, max_size):
    '''
    删除表记录
    :param table_name: 表名
    :param max_size: 表中最大记录条数
    :return:
    '''
    # 删除数据表记录
    delete_table_format = """
    DELETE p1 FROM {}
    p1 LEFT JOIN (
        SELECT id FROM {} ORDER BY id DESC LIMIT {}
    ) p2 ON p1.id = p2.id
    WHERE p2.id IS NULL;
    """
    delete_query = delete_table_format.format(table_name, table_name, max_size)

    loger.debug(f"delete query: {delete_query}")

    try:
        # 创建一个游标对象
        cursor = bot_connection.cursor()
        # 执行SQL语句
        cursor.execute(delete_query)
        # 事务提交,否则数据表当中可能没有变化
        bot_connection.commit()

    except mysql.connector.Error as err:
        loger.error(f"Failed to delete table: {err}")

    finally:
        # 关闭游标
        if cursor:
            cursor.close()

    return

def bot_sql_init():
    '''
    机器人数据库初始化
    :return:
    '''

    # 创建漂流瓶机器人表的SQL语句
    # 其中使用BIGINT作为主键类型,用于避免大量的数据插入后可能导致的id用尽
    # 还有其他方法避免主键冲突:1、使用uuid;2、使用类uuid,将时间转字符串并加入随机值,可以用于查询,减少键值设置。
    # 比如,时间转换的类uuid,20240518 203133 ---> 20240518203133123,其中生成的类uuid后加入了'123'作为随机值
    # get_data_time是数据记录插入数据库的时间,可以用于约等于获取待处理数据的时间
    # result_time是经过处理的数据结果,有的需要处理的数据基本没有延迟,此可以不用
    # process_data是待处理的文本数据,以json格式的数值字符串保存,可以保存多个需要处理的数据(暂时不实现多数据)
    # processed_flag是用于待处理数据与结果之间有较大延迟的情况下,数据按照单条处理输出,更新flag
    # 注意:process_data_sha256是process_data经过sha256计算得到hash码,用于查询匹配
    create_table_format = """
    CREATE TABLE IF NOT EXISTS {} (
        id BIGINT AUTO_INCREMENT PRIMARY KEY,
        get_data_time DATETIME NOT NULL,
        result_time DATETIME NULL,
        process_data TEXT NULL,
        process_data_sha256 CHAR(64) NULL,
        result_data TEXT NULL,
        processed_flag TINYINT(1) DEFAULT 0 NOT NULL
    )
    """

    create_table_query = create_table_format.format(datatable_name) #创建漂流瓶机器人数据表

    loger.debug(f"create table query {create_table_query}")

    # 创建数据库
    create_database(mysql_server_ip, username, password, database_name)
    # 创建数据表
    create_datatable(mysql_server_ip, username, password, database_name, create_table_query)
    # 连接数据库
    global bot_connection
    bot_connection = get_database_connection(mysql_server_ip, username, password, database_name)


def bot_sql_quit():
    '''
    退出数据库
    :return:
    '''
    loger.info("ready to quit bot mysql connector ...")
    if bot_connection.is_connected():
        bot_connection.close()
    loger.info("quit bot mysql connector ok!")
my_util.py
#进度条
import os
import sys
import time
import shutil
import logging
import time
from datetime import datetime

def print_progress_bar(iteration, total, prefix='', suffix='', decimals=1, length=100, fill='█', print_end="\r"):
    """
    调用在Python终端中打印自定义进度条的函数
    iteration - 当前迭代(Int)
    total - 总迭代(Int)
    prefix - 前缀字符串(Str)
    suffix - 后缀字符串(Str)
    decimals - 正数的小数位数(Int)
    length - 进度条的长度(Int)
    fill - 进度条填充字符(Str)
    print_end - 行尾字符(Str)
    """
    percent = ("{0:." + str(decimals) + "f}").format(100 * (iteration / float(total)))
    filled_length = int(length * iteration // total)
    bar = fill * filled_length + '-' * (length - filled_length)
    print(f'\r{prefix} |{bar}| {percent}% {suffix}', end=print_end)
    # 打印新行,完成进度条
    if iteration == total:
        print()

class Logger(object):
    """
    终端打印不同颜色的日志
    """
    ch = logging.StreamHandler()  # 创建日志处理器对象,在__init__外创建,是类当中的静态属性,不是__init__中的实例属性

    # #创建静态的日志处理器可以减少内存消耗

    # # 创建 FileHandler 实例,指定日志文件路径
    # ch = logging.FileHandler(filename='app1.log')

    def __init__(self):
        self.logger = logging.getLogger()  # 创建日志记录对象
        self.logger.setLevel(logging.INFO)  # 设置日志等级info,其他低于此等级的不打印

    def debug(self, message):
        self.fontColor('\033[0;37m%s\033[0m')
        self.logger.debug(message)

    def info(self, message):
        self.fontColor('\033[0;32m%s\033[0m')
        self.logger.info(message)

    def warning(self, message):
        self.fontColor('\033[0;33m%s\033[0m')
        self.logger.warning(message)

    def error(self, message):
        self.fontColor('\033[0;31m%s\033[0m')
        self.logger.error(message)

    def fontColor(self, color):
        formatter = logging.Formatter(color % '%(asctime)s - %(name)s - %(levelname)s - %(message)s')  # 控制日志输出颜色
        self.ch.setFormatter(formatter)
        self.logger.addHandler(self.ch)  # 向日志记录对象中加入日志处理器对象


def delete_files(folder_path, max_files):
    """
    监控指定文件夹中的文件数量,并在超过max_files时删除最旧的文件。
    """
    print("进入删除图片文件夹"+folder_path)
    print("需要删除文件数量")
    print(max_files)
    if True:
        # 获取文件夹中的文件列表
        files = os.listdir(folder_path)
        file_count = len(files)
        print(f"当前文件夹 {folder_path} 中的文件数量: {file_count}")

        # 如果文件数量超过max_files,则删除最旧的文件
        if file_count > max_files:
            # 获取文件夹中所有文件的完整路径,并带上修改时间
            file_paths_with_mtime = [(os.path.join(folder_path, f), os.path.getmtime(os.path.join(folder_path, f))) for
                                     f in files]
            # 按修改时间排序
            sorted_files = sorted(file_paths_with_mtime, key=lambda x: x[1])

            # 删除最旧的文件,直到文件数量在阈值以下
            for file_path, mtime in sorted_files[:file_count - max_files]:
                try:
                    os.remove(file_path)
                    print(f"已删除文件: {file_path}")
                except OSError as e:
                    print(f"删除文件时出错: {e.strerror}")

def copy_file(src, dst):
    shutil.copy2(src, dst)  # copy2会尝试保留文件的元数据


def end_sentence(text, max_length):
    '''
    保证在max_length长度前以句号或点号结束文本
    :param text: 文本
    :param max_length: 最大长度
    :return:
    '''
    # 如果文本长度已经超过最大长度,则直接截断
    if len(text) > max_length:
        text = text[:max_length]

    # print("结果长度 {}".format(len(text)))

    # 查找句号的位置(en)
    period_index = max(text.rfind('.'), text.rfind(','),
                       text.rfind(':'), text.rfind(';'),
                       text.rfind('!'), text.rfind('?'))  # 从后往前找,找到最后一个句号
    # 如果找到了句号且它在最大长度内
    if period_index != -1 and (period_index + 1 < max_length or
                               max_length == -1):
        # 如果需要替换,则替换句号
        text = text[:period_index] + '.'

    # 查找句号的位置(cn)
    period_index = max(text.rfind('。'), text.rfind(','),
                       text.rfind(':'), text.rfind(';'),
                       text.rfind('!'), text.rfind('?'))  # 从后往前找,找到最后一个句号
    # 如果找到了句号且它在最大长度内
    if period_index != -1 and (period_index + 1 < max_length or
                               max_length == -1):
        # 如果需要替换,则替换句号
        text = text[:period_index] + '。'

    return text


import base64


def encode_base64(input_string):
    """
    对字符串进行Base64编码
    """
    encoded_bytes = base64.b64encode(input_string.encode('utf-8'))
    encoded_string = encoded_bytes.decode('utf-8')
    return encoded_string


def decode_base64(input_string):
    """
    对Base64编码的字符串进行解码
    """
    decoded_bytes = base64.b64decode(input_string.encode('utf-8'))
    decoded_string = decoded_bytes.decode('utf-8')
    return decoded_string
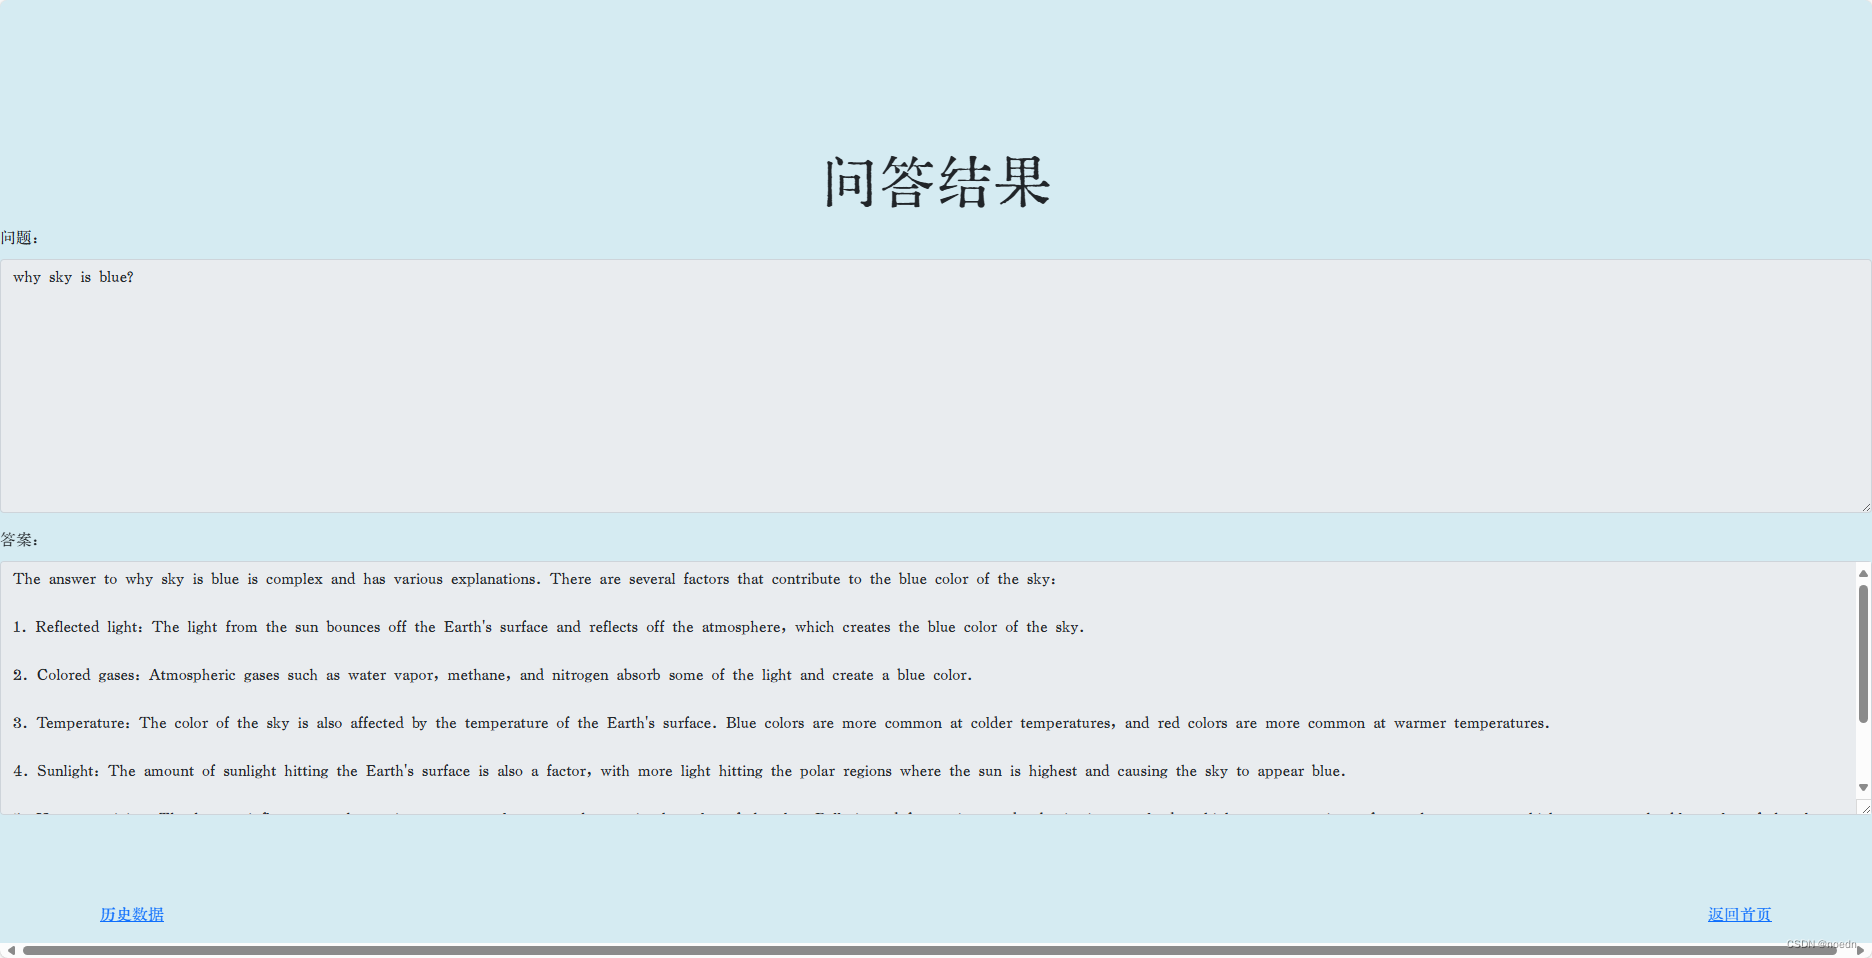
整体实现效果
page1

page2
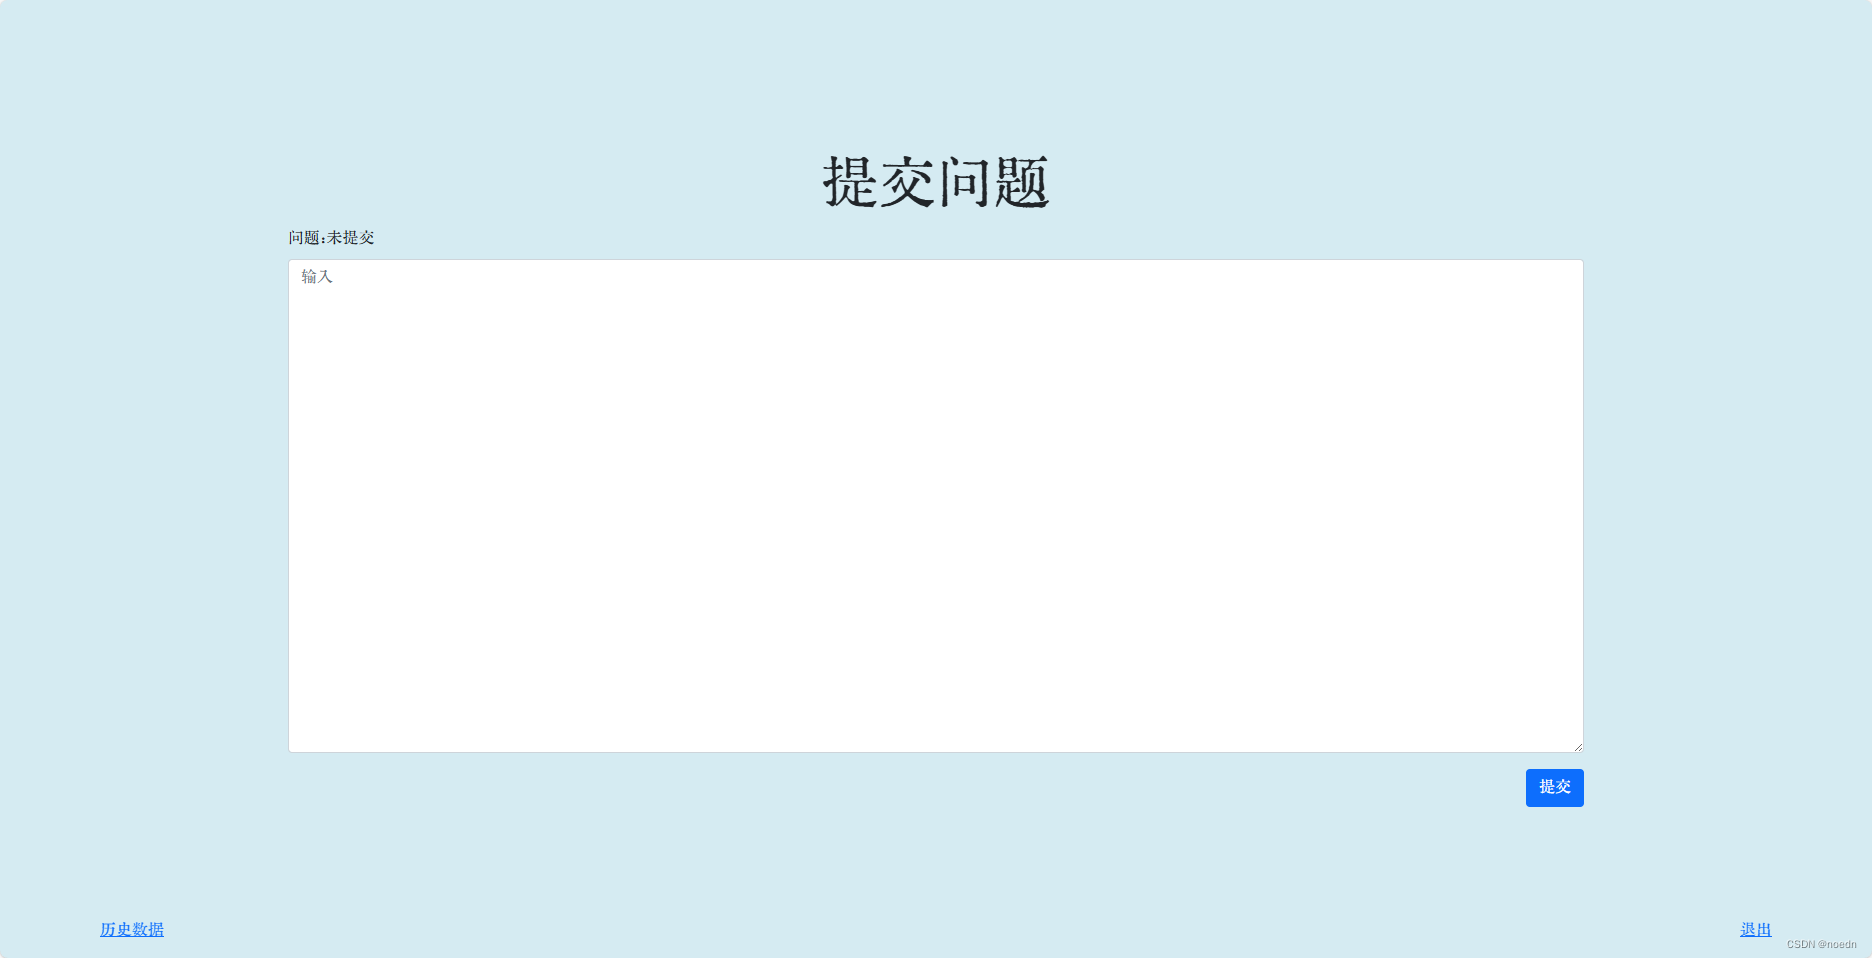
page3
page4


 792
792

 被折叠的 条评论
为什么被折叠?
被折叠的 条评论
为什么被折叠?
 到【灌水乐园】发言


