


UNet网络介绍
二、网络结构详解
我觉得很多人对这个网络架构可能还是一知半解的,包括我最初也是这样的。
首先就是这几个箭头表示的是什么,这几个箭头相比于VGG16网络架构,难了不少。
因为VGG16网络架构中只有卷积层、全连接层,不涉及到特别复杂的操作。
conv 3x3,ReLu就是卷积层,其中卷积核大小是3x3,然后经过ReLu激活。
copy and crop的意思是复制和裁剪。这块内容我觉得很多人最初和我一样,不明白是什么意思,这里的意思就是对于你输出的尺寸,你需要进行复制并进行中心剪裁。方便和后面上采样生成的尺寸进行拼接。
max pool 2x2,就是最大池化层,卷积核为2x2。
up-conv 2x2:这里对于初学者来说,是最难领悟的地方,因为看不懂这个符号是啥意思。我最初以为是upsample+conv2d,试了一下,好像生成不了符合要求的尺寸,后来想了一下,这个是不是就是反卷积,用来上采样的,然后试了一下,可以实现,并且卷积核也是2x2。本文中使用的就是ConvTranspose2d()函数进行该操作。
conv 1x1 这里就是卷积层,卷积核大小是1x1。
网络架构图,大家需要好好理解一下。
UNet总体上分为编码器和解码器,其中编码器负责提取特征信息,解码器负责还原特征信息;编码器主要由4个块组成,每个块分别由2个卷积层、1个最大池化层组成。解码器也是由4个块组成,每个块都是由1个上采样层、2个卷积层组成,详细信息请见下图。

代码
import torch
from torch import nn
from torch.nn import functional as F
from ..builder import ROTATED_BACKBONES


class Conv_Block(nn.Module):
    def __init__(self,in_channel,out_channel):
        super(Conv_Block, self).__init__()
        self.layer=nn.Sequential(
            nn.Conv2d(in_channel,out_channel,3,1,1,padding_mode='reflect',bias=False),
            nn.BatchNorm2d(out_channel),
            nn.Dropout2d(0.3),
            nn.LeakyReLU(),
            nn.Conv2d(out_channel, out_channel, 3, 1, 1, padding_mode='reflect', bias=False),
            nn.BatchNorm2d(out_channel),
            nn.Dropout2d(0.3),
            nn.LeakyReLU()
        )
    def forward(self,x):
        #print('/home/SK/swig/mmrotate_filter/mmrotate/models/backbones/UNetM.py21')
        #/home/SK/swig/mmrotate_filter/mmrotate/models/backbones/UNetM.py
        return self.layer(x)


class DownSample(nn.Module):
    def __init__(self,channel):
        super(DownSample, self).__init__()
        self.layer=nn.Sequential(
            nn.Conv2d(channel,channel,3,2,1,padding_mode='reflect',bias=False),
            nn.BatchNorm2d(channel),
            nn.LeakyReLU()
        )
    def forward(self,x):
        return self.layer(x)


class UpSample(nn.Module):
    def __init__(self,channel):
        super(UpSample, self).__init__()
        self.layer=nn.Conv2d(channel,channel//2,1,1)
    def forward(self,x,feature_map):
        up=F.interpolate(x,scale_factor=2,mode='nearest')
        out=self.layer(up)
        return torch.cat((out,feature_map),dim=1)
class TrainableParameter(nn.Module):
    def __init__(self):
        super(TrainableParameter, self).__init__()
        # 生成一个在 0~1 范围内的随机参数,并将其设置为可训练
        self.parameter = nn.Parameter(torch.rand(1,requires_grad=True)).to(device='cuda:0')

    def forward(self):
        # 通过 torch.clamp() 方法将参数限制在 0~1 范围内
        return torch.clamp(self.parameter, 0, 1)


# 定义自定义的激活函数

```python
class ThresholdActivation(nn.Module):
    def __init__(self):
        super(ThresholdActivation, self).__init__()
        self.threshold = nn.Parameter(torch.randn(1, requires_grad=True))  # 可训练的阈值参数

    def forward(self, x):
        # 大于阈值的部分置为1,小于等于阈值的部分置为0
        #print(x.device,self.threshold.device)#cuda:0 cuda:0
        return torch.where(x > self.threshold,torch.tensor(1.0, device=x.device), torch.tensor(0.0, device=x.device))

@ROTATED_BACKBONES.register_module()
class UNetm(nn.Module):
    def __init__(self,num_classes):
        super(UNetm, self).__init__()
        self.c1=Conv_Block(3,64)
        self.d1=DownSample(64)
        self.c2=Conv_Block(64,128)
        self.d2=DownSample(128)
        self.c3=Conv_Block(128,256)
        self.d3=DownSample(256)
        self.c4=Conv_Block(256,512)
        self.d4=DownSample(512)
        self.c5=Conv_Block(512,1024)
        self.u1=UpSample(1024)
        self.c6=Conv_Block(1024,512)
        self.u2 = UpSample(512)
        self.c7 = Conv_Block(512, 256)
        self.u3 = UpSample(256)
        self.c8 = Conv_Block(256, 128)
        self.u4 = UpSample(128)
        self.c9 = Conv_Block(128, 64)
        self.out=nn.Conv2d(64,num_classes,3,1,1)
        ###########################################################
        self.activation = ThresholdActivation()

        # 初始化自定义的可训练参数
        self.trainable_parameter = TrainableParameter()
        # 在你的网络中使用这个可训练参数
        # 假设你要使用这个参数作为权重
        #self.weight = nn.Parameter(torch.randn(1))

        #
        # self.params = nn.Sequential(
        #         nn.Conv2d(1024, 1, 1),
        #         nn.AdaptiveAvgPool2d((1, 1)),
        #         nn.Flatten()
        #     )
        #self.param = nn.Parameter(torch.zeros(1))
    def forward(self,x):
        #ori=x
        R1=self.c1(x)
        R2=self.c2(self.d1(R1))
        R3 = self.c3(self.d2(R2))
        R4 = self.c4(self.d3(R3))
        R5 = self.c5(self.d4(R4))
        O1=self.c6(self.u1(R5,R4))
        O2 = self.c7(self.u2(O1, R3))
        O3 = self.c8(self.u3(O2, R2))
        O4 = self.c9(self.u4(O3, R1))
        O5=self.out(O4)#torch.Size([1, 1, 608, 608])
        ###############################################
        # print(O4.device)
        O5= self.activation(O5)#0,1图片黑白图片#torch.Size([1, 64, 608, 608])
        #print(O4.device)
        #return self.out(O4),self.params(R5)
         # 获取可训练参数的值
        trainable_param_value = self.trainable_parameter()
        #################################################
        O6=O5*x*trainable_param_value+x*(1-trainable_param_value)
        O7=(O6-21.55)/24.42#拼接合成后的图片,并经过归一化处理
        return O5, O7#* self.param
'''
if __name__ == '__main__':
    x=torch.randn(2,3,256,256)
    net=UNet(2)
    print(net(x).shape)
'''
if __name__ == "__main__":
    x=torch.randn(1,3,256,256)
    net = UNetm(1)
    out,a= net(x)
    print(out.shape,a.shape)
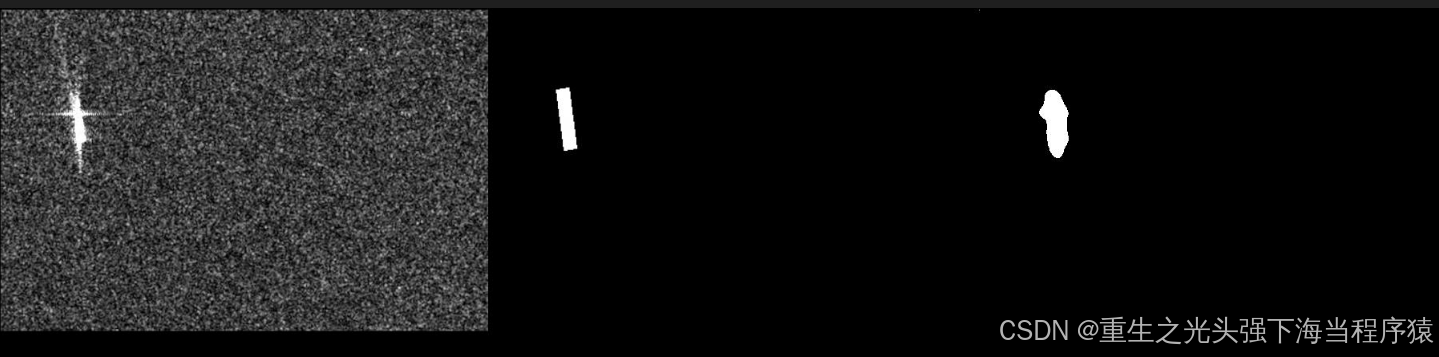
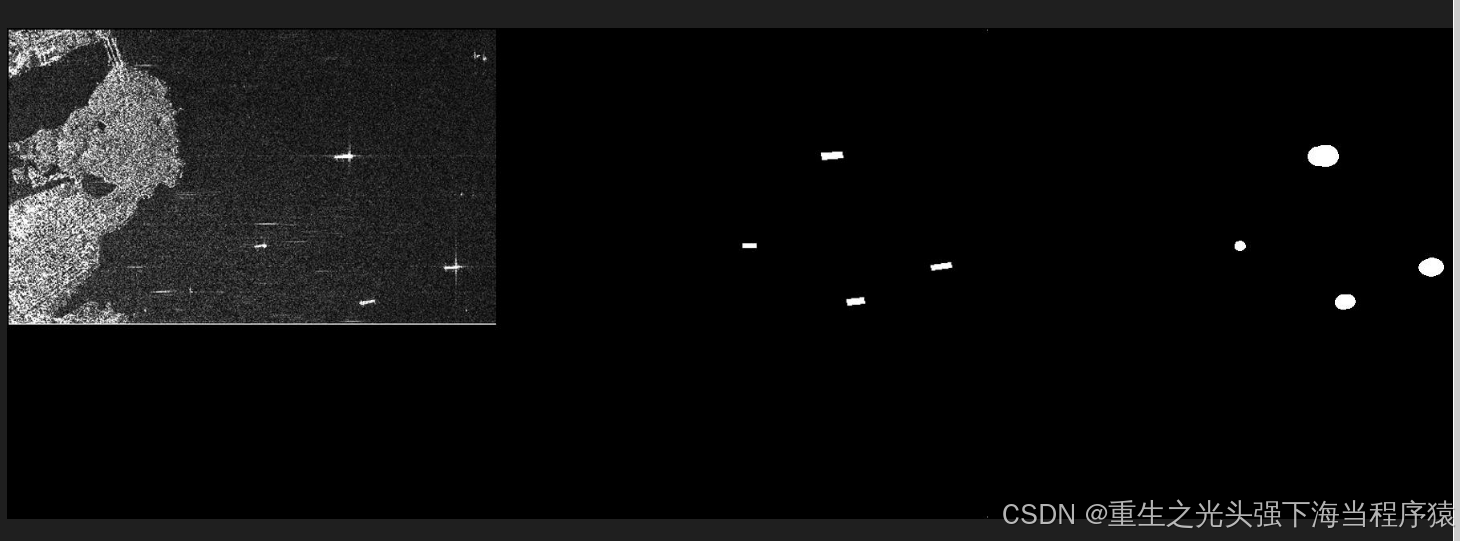
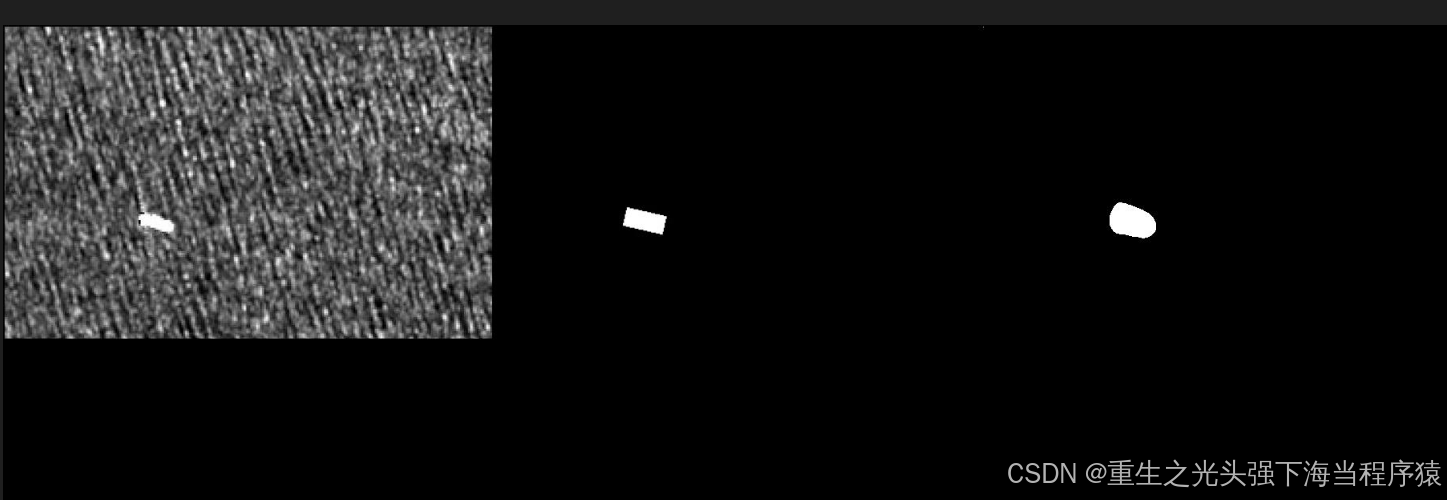
## 分割效果
左侧为原图,中间为便签,右侧为过滤后的图


 3万+
3万+


 被折叠的 条评论
为什么被折叠?
被折叠的 条评论
为什么被折叠?
 到【灌水乐园】发言


