


源博客地址:www.ozyblog.top
kibana是es官方提供的可视化软件,安装步骤如下:
kibana安装
本来想用vmtools直接拖文件到linux里面,但是不断报错什么文件不完成,后来一比对拖进去的文件和源文件的大小,才发现大小都不一致,好家伙!!!
注意:不能通过vmtools传递文件,会出现大量字节丢失的情况:
还是直接用u盘拷贝或者在线p2p传输吧,哎,真服了,咋能有这么多bug
这里推荐宿主机和客户机传文件用p2p文件传输:
经过p2p工具的传输,终于获得了完整安装包,开始解压安装:
tar -zxvf kibana-7.4.2-linux-x86_64.tar.gz -C /usr/local/kibana/进入安装目录的config目录,vim一下kibana.yml,做出如下修改:
server.port: 5601
server.host: "0.0.0.0"
elasticsearch.hosts: ["http://192.168.2.151:9200","http://192.168.2.151:9201","http://192.168.2.151:9202"]
接着要去先启动es集群,否则直接启动kibana会报错
启动玩es集群后,回到kibana安装路径,启动:
bin/kibana --allow-root稍微等待一下,出现以下信息:
看到这个就说明安装并启动成功了
kibana使用
基本使用
访问0.0.0.0:5601
点击yes,回到home
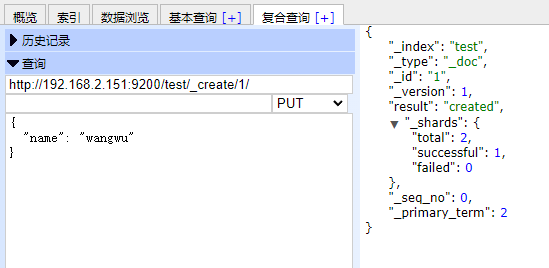
然后需要关联es索引库,比如test索引库,那么首先需要test索引库有数据,没有的话插入一条
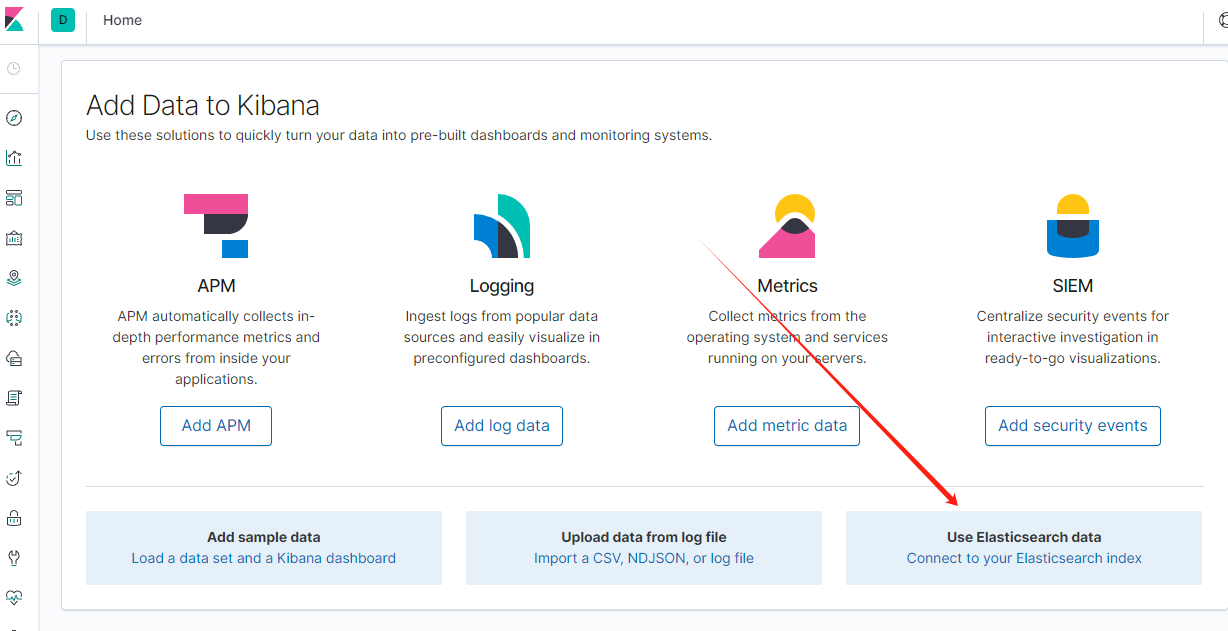
然后回到kibana,选择:
查询你的索引库:

点下一步,然后创建:
点击左下角开发工具:
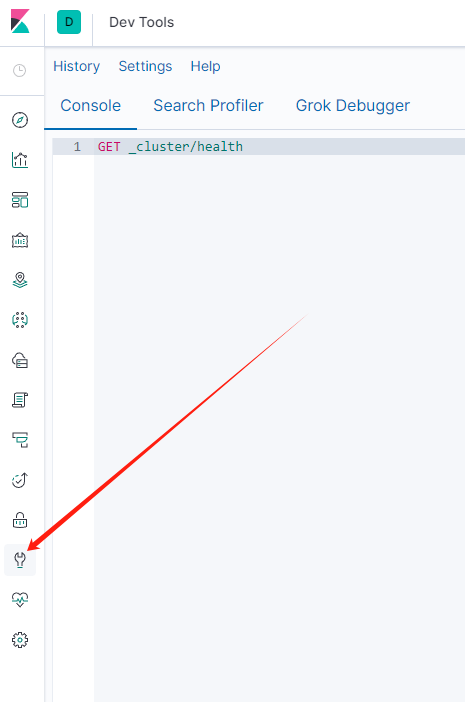
可以看到官方的介绍:
- Quick intro to the UI
The Console UI is split into two panes: an editor pane (left) and a response pane (right). Use the editor to type requests and submit them to Elasticsearch. The results will be displayed in the response pane on the right side.
Console understands requests in a compact format, similar to cURL:
PUT index/type/1
{
  "body": "here"
}
While typing a request, Console will make suggestions which you can then accept by hitting Enter/Tab. These suggestions are made based on the request structure as well as your indices and types.
- A few quick tips, while I have your attention
- Submit requests to ES using the green triangle button.
- Use the wrench menu for other useful things.
- You can paste requests in cURL format and they will be translated to the Console syntax.
- You can resize the editor and output panes by dragging the separator between them.
- Study the keyboard shortcuts under the Help button. Good stuff in there!
- UI简介 控制台用户界面(UI)分为两个窗格:编辑窗格(左侧)和响应窗格(右侧)。使用编辑窗格输入请求并将其提交到Elasticsearch。结果将在右侧的响应窗格中显示。 控制台可以理解一种紧凑的请求格式,类似于cURL: PUT index/type/1 { “body”: “here” } 在输入请求时,控制台会提供建议,您可以通过按Enter/Tab键接受这些建议。这些建议基于请求结构以及索引和类型。
- 一些快速提示,趁我还有注意力时
- 使用绿色三角形按钮将请求提交给ES。
- 使用扳手菜单执行其他有用的操作。
- 您可以粘贴以cURL格式表示的请求,它们将被转换为控制台语法。
- 您可以通过拖动它们之间的分隔符调整编辑器和输出窗格的大小。
- 在帮助按钮下查看键盘快捷键。里面有很多好东西!
比如:
GET _cluster/health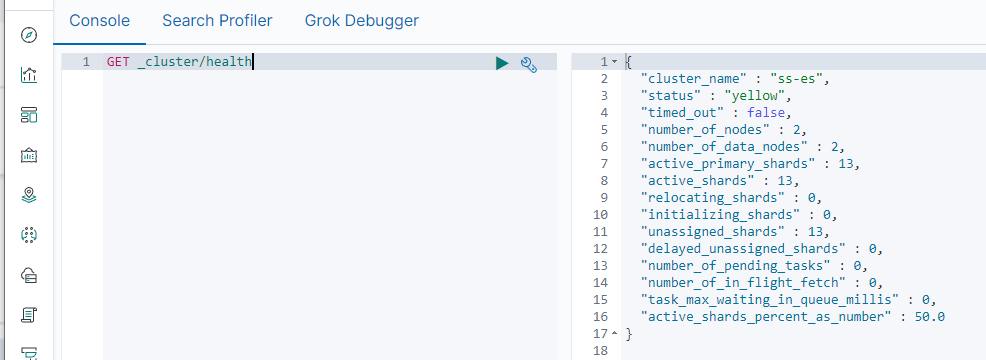
可以看到,会有语法提示:

删除索引库
回到首页,点击index management:
删除支持将kibana和es关联断开,并不是删除里面的数据


 3354
3354


 被折叠的 条评论
为什么被折叠?
被折叠的 条评论
为什么被折叠?
 到【灌水乐园】发言


