


autoware安装教程(source版本安装)
1.系统:ubuntu18.04/Melodic的系统依赖项
$ sudo apt-get update

$ sudo apt-get install -y python-catkin-pkg python-rosdep ros-$ROS_DISTRO-catkin gksu

$ sudo apt-get install -y python3-pip python3-colcon-common-extensions python3-setuptools python3-vcstool

$ pip install -U setuptools
2.CUDA支持的附加系统依赖项
有关CUDA10.0的安装说明,请参阅:Installation Guide Linux :: CUDA Toolkit Documentation
有关CUDA9.0的安装说明,请参阅:Installation Guide Linux :: CUDA Toolkit Documentation
有关CUDA8.0的安装说明,请参阅:Installation Guide Linux :: CUDA Toolkit Documentation
注意:要在Melodic上启用CUDA,需要更新Eigen
eigen3.37版本的下载地址:
https://gitlab.com/libeigen/eigen/-/releases/3.3.7$cd && wget https://gitlab.com/libeigen/eigen/-/archive/3.3.7/eigen-3.3.7.zip #Download Eigen
$ mkdir eigen && tar --strip-components=1 -xzvf 3.3.7.tar.gz -C eigen #Decompress
$ cd eigen && mkdir build && cd build && cmake .. && make && make install #Build and install
$ cd && rm -rf 3.3.7.tar.gz && rm -rf eigen #Remove downloaded and temporary files如何构建工作区
1.创建工作区
$ mkdir -p autoware.ai/src

$ cd autoware.ai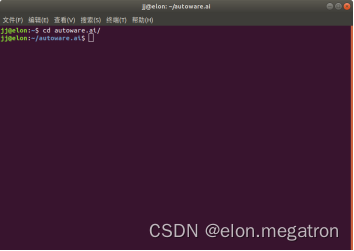
2.下载autoware.ai的工作区配置
对于1.12.0版本
$ wget -O
autoware.ai.repos "https://raw.githubusercontent.com/autowarefoundation/autoware_ai/1.12.0/autoware.ai.repos"
对于1.13版本
$ wget -O autoware.ai.repos "https://raw.githubusercontent.com/autowarefoundation/autoware_ai/1.13.0/autoware.ai.repos"Autoware1.13压缩包
链接:https://pan.baidu.com/s/1HdUMOInPdyBb9qpsaHekAA?pwd=vhk1
提取码:vhk1
对于1.14版本
$ wget -O autoware.ai.repos "https://raw.githubusercontent.com/autowarefoundation/autoware_ai/1.14.0/autoware.ai.repos"Autoware1.14压缩包
链接:https://pan.baidu.com/s/1f-cT1oDjuGOQxS7mizRAbA?pwd=bk9i
提取码:bk9i
3.将Autoware.ai下载到工作区
$ vcs import src < autoware.ai.repos有时候2,3两步会经常报错,网络链接不稳定,出现下载不了,安装不了的情况。基于此我们采用小鱼大佬的方法。做完这一步直接跳过第4步,进入第5步。
$ sudo apt install python-pip

$ sudo pip install rosdepc

$ sudo rosdepc init

$ rosdepc update

$ rosdep install -y --from-paths src --ignore-src --rosdistro $ROS_DISTRO
4.使用rosdep安装
$ rosdep update$ rosdep install -y --from-paths src --ignore-src --rosdistro $ROS_DISTRO ↓
我这里的第二个采用的是:
rosdep install --from-paths src --ignore-src -r -y5.编译工作区
支持CUDA
$ AUTOWARE_COMPILE_WITH_CUDA=1 colcon build--cmake-args -DCMAKE_BUILD_TYPE=Release --continue-on-error不支持CUDA
$ colcon build --cmake-args -DCMAKE_BUILD_TYPE=Release --continue-on-error在经历过第5步之后,会出现一些编译的错误,例如:ndt_gpu中CUDA报错
修改CUDA相关的版本检查参数
修改文件为:
autoware.ai/src/autoware/common/autoware_build_flags/cmake/autoware_build_flags-extras.cmake
修改后的结果为:
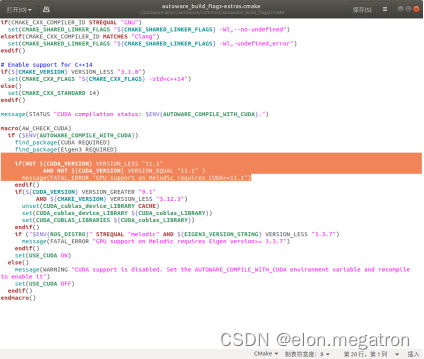
将10.0改成11.1,因为我安装的是11.1版本的CUDA,因人而异,也可以是其他的版本,根据个人的电脑配置进行更改。更改之后在运行一遍:
$ AUTOWARE_COMPILE_WITH_CUDA=1 colcon build--cmake-args -DCMAKE_BUILD_TYPE=Release --continue-on-error6.启动autoware,界面如下:


 755
755


 被折叠的 条评论
为什么被折叠?
被折叠的 条评论
为什么被折叠?
 到【灌水乐园】发言


