


canvas是什么
<canvas> 是HTML5中的标签一个容器,可以使用JS在其中绘制图形或文字。
<canvas>是一个可以使用脚本 (通常为JavaScript) 来绘制图形的 HTML 元素。
例:它可以用于绘制图表、制作图片构图或者制作简单的动画,主要聚焦于2D图形。
canvas标签
canvas标签是一张画布,默认长300像素,宽150像素的白色画布
注意:设置画布的宽高只能在html标签里通过height和width属性来设置(canvas标签有且只有这两个属性)
一、绘制基础图形
画线段
moveTo(x,y):定义画线的起始点;
lineTo(x,y):定义画线的折点;
stroke():通过线条来绘制图形轮廓;
完整试例代码
<html lang="en">
<head>
    <title>canvas_learn</title>
    <style>
        #canvas {
            box-shadow: 2px 2px 2px 2px #888888;
            position: absolute;//绝对定位
            top: 0;
            bottom: 0;
            left: 0;
            right: 0;
            margin: auto;//垂直居中
        }
    </style>
</head>
<body>
    <canvas id="canvas" height="600" width="700"></canvas><!-- 创建canvas标签: -->
</body>
</html>
<script>
    const canvas = document.getElementById('canvas')//使用Js获得canvas标签的DOM对象
    const ctx =  canvas.getContext('2d')//通过getContext()方法获得渲染上下文和绘画功能
    ctx.moveTo(200,300)//起点为(200,300)定义画线的起始点
    ctx.lineTo(500,300)//定义画线的折点
    ctx.lineTo(400,200)//定义画线的折点
    ctx.lineTo(300,100)//定义画线的折点
    ctx.stroke()//通过线条来绘制图行轮廓
</script>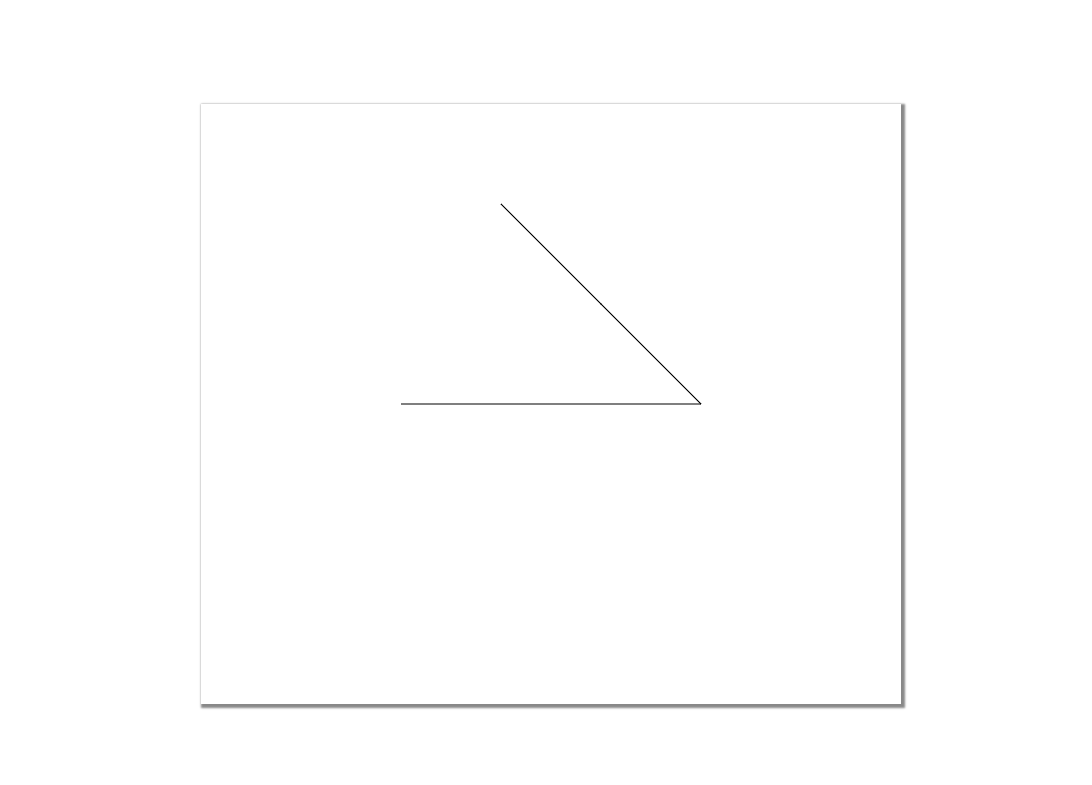
2.线段设置样式
🔊样式设置必须写在绘制图形轮廓stroke()方法之前,否则会不生效!stroke()方法是进行绘制
ctx.strokeStyle = 'pink'//设置线的颜色
ctx.lineWidth = 20//设置线的宽度
ctx.lineCap = 'round' //设置线帽为圆形round/butt默认/aquare方形
ctx.lineJoin = 'bevel'//设置线段连接处为默认/圆形/平直形式(miter/round/bevel)
ctx.globalAlpha = 20//设置图案的透明度
<head>
    <title>canvas_learn</title>
    <style>
        #canvas {
            box-shadow: 2px 2px 2px 2px #888888;
            position: absolute;
            top: 0;
            bottom: 0;
            left: 0;
            right: 0;
            margin: auto;
        }
    </style>
</head>
<body>
    <canvas id="canvas" height="600" width="700"></canvas><!-- 创建canvas标签: -->
</body>
</html>
<script>
    const canvas = document.getElementById('canvas')//使用Js获得canvas标签的DOM对象
    const ctx =  canvas.getContext('2d')//通过getContext()方法获得渲染上下文和绘画功能
    ctx.moveTo(200,300)//起点为(200,300)定义画线的起始点
    ctx.lineTo(500,300)//定义画线的折点
    ctx.lineTo(600,200)//定义画线的折点
    ctx.strokeStyle = 'pink'//设置线的颜色
    ctx.lineWidth = 20//设置线的宽度
    ctx.lineCap = 'round' //设置线帽为圆形round/butt默认/aquare方形
    ctx.lineJoin = 'bevel'//设置线段连接处为默认/圆形/平直形式(miter/round/bevel)
    ctx.globalAlpha = 20//设置图案的透明度
    ctx.stroke()//通过线条来绘制图行轮廓
</script>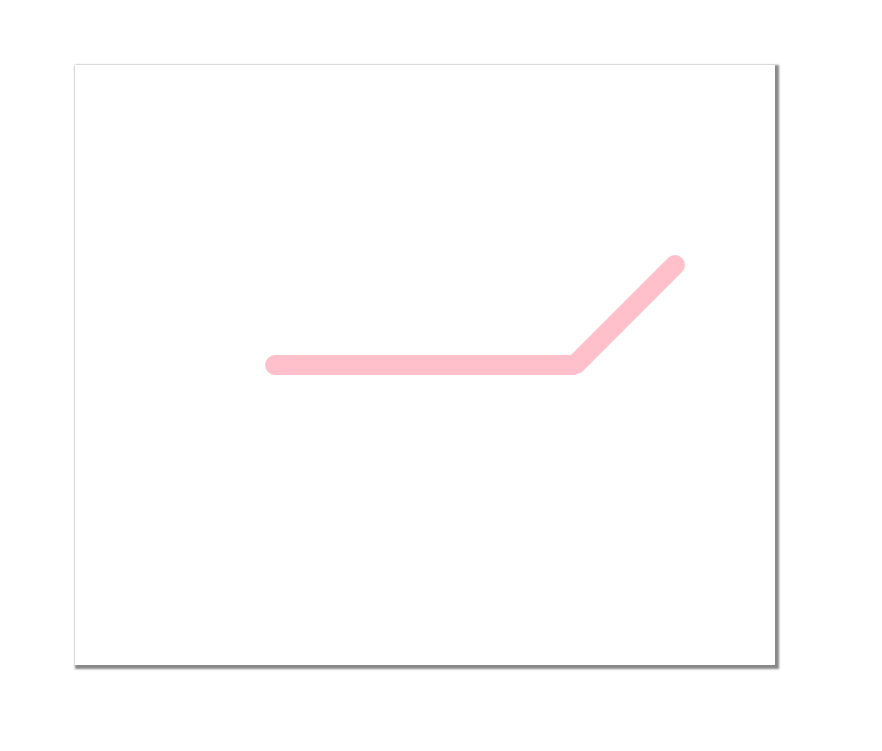
3.同时画多条线并分别设置样式
ctx.closePath()//关闭上一条路径的绘制
ctx.beginPath()//开始绘制第二条线
<body>
    <canvas id="canvas" height="600" width="700"></canvas><!-- 创建canvas标签: -->
</body>
</html>
<script>
    const canvas = document.getElementById('canvas')//使用Js获得canvas标签的DOM对象
    const ctx =  canvas.getContext('2d')//通过getContext()方法获得渲染上下文和绘画功能
    ctx.moveTo(200,300)//起点为(200,300)定义画线的起始点
    ctx.lineTo(500,300)//定义画线的折点
    ctx.lineTo(600,200)//定义画线的折点
    ctx.strokeStyle = 'pink'//设置线的颜色
    ctx.lineWidth = 20//设置线的宽度
    ctx.lineCap = 'round' //设置线帽为圆形round/butt默认/aquare方形
    ctx.lineJoin = 'bevel'//设置线段连接处为默认/圆形/平直形式(miter/round/bevel)
    ctx.globalAlpha = 20//设置图案的透明度
    ctx.stroke()//通过线条来绘制图行轮廓
    ctx.closePath()//关闭上一条路径的绘制

    ctx.beginPath()//开始绘制第二条线
    ctx.moveTo(200,200)//起点为(200,300)定义画线的起始点
    ctx.lineTo(500,200)//定义画线的折点
    ctx.lineTo(300,100)//定义画线的折点
    ctx.strokeStyle = 'green'//设置线的颜色
    ctx.lineWidth = 30//设置线的宽度
    ctx.lineCap = 'round' //设置线帽为圆形round/butt默认/aquare方形
    ctx.lineJoin = 'bevel'//设置线段连接处为默认/圆形/平直形式(miter/round/bevel)
    ctx.globalAlpha = 0.3//设置图案的透明度
    ctx.stroke()//通过线条来绘制图行轮廓

</script>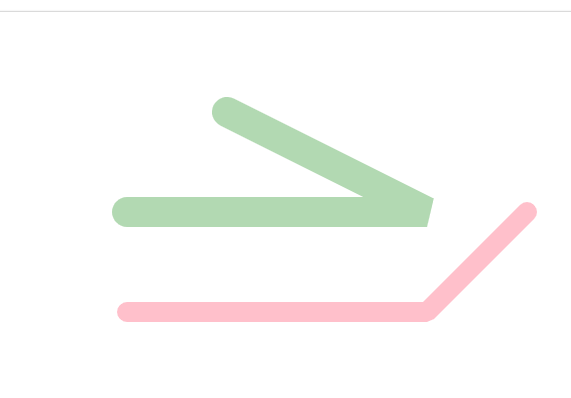
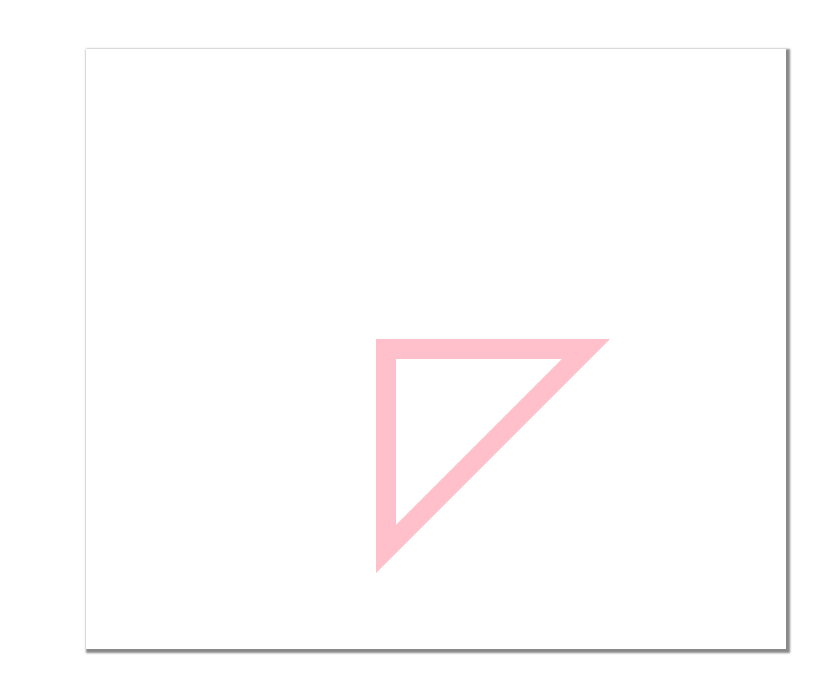
4.画三角形
<script>
    const canvas = document.getElementById('canvas')//使用Js获得canvas标签的DOM对象
    const ctx =  canvas.getContext('2d')//通过getContext()方法获得渲染上下文和绘画功能
    ctx.strokeStyle = 'pink'
    ctx.moveTo(300,300)
    ctx.lineTo(500,300)
    ctx.lineTo(300,500)
    ctx.lineTo(300,300)// 第四个点要和第一个点的坐标一致才能画出三角形
    ctx.stroke()
    ctx.closePath()
</script>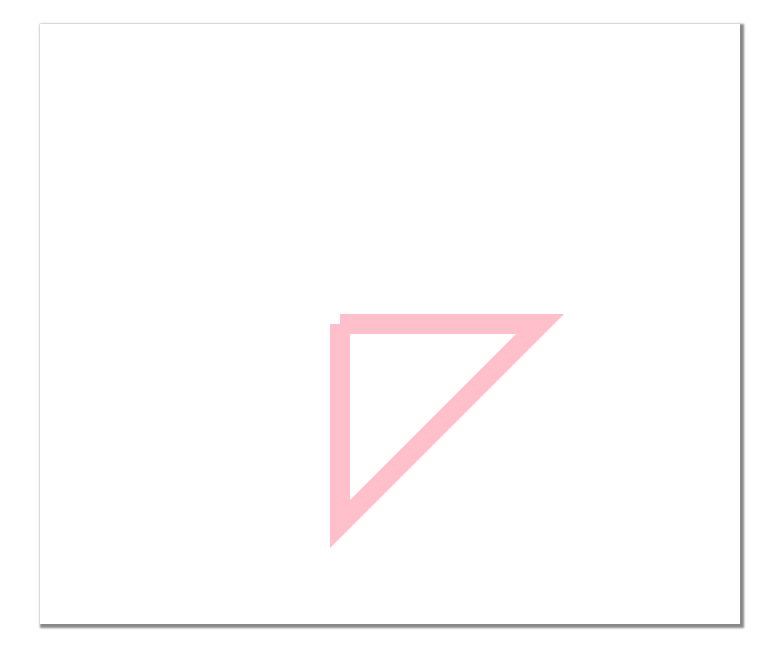
用 ctx.closePath()//把线段的终点和起点连接起来这样更衔接了
5.画矩形
a.第一种方法
<script>
    const canvas = document.getElementById('canvas')//使用Js获得canvas标签的DOM对象
    const ctx =  canvas.getContext('2d')//通过getContext()方法获得渲染上下文和绘画功能
    ctx.beginPath()
    ctx.strokeStyle = 'pink'
    ctx.lineWidth = 10
    ctx.moveTo(300,150)
    ctx.lineTo(500,150)
    ctx.lineTo(500,450)
    ctx.lineTo(300,450)
    ctx.lineTo(300,150)
    ctx.stroke()
    ctx.closePath()
</script>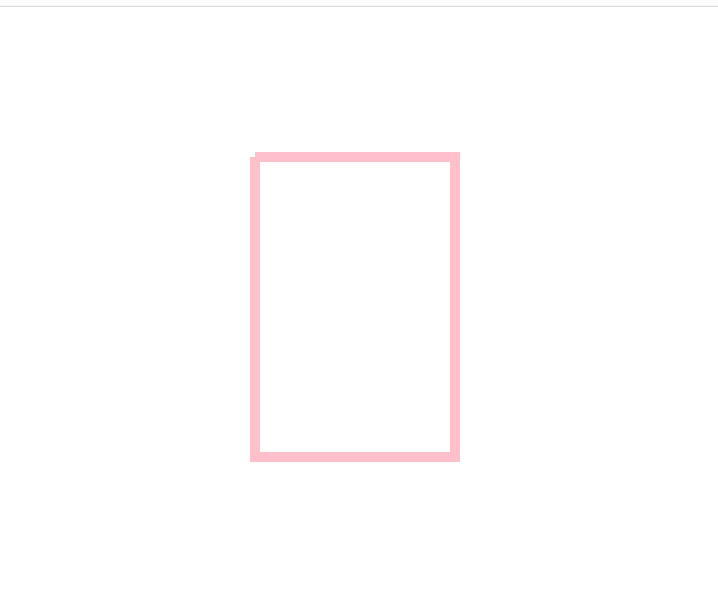
b.第二种方法----strokeRect()方法:
strokeRect( x , y , width , height ) 起点坐标,矩形宽,矩形高
<script>
    const canvas = document.getElementById('canvas')//使用Js获得canvas标签的DOM对象
    const ctx =  canvas.getContext('2d')//通过getContext()方法获得渲染上下文和绘画功能
    ctx.beginPath()
    ctx.strokeStyle = 'blue'
    ctx.lineWidth = 10
    ctx.strokeRect(600,200,300,300)
    ctx.stroke()
    ctx.closePath()
</script>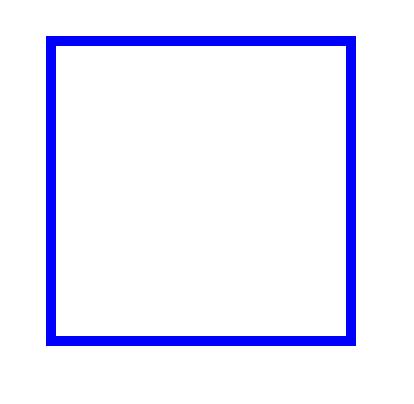
c.第三种方法stroke()和rect()
把strokeRect()方法拆成了stroke()和rect()方法,好处就是使用rect()暂时生成了矩形,但是必须调用stroke()方法才会绘制出来,可以使用下面的方式延迟两秒钟再绘制矩形
<script>
    const canvas = document.getElementById('canvas')//使用Js获得canvas标签的DOM对象
    const ctx =  canvas.getContext('2d')//通过getContext()方法获得渲染上下文和绘画功能
    ctx.beginPath()
    ctx.strokeStyle = 'yellow'
    ctx.lineWidth = 5
    ctx.rect(500,300,300,300)
    setTimeout(()=>{
        ctx.stroke()
    },2000)
    ctx.stroke()
    ctx.closePath()
</script>
6.填充矩形
a.第一种填充方法
ctx.fillStyle = 'yellow' // 填充色
<script>
    const canvas = document.getElementById('canvas')//使用Js获得canvas标签的DOM对象
    const ctx =  canvas.getContext('2d')//通过getContext()方法获得渲染上下文和绘画功能
    ctx.beginPath()
    ctx.lineWidth = 5
    ctx.fillStyle = 'yellow'// 填充颜色一定要写在生成矩形(fillRect())之前
    ctx.fillRect(500,300,300,300)// ctx.fillRect(x,y,width,height)
    ctx.stroke()
    ctx.closePath()
</script>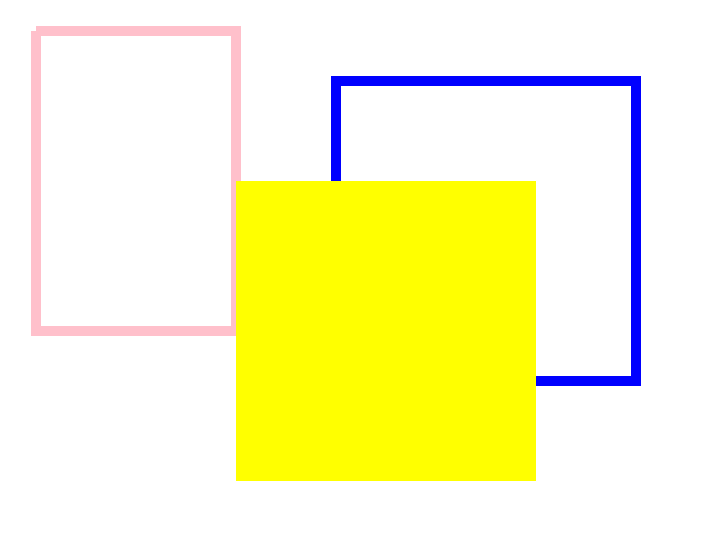
b.第二种填充方法
用fill()方法替代stroke()方法
<script>
    const canvas = document.getElementById('canvas')//使用Js获得canvas标签的DOM对象
    const ctx =  canvas.getContext('2d')//通过getContext()方法获得渲染上下文和绘画功能
    ctx.beginPath()
    ctx.rect(100,200,200,200)
    setTimeout(()=>{
        ctx.fill()
    },2000)//延迟两秒钟
    ctx.stroke()
    ctx.closePath()
</script>
7.绘制弧形或者圆形
a.方法一
使用arc(x, y, radius, startAngle, endAngle, anticlockwise)方法生成
arc(圆心坐标,半径,初始角度,结束角度,顺时针false/逆时针true)
(Math.PI) / 180 = 1°

<script>
    const canvas = document.getElementById('canvas')//使用Js获得canvas标签的DOM对象
    const ctx =  canvas.getContext('2d')//通过getContext()方法获得渲染上下文和绘画功能
    ctx.beginPath()
    ctx.fillStyle = 'pink'
    ctx.strokeStyle = 'pink'
    ctx.lineWidth = 5
    ctx.arc(350, 300, 100, 0, [(Math.PI) / 180] * 360, true)// 不写anticlockwise项的话默认为顺时针
    ctx.closePath()// 用于连接首尾点
    ctx.fill()
    ctx.stroke()
</script>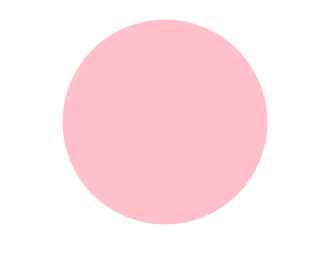
b.方法二
还可以用arcTo()方法来绘制圆弧,它接收四个参数,在它前边会有一个开始点坐标,一般由moveTo()或lineTo()方法提供。
arcTo(cx , cy , x2 , y2 , radius )
arto(两切线交点坐标,结束点坐标,半径)
解释:arcTo()方法就是利用“开始点”、“控制点”和“结束点”这三个点所形成的夹角,然后绘制一段与夹角的两边相切并且半径为radius的圆弧。其中,弧线的起点是“开始点所在边与圆的切点”,而弧线的终点是“结束点所在边与圆的切点”。arcTo()方法绘制的弧线是两个切点之间长度最短的那个圆弧。此外,如果开始点不是弧线起点,arcTo()方法还将添加一条当前端点到弧线起点的直线线段。也就是说,开始点坐标不一定是弧线起点坐标
<script>
    const canvas = document.getElementById('canvas')//使用Js获得canvas标签的DOM对象
    const ctx =  canvas.getContext('2d')//通过getContext()方法获得渲染上下文和绘画功能
    ctx.beginPath()
    ctx.strokeStyle = 'green'
    ctx.lineWidth = 5
    ctx.moveTo(800, 200) // 定义线段的起点
    ctx.arcTo(400, 100, 400, 500, 100)// 切线交点坐标为(400,100),结束点为(400,500)
    ctx.stroke()
</script>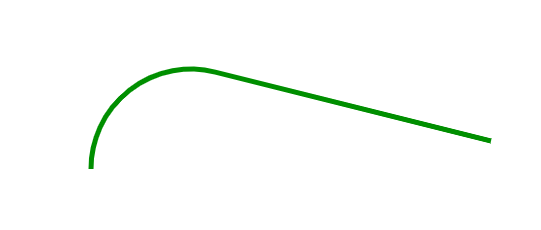


 1252
1252


 被折叠的 条评论
为什么被折叠?
被折叠的 条评论
为什么被折叠?
 到【灌水乐园】发言


