


环境:ubuntu20.04
在cmake编译过程中,最常见的莫过于fatal error: xxxx.h: 没有那个文件或目录,这个问题困扰着很多初学者,原因是没有找到某个头文件,小白版的解决方法,直接把这个头文件的地址写进.cpp源文件或者把头文件地址写进 CMakeLists.txt INCLUDE_DIRECTORIES(头文件地址)。
用这个代码作例子,代码网址:
奥比中光 Astra Pro 一代(MX400)RGBD 摄像头 彩色RGB及深度采集_astra pro没有rgb图怎么办_China_JTJ的博客-CSDN博客
//test.cpp
#include <opencv2/opencv.hpp>
#include <sstream>
#include <fstream>
#include <stdlib.h>
#include <iostream>
#include <string>
#include "OpenNI.h"
#include "opencv2/core/core.hpp"
#include "opencv2/highgui/highgui.hpp"
#include "opencv2/imgproc/imgproc.hpp"
#include<sys/stat.h>
#include<sys/types.h>

using namespace std;
using namespace cv;
using namespace openni;

void writeMatToXML(const std::string xmlName, const cv::Mat & mat)
{
    FileStorage fs(xmlName, FileStorage::WRITE);
    fs << "Mat" << mat;
    fs.release();
};

void CheckOpenNIError( Status result, string status )
{
	if( result != STATUS_OK )
		cerr << status << " Error: " << OpenNI::getExtendedError() << endl;
};

class ScenceNumber
{
    // use a file(number.txt) to recoder different scence
    public:

        int scNum;
        string fileName = "./data/number.txt";
        ScenceNumber()
        {
            ifstream f;
            f.open(this->fileName);
            if(f.good())
            {
                stringstream cvStr;
                string tmpStr;
                getline(f, tmpStr);
                cvStr << tmpStr;
                cvStr >> this->scNum;
                f.close();
            }
            else
            {
                ofstream f(this->fileName);
                f << "0" << endl;
                this->scNum = 0;
                f.close();
            }
        }
        string getNum()
        {
            ofstream f(this->fileName);
            stringstream cvStr;
            string tmpStr;
            this->scNum ++;
            cvStr << this->scNum;
            cvStr >> tmpStr;
            f << tmpStr << endl;
            f.close();
            cvStr >> tmpStr;
            return tmpStr;

        }
};

int main( int argc, char** argv )
{
	Status result = STATUS_OK;
    ScenceNumber ScN;
    string baseFilePath = "./data";
    string filePath;
    char autoFlag = 0;
	//OpenNI2 image
	VideoFrameRef oniDepthImg;
    //VideoFrameRef oniColorImg;

	//OpenCV image
	cv::Mat cvDepthImg;
	cv::Mat cvBGRImg;
	cv::Mat cvFusionImg;

	cv::namedWindow("depth");
	cv::namedWindow("image");
	cv::namedWindow("fusion");
	char key=0;

	//【1】
	// initialize OpenNI2
    result = OpenNI::initialize();
	CheckOpenNIError( result, "initialize context" );

	// open device
	Device device;
    result = device.open( openni::ANY_DEVICE );


	//【2】
	// create depth stream
    VideoStream oniDepthStream;
    result = oniDepthStream.create( device, openni::SENSOR_DEPTH );

	//【3】
	// set depth video mode
    VideoMode modeDepth;
    modeDepth.setResolution( 640, 480 );
    modeDepth.setFps( 30 );
    modeDepth.setPixelFormat( PIXEL_FORMAT_DEPTH_1_MM );
    oniDepthStream.setVideoMode(modeDepth);
	// start depth stream
    result = oniDepthStream.start();

	 create color stream
    VideoCapture capture;
    capture.open(0);
    capture.set(3, 640); //set the rgb size
    capture.set(4, 480);

//【4】
	set depth and color imge registration mode
	if( device.isImageRegistrationModeSupported(IMAGE_REGISTRATION_DEPTH_TO_COLOR ) )
	{
	device.setImageRegistrationMode( IMAGE_REGISTRATION_DEPTH_TO_COLOR );
	}


    long numInSc;
	while( key!=27 )
	{
        if (key == 'g')
        {
            //generate the path
            if (not autoFlag)
            {
                filePath = baseFilePath + "/scence" + ScN.getNum();
                mkdir(filePath.c_str(), 0777);
                numInSc = 0;
                autoFlag = 1;
                cout << filePath << endl;
            }
        }
        if (key == 's')
        {
            //generate the path
            if (autoFlag)
            {
                numInSc = 0;
                autoFlag = 0;
                cout << "scence over" << endl;
            }
        }
		// read frame
		if( oniDepthStream.readFrame( &oniDepthImg ) == STATUS_OK )
		{
            capture >> cvBGRImg;
			cv::Mat cvRawImg16U( oniDepthImg.getHeight(), oniDepthImg.getWidth(), CV_16UC1, (void*)oniDepthImg.getData() );

			cvRawImg16U.convertTo(cvDepthImg, CV_8U, 255.0/(oniDepthStream.getMaxPixelValue()));
            cv::flip(cvDepthImg, cvDepthImg, 1);
			//【5】
			// convert depth image GRAY to BGR
			cv::cvtColor(cvDepthImg,cvFusionImg,COLOR_GRAY2BGR);
			cv::imshow( "depth", cvDepthImg );
            cv::imshow( "image", cvBGRImg );
            if(autoFlag) //auto take photos
            {
                stringstream cvt;
                string SNumInSc;
                cvt << numInSc;
                cvt >> SNumInSc;
                writeMatToXML(filePath + "/" + SNumInSc + ".xml", cvRawImg16U);
                cv::imwrite(filePath + "/" + SNumInSc + ".jpg", cvBGRImg);
                cout << SNumInSc << " " << numInSc << "  saved" << endl;
                numInSc ++;
            }
		}
		//【6】
		cv::addWeighted(cvBGRImg,0.5,cvFusionImg,0.5,0,cvFusionImg);
		cv::imshow( "fusion", cvFusionImg );
		key = cv::waitKey(100);
	}
    //cv destroy
	cv::destroyWindow("depth");
	cv::destroyWindow("image");
	cv::destroyWindow("fusion");

    //OpenNI2 destroy
    oniDepthStream.destroy();
    capture.release();
    device.close();
    OpenNI::shutdown();

	return 0;
}
CMakeLists.txt
# cmake needs this line
cmake_minimum_required(VERSION 3.1)

# Enable C++11
set(CMAKE_CXX_STANDARD 11)
set(CMAKE_CXX_STANDARD_REQUIRED TRUE)

# Define project name
project(data_capture)

# Find OpenCV, you may need to set OpenCV_DIR variable
# to the absolute path to the directory containing OpenCVConfig.cmake file
# via the command line or GUI
INCLUDE_DIRECTORIES($ENV{OPENNI2_INCLUDE})
link_directories($ENV{OPENNI2_REDIST})
find_package(OpenCV REQUIRED)

# If the package has been found, several variables will
# be set, you can find the full list with descriptions
# in the OpenCVConfig.cmake file.
# Print some message showing some of them
message(STATUS "OpenCV library status:")
message(STATUS "    config: ${OpenCV_DIR}")
message(STATUS "    version: ${OpenCV_VERSION}")
message(STATUS "    libraries: ${OpenCV_LIBS}")
message(STATUS "    include path: ${OpenCV_INCLUDE_DIRS}")
message(STATUS "    include path: $ENV{OPENNI2_INCLUDE}")

# Declare the executable target built from your sources
add_executable(data_capture test.cpp)

# Link your application with OpenCV libraries
target_link_libraries(data_capture LINK_PRIVATE ${OpenCV_LIBS} libOpenNI2.so)
新建文件夹 test 把text.cpp ,CMakeLists.txt放入文件夹。把上面的代码复制进对应的文件。
mkdir test
cd test
touch test.cpp
touch CMakeLists.txt
编译
cd test
mkdir build
cd build
cmake ..
make
报错:
/home/m/cxx/OpenNI2_OpenCV/test.cpp:8:10: fatal error: OpenNI.h: 没有那个文件或目录
8 | #include "OpenNI.h"
| ^~~~~~~~~~
compilation terminated.
make[2]: *** [CMakeFiles/data_capture.dir/build.make:63:CMakeFiles/data_capture.dir/test.cpp.o] 错误 1
make[1]: *** [CMakeFiles/Makefile2:76:CMakeFiles/data_capture.dir/all] 错误 2
make: *** [Makefile:84:all] 错误 2
这个错误说明找不到OpenNI.h这个头文件。虽然cmake找不到,但我们可以用find命令自己找。
sudo find / -name OpenNI.hm@r:~$ sudo find / -name OpenNI.h
[sudo] m 的密码:
find: ‘/run/user/1000/doc’: 权限不够
find: ‘/run/user/1000/gvfs’: 权限不够
/usr/include/openni2/OpenNI.h
/home/m/OpenNI_v2.3.0.85_20220615_1b09bbfd_linux_x64_release/samples/samples/ThirdParty/OpenNI2/Include/OpenNI.h
find命令既然找到了头文件,解决这个错误有2个方法(只针对小白,大神勿扰):
方法1:
修改test.cpp源代码 include 直接连同目录导进来。

在编译就不会提示找不到这个头文件了,所有找不到头文件的问题都可以用这个方法解决。
方法2:
CMakeLists.txt 内直接添加一行:INCLUDE_DIRECTORIES(/usr/include/openni2/)
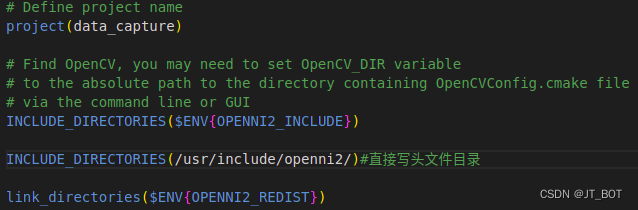
这样写就是告诉cmake,头文件直接到目录去找吧。
用上面2个方法中的一个,就可以彻底解决找不到头文件的问题,除非这个头文件根本在电脑内就不存在,那就是另外的问题了,需要的依赖项没有安装。
所有素材来自网络,如有侵权请告知本人删除。


 1060
1060


 被折叠的 条评论
为什么被折叠?
被折叠的 条评论
为什么被折叠?
 到【灌水乐园】发言


