


PS:文档著于2024年4月19日,官方更新本总结并不会跟着更新,只能提供当前的一些经验和教训,实际已当前版本和文档为主
参数和要求
我的部署参数:系统:Ubuntu22,显卡:RTX4060Ti 16G 内存:DDR5 6000 48G CPU:intel12490F
训练方式:LORA 微调训练
PS:至少要16G显存和8G以上内存
- SFT 全量微调: 4张显卡平均分配,每张显卡占用
48346MiB显存。 - P-TuningV2 微调: 1张显卡,占用
18426MiB显存。 - LORA 微调: 1张显卡,占用
14082MiB显存。
1.拉取最新chatglm3最新模型,huggingface或者是魔塔社区,一定要拉取最新的,本demo在最新chatglm上运行
2.拉取后拉Github官方Demo GitHub - THUDM/ChatGLM3: ChatGLM3 series: Open Bilingual Chat LLMs | 开源双语对话语言模型
数据集处理
PS:训练集是不能直接用的要处理为对应格式
拉取数据集 https://drive.google.com/file/d/13_vf0xRTQsyneRKdD1bZIr93vBGOczrk/view?usp=sharing
其中dev.json是验证集,train.json是验证集
如果仅希望微调模型的对话能力,而非工具能力,你应该按照以下格式整理数据。
{
    "conversations": [
      {
        "role": "system",
        "content": "<system prompt text>"
      },
      {
        "role": "user",
        "content": "<user prompt text>"
      },
      {
        "role": "assistant",
        "content": "<assistant response text>"
      },
      // ... Muti Turn
      {
        "role": "user",
        "content": "<user prompt text>"
      },
      {
        "role": "assistant",
        "content": "<assistant response text>"
      }
    ]
  }
请注意,这种方法在微调的step较多的情况下会影响到模型的工具调用功能
如果您希望微调模型的对话和工具能力,您应该按照以下格式整理数据。
 {
    "tools": [
      // available tools, format is not restricted
    ],
    "conversations": [
      {
        "role": "system",
        "content": "<system prompt text>"
      },
      {
        "role": "user",
        "content": "<user prompt text>"
      },
      {
        "role": "assistant",
        "content": "<assistant thought to text>"
      },
      {
        "role": "tool",
        "name": "<name of the tool to be called",
        "parameters": {
          "<parameter_name>": "<parameter_value>"
        },
        "observation": "<observation>"
        // don't have to be string
      },
      {
        "role": "assistant",
        "content": "<assistant response to observation>"
      },
      // ... Muti Turn
      {
        "role": "user",
        "content": "<user prompt text>"
      },
      {
        "role": "assistant",
        "content": "<assistant response text>"
      }
    ]
  }
贴出一些处理完后的json格式

贴上我的json处理代码,非多轮对话处理,多轮对话请自行处理
import json
import time

def process_and_save_json(input_filepath, output_filepath):
    # 记录开始时间
    start_time = time.time()
    with open(input_filepath, 'r', encoding='utf-8') as file:
        for line in file:
            data = json.loads(line.strip())

            user_data = {
                "role": "user",
                "content": data["content"]
            }
            assistant_data = {
                "role": "assistant",
                "content": data["summary"]
            }
            outfile = open(output_filepath, 'a', encoding='utf-8')
            json.dump({"conversations": [user_data, assistant_data]}, outfile, ensure_ascii=False)
            outfile.write('\n')
    # 记录结束时间
    end_time = time.time()
    elapsed_time = end_time - start_time

    print("耗时:", elapsed_time, "秒")

input_filepath = 'train.json'  # 传入处理前的json
output_filepath = 'train2.json'  # 处理后的保存位置

process_and_save_json(input_filepath, output_filepath)
得到数据后,将它们保存到 ChatGLM3/finetune_demo/data/AdvertiseGen 文件夹下其中AdvertiseGen文件夹请自己创建
安装模型和模型训练所需依赖
模型所需依赖
# basic requirements

protobuf>=4.25.3
transformers>=4.39.3
tokenizers>=0.15.0
cpm_kernels>=1.0.11
torch>=2.1.0
gradio>=4.26.0
sentencepiece>=0.2.0
sentence_transformers>=2.4.0
accelerate>=0.29.2
streamlit>=1.33.0
fastapi>=0.110.0
loguru~=0.7.2
mdtex2html>=1.3.0
latex2mathml>=3.77.0
jupyter_client>=8.6.1

# for openai demo
openai>=1.17.1
zhipuai>=2.0.1
pydantic>=2.7.0
sse-starlette>=2.0.0
uvicorn>=0.29.0
timm>=0.9.16
tiktoken>=0.6.0

# for langchain demo

langchain>=0.1.16
langchainhub>=0.1.15
arxiv>=2.1.0
训练所需依赖
其中deepspeed, mpi4py 两个依赖,如果LORA微调是用不到的可以去掉,很可能遇到依赖安装报错问题,主要是系统缺少了一些头文件,如果你遇到了依赖报错可以自行百度缺少的依赖头文件或间接依赖,这里就不列举了。
jieba>=0.42.1
ruamel_yaml>=0.18.6
rouge_chinese>=1.0.3
jupyter>=1.0.0
datasets>=2.18.0
peft>=0.10.0
deepspeed==0.13.1
mpi4py>=3.1.5
可以保存到txt文件后 pip install -r 你的文件.txt
以下训练前的一些检查
重要:查看你的Pytorch CUDA是否正确识别,有可能会下到CPU版本的,导致训练时候使用CPU非常慢使用以下代码可以检查,如果第一行打印false然后报错,证明你的Pytorch可能安装的是CPU版本,使用conda查看 Pytorch ,conda list pytorch查看详细,如果定位是CPU到则去官网找的安装GPU版本Pytorch
import torch

print(torch.cuda.is_available())
print(torch.cuda.current_device())
print(torch.cuda.get_device_name(0))
lora.yaml配置解析
以下列上一些配置文件 configs/lora.yaml配置参数以及说明,如有不对请指正
data_config:
  train_file: train.json                # 训练数据文件
  val_file: dev.json               # 验证数据文件
  test_file: dev.json               # 测试数据文件
  num_proc: 12                          # 数据加载和预处理使用的进程数,根据CPU核数来

max_input_length: 256                   # 模型输入的最大长度
max_output_length: 512                  # 模型输出的最大长度

training_args:
  output_dir: ./output                  # 模型输出和检查点的保存目录
  max_steps: 3000                       # 训练的最大步数
  learning_rate: 5e-5                   # 学习率
  per_device_train_batch_size: 2        # 每个设备的训练批量大小
  dataloader_num_workers: 12            # 数据加载的工作进程数,根据CPU核数来
  remove_unused_columns: false          # 是否移除未使用的列
  save_strategy: steps                  # 模型保存策略
  save_steps: 500                       # 模型保存步数间隔
  log_level: info                       # 日志级别
  logging_strategy: steps               # 日志记录策略
  logging_steps: 1                     # 日志记录步数间隔
  per_device_eval_batch_size: 6        # 每个设备的评估批量大小
  evaluation_strategy: steps            # 评估策略
  eval_steps: 500                       # 评估步数间隔
  predict_with_generate: true           # 使用生成模式进行预测
  generation_config:
    max_new_tokens: 512                 # 生成任务中最大新生成的token数
  use_cpu: false                        # 是否使用CPU进行训练

peft_config:
  peft_type: LORA                       # 使用的参数效率微调技术类型(LoRA)
  task_type: CAUSAL_LM                  # 任务类型,因果语言模型
  r: 8                                  # LoRA的秩
  lora_alpha: 32                        # LoRA的放大系数
  lora_dropout: 0.1                     # LoRA层的dropout率
以上为16G显卡跑到参数,占用在14.9G作用,显卡比较好的可以调高,per_device_train_batch_size: 2 和 per_device_eval_batch_size: 6 ,否则可以调低
开始训练
进入 finetune_demo
可以运行一下脚本
#!/bin/bash

# 设置环境变量
export CUDA_VISIBLE_DEVICES=0
export NCCL_P2P_DISABLE="1"
export NCCL_IB_DISABLE="1"

# 执行 Python 脚本
python finetune_hf.py data/AdvertiseGen/ /你的6B模型路径 configs/lora.yaml
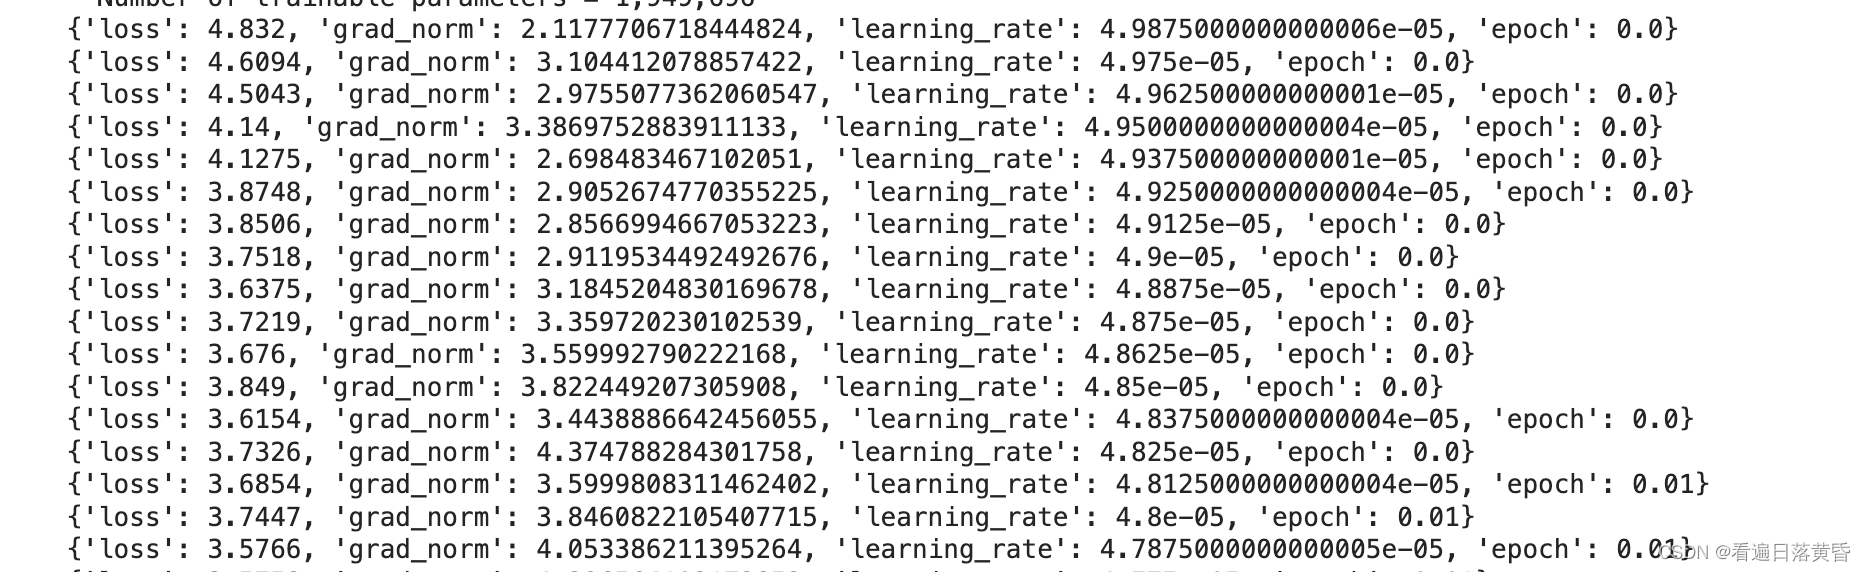
正常跑训练后就是下图
加载权重并实验模型
demo 内使用我们的 lora 和 全参微调的模型。按照以下教程进行修改代码。
- 使用
finetune_demo/inference_hf.py中读入模型的方式替换 demo 中读入模型的方式。
请注意,对于 LORA 和 P-TuningV2 我们没有合并训练后的模型,而是在
adapter_config.json中记录了微调型的路径,如果你的原始模型位置发生更改,则你应该修改adapter_config.json中base_model_name_or_path的路径。
def load_model_and_tokenizer(
        model_dir: Union[str, Path], trust_remote_code: bool = True
) -> tuple[ModelType, TokenizerType]:
    model_dir = _resolve_path(model_dir)
    if (model_dir / 'adapter_config.json').exists():
        model = AutoPeftModelForCausalLM.from_pretrained(
            model_dir, trust_remote_code=trust_remote_code, device_map='auto'
        )
        tokenizer_dir = model.peft_config['default'].base_model_name_or_path
    else:
        model = AutoModelForCausalLM.from_pretrained(
            model_dir, trust_remote_code=trust_remote_code, device_map='auto'
        )
        tokenizer_dir = model_dir
    tokenizer = AutoTokenizer.from_pretrained(
        tokenizer_dir, trust_remote_code=trust_remote_code
    )
return model, tokenizer- 读取微调的模型,请注意,你应该使用微调模型的位置,例如,若你的模型位置为
/path/to/finetune_adapter_model,原始模型地址为path/to/base_model,则你应该使用/path/to/finetune_adapter_model作为model_dir。 - 完成上述操作后,就能正常使用微调的模型了,其他的调用方式没有变化。
- 将以上代码替换web demo的模型加载就可以加载带有微调权重的模型
闲谈,模型合并
官方并没有给模型合并的demo,但是我看到有些demo可以用
这个是chatglm-v2给出的demo
#%%
from transformers import AutoTokenizer, AutoModel
from peft import PeftModel, PeftConfig
import torch
import os
os.environ['CUDA_VISIBLE_DEVICES'] = '1'


model_name_or_path = "/media/yuanz/新加卷/训练代码/chatglm6b_v2_0716/chatglm2-6b_model"


tokenizer = AutoTokenizer.from_pretrained(model_name_or_path, trust_remote_code=True)
model = AutoModel.from_pretrained(model_name_or_path, trust_remote_code=True, device_map='auto', torch_dtype=torch.bfloat16)#.half().cuda()


peft_model_id = "output/adgen-chatglm2-6b-lora_version/checkpoint-880"
model = PeftModel.from_pretrained(model, peft_model_id)
model = model.eval()

# 合并lora
model_merge = model.merge_and_unload()
merger_lora_model_path = "test_merge_dir"

model_merge.save_pretrained(merge_lora_model_path, max_shard_size="2GB")
tokenizer.save_pretrained(merge_lora_model_path)
以下为chatglm3合并demo 引用知乎某篇文章回答感兴趣可以去看一下转载地址:安全验证 - 知乎
使用inference_hf.py中读入模型的方式替换 demo 中读入模型的方式。
请注意,对于 LORA 我们没有合并训练后的模型,而是在adapter_config.json 中记录了微调型的路径,如果你的原始模型位置发生更改,则你应该修改adapter_config.json中base_model_name_or_path的路径。
4. 模型合并及部署
我们通过 finetune_hf.py 微调出的模型, 我们没有合并训练后的模型,而是在adapter_config.json中记录了微调型的路径,如果你的原始模型位置发生更改,我们也要修改adapter_config.json中base_model_name_or_path的路径。 所以, 我们使用load_model_and_tokenizer,通过 AutoPeftModelForCausalLM.from_pretrained调用实现rola权重和基础模型的合并。 这个不是真正意义的合并,还是需要基础模型和lora权重分别保存。
如果作为下一步应用和部署,我们需要合并成一个和基础模型一样的模型, 然后部署。 这个目前官网上没有发布相应的代码, 需要自己实现。我们可以参考 huggingface的文档有关transformer的代码和peft 加速框架,自己写一个合并模型的代码, 实现模型合并,并通过官方通用加载和推理代码实现推理,这样合并的模型和基础模型一样吗就可以并入官方提供的各种应用中了。
代码我基本上在 inference_hf.py 的基础上做了修改,增加了模型合并,去掉了推理部分
def load_model_and_tokenizer(
        model_dir: Union[str, Path], trust_remote_code: bool = True
) -> tuple[ModelType, TokenizerType]:
    model_dir = _resolve_path(model_dir)
    if (model_dir / 'adapter_config.json').exists():
        model = AutoPeftModelForCausalLM.from_pretrained(
            model_dir, trust_remote_code=trust_remote_code, device_map='auto'
        )
        tokenizer_dir = model.peft_config['default'].base_model_name_or_path
    else:
        model = AutoModelForCausalLM.from_pretrained(
            model_dir, trust_remote_code=trust_remote_code, device_map='auto'
        )
        tokenizer_dir = model_dir
    tokenizer = AutoTokenizer.from_pretrained(
        tokenizer_dir, trust_remote_code=trust_remote_code
    )
    return model, tokenizer
。

#  前一部分和inference_hf.py 代码一样

@app.command()
def main(
        model_dir: Annotated[str, typer.Argument(help='')],
        out_dir: Annotated[str, typer.Option(help='')],
):
    model, tokenizer = load_model_and_tokenizer(model_dir)

    # 把加载原模型和lora模型后做合并,并保存
    merged_model = model.merge_and_unload()
    merged_model.save_pretrained(out_dir, safe_serialization=True)
    tokenizer.save_pretrained(out_dir)

if __name__ == '__main__':
    app()


 64
64

 被折叠的 条评论
为什么被折叠?
被折叠的 条评论
为什么被折叠?
 到【灌水乐园】发言


