


小目标检测数据增强策略
在工业视觉场景中,经常会遇到样本不足等问题,同时相机像素很高,但是目标对象像素很小,会严重导致训练效果不好。如下图,要检测螺丝钉的有无,很常见的一个场景
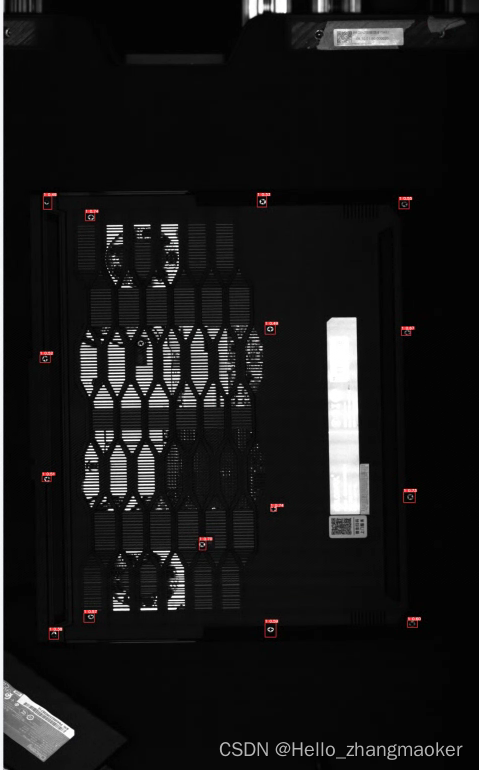
图像大小是4096x6666,而目标大小是70x70,最开始的策略是,将外壳分割出来,再进行检测,但是由于本批次数据集的光照效果实在太差,就直接检测螺丝。
废话不多说,直接上代码:
import os
import cv2
import json
import numpy as np
from pathlib import Path
from glob import glob
import os.path as osp
from PIL import Image
import random
from tqdm import tqdm
from shutil import copyfile
from skimage.util import random_noise
import time
import math
class IMGAUG:
    """


    """
    def __init__(self, root_path,isImgAug):
        self.root_path = root_path
        self.isImgAug = isImgAug
    # 读取中文路径
    def cv_cn_imread(self,filePath):
        cv_img=cv2.imdecode(np.fromfile(filePath,dtype=np.uint8),flags=cv2.IMREAD_COLOR)
        return cv_img


    def core(self):
        root_path = str(Path(self.root_path))
        root_path = root_path + '/'
        json_path = root_path + 'json'  + '/'
        img_path = root_path + 'image' + '/'
        # todo 创建对应的文件夹
        temp_crop_img_path = root_path + 'temp_crop_img_path' + '/'
        img_save_path = root_path + 'img_save_path' + '/'
        json_save_path = root_path + 'json_save_path' + '/'
        if not os.path.exists(json_path):
            print("请注意文件夹命名规则-json文件夹")
            return
        if not os.path.exists(img_path):
            print("请注意文件夹命名规则-image文件夹")
            return
        if not os.path.exists(temp_crop_img_path):
            print("创建临时裁剪图片文件夹"+temp_crop_img_path+"完成")
            os.makedirs(temp_crop_img_path)
        if not os.path.exists(img_save_path):
            print("创建图片保存文件夹"+img_save_path+"完成")
            os.makedirs(img_save_path)
        if not os.path.exists(json_save_path):
            print("创建json保存文件夹"+json_save_path+"完成")
            os.makedirs(json_save_path)
        json_path_tqdm = tqdm(os.listdir(json_path))
        for file in json_path_tqdm:
            # 根据labelme的目标裁剪图像
            # 读取labelme标注的json文件
            anno= json.load(open(json_path + file , "r", encoding="utf-8"))
            # 从json中读取图片名称 xxx.png
            filename = anno['imagePath']
            file_only_name, file_ext = str(filename).split(".")[0],str(filename).split(".")[1]
            # 读取对应的图片数据
            img = self.cv_cn_imread(img_path + filename)
            # 获取shape
            imgH = img.shape[0]
            imgW = img.shape[1]
            shapes = anno['shapes']
            count = 1
            tempShapes = []
            shapes = tqdm(shapes)
            for shape in shapes:
                tempShape = {"label": "0","points": [[0,0],[0,0]],"group_id": "0","description": "0","shape_type": "0","flags": {}}
                tempShape['label'] = shape['label']
                tempShape['group_id'] = shape['group_id']
                tempShape['description'] = shape['description']
                tempShape['shape_type'] = shape['shape_type']
                tempShape['flags']  = shape['flags']
                pts = shape['points']
                x1, y1 = pts[0]
                x2, y2 = pts[1]
                mx = int(x2)-int(x1)
                my = int(y2)-int(y1)
                tempcrop = img[int(y1):int(y2), int(x1):int(x2)]
                # 数据增强
                if self.isImgAug:
                    tempcrop = self.imgaug(tempcrop)
                # 保存裁剪图像
                crop_img_name = temp_crop_img_path+file_only_name+"-"+str(count).zfill(7)+".jpg"
                cv2.imwrite(crop_img_name, tempcrop)

                # 在lable中的坐标随机
                w = random.randint(0,imgW)
                h = random.randint(0,imgH)
                tempShape['points'][0][0] = w
                tempShape['points'][0][1] = h
                tempShape['points'][1][0] = w + mx
                tempShape['points'][1][1] = h + my
                tempShapes.append(tempShape)

                if not os.path.isfile(img_save_path + filename):
                    copyfile(img_path + filename,img_save_path + filename)
                # 将小图放置到大图上
                self.Picture_Synthesis(img_save_path + filename,crop_img_name,img_save_path + filename,(w,h))
                count = count + 1
            # # 修改对应的label
            for j in tempShapes:
                anno['shapes'].append(j)
            # print(anno['shapes'])
            with open(json_save_path+file, "w", encoding="utf-8") as f:
                json.dump(anno, f)
    # 对裁剪后的图像进行图像增强
    def imgaug(self,tempcrop):
        i = random.randint(1,4)
        if i == 1:
            # rng 属性 在老版本 用seed
            tempcrop = random_noise(tempcrop, mode='gaussian', rng=int(time.time()), clip=True) * 255
            return tempcrop
        elif i == 2:
            alpha = random.uniform(0.35, 1)
            blank = np.zeros(tempcrop.shape, tempcrop.dtype)
            tempcrop = cv2.addWeighted(tempcrop, alpha, blank, 1 - alpha, 0)
            return tempcrop
        elif i ==3:
            w = tempcrop.shape[1]
            h = tempcrop.shape[0]
            # 角度变弧度
            rangle = np.deg2rad(5)  # angle in radians
            # now calculate new image width and height
            nw = (abs(np.sin(rangle) * h) + abs(np.cos(rangle) * w)) * 1
            nh = (abs(np.cos(rangle) * h) + abs(np.sin(rangle) * w)) * 1
            # ask OpenCV for the rotation matrix
            rot_mat = cv2.getRotationMatrix2D((nw * 0.5, nh * 0.5), 5, 1)
            # calculate the move from the old center to the new center combined
            # with the rotation
            rot_move = np.dot(rot_mat, np.array([(nw - w) * 0.5, (nh - h) * 0.5, 0]))
            # the move only affects the translation, so update the translation
            rot_mat[0, 2] += rot_move[0]
            rot_mat[1, 2] += rot_move[1]
            # 仿射变换
            rot_img = cv2.warpAffine(tempcrop, rot_mat, (int(math.ceil(nw)), int(math.ceil(nh))), flags=cv2.INTER_LANCZOS4)
            return rot_img
        elif i ==4:
            sed = random.random()
            if 0 < sed < 0.33:  # 0.33的概率水平翻转,0.33的概率垂直翻转,0.33是对角反转
                flip_img = cv2.flip(tempcrop, 0)  # _flip_x
            elif 0.33 < sed < 0.66:
                flip_img = cv2.flip(tempcrop, 1)  # _flip_y
            else:
                flip_img = cv2.flip(tempcrop, -1)  # flip_x_y
            return flip_img

    # 对增强后的图像 随机放到图片上
    def Picture_Synthesis(self,mother_img,son_img,save_img,coordinate):
        """
        :param mother_img: 母图
        :param son_img: 子图
        :param save_img: 保存图片名
        :param coordinate: 子图在母图的坐标 左上角坐标
        :return:
        """
        #将图片赋值,方便后面的代码调用
        M_Img = Image.open(mother_img)
        S_Img = Image.open(son_img)
        try:
            M_Img.paste(S_Img, coordinate, mask=None)
        except:
            print("坐标指定出错 ")
        # 保存图片
        M_Img.save(save_img)

if __name__ == '__main__':
    """
    文件路径命名:
    rootpath
        json(命名要准确)
        image(命名要准确)
        img_save_path(脚本会创建)
        json_save_path(脚本会创建)
    """
    rootpath = r'D:\foshan\1117\newroot'
    # 第二个参数为是否对裁剪数据进行增强
    yolo2json = IMGAUG(rootpath,True)
    yolo2json.core()
   相信大家的聪明才智一下子就能看懂思路,毕竟不是很复杂的问题,我就只简单说一说大概逻辑,以及使用需要注意的点:
脚本读取的是labelme标注的目标检测任务的,其实比较费力的就是拼凑json格式的标签文件,其他真的还好
如果你用labelimg软件标注的,你只需要读取xml文件,修改对应的代码就行了。
1创建对应的文件夹:原始文件json和image的路径名称别弄错了,是根据json文件中的字段去找的图片名称
2读取每一个shape,并将目标裁剪下来
3图像增强:对裁剪下来的图像进行数据增强,包括旋转,噪声,亮度,翻转
4生成随机坐标,放置到原图上并保存
5生成shape,保存到label中,并更新label,重新保存
注意点:
如果图像中存在大目标和小目标,该方法就不适用了,因为很多目标可能存在覆盖遮挡的情况,后续可能会更新为先处理大目标,然后处理小目标。
会在根目录生成如下图的文件夹:
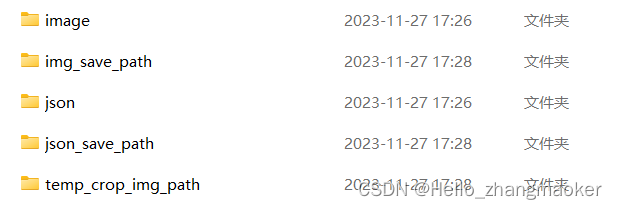
image和json是原始的,temp是裁剪下来的目标文件,其他两个,是处理后的图片和对应的label文件
如图所示为处理的图像
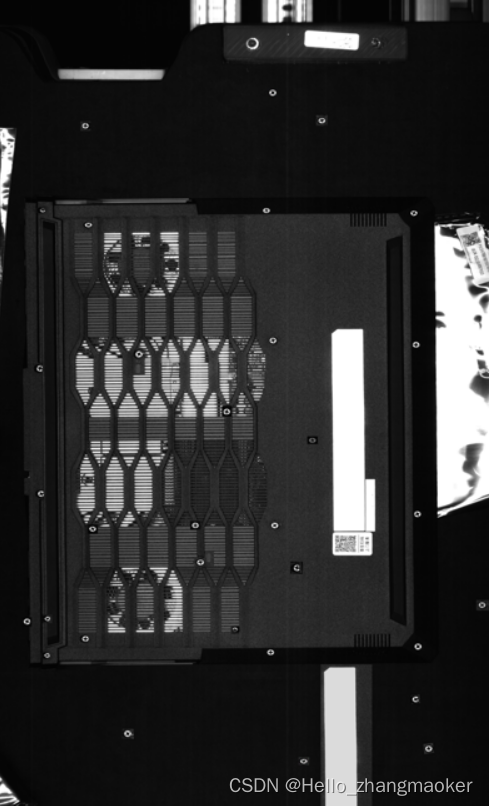
训练效果也得到了提升
有意私聊 zhangmaoker@163.com


 2643
2643


 被折叠的 条评论
为什么被折叠?
被折叠的 条评论
为什么被折叠?
 到【灌水乐园】发言


