


本文将记录如何一步一步做TabHost的,最终实现效果如下图

下面具体讲解如何一步一步做出来这个效果的!
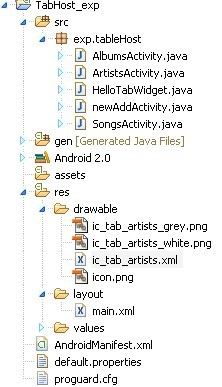
1:创建工程和类如下图所示
2: 编写ic_tab_artists.xml
<?xml version="1.0" encoding="utf-8"?>
<selector xmlns:android="http://schemas.android.com/apk/res/android">
    <!-- When selected, use grey -->
    <item android:drawable="@drawable/ic_tab_artists_grey"
          android:state_selected="true" />
    <!-- When not selected, use white-->
    <item android:drawable="@drawable/ic_tab_artists_white" />
</selector>
作用: 这个选择器适用于当tab在不同之间切换的时候选择不同的图片,可以通过state_selected来设置
3: 编写main.xml
<?xml version="1.0" encoding="utf-8"?>
<TabHost xmlns:android="http://schemas.android.com/apk/res/android"
    android:id="@android:id/tabhost"
    android:layout_width="fill_parent"
    android:layout_height="fill_parent">
    <RelativeLayout
        android:orientation="vertical"
        android:layout_width="fill_parent"
        android:layout_height="fill_parent"
        android:padding="5dp">
        <TabWidget
            android:id="@android:id/tabs"
            android:layout_width="fill_parent"
            android:layout_height="wrap_content"
            android:layout_alignParentBottom="true"
          />
        <FrameLayout
            android:id="@android:id/tabcontent"
            android:layout_width="fill_parent"
            android:layout_height="fill_parent"
            android:padding="5dp" />
    </RelativeLayout>
</TabHost>
作用:一个TabHost的配置文件 android:layout_alignParentBottom="true" 指明tab的方向(默认在上方,我这个例子实现的是放在下方) 其中 : TabWidget 指明的是tab
FrameLayout 指明的是content
4:为每个tab编写类容
public class AlbumsActivity extends Activity {
    public void onCreate(Bundle savedInstanceState) {
        super.onCreate(savedInstanceState);
        TextView textview = new TextView(this);
        textview.setText("This is the Albums tab");
        setContentView(textview);
    }
}
作用:显示content的区域,这里只是简单的使用了一个TextView 来进行显示区域里面的数据(其他几个类似)
5: 编写HelloTabWidget
public class HelloTabWidget extends TabActivity {
    /** Called when the activity is first created. */
    @Override
    public void onCreate(Bundle savedInstanceState) {
    	 super.onCreate(savedInstanceState);
    	    setContentView(R.layout.main);

    	    Resources res = getResources(); // Resource object to get Drawables
    	    TabHost tabHost = getTabHost();  // The activity TabHost
    	    TabHost.TabSpec spec;  // Resusable TabSpec for each tab
    	    Intent intent;  // Reusable Intent for each tab

    	    // Create an Intent to launch an Activity for the tab (to be reused)
    	    intent = new Intent().setClass(this, ArtistsActivity.class);

    	    // Initialize a TabSpec for each tab and add it to the TabHost
    	    spec = tabHost.newTabSpec("artists").setIndicator("Artists",
    	                      res.getDrawable(R.drawable.ic_tab_artists))
    	                  .setContent(intent);
    	    tabHost.addTab(spec);

    	    // Do the same for the other tabs
    	    intent = new Intent().setClass(this, AlbumsActivity.class);
    	    spec = tabHost.newTabSpec("albums").setIndicator("Albums",
    	                      res.getDrawable(R.drawable.ic_tab_artists))
    	                  .setContent(intent);
    	    tabHost.addTab(spec);

    	    intent = new Intent().setClass(this, SongsActivity.class);
    	    spec = tabHost.newTabSpec("songs").setIndicator("Songs",
    	                      res.getDrawable(R.drawable.ic_tab_artists))
    	                  .setContent(intent);
    	    tabHost.addTab(spec);

    	    intent = new Intent().setClass(this, newAddActivity.class);

    	    // Initialize a TabSpec for each tab and add it to the TabHost
    	    spec = tabHost.newTabSpec("add").setIndicator("Add",
    	                      res.getDrawable(R.drawable.ic_tab_artists))
    	                  .setContent(intent);
    	    tabHost.addTab(spec);

    	    tabHost.setCurrentTab(2);
    	    //处理tabId
    	    tabHost.setOnTabChangedListener(new OnTabChangeListener() {
				public void onTabChanged(String tabId) {
                         Log.i("HelloTabWidget", tabId) ;
				}
			});

    }
作用: 实现了TabActivity 并添加了一个新的newAddActivity ,如果你要实现TabChanged后的逻辑可以实现OnTabChangeListener这个接口
这里具体讲解一下如何实现的过程:
①:TabHost tabHost = getTabHost(); 获得TabHost根标签
②:spec = tabHost.newTabSpec("artists").setIndicator("Artists", res.getDrawable(R.drawable.ic_tab_artists)) .setContent(intent); 实例化一个具体的tab,并设置图标和类容
③: tabHost.addTab(spec); 添加到TabHost 中
④: tabHost.setCurrentTab(2); 默认选择卡
本例的下载源码: http://download.csdn.net/source/3576083


 6636
6636

 被折叠的 条评论
为什么被折叠?
被折叠的 条评论
为什么被折叠?
 到【灌水乐园】发言


