


Google最新VR消息
google最近退出了Day-dream的SDK测试版,提供给开发者,我把google的sdk运行了一遍并结合官网的介绍算搞明白了一些api的调用。下面时Google的demo地址Day-dreamDemo
我们下载并且import到AS中
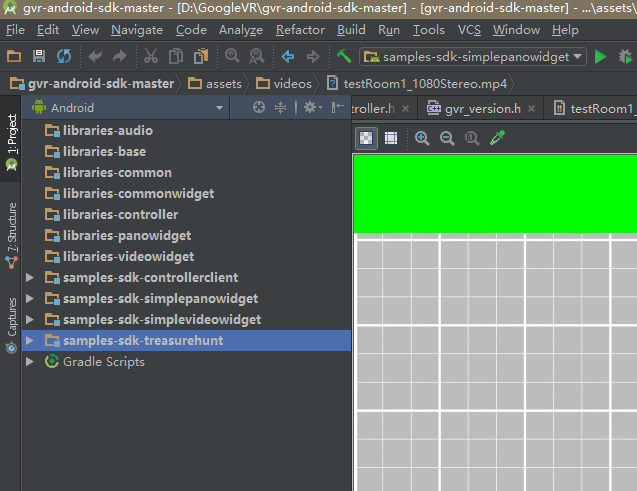
这里我们看到Google的demo中给了我们4个案例。供我们参考,其他的Libraries都是以arr的形式提供给我们。可以看出来Google的用心和信息。
需要注意的时:Google建议使用7.0系统 开启vr设置
当然我们依然可以使用低版本的系统(4.4以上为佳)
我们依次看每一个demo
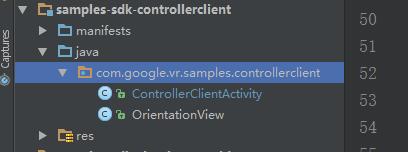
com.google.vr.samples.controllerclient
手柄的控制demo
我们清晰的看到OrientationView时自定义了一个GlsurfaceView的视图,ControllerClientActivity则时整个视图。- OrientationView的Code段
 public OrientationView(Context context, AttributeSet attributeSet) {
    super(context, attributeSet);
    setEGLContextClientVersion(2);
    setEGLConfigChooser(8, 8, 8, 8, 16, 0);
    setRenderer(new Renderer());

    sensorManager = (SensorManager) context.getSystemService(Context.SENSOR_SERVICE);
    orientationSensor = sensorManager.getDefaultSensor(Sensor.TYPE_ROTATION_VECTOR);
    phoneOrientationListener = new PhoneOrientationListener();
  }
这里是自定义控件的初始化,初始了GL2.0 并且设置了旋转传感器的监听。
private class Renderer implements GLSurfaceView.Renderer中最重要的对视图进行绘制矩阵
@Override
    public final void onDrawFrame(GL10 unused) {
      GLES20.glClear(GLES20.GL_COLOR_BUFFER_BIT | GLES20.GL_DEPTH_BUFFER_BIT);
      GLES20.glUseProgram(program);

      // Set up camera.
      Matrix.setIdentityM(tmpMatrix1, 0);

      // Convert world space to head space.
      Matrix.translateM(tmpMatrix1, 0, 0, 0, -VIEW_SIZE);
      Matrix.multiplyMM(tmpMatrix2, 0, tmpMatrix1, 0, phoneInWorldSpaceMatrix, 0);

      // Phone's Z faces up. We need it to face toward the user.
      Matrix.rotateM(tmpMatrix2, 0, 90, 1, 0, 0);

      if (startFromSensorTransformation != null) {
        // Compensate for the yaw by rotating in the other direction.
        Matrix.rotateM(tmpMatrix2, 0, -startFromSensorTransformation[0], 0, 1, 0);
      } // Else we're in a transient state between a resetYaw call and an onSensorChanged call.

      // Convert object space to world space.
      if (controller != null) {
        controller.update();
        controller.orientation.toRotationMatrix(controllerInStartSpaceMatrix);
      }
      Matrix.multiplyMM(tmpMatrix1, 0, tmpMatrix2, 0, controllerInStartSpaceMatrix, 0);

      // Set mvpMatrix.
      int mvp = GLES20.glGetUniformLocation(program, "uMvpMatrix");
      Matrix.multiplyMM(mvpMatrix, 0, projectionMatrix, 0, tmpMatrix1, 0);
      GLES20.glUniformMatrix4fv(mvp, 1, false, mvpMatrix, 0);

      // Draw.
      int position = GLES20.glGetAttribLocation(program, "aPosition");
      GLES20.glVertexAttribPointer(position, 3, GLES20.GL_FLOAT, false, 0, boxVertices);
      GLES20.glEnableVertexAttribArray(position);

      int color = GLES20.glGetAttribLocation(program, "aColor");
      GLES20.glVertexAttribPointer(color, 4, GLES20.GL_FLOAT, false, 0, boxColors);
      GLES20.glEnableVertexAttribArray(color);

      GLES20.glDrawArrays(GLES20.GL_LINES, 0, vertexCount);
      GLES20.glDisableVertexAttribArray(position);
      GLES20.glDisableVertexAttribArray(color);
    }
  }
2 . com.google.vr.sdk.samples.simplepanowidget
panorama(全景图片)沉溺demo
  @Override
  protected void onCreate(Bundle savedInstanceState) {
    super.onCreate(savedInstanceState);
    setContentView(R.layout.main_layout);

    // Make the source link clickable.
    TextView sourceText = (TextView) findViewById(R.id.source);
    sourceText.setText(Html.fromHtml(getString(R.string.source)));
    sourceText.setMovementMethod(LinkMovementMethod.getInstance());

    panoWidgetView = (VrPanoramaView) findViewById(R.id.pano_view);
    panoWidgetView.setEventListener(new ActivityEventListener());

    // Initial launch of the app or an Activity recreation due to rotation.
    handleIntent(getIntent());
  }
以上我们可以看到初始话控件,以及设置一些事件的监听。(最重要的是学习到了新的知识(让Activity可以getIntent())
/**
   * Called when the Activity is already running and it's given a new intent.
   */
  @Override
  protected void onNewIntent(Intent intent) {
    Log.i(TAG, this.hashCode() + ".onNewIntent()");
    // Save the intent. This allows the getIntent() call in onCreate() to use this new Intent during
    // future invocations.
    setIntent(intent);
    // Load the new image.
    handleIntent(intent);
}其中handleIntent的方法内写了一些引用图片的代码段(并不重要,不再展示)
再AsyTask中我看到了一个让我感觉很重要的东西
  panoOptions = new Options();
          panoOptions.inputType = Options.TYPE_STEREO_OVER_UNDER;
Options 具有两个public常量
| 范围 | 名称 | 值 |
|---|---|---|
| public | TYPE_MONO(单独全景图片时使用) | 1 |
| public | TYPE_STEREO_OVER_UNDER(全景图片拼接为上下两部分时候使用) | 2 |
| private | TYPE_START_MARKER | 0 |
| private | TYPE_END_MARKER | 3 |
2中不同模式比较
* TYPE_MONO模式下
* TYPE_STEREO_OVER_UNDER模式下

3 . com.google.vr.sdk.samples.simplevideowidget
最关注的莫过于 VR的音频播放了。在了解前,我们需要看一下Google告诉我们如何导入比如MP3,HlS等音频的操作。
/**
 * A test activity that renders a 360 video using {@link VrVideoView}.
 * It loads the video in the assets by default. User can use it to load any video files using the
 * command:
 *   adb shell am start -a android.intent.action.VIEW \
 *     -n com.google.vr.sdk.samples.simplevideowidget/.SimpleVrVideoActivity \
 *     -d /sdcard/FILENAME.MP4
 *
 * To load HLS urls add "--ei inputFormat 2" to pass in an integer extra which will set
 * VrVideoView.Options.inputFormat. e.g.
 *   adb shell am start -a android.intent.action.VIEW \
 *     -n com.google.vr.sdk.samples.simplevideowidget/.SimpleVrVideoActivity \
 *     -d "https://EXAMPLE.COM/FILENAME.M3U8" \
 *     --ei inputFormat 2
 *
 * To specify that the video is of type stereo over under (has images for left and right eyes),
 * add "--ei inputType 2" to pass in an integer extra which will set VrVideoView.Options.inputType.
 * This can be combined with other extras.
 * e.g.
 *   adb shell am start -a android.intent.action.VIEW \
 *     -n com.google.vr.sdk.samples.simplevideowidget/.SimpleVrVideoActivity \
 *     -d "https://EXAMPLE.COM/FILENAME.MP4" \
 *     --ei inputType 2
 */
在我们导入前,我们需要了解视频的格式以及是否双眼等选择对应的类型,使用adb导入到手机的内存中。
 // Bind input and output objects for the view.
        videoWidgetView = (VrVideoView) findViewById(R.id.video_view); //VR视频控件VrVideoView
        videoWidgetView.setEventListener(new ActivityEventListener());  //设置视频的回掉(处理进度条等)
可以看到视频VR视频播放控件的初始化,和设置监听事件。
    Options options = new Options();
                    options.inputType = Options.TYPE_STEREO_OVER_UNDER;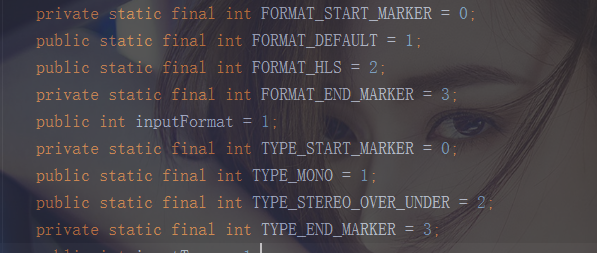
这里的模式和全景图片类似,不过注意多出来的几个Public属性,为音频的格式Default还是Hls.
4 .com.google.vr.sdk.samples.treasurehunt
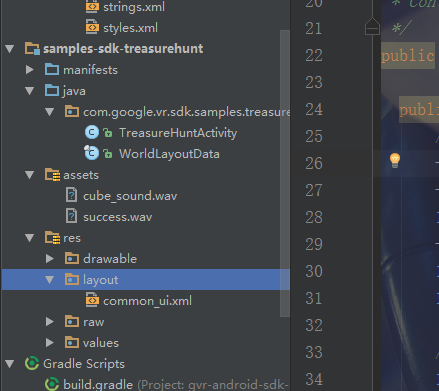
首先我们先看一下目录结构:
|-TreasureHuntActivity (主要的实现类)
|-WorldLayoutData (主要是需要渲染的视图矩阵坐标)
TreasureHuntActivity的code
我们需要初始化3D音效
    // Initialize 3D audio engine.
    gvrAudioEngine = new GvrAudioEngine(this, GvrAudioEngine.RenderingMode.BINAURAL_HIGH_QUALITY);
画地板的Gl代码段
/**
   * Draw the floor.
   *
   * <p>This feeds in data for the floor into the shader. Note that this doesn't feed in data about
   * position of the light, so if we rewrite our code to draw the floor first, the lighting might
   * look strange.
   */
  public void drawFloor() {
    GLES20.glUseProgram(floorProgram);

    // Set ModelView, MVP, position, normals, and color.
    GLES20.glUniform3fv(floorLightPosParam, 1, lightPosInEyeSpace, 0);
    GLES20.glUniformMatrix4fv(floorModelParam, 1, false, modelFloor, 0);
    GLES20.glUniformMatrix4fv(floorModelViewParam, 1, false, modelView, 0);
    GLES20.glUniformMatrix4fv(floorModelViewProjectionParam, 1, false, modelViewProjection, 0);
    GLES20.glVertexAttribPointer(
        floorPositionParam, COORDS_PER_VERTEX, GLES20.GL_FLOAT, false, 0, floorVertices);
    GLES20.glVertexAttribPointer(floorNormalParam, 3, GLES20.GL_FLOAT, false, 0, floorNormals);
    GLES20.glVertexAttribPointer(floorColorParam, 4, GLES20.GL_FLOAT, false, 0, floorColors);

    GLES20.glEnableVertexAttribArray(floorPositionParam);
    GLES20.glEnableVertexAttribArray(floorNormalParam);
    GLES20.glEnableVertexAttribArray(floorColorParam);

    GLES20.glDrawArrays(GLES20.GL_TRIANGLES, 0, 24);

    checkGLError("drawing floor");
  }
监测是否眼睛查看到视野中的物体代码(为了可以点击消除掉cube)
 /**
   * Check if user is looking at object by calculating where the object is in eye-space.
   *
   * @return true if the user is looking at the object.
   */
  private boolean isLookingAtObject() {
    // Convert object space to camera space. Use the headView from onNewFrame.
    Matrix.multiplyMM(modelView, 0, headView, 0, modelCube, 0);
    Matrix.multiplyMV(tempPosition, 0, modelView, 0, POS_MATRIX_MULTIPLY_VEC, 0);

    float pitch = (float) Math.atan2(tempPosition[1], -tempPosition[2]);
    float yaw = (float) Math.atan2(tempPosition[0], -tempPosition[2]);

    return Math.abs(pitch) < PITCH_LIMIT && Math.abs(yaw) < YAW_LIMIT;
  }


 968
968

 被折叠的 条评论
为什么被折叠?
被折叠的 条评论
为什么被折叠?
 到【灌水乐园】发言


