


翻译自:http://www.opengl-tutorial.org/intermediate-tutorials/tutorial-14-render-to-texture/
Tutorial 14 : Render To Texture
第14课:渲染到纹理
Render-To-Texture is a handful method to create a variety of effects. The basic idea is that you render a scene just like you usually do, but this time in a texture that you can reuse later.
渲染到纹理再制作各种特效时非常使用。渲染到纹理就像平时渲染场景一样,不过这次我们是将其渲染到纹理上以备后用。
Applications include in-game cameras, post-processing, and as many GFX as you can imagine.
渲染到纹理的应用范围包括模拟游戏中的相机,后期处理以及许多你可以想象的图像效果。
Render To Texture
渲染到纹理
We have three tasks : creating the texture in which we’re going to render ; actually rendering something in it ; and using the generated texture.
我们有3个任务:创建将要渲染的纹理;将所需要渲染的场景物件渲染上去;使用这张生成的纹理。
Creating the Render Target
创建Render Target
What we’re going to render to is called a Framebuffer. It’s a container for textures and an optional depth buffer. It’s created just like any other object in OpenGL :
我们会将需要渲染的东西渲染到一个叫Framebuffer的东西中。他是一个纹理和可选深度缓存的容器。我们可以像创建其他OpenGL对象一样创建它。
1 // The framebuffer, which regroups 0, 1, or more textures, and 0 or 1 depth buffer.
2 GLuint FramebufferName = 0;
3 glGenFramebuffers(1, &FramebufferName);
4 glBindFramebuffer(GL_FRAMEBUFFER, FramebufferName);
Now we need to create the texture which will contain the RGB output of our shader. This code is very classic :
现在我们需要创建一张接受我们shader输出的纹理。示例代码如下:
 1 // The texture we're going to render to
 2 GLuint renderedTexture;
 3 glGenTextures(1, &renderedTexture);
 4
 5 // "Bind" the newly created texture : all future texture functions will modify this texture
 6 glBindTexture(GL_TEXTURE_2D, renderedTexture);
 7
 8 // Give an empty image to OpenGL ( the last "0" )
 9 glTexImage2D(GL_TEXTURE_2D, 0,GL_RGB, 1024, 768, 0,GL_RGB, GL_UNSIGNED_BYTE, 0);
10
11 // Poor filtering. Needed !
12 glTexParameteri(GL_TEXTURE_2D, GL_TEXTURE_MAG_FILTER, GL_NEAREST);
13 glTexParameteri(GL_TEXTURE_2D, GL_TEXTURE_MIN_FILTER, GL_NEAREST);
We also need a depth buffer. This is optional, depending on what you actually need to draw in your texture; but since we’re going to render Suzanne, we need depth-testing.
我们还需要一个深度缓存。是否使用深度缓存是基于你想要在你的纹理上绘制什么;但既然我们需要渲染Suzanne,我们需要进行深度测试。
1 // The depth buffer
2 GLuint depthrenderbuffer;
3 glGenRenderbuffers(1, &depthrenderbuffer);
4 glBindRenderbuffer(GL_RENDERBUFFER, depthrenderbuffer);
5 glRenderbufferStorage(GL_RENDERBUFFER, GL_DEPTH_COMPONENT, 1024, 768);
6 glFramebufferRenderbuffer(GL_FRAMEBUFFER, GL_DEPTH_ATTACHMENT, GL_RENDERBUFFER, depthrenderbuffer);
Finally, we configure our framebuffer
最后我们配置下我们的Framebuffer
1 // Set "renderedTexture" as our colour attachement #0
2 glFramebufferTexture(GL_FRAMEBUFFER, GL_COLOR_ATTACHMENT0, renderedTexture, 0);
3
4 // Set the list of draw buffers.
5 GLenum DrawBuffers[1] = {GL_COLOR_ATTACHMENT0};
6 glDrawBuffers(1, DrawBuffers); // "1" is the size of DrawBuffers
Something may have gone wrong during the process, depending on the capabilities of the GPU. This is how you check it :
因为GPU的能力不同,有些东西在处理的时候可能会出错。我们可以这样进行检测:
1 // Always check that our framebuffer is ok
2 if(glCheckFramebufferStatus(GL_FRAMEBUFFER) != GL_FRAMEBUFFER_COMPLETE)
3 return false;
Rendering to the texture
把内容渲染到纹理
Rendering to the texture is straightforward. Simply bind your framebuffer, and draw your scene as usual. Easy !
把内容渲染到纹理上非常简明扼要。简单的绑定你的Framebuffer,然后和通常一样绘制你的场景就好了。
1 // Render to our framebuffer
2 glBindFramebuffer(GL_FRAMEBUFFER, FramebufferName);
3 glViewport(0,0,1024,768); // Render on the whole framebuffer, complete from the lower left corner to the upper right
The fragment shader just needs a minor adaptation :
fragment shader只需要做一些简单的调整:
1 layout(location = 0) out vec3 color;This means that when writing in the variable “color”, we will actually write in the Render Target 0, which happens to be our texure because DrawBuffers[0] is GL_COLOR_ATTACHMENTi, which is, in our case, renderedTexture.
以上代码表示,当写变量color时,我们事实上是写进Render Target 0中,也就是我们指定的纹理中,对于我们而言就是渲染到纹理。
To recap :
- color will be written to the first buffer because of layout(location=0).
- The first buffer is GL_COLOR_ATTACHMENT0 because of DrawBuffers[1] = {GL_COLOR_ATTACHMENT0}
- GL_COLOR_ATTACHMENT0 has renderedTexture attached, so this is where your color is written.
- In other words, you can replace GL_COLOR_ATTACHMENT0 by GL_COLOR_ATTACHMENT2 and it will still work.
Note : there is no layout(location=i) in OpenGL < 3.3, but you use glFragData[i] = mvvalue anyway.
总得来说:
1.颜色会写到第一个buffer中,因为layout(location=0)
2.第一个buffer是GL_COLOR_ATTACHMENT0因为DrawBuffers[1] = {GL_COLOR_ATTACHMENT0}
3.因为renderedTexture与GL_COLOR_ATTACHMENT0进行了关联,所以颜色绘制在其上。
4.换句话说,你也可以用GL_COLOR_ATTACHMENT2来替换GL_COLOR_ATTACHMENT0,它同样有用。
注意:在OpenGL3.3以下版本中没有layout(location=i)这样的写法,而是使用glFragData[i] = mvvalue。
Using the rendered texture
使用渲染好的纹理
We’re going to draw a simple quad that fills the screen. We need the usual buffers, shaders, IDs, …
我们来画一个简单的四边形来填满屏幕,我们需要使用平时的buffers, shaders, IDs...
 1 // The fullscreen quad's FBO
 2 GLuint quad_VertexArrayID;
 3 glGenVertexArrays(1, &quad_VertexArrayID);
 4 glBindVertexArray(quad_VertexArrayID);
 5
 6 static const GLfloat g_quad_vertex_buffer_data[] = {
 7     -1.0f, -1.0f, 0.0f,
 8     1.0f, -1.0f, 0.0f,
 9     -1.0f,  1.0f, 0.0f,
10     -1.0f,  1.0f, 0.0f,
11     1.0f, -1.0f, 0.0f,
12     1.0f,  1.0f, 0.0f,
13 };
14
15 GLuint quad_vertexbuffer;
16 glGenBuffers(1, &quad_vertexbuffer);
17 glBindBuffer(GL_ARRAY_BUFFER, quad_vertexbuffer);
18 glBufferData(GL_ARRAY_BUFFER, sizeof(g_quad_vertex_buffer_data), g_quad_vertex_buffer_data, GL_STATIC_DRAW);
19
20 // Create and compile our GLSL program from the shaders
21 GLuint quad_programID = LoadShaders( "Passthrough.vertexshader", "SimpleTexture.fragmentshader" );
22 GLuint texID = glGetUniformLocation(quad_programID, "renderedTexture");
23 GLuint timeID = glGetUniformLocation(quad_programID, "time");
Now you want to render to the screen. This is done by using 0 as the second parameter of glBindFramebuffer.
1 // Render to the screen
2 glBindFramebuffer(GL_FRAMEBUFFER, 0);
3 glViewport(0,0,1024,768); // Render on the whole framebuffer, complete from the lower left corner to the upper right
We can draw our full-screen quad with such a shader:
我们可以使用如下shader来填满四边形的屏幕:
 1 #version 330 core
 2
 3 in vec2 UV;
 4
 5 out vec3 color;
 6
 7 uniform sampler2D renderedTexture;
 8 uniform float time;
 9
10 void main(){
11     color = texture( renderedTexture, UV + 0.005*vec2( sin(time+1024.0*UV.x),cos(time+768.0*UV.y)) ).xyz;
12 }
This code simply sample the texture, but adds a tiny offset which depends on time.
这段代码简单的采样了纹理,但是添加了一个基于时间的很小的偏移。
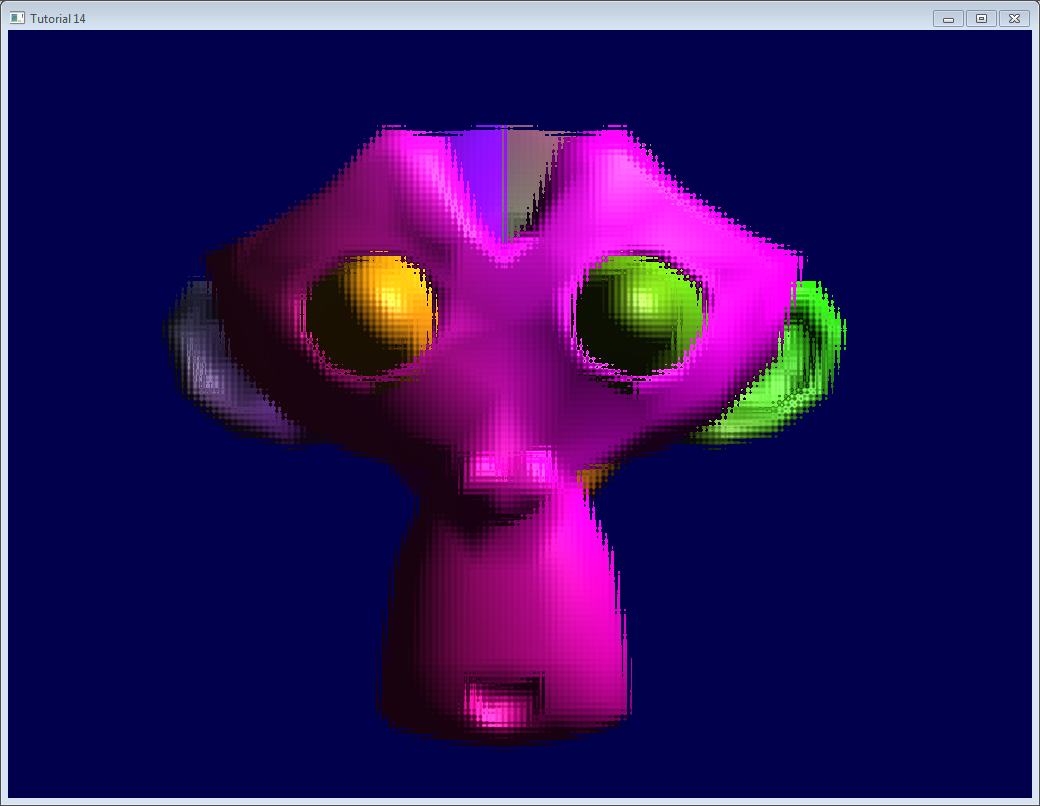
Results
结果
Going further
Using the depth
In some cases you might need the depth when using the rendered texture. In this case, simply render to a texture created as follows :
在一些情况下我们可能在使用渲染到纹理时使用到深度。在这种情况下,如下设置:
1 glTexImage2D(GL_TEXTURE_2D, 0,GL_DEPTH_COMPONENT24, 1024, 768, 0,GL_DEPTH_COMPONENT, GL_FLOAT, 0);(“24” is the precision, in bits. You can choose between 16, 24 and 32, depending on your needs. Usually 24 is fine)
This should be enough to get you started, but the provided source code implements this too.
Note that this should be somewhat slower, because the driver won’t be able to use some optimisations such as Hi-Z.
In this screenshot, the depth levels are artificially “prettified”. Usually, its much more difficult to see anything on a depth texture. Near = Z near 0 = black, far = Z near 1 = white.

Multisampling
多重采样
You can write to multisampled textures instead of “basic” textures : you just have to replace glTexImage2D by glTexImage2DMultisample in the C++ code, and sampler2D/texture by sampler2DMS/texelFetch in the fragment shader.
There is a big caveat, though : texelFetch needs another argument, which is the number of the sample to fetch. In other words, there is no automatic “filtering” (the correct term, when talking about multisampling, is “resolution”).
So you may have to resolve the MS texture yourself, in another, non-MS texture, thanks to yet another shader.
Nothing difficult, but it’s just bulky.
Multiple Render Targets
多个Render Targets
You may write to several textures at the same time.
Simply create several textures (all with the correct and same size !), call glFramebufferTexture with a different color attachement for each, call glDrawBuffers with updated parameters ( something like (2,{GL_COLOR_ATTACHMENT0,GL_COLOR_ATTACHMENT1}})), and add another output variable in your fragment shader :
1 layout(location = 1) out vec3 normal_tangentspace; // or whateverHint : If you effectively need to output a vector in a texture, floating-point textures exist, with 16 or 32 bit precision instead of 8… SeeglTexImage2D’s reference (search for GL_FLOAT).
Hint2 : For previous versions of OpenGL, use glFragData[1] = myvalue instead.
Exercices
- Try using glViewport(0,0,512,768); instead of glViewport(0,0,1024,768); (try with both the framebuffer and the screen)
- Experiment with other UV coordinates in the last fragment shader
- Transform the quad with a real transformation matrix. First hardcode it, and then try to use the functions of controls.hpp ; what do you notice ?


 1997
1997

 被折叠的 条评论
为什么被折叠?
被折叠的 条评论
为什么被折叠?
 到【灌水乐园】发言


