


github:https://github.com/wang-xinyu/tensorrtx
参考:TensorRT详细入门指北,如果你还不了解TensorRT,过来看看吧_程序员老潘的博客-CSDN博客_lstm tensorrt
默认前置条件已安装驱动、CUDA、cudnn、pytorch。
这里以ubuntu20.04,驱动470,CUDA11.1.1,cudnn8.1.1,pytorch1.12,tensorrt7.2.3.4为例。
简介
tensorrt主要用于优化模型推理速度,是硬件相关的。主要有两种将torch转化为tensorrt的方式:
1. github路线:首先保存模型的.pth权重文件,然后将其转化为.wts文件。之后编写c++程序对.wts进行编译,生成.engine文件,通过.engine来进行tensorrt的推理。
2. onnx路线:将网络结构保存为onnx格式,然后利用ONNX-TensorRT工具将onnx转换为tensorrt模型即可。
安装
下载路径:NVIDIA TensorRT | NVIDIA Developer
选择对应版本下载:
nvidia-smi查看驱动版本:
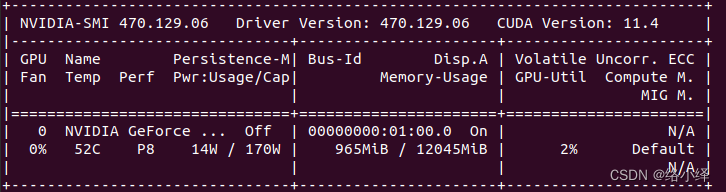
这里显示的CUDA Version是电脑最高支持的版本,实际11.0-11.4均可,电脑实际版本根据下述命令查询:
nvcc --version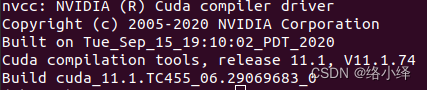
找到对应版本下载:
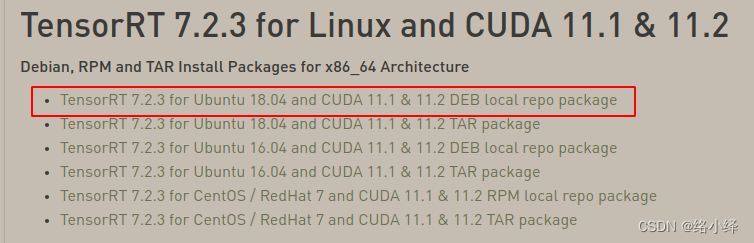
虽然显示的是18.04但20.04也是可以使用的。
安装与检查:
\\ tensorrt安装
sudo dpkg -i nv-tensorrt-repo-ubuntu1804-cuda11.1-trt7.2.3.4-ga-20210226_1-1_amd64.deb
sudo apt update
sudo apt install tensorrt

\\ opencv安装
sudo add-apt-repository ppa:timsc/opencv-3.3
sudo apt-get update
sudo apt install libopencv-dev

\\ 检查是否安装成功
dpkg -l | grep cuda
dpkg -l | grep nvinfer
dpkg -l | grep opencv装其它版本的opencv参考:Ubuntu 18.04 安装opencv4.2.0_翟羽嚄的博客-CSDN博客_ubuntu安装opencv4.2
github路线[1]
以lenet为例,pytorch代码中获得网络的输出:
git clone https://github.com/wang-xinyu/pytorchx
cd pytorchx/lenet
python lenet5.py    # get lenet5.pth
python inference.py # get lenet5.wts![]()
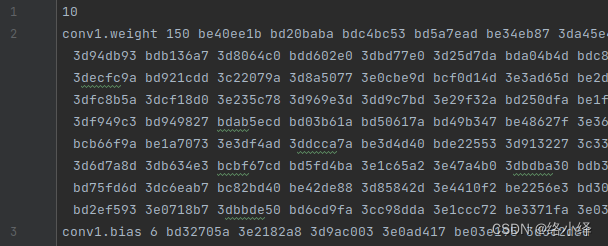
lenet5.wts,第1行是参数个数,接下来的10行,每行开头为参数名,数量,然后是值:
make lenet5,分为c++版本和python版本:
git clone https://github.com/wang-xinyu/tensorrtx
cd tensorrtx/lenet
cp [PATH-OF-pytorchx]/pytorchx/lenet/lenet5.wts .
c++(推荐):
mkdir build
cd build
cmake ..
make

./lenet -s # 生成lenet5.engine
./lenet -d # 推理
python(不推荐,除非tensorrt装的最新版本):
pip install --upgrade setuptools pip

pip install pycuda
pip install nvidia-pyindex
pip install nvidia-tensorrt==<your tensorrt version>

python lenet.py -s # 生成lenet5.engine
python lenet.py -d # 推理
和之前直接pytorch输出的结果一致。
错误汇总
1. make时报错:
(1) .../logging.h:239:10: error: looser throw specifier for xxxx


参考:https://blog.csdn.net/lxx191079173/article/details/123511086
修改logging.h 239行:
void log(Severity severity, const char* msg) override
//改为
void log(Severity severity, nvinfer1::AsciiChar const* msg) noexcept
(2) lenet.cpp:2:10: fatal error: cuda_runtime_api.h: 没有那个文件或目录

参考:【已解决】 fatal error: cuda_runtime.h: 没有那个文件或目录_HeyMountain的博客-CSDN博客_cuda_runtime.h: 没有那个文件或目录
sudo gedit ~/.bashrc

# 加入以下语句
export CPATH=/usr/local/cuda-11.1/targets/x86_64-linux/include:$CPATH
export LD_LIBRARY_PATH=/usr/local/cuda-11.1/targets/x86_64-linux/lib:$LD_LIBRARY_PATH
export PATH=/usr/local/cuda-11.1/bin:$PATH

source ~/.bashrc
无效。
我是在conda虚拟环境下make的,参考:ERROR: cuda_runtime_api.h: No such file or directory_圆滚熊的博客-CSDN博客
export CUDA_HOME = /usr/local/cuda-11.1
无效。
参考:解决 :fatal error: cuda_runtime.h: No such file or directory_seaun163的博客-CSDN博客_cuda runtime.h
在CMakeLists.txt中找到:
![]()
修改为自己对应的名称:

删除build文件夹后重新创建和cmake make:

成功。
2. ./lenet -s 时报错:
(1) [W] [TRT] TensorRT was linked against cuBLAS/cuBLAS LT 11.3.0 but loaded cuBLAS/cuBLAS LT 11.2.1
nvcc --version 查询得到,电脑的cuda是11.1版本。
通过:Release Notes :: CUDA Toolkit Documentation
可知,11.1.0版本对应的cuBLAS是11.2.1.74,而11.1.1版本对应11.3.0.106,跟报错信息对上了。
因此重装11.1.1的cuda[2]:
wget https://developer.download.nvidia.com/compute/cuda/11.1.1/local_installers/cuda_11.1.1_455.32.00_linux.run
sudo sh cuda_11.1.1_455.32.00_linux.run
按提示安装,显示CUDA Installer界面时,不要勾选安装驱动。
(2) [W] [TRT] Try increasing the workspace size to 4194304 bytes to get better performance.
修改lenet.cpp中workspace:
![]()
20改为30,删除build,从头编译:
![]()
错误消失。could not open plan output file 问题通过 sudo 解决。
3. python方式生成engine时报错:
ModuleNotFoundError: No module named 'tensorrt'
参考:A Guide to using TensorRT on the Nvidia Jetson Nano - Donkey Car
nvcc --version
pip install pycuda

export PYTHONPATH=/usr/lib/python3/dist-packages:$PYTHONPATH
# 或者虚拟环境下python路径
which python # <...>/anaconda3/envs/objDet/bin/python
export PYTHONPATH=<...>/anaconda3/envs/objDet/lib/python3.8/site-packages
无效。
参考:https://github.com/NVIDIA-AI-IOT/torch2trt/issues/429
pip install --upgrade setuptools pip

pip install nvidia-pyindex
pip install nvidia-tensorrt==<your tensorrt version>
成功:
4. python lenet.py -s 时报错:

推荐升级tensorrt为最新版。
onnx路线
1. 将torch网络结构转化成onnx模型
根据:网络结构可视化onnx+netron_络小绎的博客-CSDN博客_onnx网络可视化
2. 验证onnx正确性,check_onnx.py:
# -*- coding: utf-8 -*-

"""
验证onnx模型的正确性。
@Time : 8/10/22 1:52 PM
@Auth : lakuite
@File : check_onnx.py
@From : https://zhuanlan.zhihu.com/p/371239130
         https://blog.csdn.net/m0_37192554/article/details/112304434
"""

import onnx
import numpy as np
import onnxruntime as rt
import torch
from lenet5 import Lenet5

torch.manual_seed(1)

model_path = 'lenet5.onnx'

# 验证模型合法性
onnx_model = onnx.load(model_path)
onnx.checker.check_model(onnx_model)


image = torch.randn(2, 1, 32, 32)  # torch
image_arr = np.array(image).astype('float32') # onnx要2个batch,且为array格式,不然报错

# 设置模型session以及输入信息
sess = rt.InferenceSession(model_path)
input_name = sess.get_inputs()[0].name # input.1
output = sess.run(None, {input_name: image_arr})
print(output)

# 对比两者结果是否一致,精确到小数点后5位
y_torch = np.array(Lenet5()(image).detach().numpy().flatten())
y_onnx = np.array(output).flatten()
np.testing.assert_almost_equal(y_torch,y_onnx, decimal=5)
print("ok!")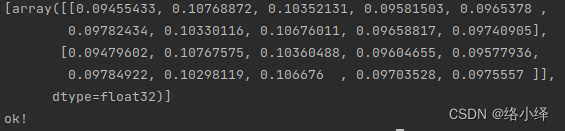
3. 使用tensorrt中的trtexec工具进行onnx到tensorrt的转换:
/usr/src/tensorrt/bin/trtexec --onnx=lenet5.onnx --saveEngine=lenet5.trt --workspace=6000如果tensorrt是使用deb安装的,默认装在/usr/src/下。如果是rar安装的,到对应路径下的bin目录里寻找trtexec。
4. 运行tensorrt模型,首先需要安装torch2trt库:
git clone https://github.com/NVIDIA-AI-IOT/torch2trt
cd torch2trt
python setup.py install
trt.py:
# -*- coding: utf-8 -*-
"""
@Time : 8/10/22 3:34 PM
@Auth : lakuite
@File : trt.py
@From : https://zhuanlan.zhihu.com/p/371239130
"""
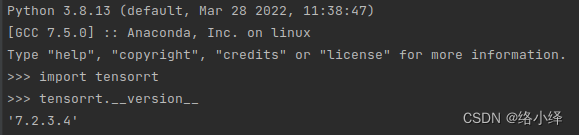
import tensorrt as trt
import torch
import numpy as np
from torch2trt import TRTModule
torch.manual_seed(1)
logger = trt.Logger(trt.Logger.INFO)
with open("lenet5.trt", "rb") as f, trt.Runtime(logger) as runtime:
engine=runtime.deserialize_cuda_engine(f.read())
model_all_names = []
for idx in range(engine.num_bindings):
is_input = engine.binding_is_input(idx)
name = engine.get_binding_name(idx)
op_type = engine.get_binding_dtype(idx)
model_all_names.append(name)
shape = engine.get_binding_shape(idx)
print('input id:',idx,' is input: ', is_input,' binding name:', name, ' shape:', shape, 'type: ', op_type)
print(model_all_names)
image = torch.randn(2, 1, 32, 32).to('cuda:0') # 不加.to('cuda:0')会报错
trt_model = TRTModule(engine, ["input.1"], ["32"])
result_trt = trt_model(image)
print(result_trt)

可以看到,有1个输入1个输出,shape和value都能和onnx对应上。
5. 安装Polygraphy,查看onnx转化tensorrt后的精度损失:
python -m pip install colored polygraphy --extra-index-url https://pypi.ngc.nvidia.com

# 配置环境变量
sudo gedit ~/.bashrc
export PATH=~/.local/bin:$PATH # 最后一行加入
source ~/.bashrc

polygraphy run lenet5.onnx --trt --onnxrt --rtol 1e-05 --atol 1e-05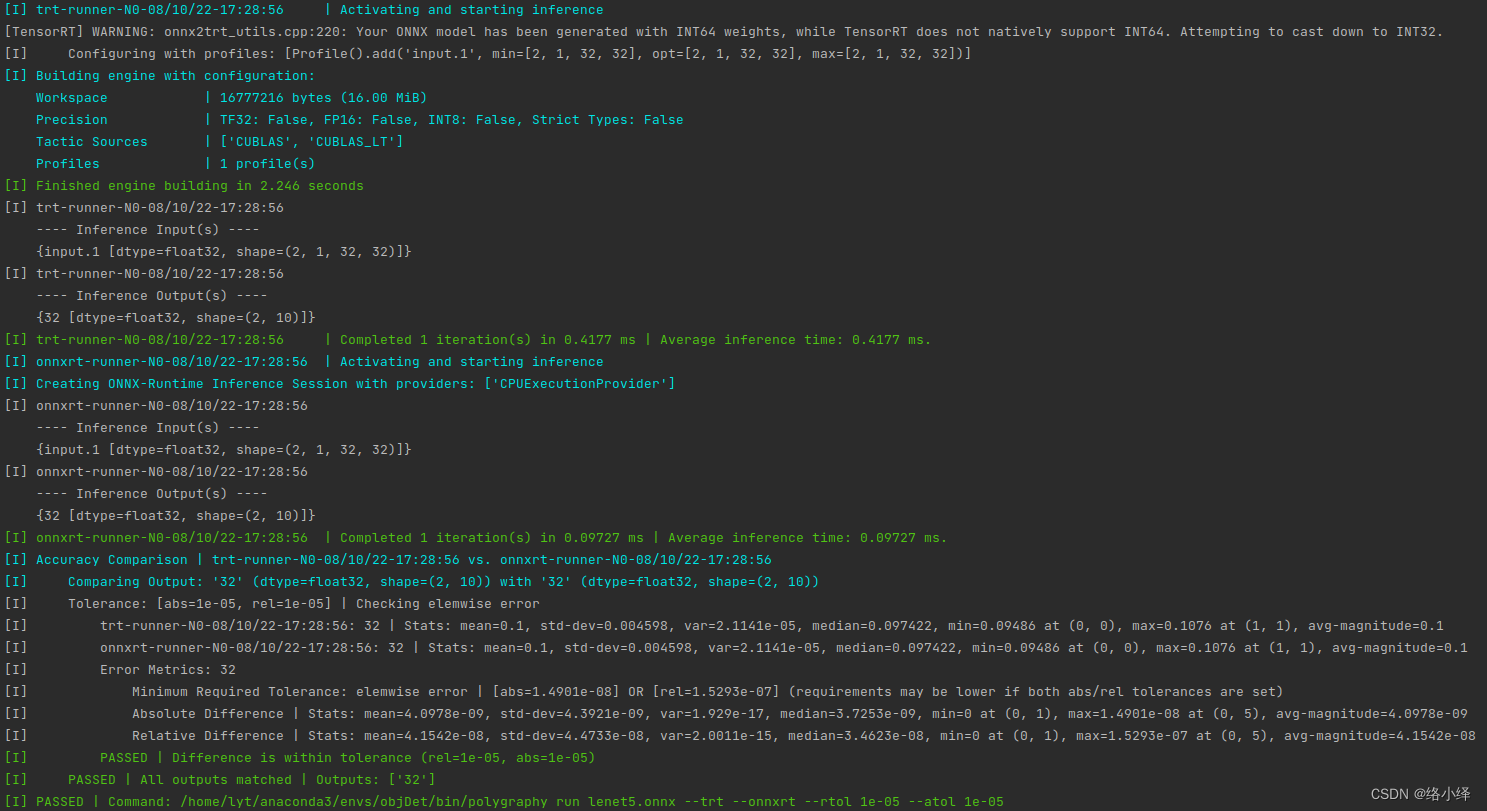
一些Polygraphy的介绍:TensorRT/tools/Polygraphy/polygraphy at master · NVIDIA/TensorRT · GitHub
错误汇总
1. 运行trt.py时报错:RuntimeError: CUDA error: an illegal memory access was encountered

在trt.py中加入:
import os
os.environ['CUDA_LAUNCH_BLOCKING'] = '1'
获得新的报错信息:
![]()
Never mind, I found the problem. I added torch.device in some classes to check if everything is running on the GPU and not CPU and this messed everything up. After deleting them it worked fine.
确保输入加载在GPU上:
image = torch.randn(2, 1, 32, 32).to('cuda:0')同时去除之前加的import os相关代码即可。


 1356
1356


 被折叠的 条评论
为什么被折叠?
被折叠的 条评论
为什么被折叠?
 到【灌水乐园】发言


