


前言
本来ThreadX全家桶是无缝接入STM32单片机的,但是今天突然发现ST官方没有X-CUBE-AZRTOS-F1这个软件包。使用CubeMX添加工程组件的时候,也没有ThreadX可以选择。因此就有了此文。
Keil环境下的移植可以参考此文:threadx系统_STM32F103C8基于CubeMX+ MDK来移植ThreadX系统
一、创建工程模版
首先在CubeIDE环境下创建一个工程模板,只使用到了一个串口输出和一个LED灯。
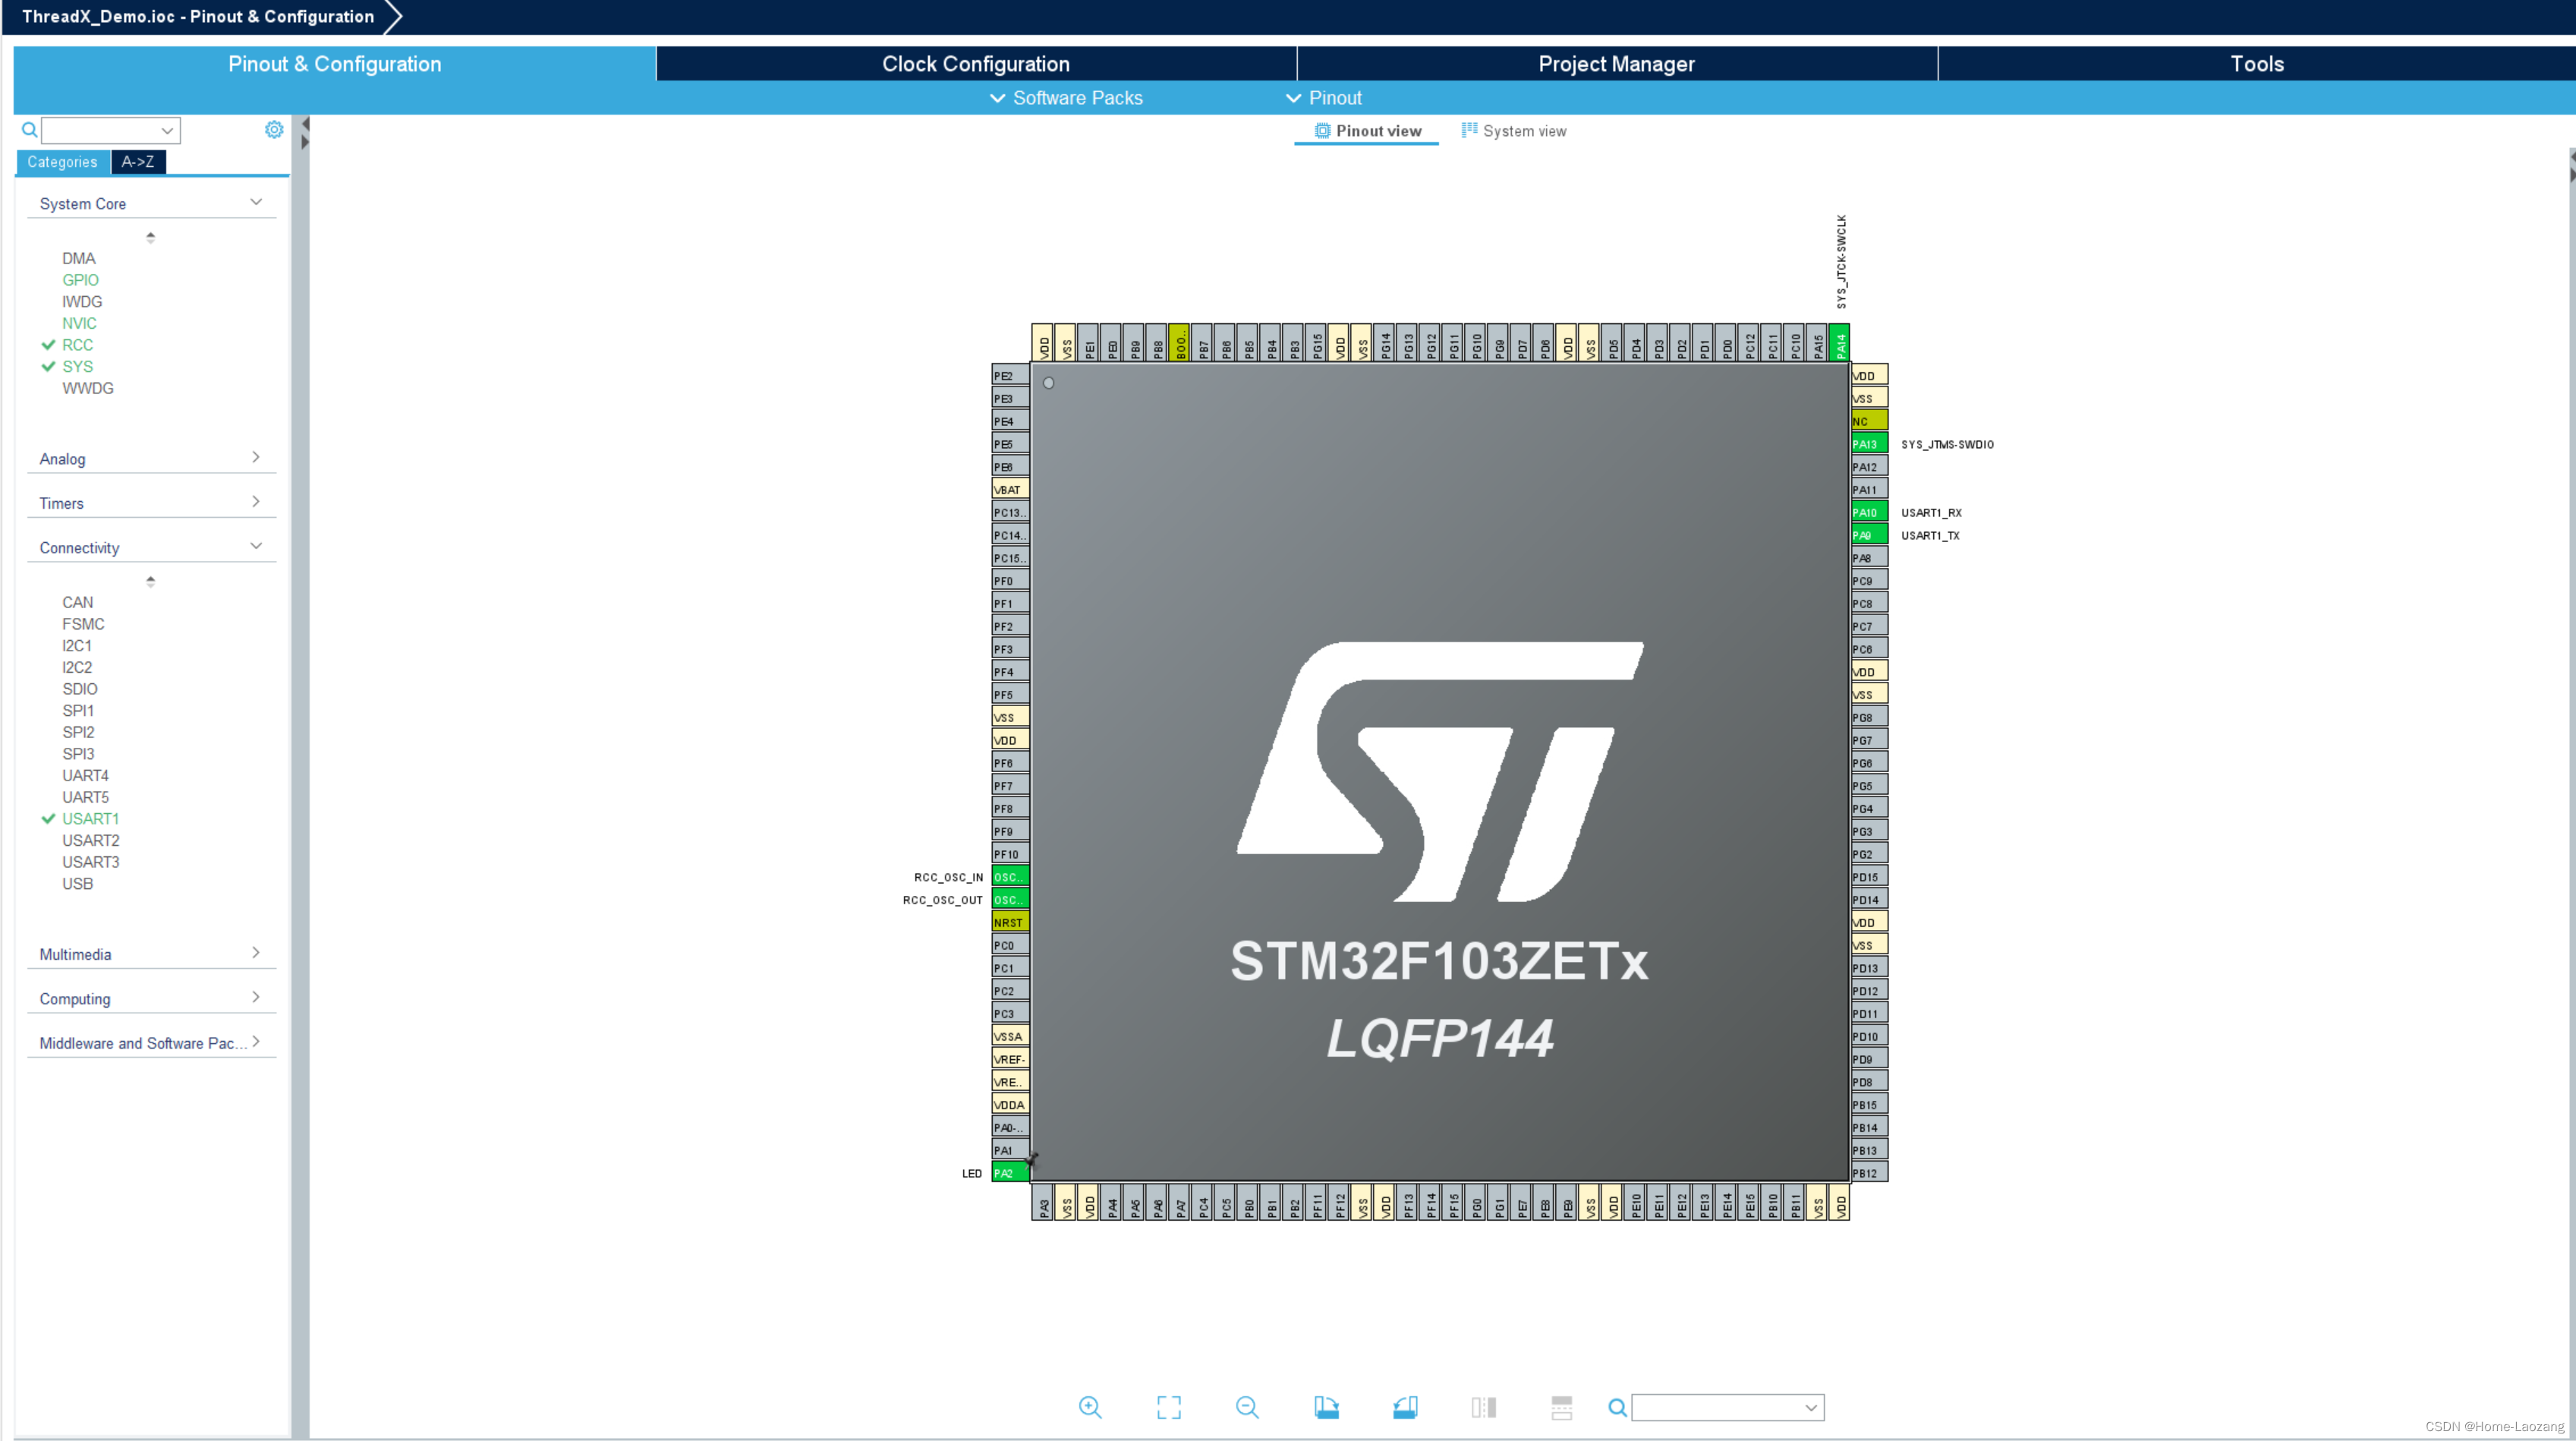
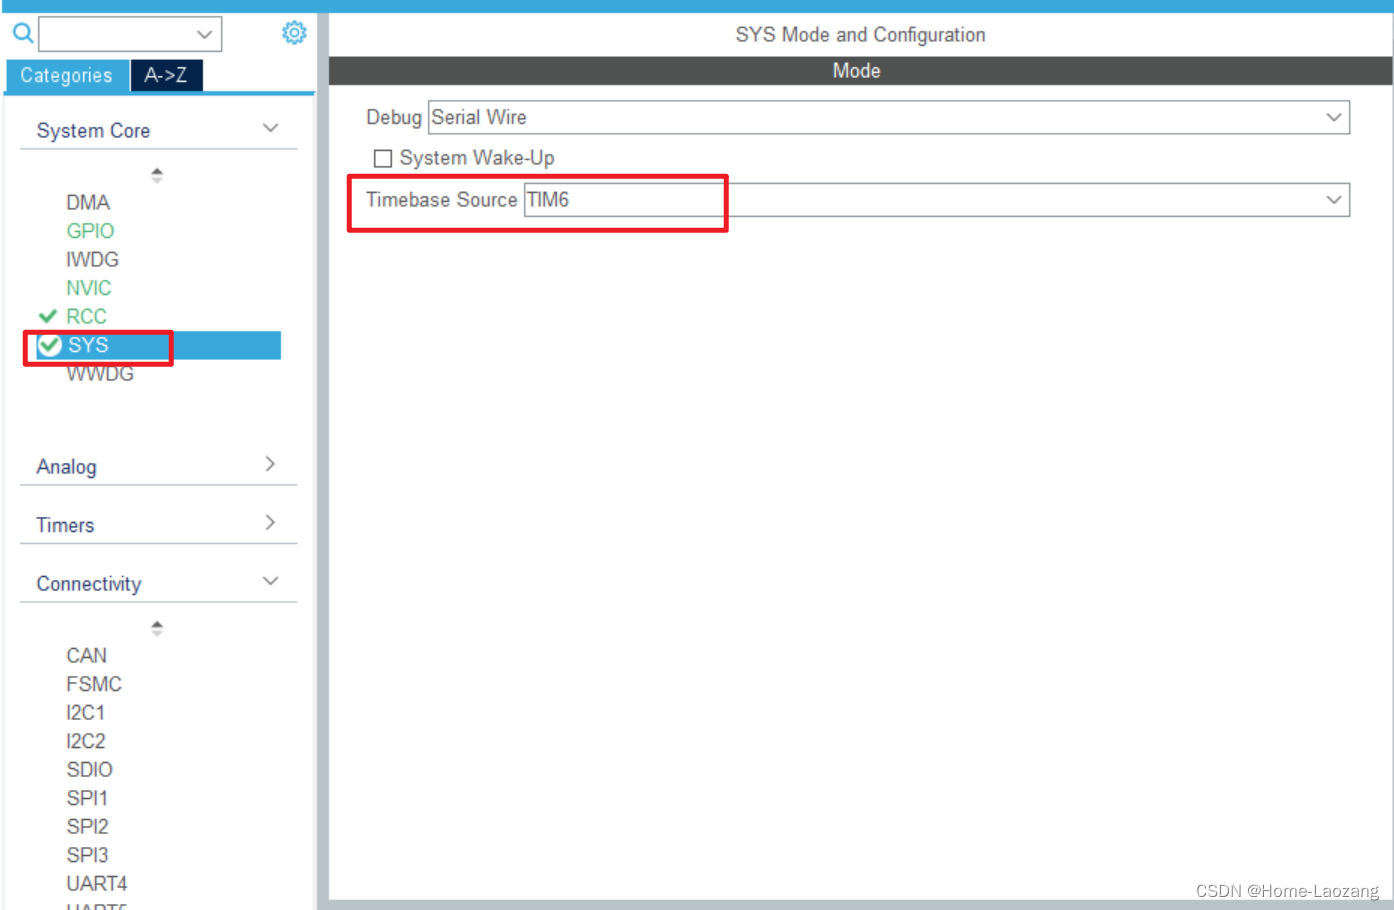
上述的功能正常配置,唯一需要注意的地方是Timebase Source不能再选择Systick了,而需要选择其他的定时器,比如通用定时器6。因Systick将用来给ThreadX提供Timebase。
配置完成后,现在裸机下测试一下添加的功能是否正常,以保证工程模板是正确的。
二、获得ThreadX源码
ThreadX的源码仓库地址:https://github.com/azure-rtos/threadx
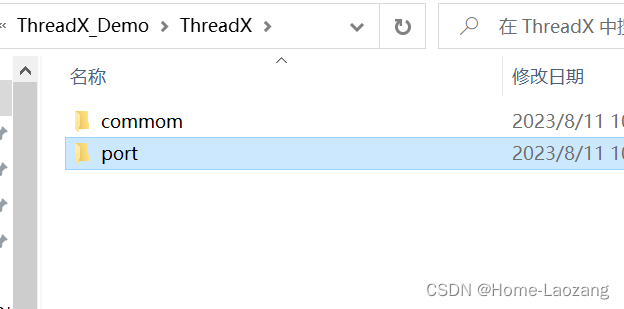
文件结构如下:

我们需要使用就只有commom和ports两个文件夹。
三、移植工作
3.1 添加文件
在工程模版工作空间内新建ThreadX文件夹,此文件夹下新建两个空文件夹commom和port。
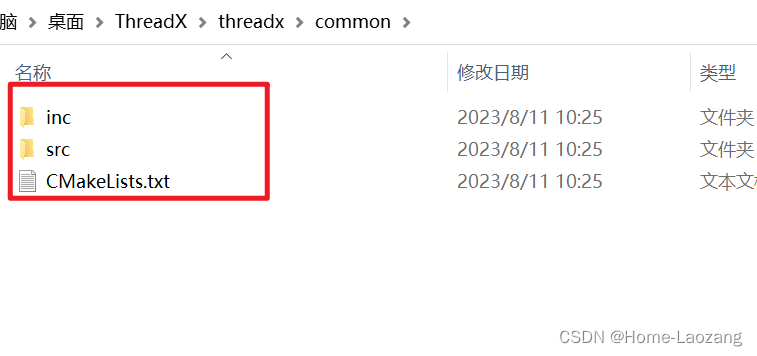
其中commom文件夹内需要把上述ThreadX软件包中的commom文件夹内的内容整个复制过来。
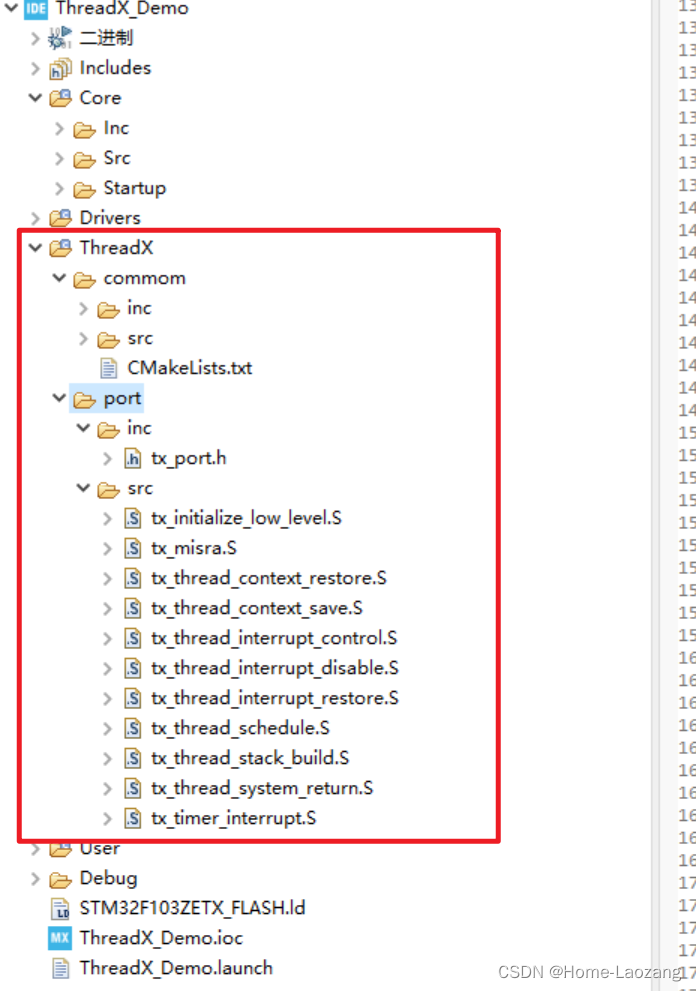
port文件夹需要复制的内容如下:
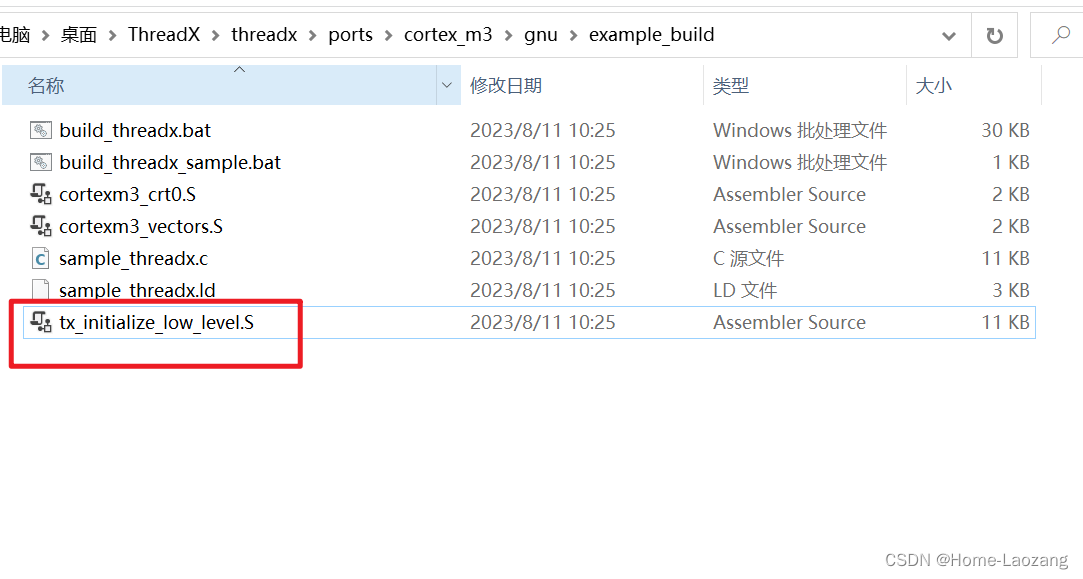
1:“…\ThreadX\threadx\ports\cortex_m3\gnu"路径下inc和src文件夹。
2:”…\ThreadX\threadx\ports\cortex_m3\gnu\example_build"路径下的tx_initialize_low_level.S文件,复制到第一步的src文件夹下。
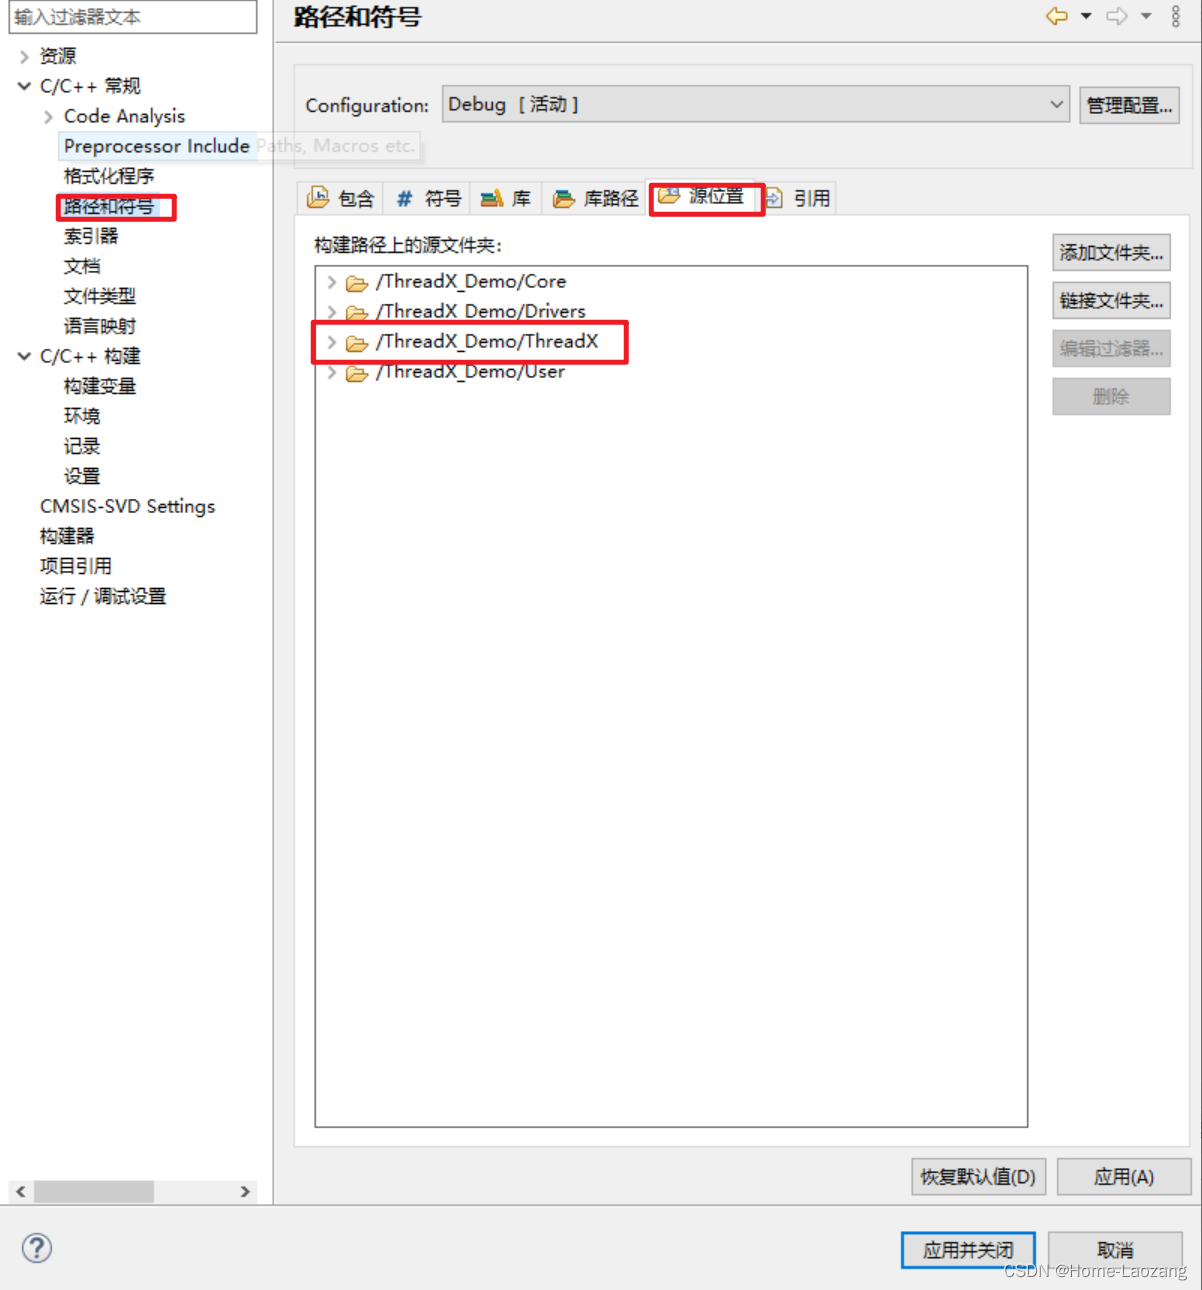
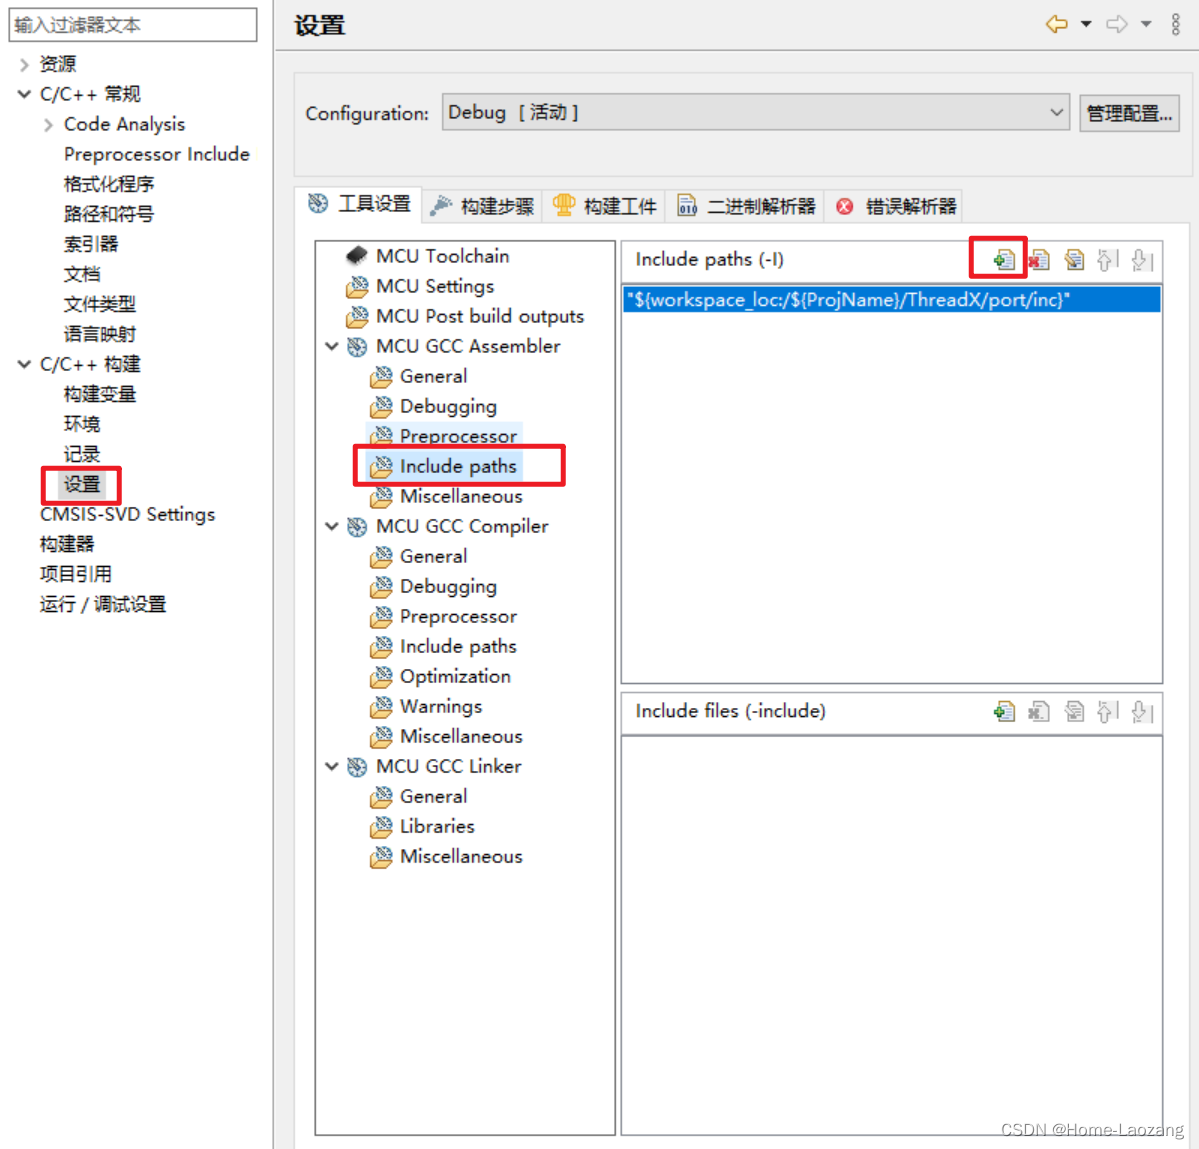
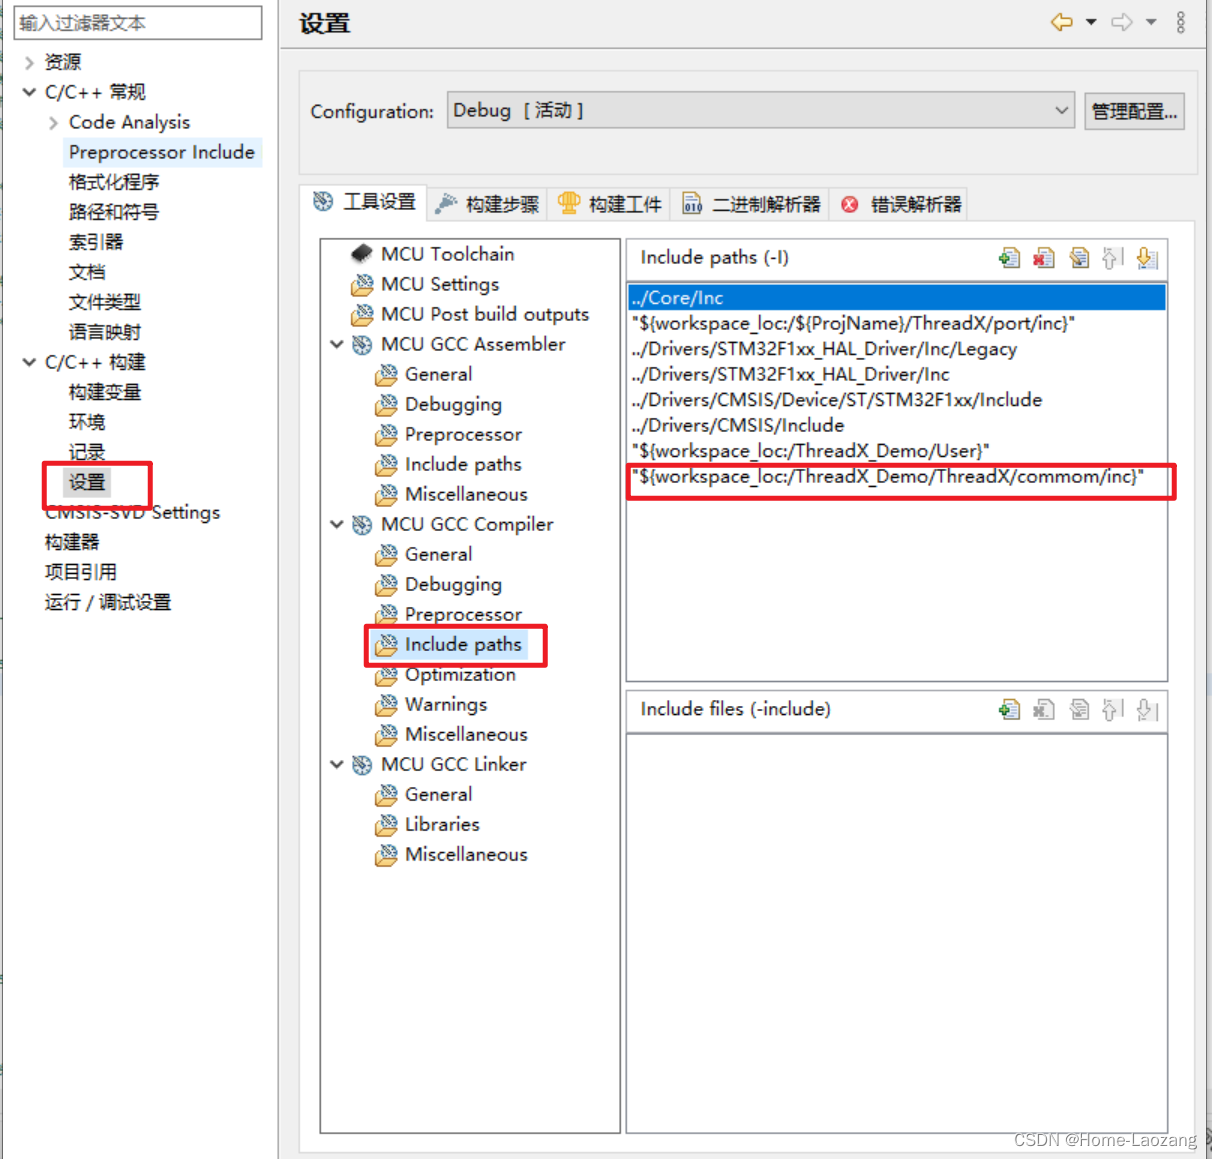
在CubeIDE中添加源文件和头文件路径。
最终的文件夹效果如下:
3.2 文件修改
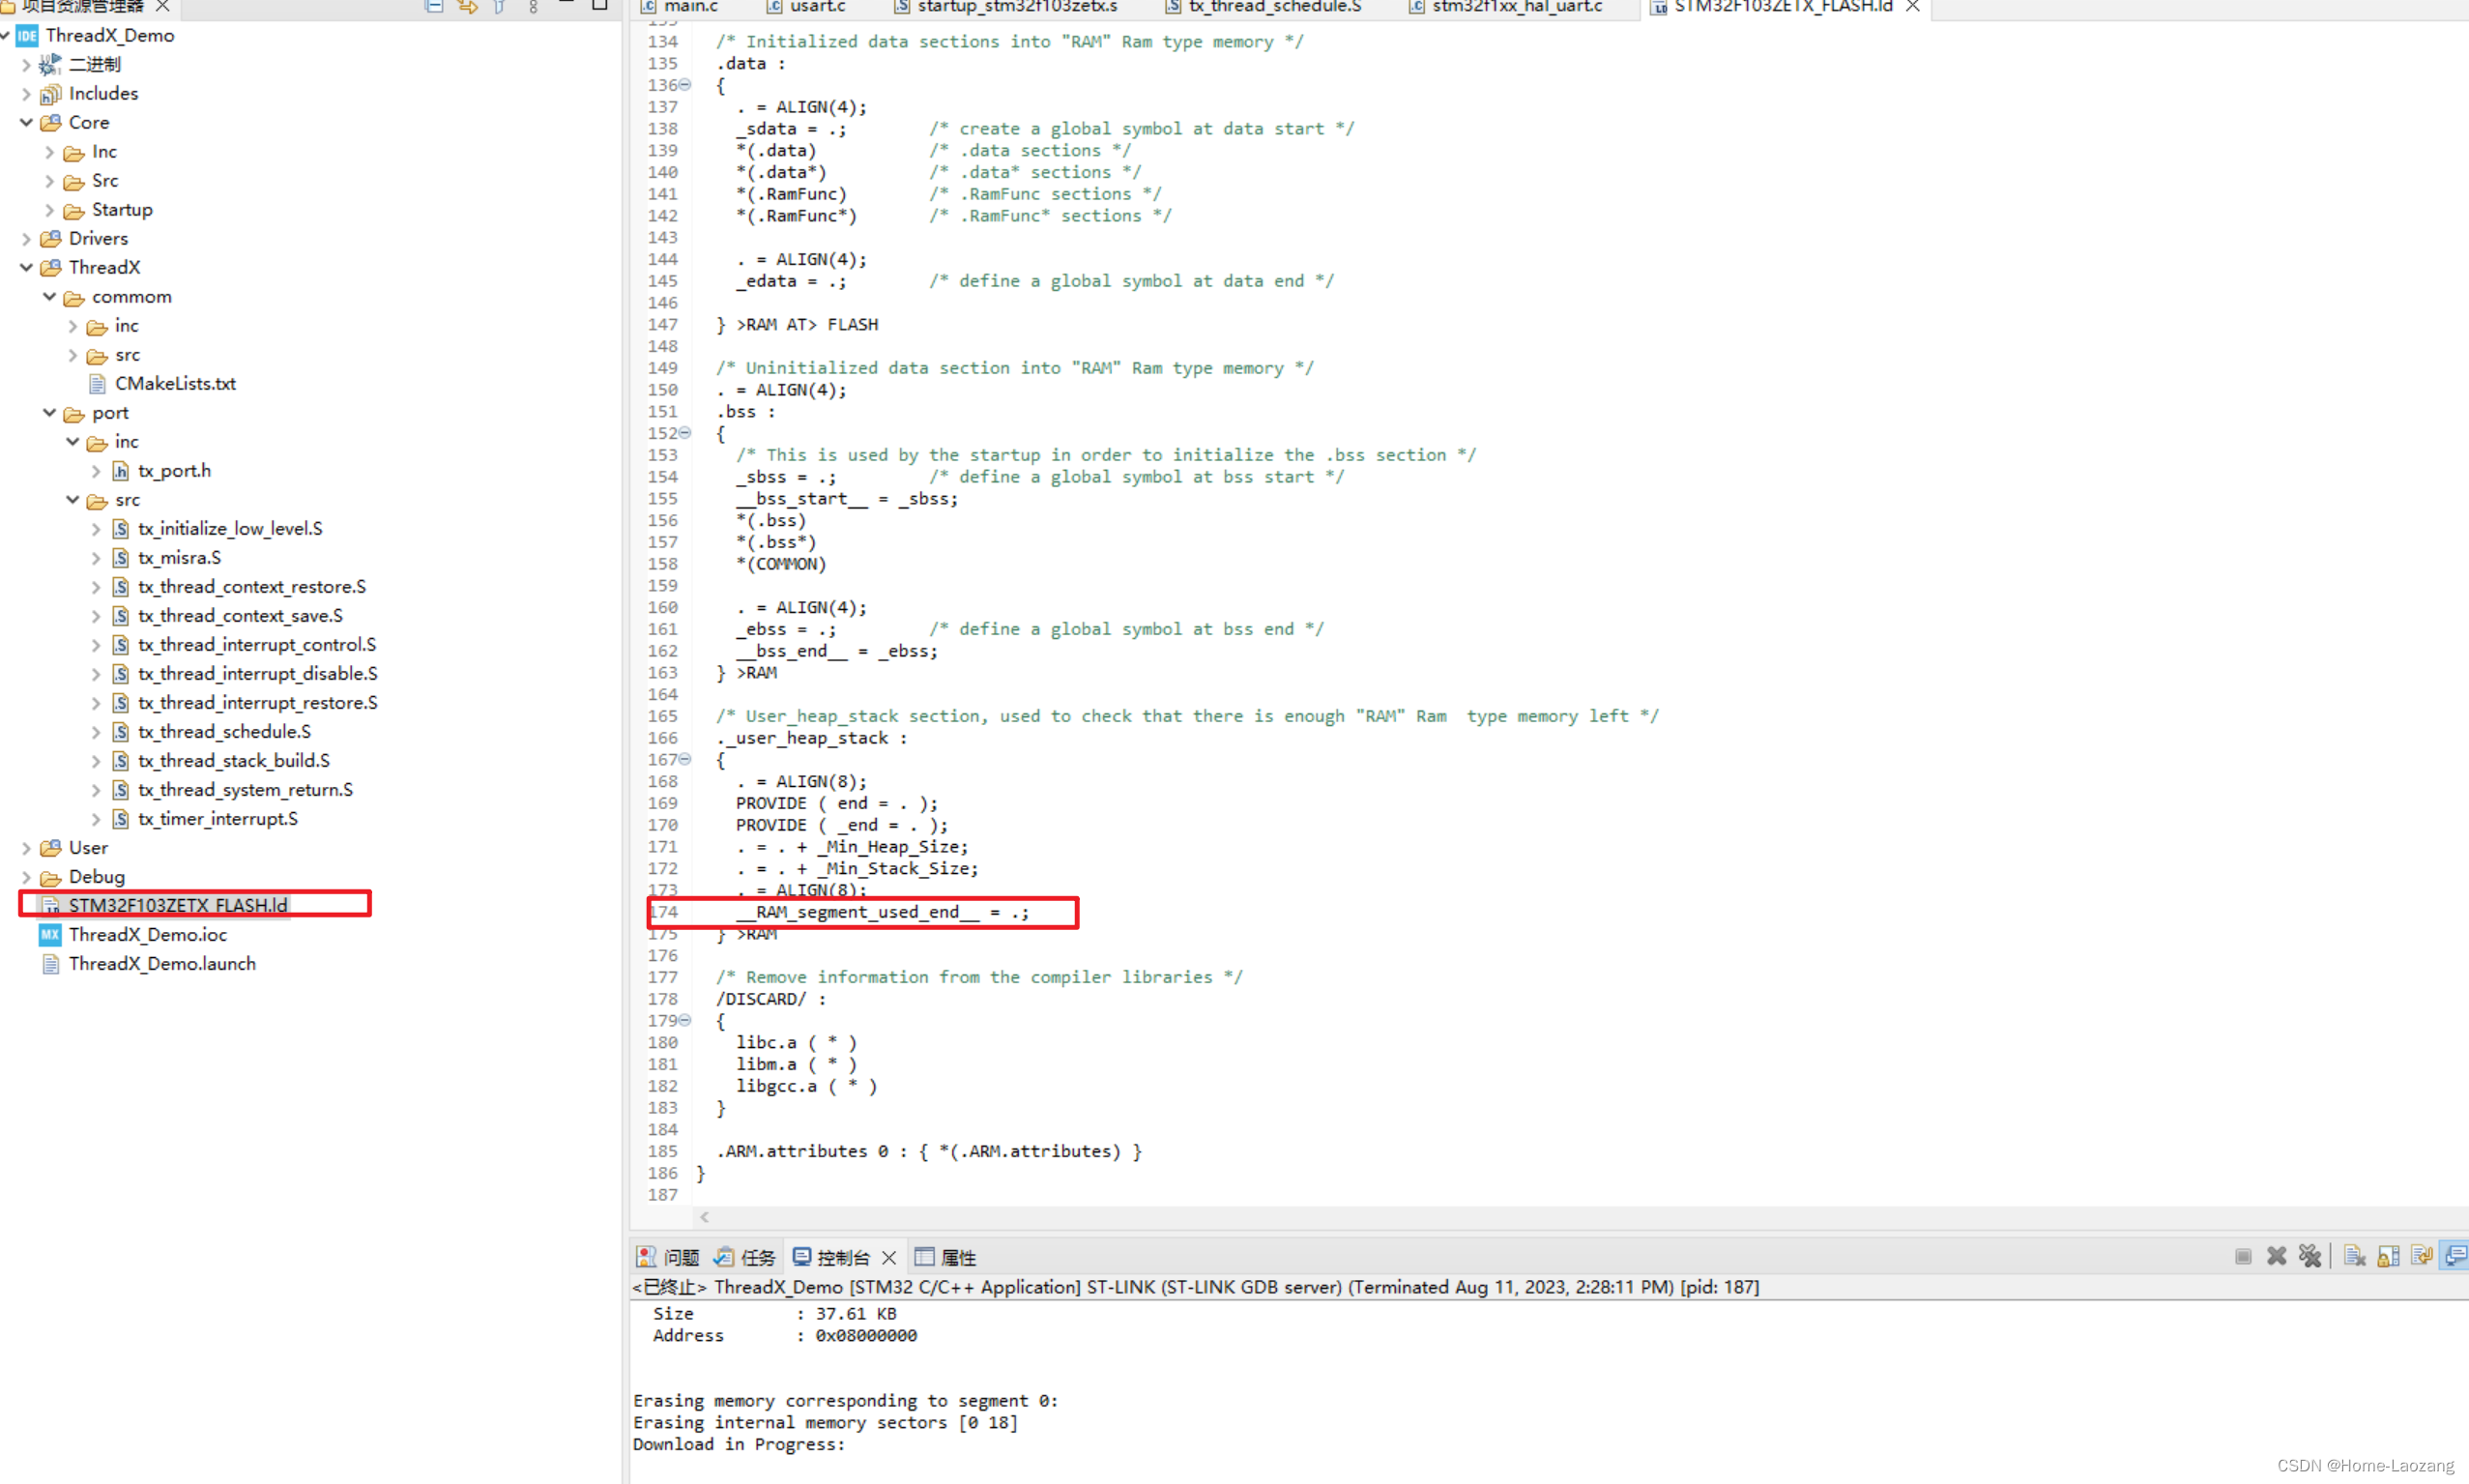
3.2.1 链接文件修改
在链接文件中添加如下语句:
__RAM_segment_used_end__ = .;
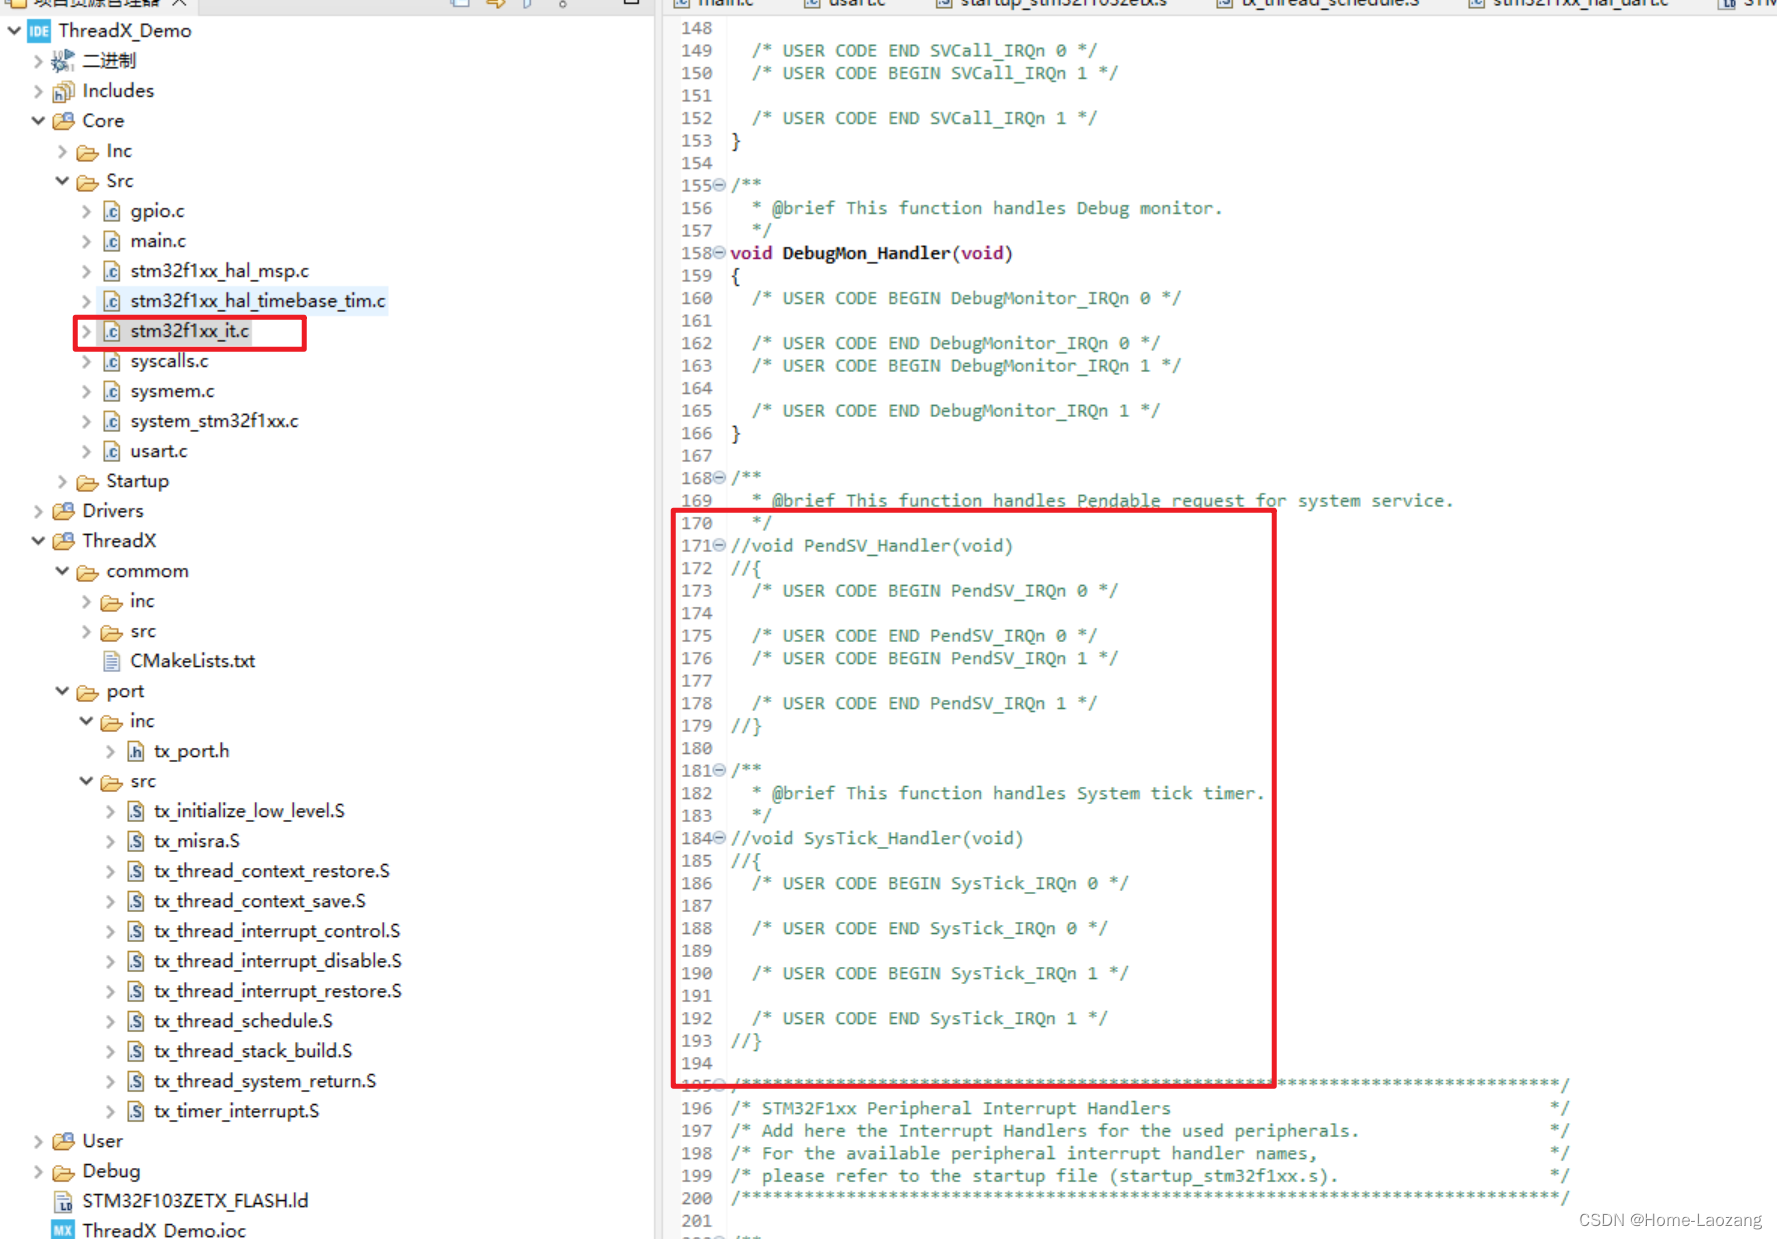
3.2.2 中断文件修改
在stm32f1xx_it.c文件中屏蔽Systick中断和PendSV中断。
3.2.3 tx_initialize_low_level.S修改
将tx_initialize_low_level.S中的中断向量表更改为自己芯片的向量表。
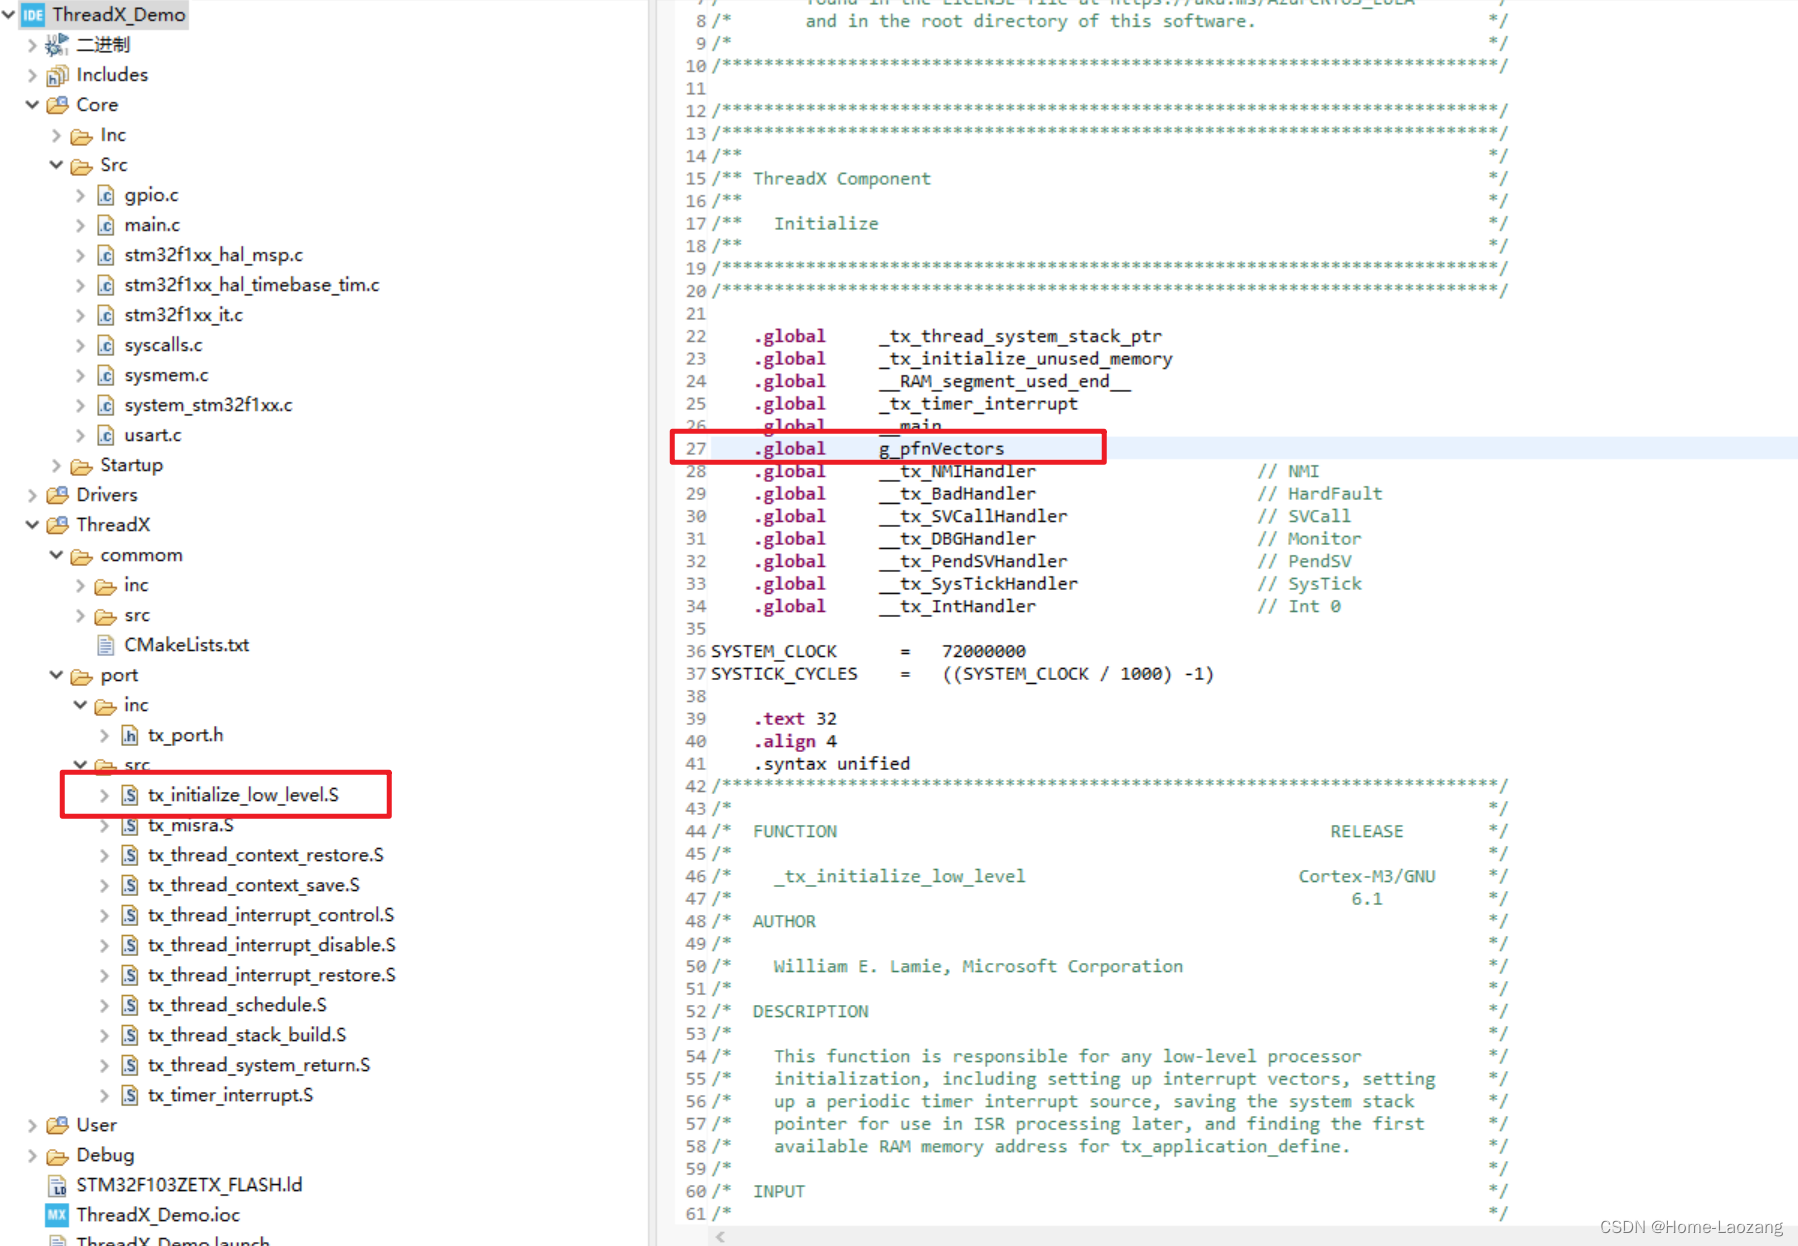
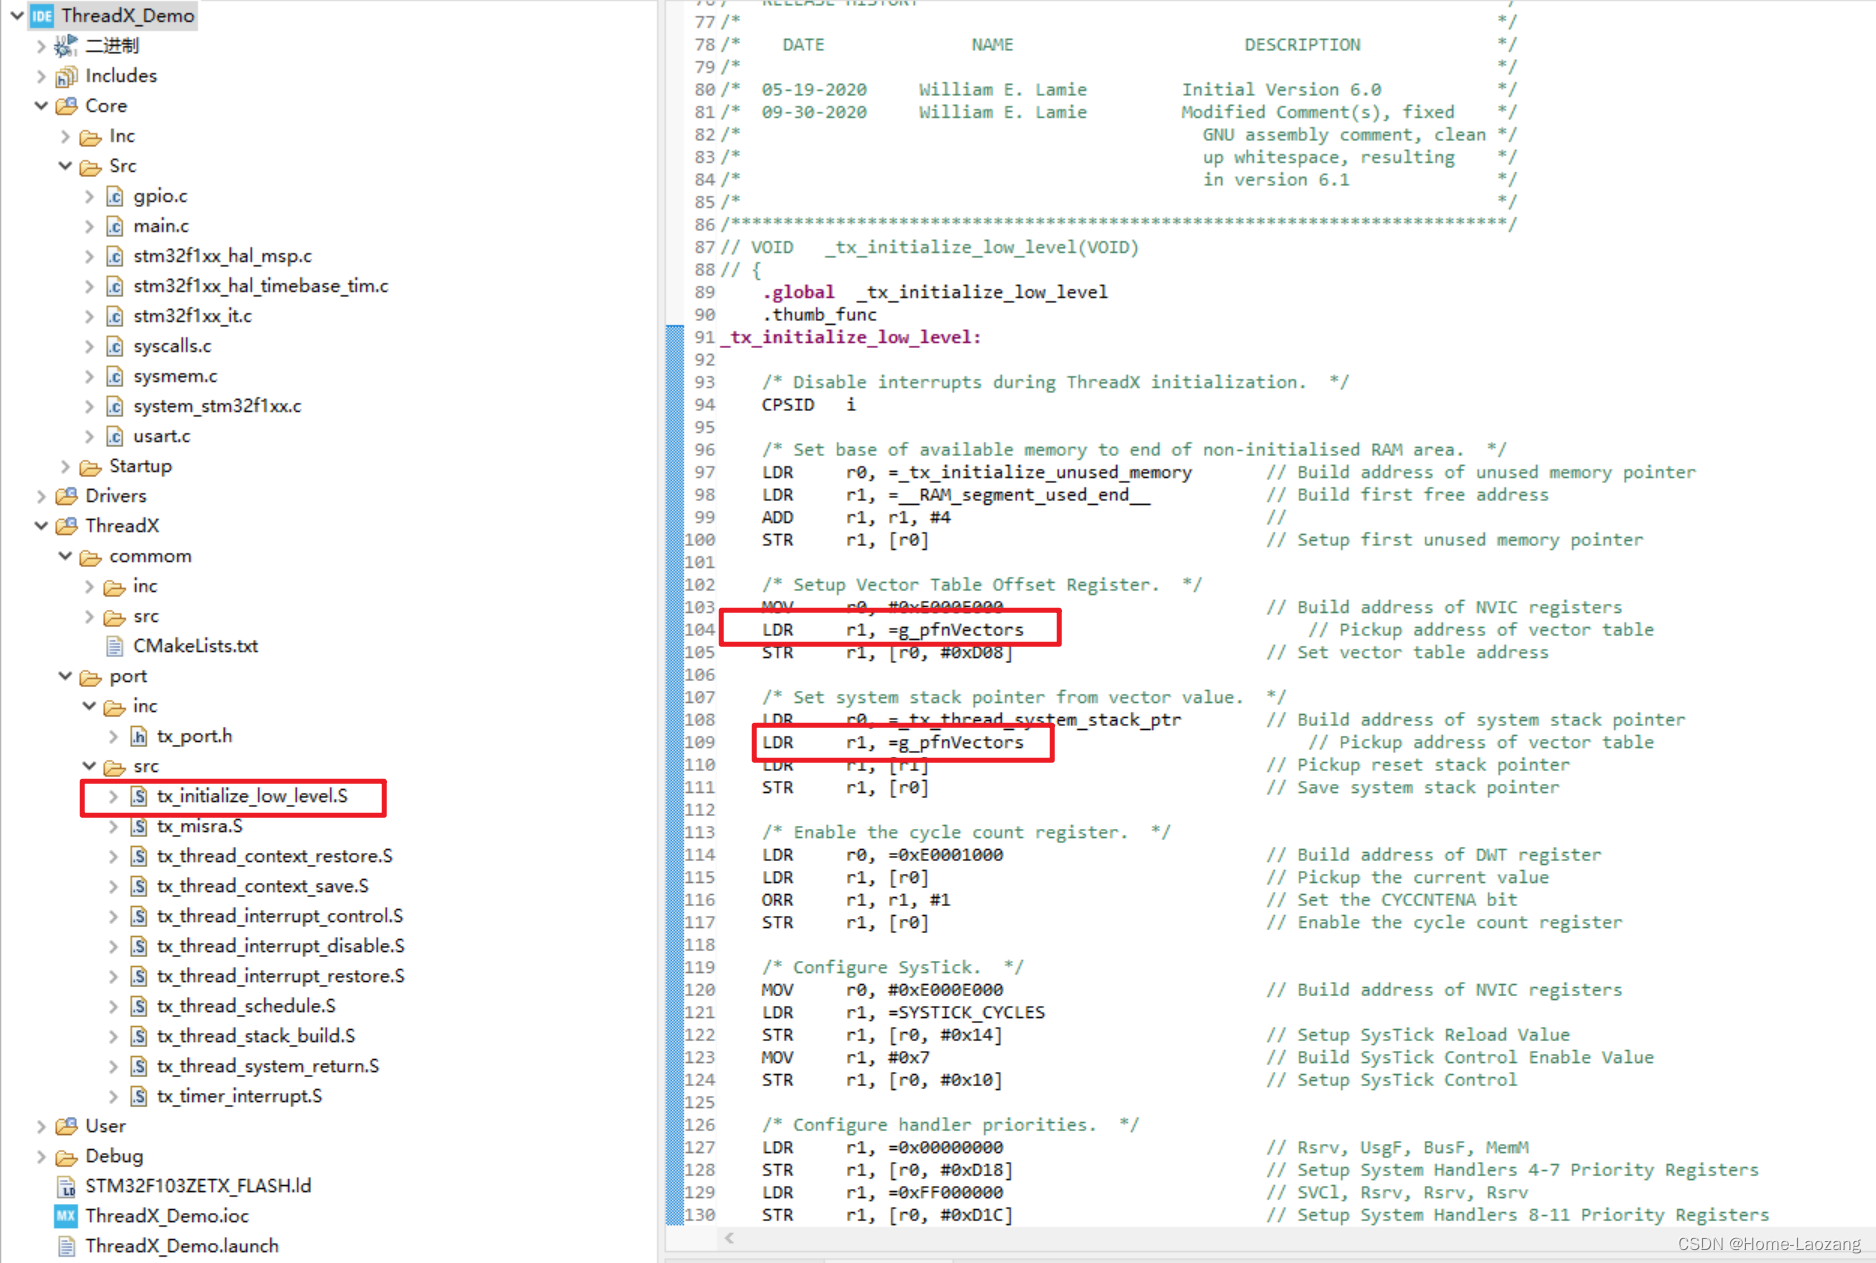
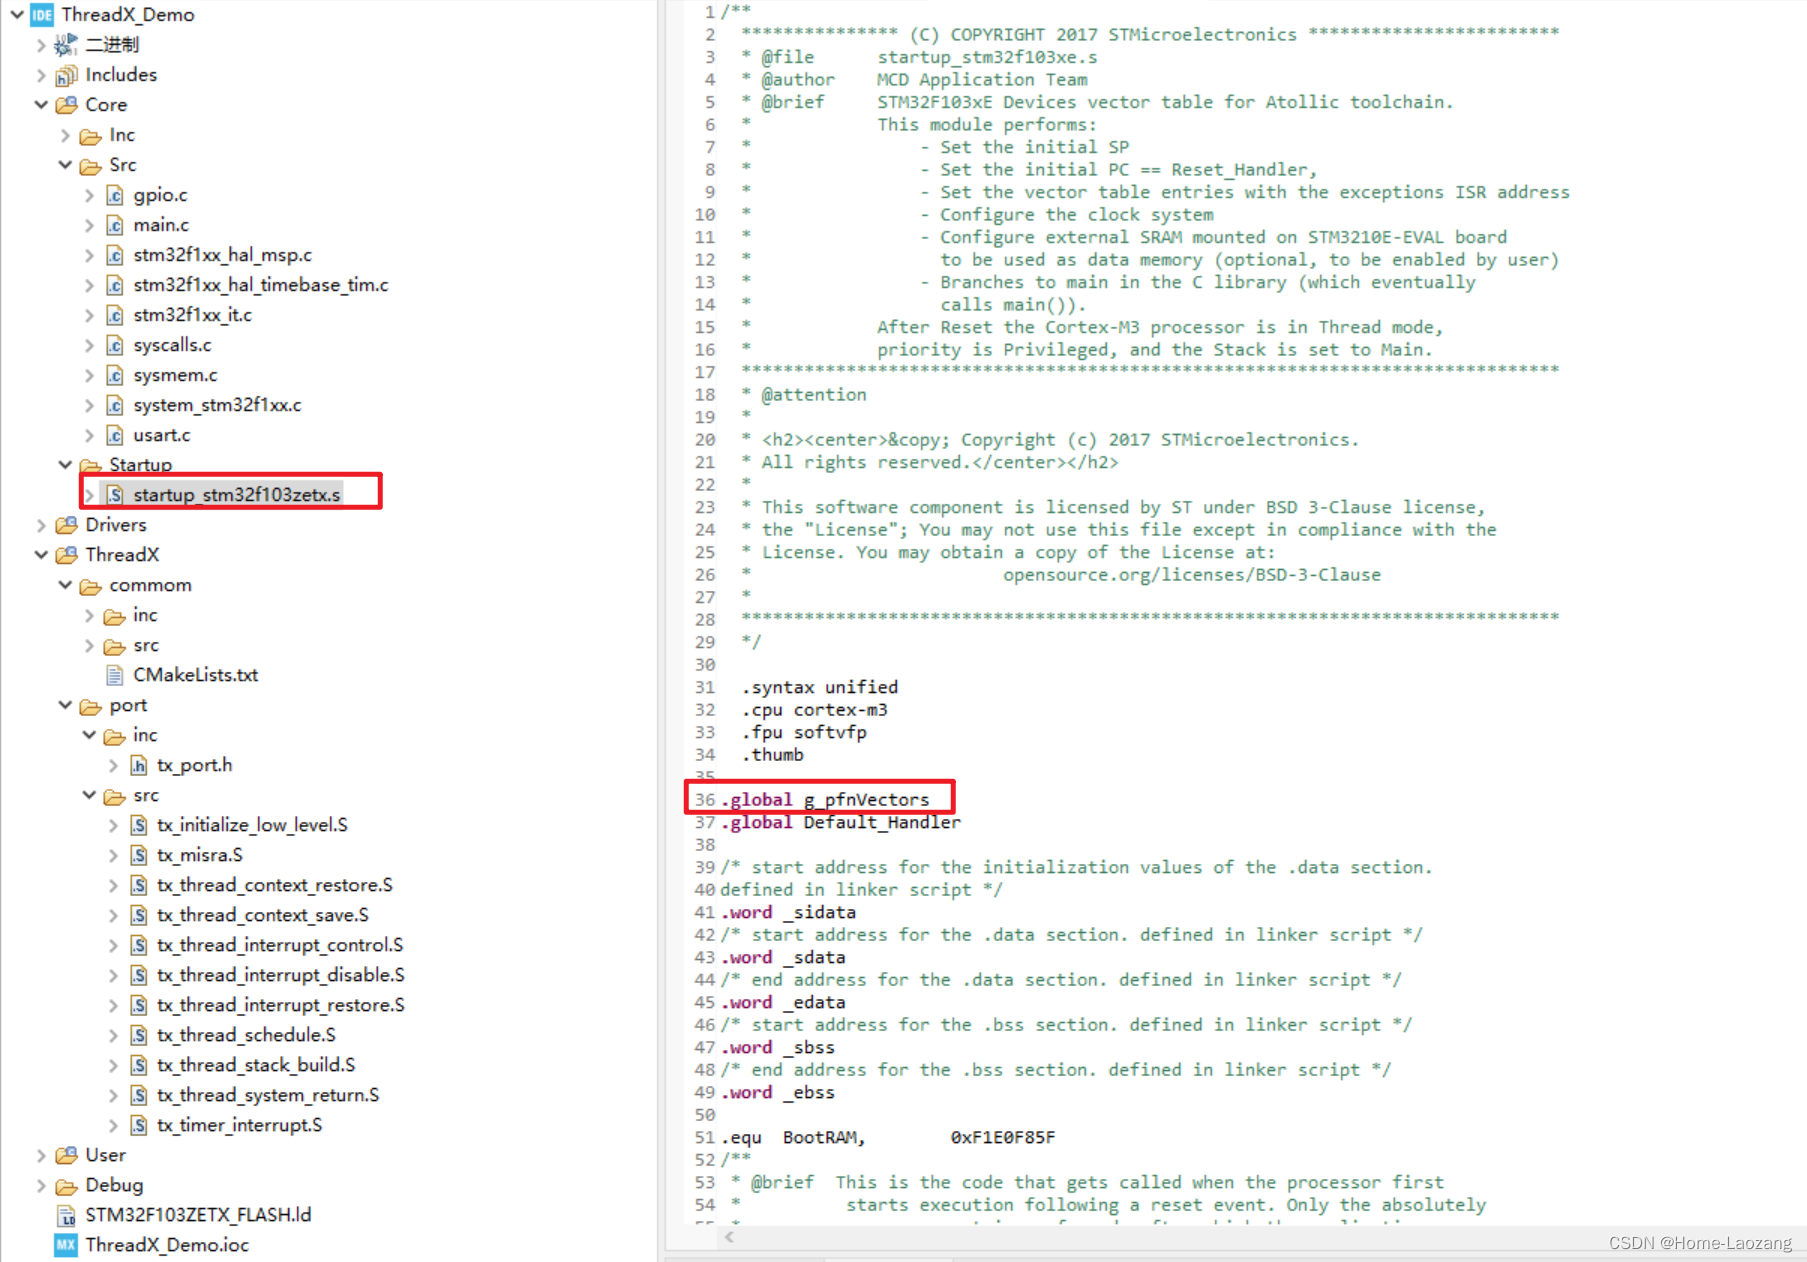
这个g_pfnVectors来自于startup_stm32f103zetx.s文件。
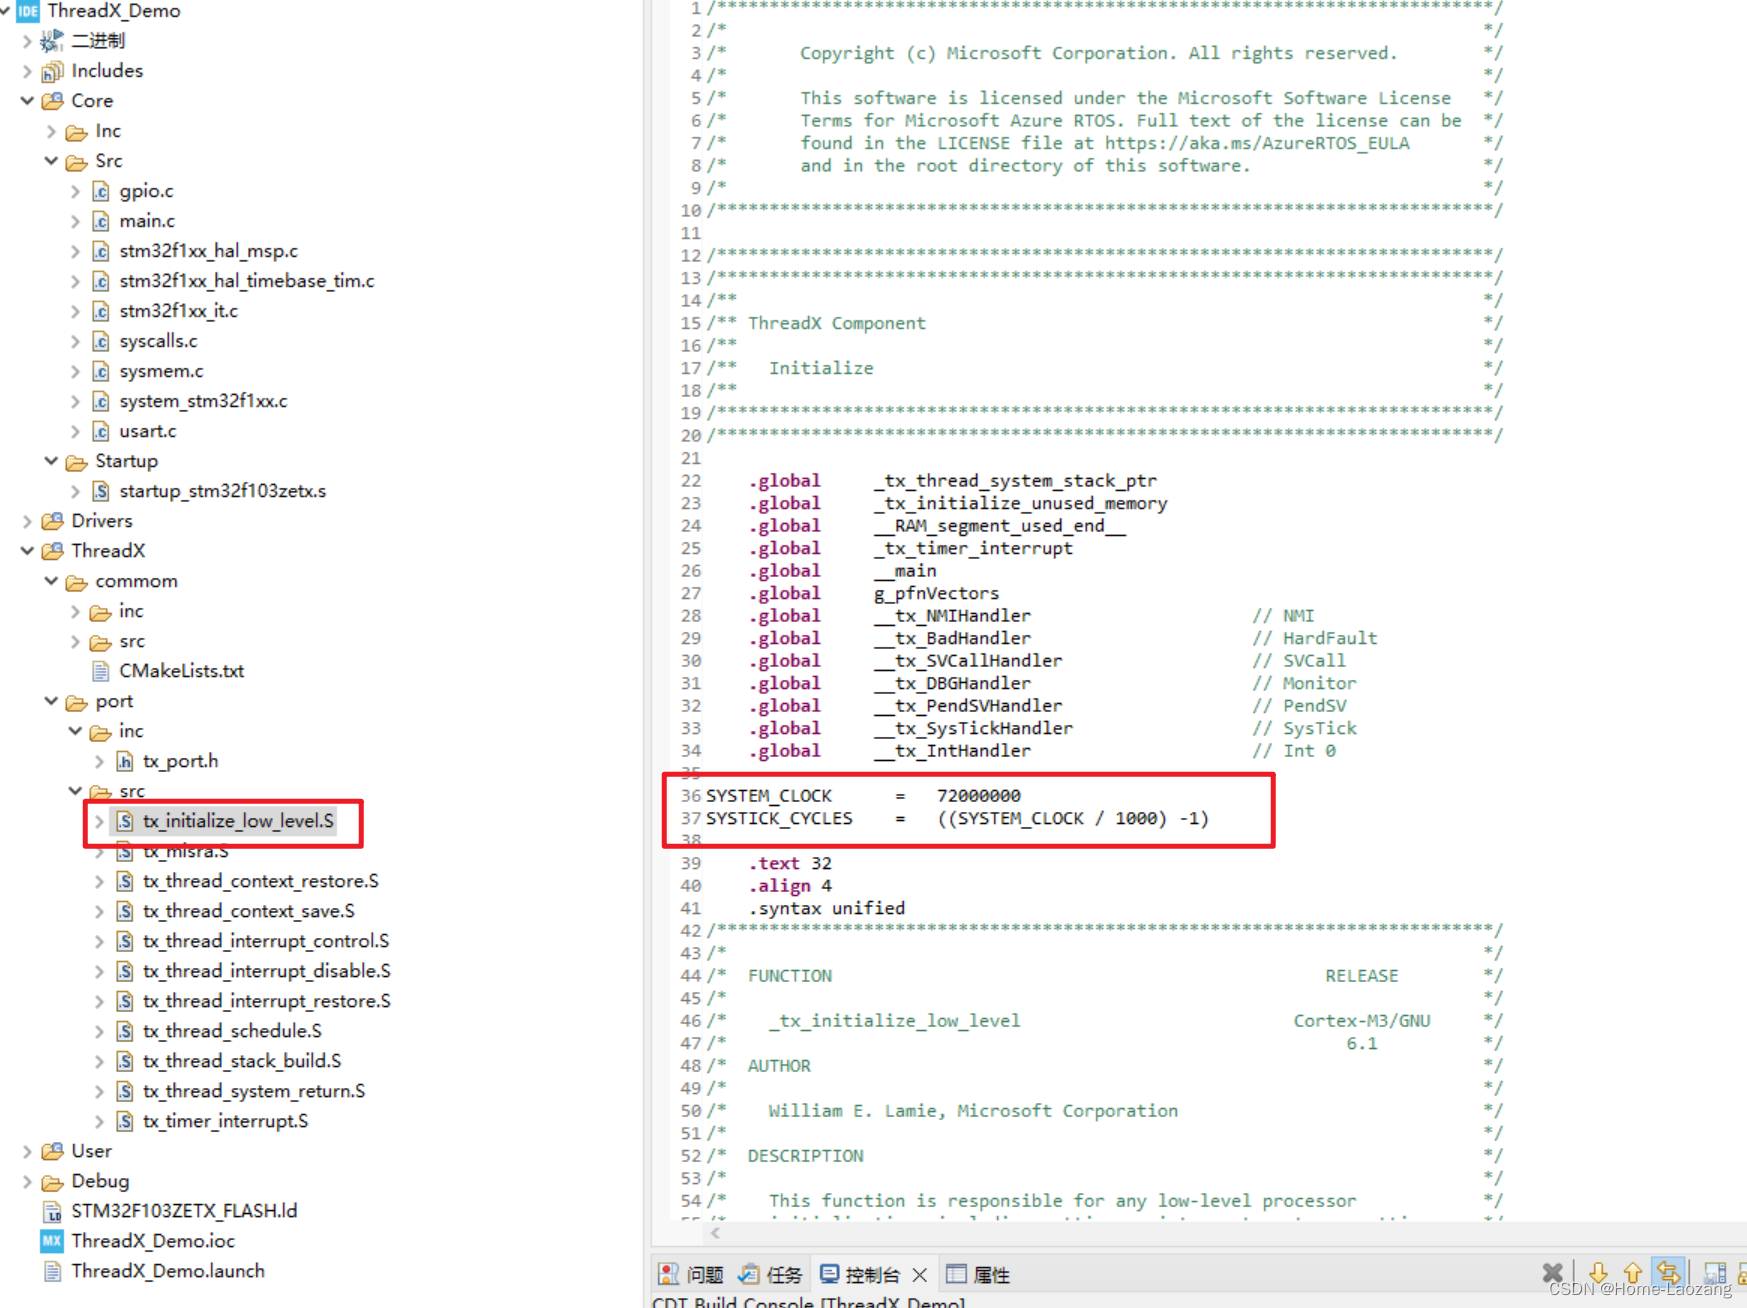
此外还需要修改时钟,我使用的是外部8M晶振倍频得到的72MHz时钟。需要修改如下地方。把系统的心跳周期更改为1ms。
至此,文件就修改完成了。
我做的不是很详细,需要更加详细的版本,可以参考:threadx 移植(二)-基于 CubeIDE 移植 threadx
四、添加测试代码
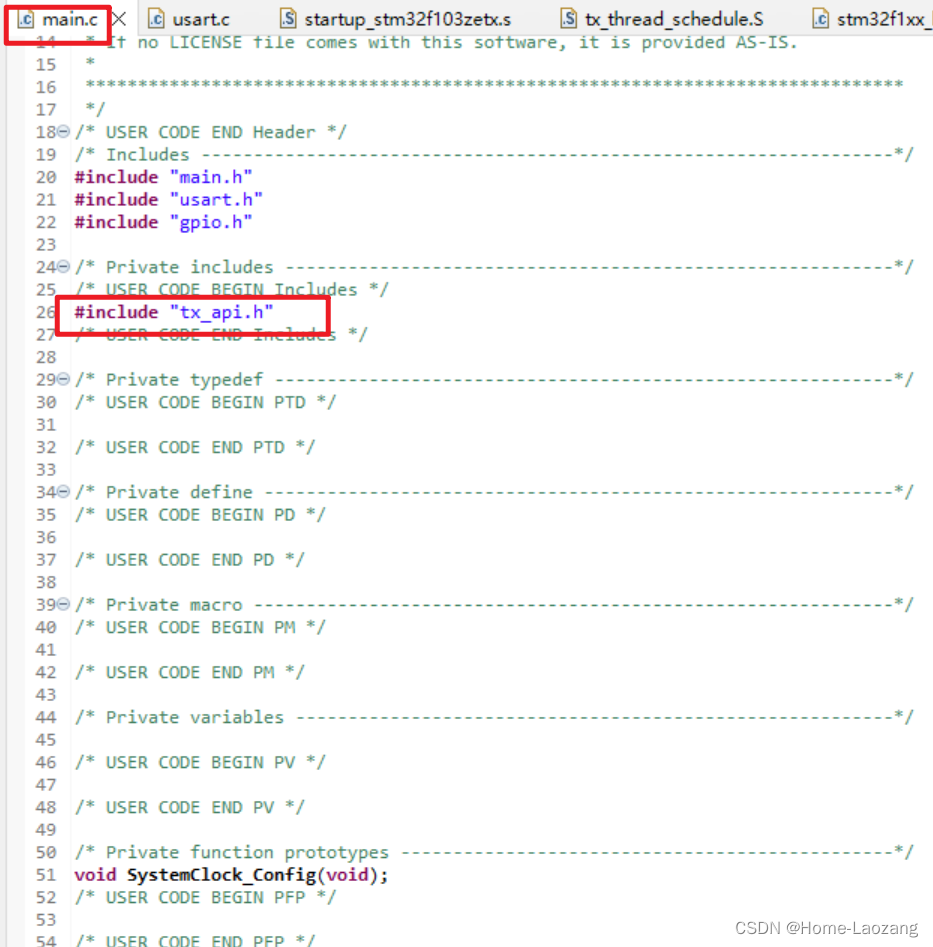
4.1 添加头文件
在main.c文件中添加"tx_api.h"头文件。
4.2 添加任务
在main.c文件中添加如下代码。
/* 信号量 */
TX_SEMAPHORE UART_semaphore;

/* 任务1 */
TX_THREAD LED_thread;
#define LED_STACK_SIZE 512
static uint8_t LED_thread_stack[LED_STACK_SIZE];

void LED_thread_entry(ULONG thread_input)
{
    /* This thread simply sits in while-forever-sleep loop.  */
    while (1)
    {
        LED_Set(0);
        tx_thread_sleep(500);
        LED_Set(1);
        tx_thread_sleep(500);

        tx_semaphore_put(&UART_semaphore);
    }
}

/* 任务2 */
TX_THREAD UART_thread;
#define UART_STACK_SIZE 512
static uint8_t UART_thread_stack[UART_STACK_SIZE];

void UART_thread_entry(ULONG thread_input)
{
    /* This thread simply sits in while-forever-sleep loop.  */
    while (1)
    {
        if (TX_SUCCESS == tx_semaphore_get(&UART_semaphore, TX_WAIT_FOREVER))
            printf("Entering RTOS\r\n");
    }
}

void tx_application_define(void *first_unused_memory)
{
    tx_semaphore_create(&UART_semaphore, "UART Semaphore", 0);

    /* Create the main thread.  */
    tx_thread_create(&LED_thread,      // 线程句柄
                     "LED thread",     // 线程名称
                     LED_thread_entry, // 线程入口函数
                     0,                // 线程入口函数参数
                     LED_thread_stack, // 线程堆栈
                     LED_STACK_SIZE,   // 线程堆栈大小
                     1,                // 线程优先级,值越小优先级越高
                     1,                // 禁止抢占的线程的最高优先级,只有高于此级别的优先级才可以抢占该线程
                     TX_NO_TIME_SLICE, // 相同优先级线程才有用,相同优先级下任务时间片轮运行
                     TX_AUTO_START);   // 线程立即启动还是挂起

    /* Create the main thread.  */
    tx_thread_create(&UART_thread,      // 线程句柄
                     "UART thread",     // 线程名称
                     UART_thread_entry, // 线程入口函数
                     0,                 // 线程入口函数参数
                     UART_thread_stack, // 线程堆栈
                     UART_STACK_SIZE,   // 线程堆栈大小
                     0,                 // 线程优先级,值越小优先级越高
                     0,                 // 禁止抢占的线程的最高优先级,只有高于此级别的优先级才可以抢占该线程
                     TX_NO_TIME_SLICE,  // 相同优先级线程才有用,相同优先级下任务时间片轮运行
                     TX_AUTO_START);    // 线程立即启动还是挂起
}
4.3 启动任务
调用tx_kernel_enter();
int main(void)
{
    HAL_Init();

    /* Configure the system clock */
    SystemClock_Config();
    /* Initialize all configured peripherals */
    MX_GPIO_Init();
    MX_USART1_UART_Init();
    /* Infinite loop */
    /* USER CODE BEGIN WHILE */
    tx_kernel_enter();
    while (1)
    {
    }
}
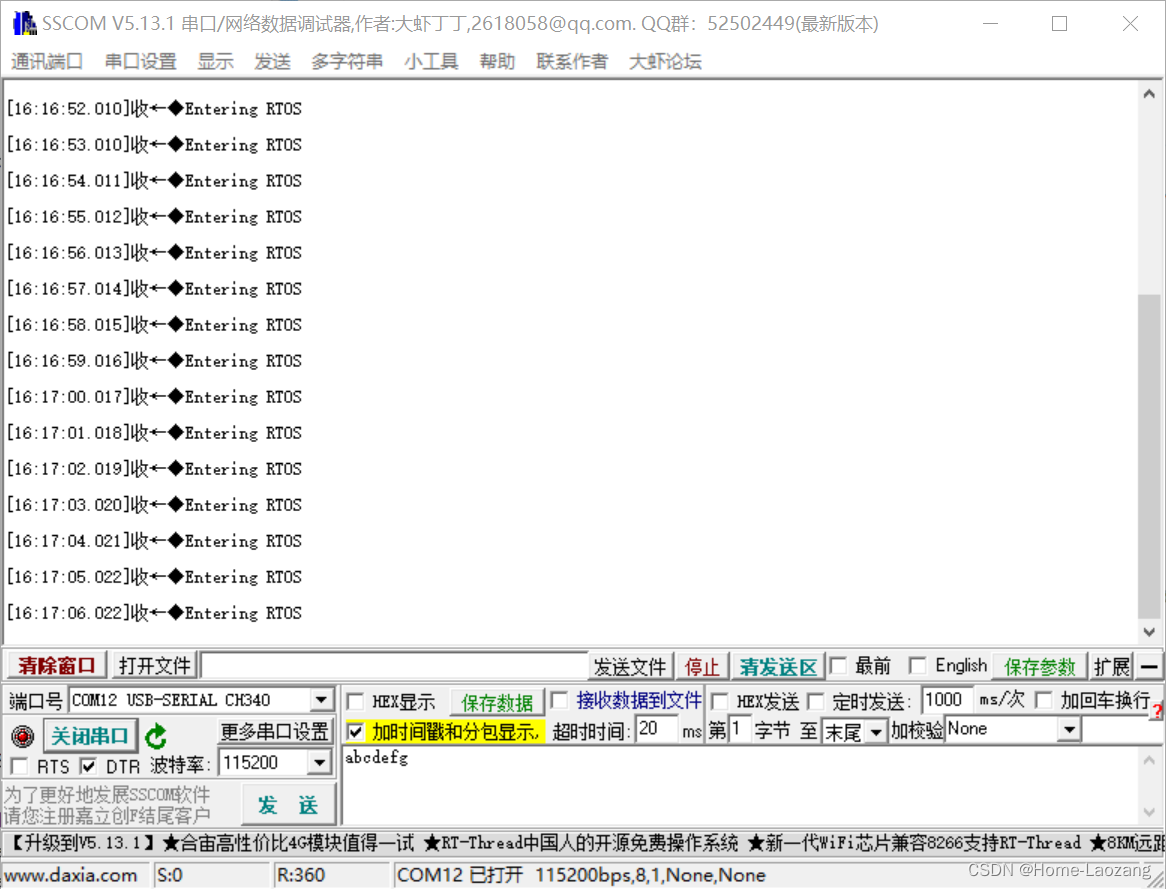
五、最终效果
5.1 编译

5.2 运行效果


 731
731


 被折叠的 条评论
为什么被折叠?
被折叠的 条评论
为什么被折叠?
 到【灌水乐园】发言


