


参考:https://blog.csdn.net/tengfei461807914/article/details/78009887
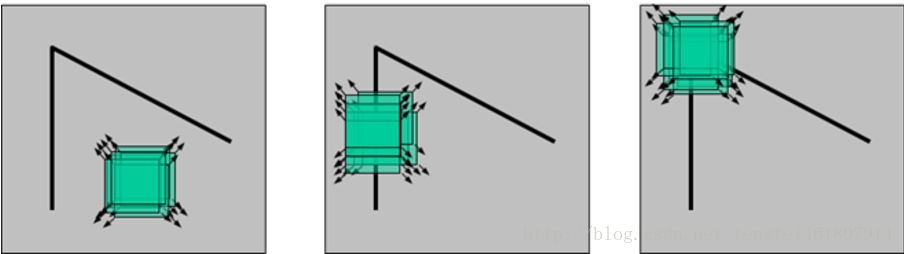
理解:窗口移动,第一个移动像素值不会变化,无边缘和角点,第二个上下检测不到边缘,左右能检测到,第三个各个方向的偏移均会导致像素值变化,有角点
# 修正的作用:某个角点处或者说图片的拐角处会检测到多个角点,需要合成一个
import cv2
import numpy as np

filename = 'image/qi.jpg'
img = cv2.imread(filename)
gray = cv2.cvtColor(img, cv2.COLOR_BGR2GRAY)

# 找到Harris角点
gray = np.float32(gray)
dst = cv2.cornerHarris(gray, 2, 3, 0.04)
dst = cv2.dilate(dst, None)
ret, dst = cv2.threshold(dst, 0.01 * dst.max(), 255, 0)
dst = np.uint8(dst)

# 找到重心
ret, labels, stats, centroids = cv2.connectedComponentsWithStats(dst)

# 定义迭代次数
criteria = (cv2.TERM_CRITERIA_EPS + cv2.TERM_CRITERIA_MAX_ITER, 100, 0.001)
corners = cv2.cornerSubPix(gray, np.float32(centroids), (5, 5), (-1, -1), criteria)
# 返回角点

# 绘制
res = np.hstack((centroids, corners))
res = np.int0(res)
print(res.shape)
img[res[:, 1], res[:, 0]] = [0, 0, 255]  # 绘制红点---Harris角点
img[res[:, 3], res[:, 2]] = [0, 255, 0]  # 绘制绿点---修正后的角点

# 图片放大才能看到角点
# cv2.imwrite('subpixel5.png',img)
cv2.imshow('img', img)
cv2.waitKey(0)


 2246
2246

 被折叠的 条评论
为什么被折叠?
被折叠的 条评论
为什么被折叠?
 到【灌水乐园】发言


