


pdd四块钱买了个BMP280,经过一番折腾,终于用esp32c3读到数据了,以下是简易教程。
不想看过程的,直接跳到最后看【总结】就OK啦!
BMP280资料:


网盘资料:https://pan.baidu.com/s/1V8vXsSuQBtT8Z3Vg1SEYvg(资料比较老,仅供参考)
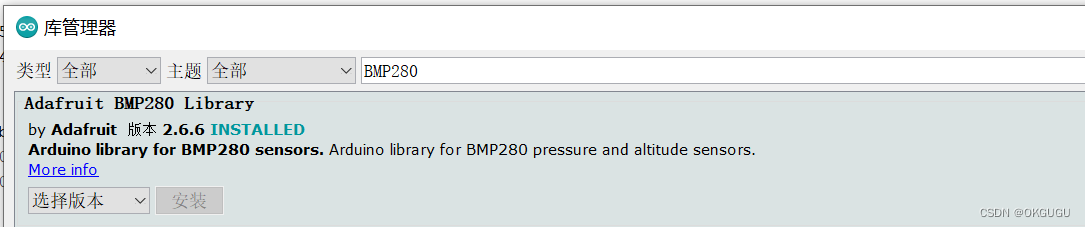
1、添加arduino_IDE库文件

搜索“BMP280” Adafruit版本并安装
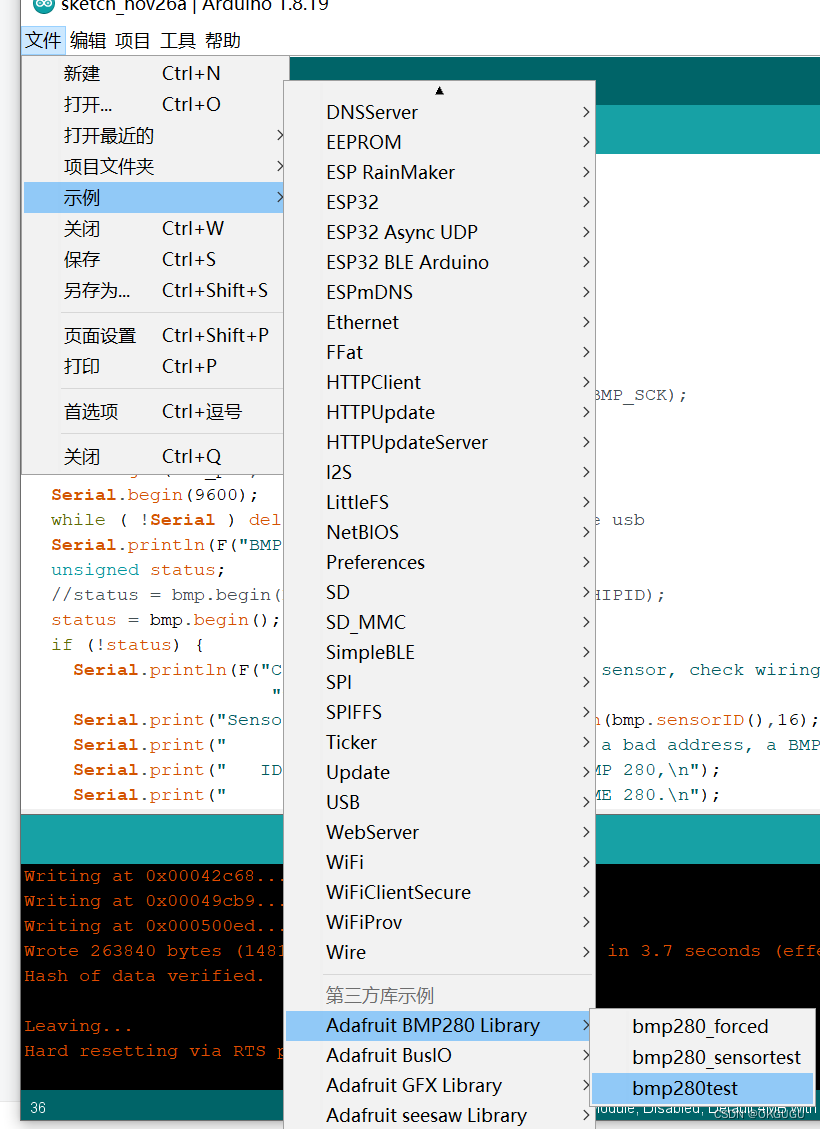
2、打开示例程序
3、 示例程序,我们使用IIC接线方式,在Adafruit_BMP280_Library的Readme文件中,我们可以看到,对于ESP8266(ESP32C3同理)的SDA/SCL默认对应GPIO4和GPIO5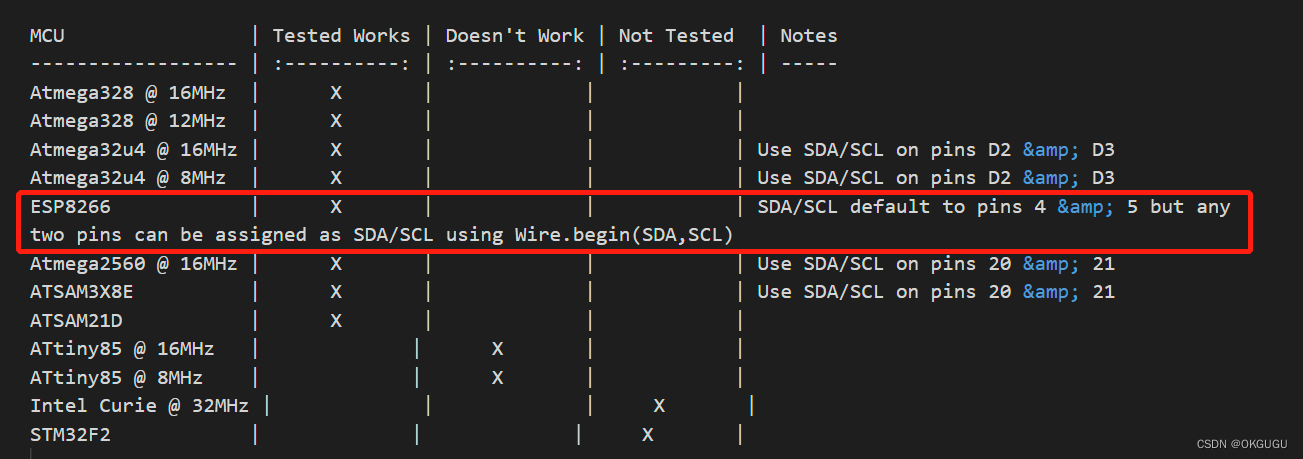
也就是说只要我们按照以下方式接线,运行示例程序就行?(并不行)
| 合宙ESP32C3 | BMP280 |
| VCC(3.3V) | VCC |
| GND | GND |
| SDA(GPIO4) | SDA |
| SLK(GPIO5) | SLK |
当接好线缆,并下载程序后,串口显示如下信息,读取失败:

在网上查攻略,说是要把库文件的头文件 Adafruit_BMP280.h 中的IIC地址从0x77修改为0x76:
这里定义了地址:
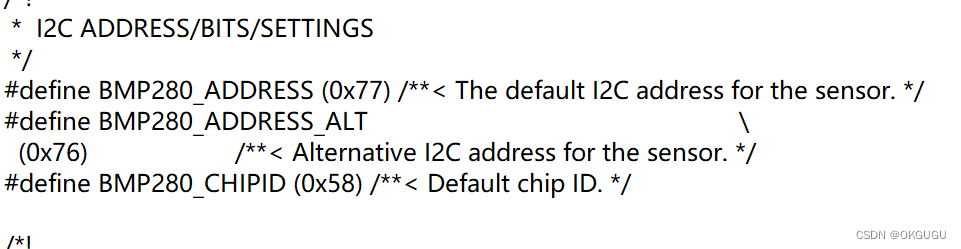
把这一行修改为:
//原来
bool begin(uint8_t addr = BMP280_ADDRESS, uint8_t chipid = BMP280_CHIPID);
//修改
bool begin(uint8_t addr = BMP280_ADDRESS_ALT, uint8_t chipid = BMP280_CHIPID);
再次编译程序下载,依然显示读取失败???

这时我就纳闷了,接着想到了库文件中的Readme还有半句话:
可以使用 Wire.begin(SDA,SCL) 语句来定义任意两个io口为SDA/SLK接口!

So,在示例文件中添加宏定义两个针脚:
例如我们ESP32C3的GPIO2和GPIO3作为SDA/SLK(当然用GPIO 4/5或者其他也行),
在setup()函数中加入 Wire.begin(SDA_pin,SLK_pin),
确认线缆连接无误!

完整代码如下:
/***************************************************************************
This is a library for the BMP280 humidity, temperature & pressure sensor
Designed specifically to work with the Adafruit BMP280 Breakout
----> http://www.adafruit.com/products/2651
These sensors use I2C or SPI to communicate, 2 or 4 pins are required
to interface.
Adafruit invests time and resources providing this open source code,
please support Adafruit andopen-source hardware by purchasing products
from Adafruit!
Written by Limor Fried & Kevin Townsend for Adafruit Industries.
BSD license, all text above must be included in any redistribution
***************************************************************************/
#include <Wire.h>
#include <SPI.h>
#include <Adafruit_BMP280.h>
#define BMP_SCK (13)
#define BMP_MISO (12)
#define BMP_MOSI (11)
#define BMP_CS (10)
#define SLK_pin 3 //添加管脚宏定义,序号对应GPIO号
#define SDA_pin 2
Adafruit_BMP280 bmp; // I2C
//Adafruit_BMP280 bmp(BMP_CS); // hardware SPI
//Adafruit_BMP280 bmp(BMP_CS, BMP_MOSI, BMP_MISO, BMP_SCK);
void setup() {
Wire.begin(SDA_pin,SLK_pin); //使这两个GPIO管脚作为SDA/SLK
Serial.begin(9600);
while ( !Serial ) delay(100); // wait for native usb
Serial.println(F("BMP280 test"));
unsigned status;
//status = bmp.begin(BMP280_ADDRESS_ALT, BMP280_CHIPID);
status = bmp.begin();
if (!status) {
Serial.println(F("Could not find a valid BMP280 sensor, check wiring or "
"try a different address!"));
Serial.print("SensorID was: 0x"); Serial.println(bmp.sensorID(),16);
Serial.print(" ID of 0xFF probably means a bad address, a BMP 180 or BMP 085\n");
Serial.print(" ID of 0x56-0x58 represents a BMP 280,\n");
Serial.print(" ID of 0x60 represents a BME 280.\n");
Serial.print(" ID of 0x61 represents a BME 680.\n");
while (1) delay(10);
}
/* Default settings from datasheet. */
bmp.setSampling(Adafruit_BMP280::MODE_NORMAL, /* Operating Mode. */
Adafruit_BMP280::SAMPLING_X2, /* Temp. oversampling */
Adafruit_BMP280::SAMPLING_X16, /* Pressure oversampling */
Adafruit_BMP280::FILTER_X16, /* Filtering. */
Adafruit_BMP280::STANDBY_MS_500); /* Standby time. */
}
void loop() {
Serial.print(F("Temperature = "));
Serial.print(bmp.readTemperature());
Serial.println(" *C");
Serial.print(F("Pressure = "));
Serial.print(bmp.readPressure());
Serial.println(" Pa");
Serial.print(F("Approx altitude = "));
Serial.print(bmp.readAltitude(1013.25)); /* Adjusted to local forecast! */
Serial.println(" m");
Serial.println();
delay(2000);
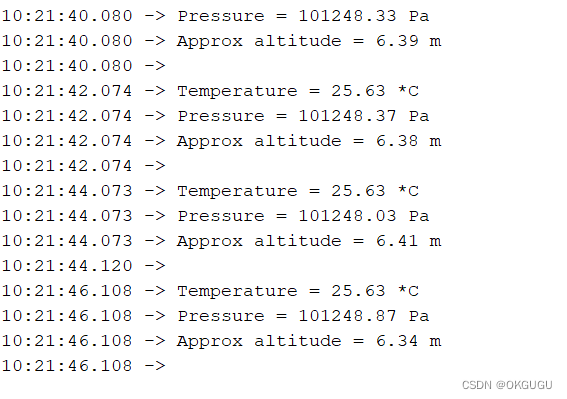
}编译下载后打开串口,成功读取温度、气压、高度数据:
【总结】对于合宙ESP32C3:(其他板子如果改完还是不行的,可能不需要下描述第一步)
1、更改Adafruit_BMP280.h库这一句:
//原来
bool begin(uint8_t addr = BMP280_ADDRESS, uint8_t chipid = BMP280_CHIPID);
//修改
bool begin(uint8_t addr = BMP280_ADDRESS_ALT, uint8_t chipid = BMP280_CHIPID);
2、代码添加指定某两个GPIO管脚为SDA/SLK
#define SLK_pin 3
#define SDA_pin 2
3、setup()中使用Wire.begin()
void setup()
{
    Wire.begin(SDA_pin,SLK_pin);
    Serial.begin(9600);
    ......
    ......
}


 1625
1625


 被折叠的 条评论
为什么被折叠?
被折叠的 条评论
为什么被折叠?
 到【灌水乐园】发言


