


在之前学习并实践了使用Intel Realsense d435 拍摄RGB视频及深度图视频后,经过图像处理获得了连续的深度图与RGB颜色图图像帧,现根据深度图与颜色图生成实践场景的局部点云,以下为总体代码:
// C++ 标准库
#include <iostream>
#include <string>
#include <vector>
#include <algorithm>

// OpenCV 库
#include "opencv2/opencv.hpp"
#include "opencv2/calib3d/calib3d.hpp"
#include "opencv2/imgproc.hpp"
#include "opencv2/imgcodecs.hpp"
#include "opencv2/core/utility.hpp"
#include <opencv2/ximgproc/disparity_filter.hpp>

// PCL 库
//#include <pcl/io/pcd_io.h>
#include <pcl/io/ply_io.h>
#include <pcl/point_types.h>
#include <pcl/filters/statistical_outlier_removal.h>

// 定义点云类型
// 定义点云使用的格式:这里用的是XYZRGBA
typedef pcl::PointXYZRGBA PointT;
typedef pcl::PointCloud<PointT> PointCloud;


using namespace std;
using namespace cv;


int main()
{
    // 数据读取
    cv::Mat rgb, depth_origin, depth, rdepth;

    // 相机内参
    double K_cx = 640;
    double K_cy = 360;
    double K_fx = 915;
    double K_fy = 915;
    double depthScale = 1000;


    // 定义点云点的三维坐标值:计算每个点对应的XYZRGB值
    PointCloud::Ptr __pointCloud(new PointCloud);

        string path_rgb = "./rgb";
        int    imagenum ;
        imagenum = j;
        string path_rgb_imgtest = path_rgb + "/" + to_string(imagenum) + "_rgb.png";
        string path_depth = "./depth";
        string path_depth_imgtest = path_depth + "/" + to_string(imagenum) + "_depth.png";

        rgb = cv::imread(path_rgb_imgtest);
        depth = cv::imread(path_depth_imgtest, IMREAD_UNCHANGED);


    if (!__pointCloud->empty())
        __pointCloud->clear();

    // 遍历深度图图像,获取每个像素点的深度图
    for (int v = 0; v < rgb.rows; v++)
    {
        for (int u = 0; u < rgb.cols; u++)
        {

            unsigned int d = depth.ptr<unsigned short>(v)[u];

            if (d == 0)            //坏点滤除:深度为0的点
                continue;

            //点云的三维坐标计算
            PointT p;
            p.z = double(d) / depthScale;
            p.x = (u - K_cx) * p.z / K_fx;
            p.y = (v - K_cy) * p.z / K_fy;
            //点云点BGR颜色通道
            p.b = rgb.data[v * rgb.step + u * rgb.channels()];
            p.g = rgb.data[v * rgb.step + u * rgb.channels() + 1];
            p.r = rgb.data[v * rgb.step + u * rgb.channels() + 2];
            //点云保存
            __pointCloud->points.push_back(p);

        }


    //点云保存
    cout << imagenum << "号点云共有" << __pointCloud->size() << "个点." << endl;
    string path_depth_save = "./"+to_string(imagenum)+ ".ply";
    pcl::io::savePLYFile(path_depth_save, *__pointCloud);

    }
    return 0;
}
代码分析:
1.库引用:
// C++ 标准库
#include <iostream>
#include <string>
#include <vector>
#include <algorithm>

// OpenCV 库
#include "opencv2/opencv.hpp"
#include "opencv2/calib3d/calib3d.hpp"
#include "opencv2/imgproc.hpp"
#include "opencv2/imgcodecs.hpp"
#include "opencv2/core/utility.hpp"
#include <opencv2/ximgproc/disparity_filter.hpp>


// PCL 库
//#include <pcl/io/pcd_io.h>
#include <pcl/io/ply_io.h>
#include <pcl/point_types.h>
#include <pcl/filters/statistical_outlier_removal.h>


// 定义点云类型
// 定义点云使用的格式:这里用的是XYZRGB
typedef pcl::PointXYZRGBA PointT;
typedef pcl::PointCloud<PointT> PointCloud;


using namespace std;
using namespace cv;
在点云处理程序汇总,需要进行基本的图像处理,使用了Opencv库;
点云的定义、处理和生成,调用了PCL库;
还有C++的基本库;其中PCL库和Opencv库需要自行安装,以下为参考链接:
Win10 系统下 VisualStudio2019 配置点云库 PCL1.11.1
OpenCV安装教程:Windows 安装 Visual Studio + OpenCV + OpenCV contrib
2.图像读取:
        string path_rgb = "./rgb";
        int    imagenum ;
        imagenum = j;
        string path_rgb_imgtest = path_rgb + "/" + to_string(imagenum) + "_rgb.png";
        string path_depth = "./depth";
        string path_depth_imgtest = path_depth + "/" + to_string(imagenum) + "_depth.png";

        rgb = cv::imread(path_rgb_imgtest);
        depth = cv::imread(path_depth_imgtest, IMREAD_UNCHANGED);
其中深度图与RGB图片所在文件夹,图像帧名称需要根据本地情况进行修改;
深度图读取过程中需要使用IMREAD_UNCHANGED参数,否则会将16位深度数据强制转换;进行读取错误的深度图值,造成后续点云生成错误
3.点云生成:
// 遍历深度图图像,获取每个像素点的深度图
    for (int v = 0; v < rgb.rows; v++)
    {
        for (int u = 0; u < rgb.cols; u++)
        {

            unsigned int d = depth.ptr<unsigned short>(v)[u];

            if (d == 0)            //坏点滤除:深度为0的点
                continue;

            //点云的三维坐标计算
            PointT p;
            p.z = double(d) / depthScale;
            p.x = (u - K_cx) * p.z / K_fx;
            p.y = (v - K_cy) * p.z / K_fy;
            //点云点BGR颜色通道
            p.b = rgb.data[v * rgb.step + u * rgb.channels()];
            p.g = rgb.data[v * rgb.step + u * rgb.channels() + 1];
            p.r = rgb.data[v * rgb.step + u * rgb.channels() + 2];
            //点云保存
            __pointCloud->points.push_back(p);
首先根据深度图获取对应像素点的深度值,后根据RBG图中像素点位置获取像素点的2D坐标,根据投影关系,结合相机内参参数将2D像素点三维化,获取点云点的三维坐标,随后保存三维的点云点。
由此遍历图像像素点,将所有2D像素点转换为三维点云点,完成局部点云构建。
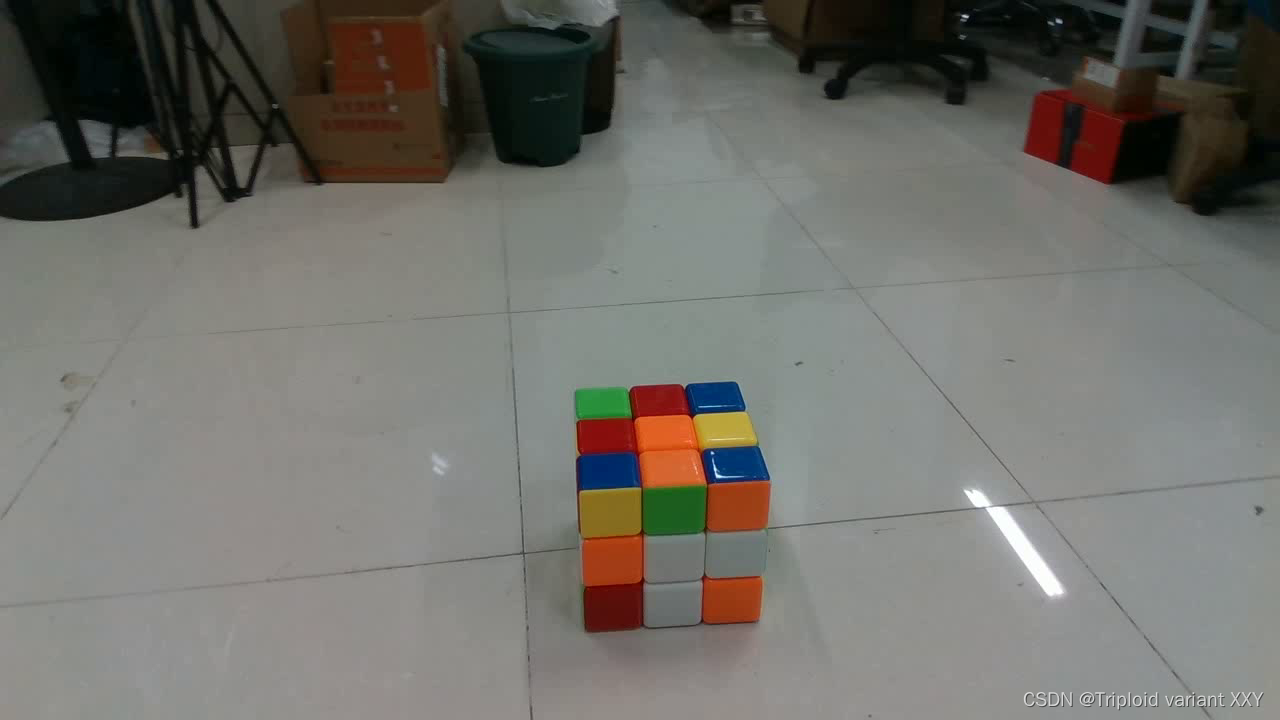
以为为实践效果:
RGB图:
深度图:

局部点云:
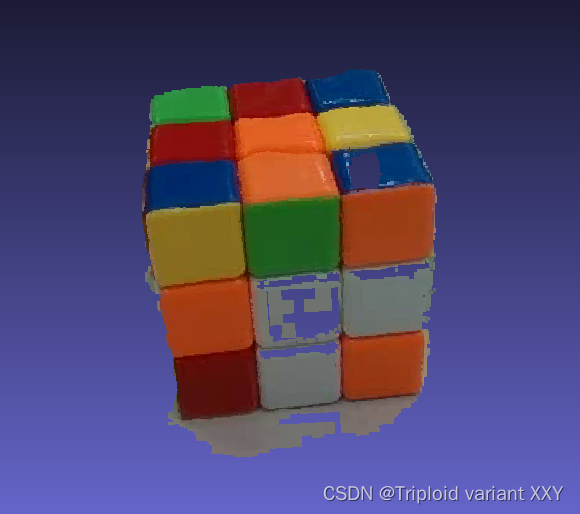
以上便完成了基于深度图与RGB图的局部点云生成!


 2711
2711


 被折叠的 条评论
为什么被折叠?
被折叠的 条评论
为什么被折叠?
 到【灌水乐园】发言


