


TensorFlow的学习-1
TensorFlow的介绍
TensorFlow是一个由谷歌开发和维护的开源深度学习框架,它基于数据流编程(dataflow programming)的符号数学系统,被广泛应用于各类机器学习(machine learning)算法的编程实现。TensorFlow的前身是谷歌的神经网络算法库DistBelief,相比于前作,TensorFlow在性能上有显著改进,构架灵活性和可移植性也得到增强[1]。
TensorFlow拥有多层级结构,可部署于各类服务器、PC终端和网页,并支持GPU和TPU高性能数值计算。TensorFlow的生态系统非常完善,包括TensorFlow Hub、TensorFlow Lite、TensorFlow Research Cloud等多个项目,以及各类应用程序接口(Application Programming Interface, API)[1]。
TensorFlow的基本概念包括张量(Tensor,可以看作是一个多维数组,存储各种数据类型)、计算图(Graph,用来表示计算任务的图,包括节点和边)、会话(Session,计算图必须在会话中运行,会话可以跨多个CPU和GPU进行分布式运算)、变量(Variable,在计算图中用来存储状态信息的节点)和操作(Operation,计算图中的节点,代表具体的操作)[2]。
TensorFlow的使用场景非常广泛,包括但不限于图像和语音识别、自然语言处理、数据挖掘、嵌入式设备等。例如,TensorFlow可以用来实现卷积神经网络和递归神经网络等技术,用于图像和语音识别;可以用来实现循环神经网络等技术,用于自然语言处理任务,如文本分类、机器翻译等;也可以用来实现各种机器学习算法,包括监督学习、非监督学习、深度学习等[2]。
TensorFlow的特点包括可移植、跨平台性强(相同的代码和模型可以同时在服务器、PC、移动设备上运行,TensorFlow还可以选择在CPU或者GPU上面运行)、良好的社区生态(TensorFlow的官方文档几乎为所有的函数与所有的参数都进行了详细的阐述,并且很大一部分的官方教程支持中文,对于国内学习成本较低)、内置算法非常完善(在TensorFlow之中内嵌了我们在机器学习中能用到的绝大部分的算法)、适用工业生产(TensorFlow内置的Service、分布式等结构能够帮助个人和企业很方便完成模型的训练与部署)、编程扩展性好(支持市面上大多数编程语言比如Python、C、R、Go等)[3]。
TensorFlow的缺点包括调试比较麻烦(不能深入其内部进行调试)、许多高阶API导致修改模型有一定难度、TensorFlow 1.x版本与TensorFlow 2.x的差别较大,代码版本迁移比较麻烦等[3]。
总的来说,TensorFlow是一个功能强大、生态完善的深度学习框架,被广泛应用于各种机器学习领域的研究和应用中。
参考其他博客
TensorFlow介绍与应用
TensorFlow是由Google开源的一个深度学习平台,它使用数据流图的形式来表示计算,支持跨多个CPU和GPU的分布式运算。TensorFlow可以用来实现多种机器学习算法,包括神经网络、卷积神经网络、递归神经网络等。TensorFlow的基本概念如下:
张量(Tensor):TensorFlow中的基本数据结构,可以看作是一个多维数组,可以存储各种数据类型。
计算图(Graph):TensorFlow中用来表示计算任务的图,包括节点(节点代表具体的操作)和边(边代表数据流)。
会话(Session):在TensorFlow中,计算图必须在会话中运行,会话可以跨多个CPU和GPU进行分布式运算。
变量(Variable):在计算图中用来存储状态信息的节点,可以在整个计算过程中保持不变。
操作(Operation):计算图中的节点,代表具体的操作,可以是数学运算、数据读取等。
TensorFlow的使用场景非常广泛,主要包括以下几个方面:
图像和语音识别:TensorFlow可以用来实现卷积神经网络和递归神经网络等技术,用于图像和语音识别。
自然语言处理:TensorFlow可以用来实现循环神经网络等技术,用于自然语言处理任务,如文本分类、机器翻译等。
数据挖掘:TensorFlow可以用来实现各种机器学习算法,包括监督学习、非监督学习、深度学习等。
嵌入式设备:TensorFlow可以在嵌入式设备上运行,用于实现各种智能化应用,如智能家居、智能车载系统等。以下是一些 TensorFlow 应用的代码示例:
图像分类:
import tensorflow as tf

##  加载 MNIST 手写数字数据集
mnist = tf.keras.datasets.mnist
(train_images, train_labels), (test_images, test_labels) = mnist.load_data()

##  改变图像维度为 (28, 28, 1),并进行归一化
train_images = train_images.reshape((60000, 28, 28, 1))
train_images, test_images = train_images / 255.0, test_images / 255.0

##  定义模型
model = tf.keras.models.Sequential([
 tf.keras.layers.Conv2D(32, (3,3), activation='relu', input_shape=(28, 28, 1)),
 tf.keras.layers.MaxPooling2D((2,2)),
 tf.keras.layers.Flatten(),
 tf.keras.layers.Dense(10, activation='softmax')
])

##  编译模型
model.compile(optimizer='adam',
             loss='sparse_categorical_crossentropy',
             metrics=['accuracy'])

## 训练模型
model.fit(train_images, train_labels, epochs=5, validation_data=(test_images, test_labels))
机器翻译:
import tensorflow as tf
from tensorflow.keras.layers import Input, LSTM, Dense
from tensorflow.keras.models import Model

# 加载数据集
dataset = tf.keras.datasets.multi30k
(train_data, train_labels), (test_data, test_labels) = dataset.load_data()

# 创建 Tokenizer
tokenizer = tf.keras.preprocessing.text.Tokenizer(filters='!"#$%&()*+,-./:;=?@[\\]^_`{|}~\t\n',
                                                  oov_token="<OOV>")

# 对输入序列进行 Tokenize,并对输出序列进行 padding
tokenizer.fit_on_texts(train_data)
train_data = tokenizer.texts_to_sequences(train_data)
train_data = tf.keras.preprocessing.sequence.pad_sequences(train_data, padding='post')

# 定义模型
embedding_dim = 256
units = 1024
vocab_size = len(tokenizer.word_index) + 1

encoder_inputs = Input(shape=(None,))
encoder_embedding = tf.keras.layers.Embedding(vocab_size, embedding_dim)(encoder_inputs)
encoder_lstm = tf.keras.layers.LSTM(units, return_sequences=True, return_state=True)
encoder_outputs, state_h, state_c = encoder_lstm(encoder_embedding)
encoder_states = [state_h, state_c]

decoder_inputs = Input(shape=(None,))
decoder_embedding = tf.keras.layers.Embedding(vocab_size, embedding_dim)(decoder_inputs)
decoder_lstm = tf.keras.layers.LSTM(units, return_sequences=True, return_state=True)
decoder_outputs, _, _ = decoder_lstm(decoder_embedding, initial_state=encoder_states)
decoder_dense = Dense(vocab_size, activation='softmax')
decoder_outputs = decoder_dense(decoder_outputs)

model = Model([encoder_inputs, decoder_inputs], decoder_outputs)

# 编译模型
model.compile(optimizer='adam', loss='categorical_crossentropy')

# 训练模型
model.fit([train_data[:, :-1], train_data[:, 1:]], tf.keras.utils.to_categorical(train_labels),
          batch_size=64, epochs=10, validation_split=0.2)
生成对抗网络:
import tensorflow as tf
from tensorflow.keras.layers import Input, Dense, Reshape, Flatten
from tensorflow.keras.layers import BatchNormalization, Activation, ZeroPadding2D
from tensorflow.keras.layers import UpSampling2D, Conv2D
from tensorflow.keras.models import Sequential, Model
from tensorflow.keras.optimizers import Adam

import numpy as np
import matplotlib.pyplot as plt

# 加载数据集
(X_train, _), (_, _) = tf.keras.datasets.mnist.load_data()

# 归一化数据并转换为浮点数型,使值在 [-1, 1] 之间
X_train = X_train / 127.5 - 1.
X_train = np.expand_dims(X_train, axis=3)

# 定义生成器
def build_generator():
    model = Sequential()

    model.add(Dense(128 * 7 * 7, activation="relu", input_dim=100))
    model.add(Reshape((7, 7, 128)))
    model.add(UpSampling2D())
    model.add(Conv2D(128, kernel_size=3, padding="same"))
    model.add(BatchNormalization(momentum=0.8))
    model.add(Activation("relu"))
    model.add(UpSampling2D())
    model.add(Conv2D(64, kernel_size=3, padding="same"))
    model.add(BatchNormalization(momentum=0.8))
    model.add(Activation("relu"))
    model.add(Conv2D(1, kernel_size=3, padding="same"))
    model.add(Activation("tanh"))

    noise = Input(shape=(100,))
    img = model(noise)

    return Model(noise, img)

# 定义判别器
def build_discriminator():
    model = Sequential()

    model.add(Conv2D(32, kernel_size=3, strides=2, input_shape=(28, 28, 1), padding="same"))
    model.add(LeakyReLU(alpha=0.2))
    model.add(Dropout(0.25))
    model.add(Conv2D(64, kernel_size=3, strides=2, padding="same"))
    model.add(ZeroPadding2D(padding=((0,1),(0,1))))
    model.add(BatchNormalization(momentum=0.8))
    model.add(LeakyReLU(alpha=0.2))
    model.add(Dropout(0.25))
    model.add(Conv2D(128, kernel_size=3, strides=2, padding="same"))
    model.add(BatchNormalization(momentum=0.8))
    model.add(LeakyReLU(alpha=0.2))
    model.add(Dropout(0.25))
    model.add(Conv2D(256, kernel_size=3, strides=1, padding="same"))
    model.add(BatchNormalization(momentum=0.8))
    model.add(LeakyReLU(alpha=0.2))
    model.add(Dropout(0.25))
    model.add(Flatten())
    model.add(Dense(1, activation='sigmoid'))

    img = Input(shape=(28, 28, 1))
    validity = model(img)

    return Model(img, validity)

# 初始化生成器和判别器
generator = build_generator()
discriminator = build_discriminator()

# 编译判别器模型
optimizer = Adam(0.0002, 0.5)
discriminator.compile(loss='binary_crossentropy',
                      optimizer=optimizer,
                      metrics=['accuracy'])

# 固定判别器的权重,只训练生成器
discriminator.trainable = False

# 设置生成器和判别器的组合模型
z = Input(shape=(100,))
img = generator(z)
valid = discriminator(img)

gan = Model(z, valid)
gan.compile(loss='binary_crossentropy', optimizer=optimizer)

# 训练 GAN 模型
epochs = 30000
batch_size = 32
sample_interval = 1000

for epoch in range(epochs):
    # 随机选择一批真实图像
    idx = np.random.randint(0, X_train.shape[0], batch_size)
    imgs = X_train[idx]

    # 生成一批 fake 图像
    noise = np.random.normal(0, 1, (batch_size, 100))
    gen_imgs = generator.predict(noise)

    # 训练判别器模型
    d_loss_real = discriminator.train_on_batch(imgs, np.ones((batch_size, 1)))
    d_loss_fake = discriminator.train_on_batch(gen_imgs, np.zeros((batch_size, 1)))
    d_loss = 0.5 * np.add(d_loss_real, d_loss_fake)

    # 训练生成器模型
    g_loss = gan.train_on_batch(noise, np.ones((batch_size, 1)))

    # 打印损失函数
    if epoch % sample_interval == 0:
        print(f"Epoch: {epoch}, D Loss: {d_loss[0]}, G Loss: {g_loss}")以下是一些 TensorFlow 应用的代码示例:

1. 图像分类:

```python
import tensorflow as tf

# 加载 MNIST 手写数字数据集
mnist = tf.keras.datasets.mnist
(train_images, train_labels), (test_images, test_labels) = mnist.load_data()

# 改变图像维度为 (28, 28, 1),并进行归一化
train_images = train_images.reshape((60000, 28, 28, 1))
train_images, test_images = train_images / 255.0, test_images / 255.0

# 定义模型
model = tf.keras.models.Sequential([
  tf.keras.layers.Conv2D(32, (3,3), activation='relu', input_shape=(28, 28, 1)),
  tf.keras.layers.MaxPooling2D((2,2)),
  tf.keras.layers.Flatten(),
  tf.keras.layers.Dense(10, activation='softmax')
])

# 编译模型
model.compile(optimizer='adam',
              loss='sparse_categorical_crossentropy',
              metrics=['accuracy'])

# 训练模型
model.fit(train_images, train_labels, epochs=5, validation_data=(test_images, test_labels))
原文链接:https://blog.csdn.net/qq_16908013/article/details/131400191
TensorFlow安装
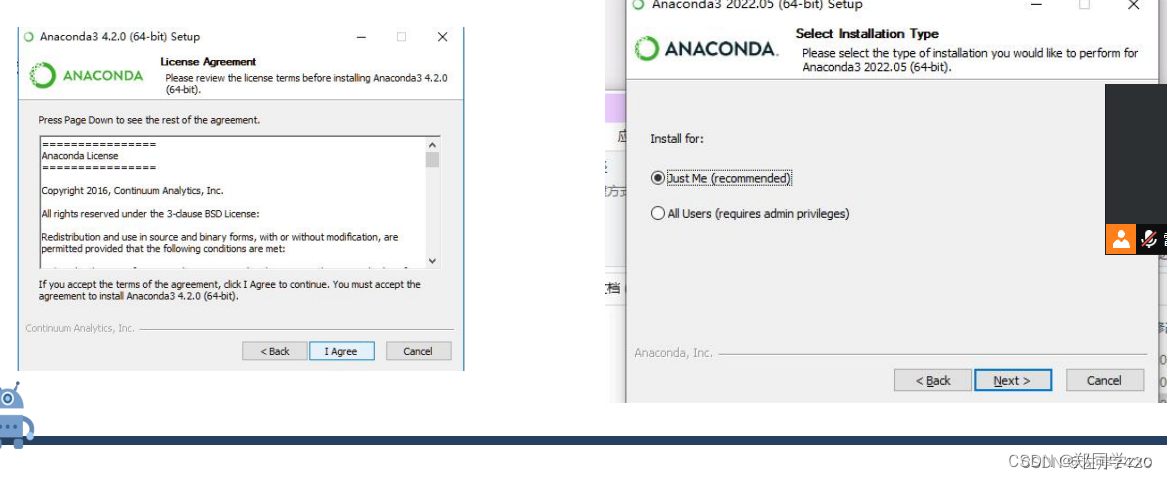
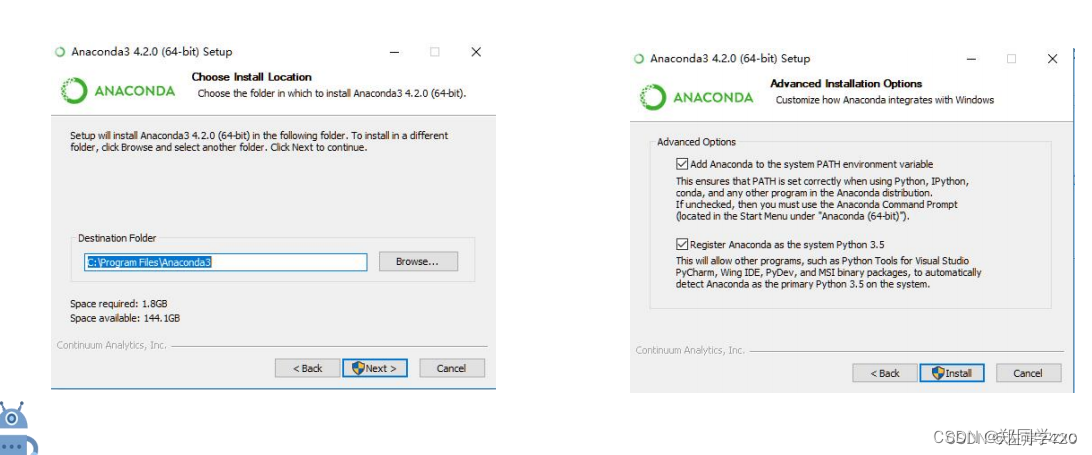
第一步:安装anaconda
安装路径:https://repo.anaconda.com/archive/
1、下载Python2.7或3.3+任意版本
2、
3、
二、环境配置
1、安装完成需要查看电脑是否有anaconda这个环境配置
找到设置,点击系统->系统信息->高级系统设置->环境变量
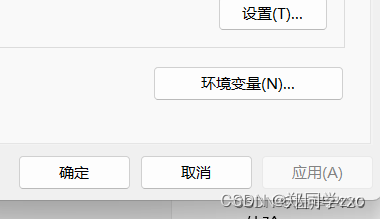
分别点开用户变量和系统变量的path查看是否有anaconda的环境配置
用户变量:

环境变量:
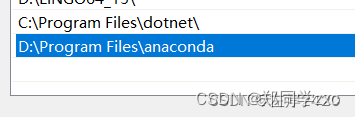
如果检查没有的话进行手动添加
2、添加环境配置
分别双击用户变量和环境变量的path,点击新建->浏览,找到anaconda的文件所在地进行添加,最后点击确定,添加完成。

三、进行虚拟环境搭建(GPU安装)
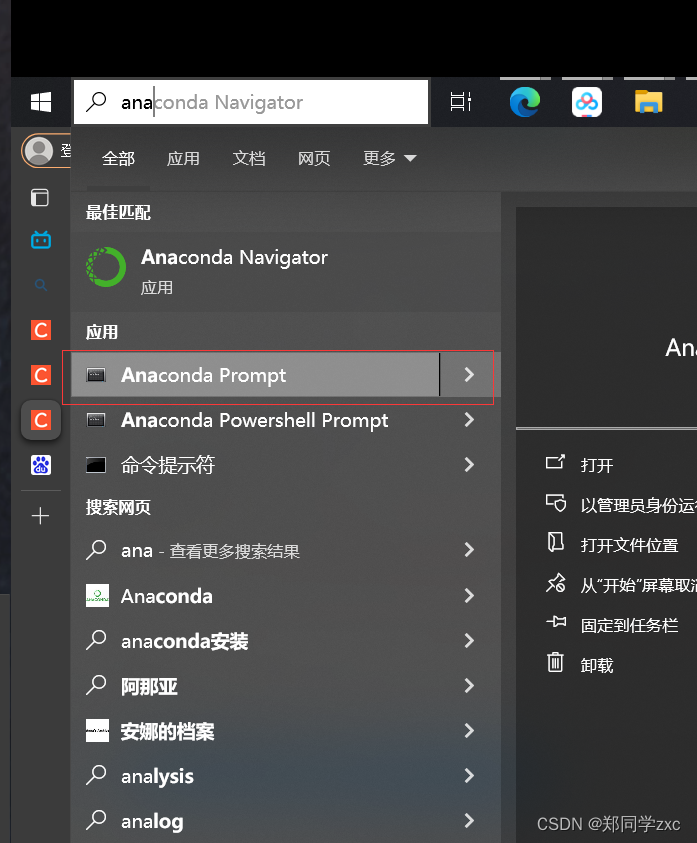
1、打开Anaconda Prompt
2、查看当前虚拟环境
输入指令:conda env list
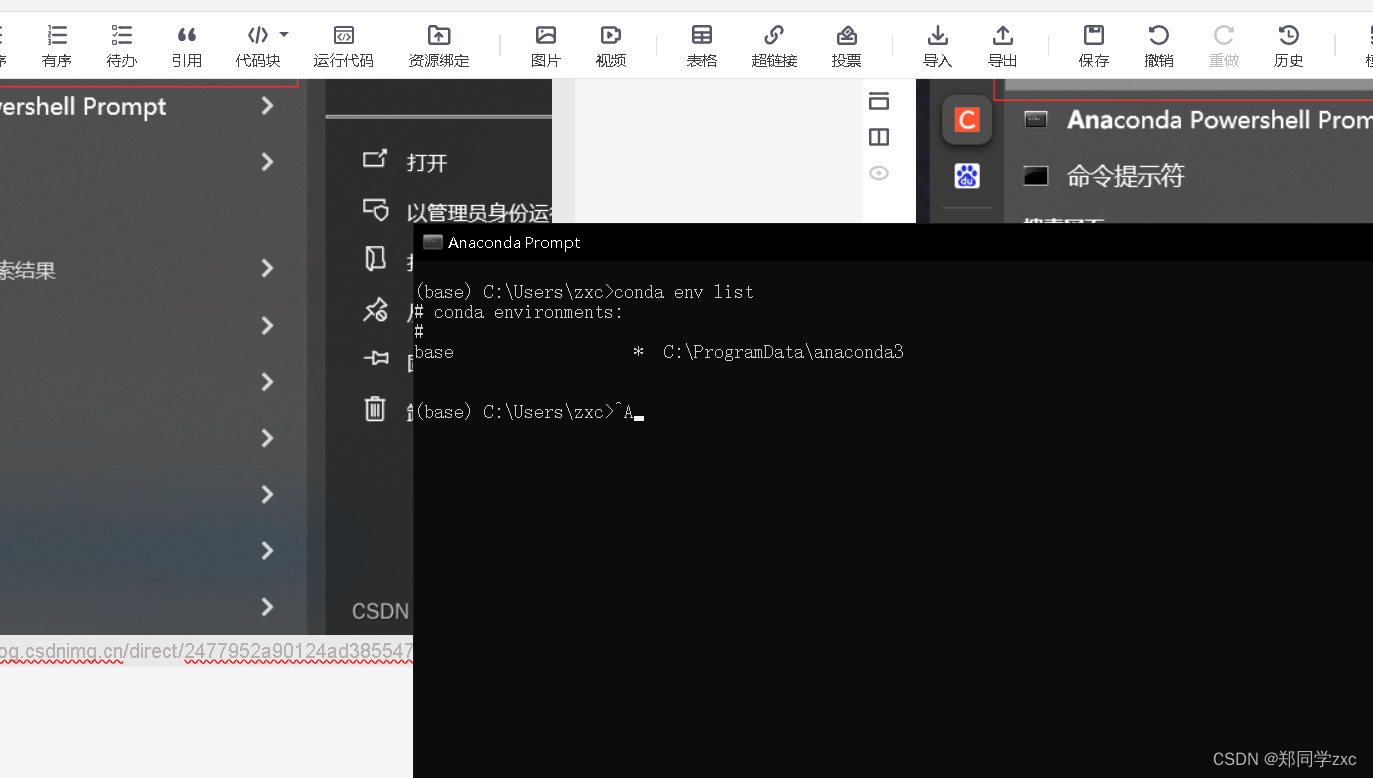
电脑默认只有一个base
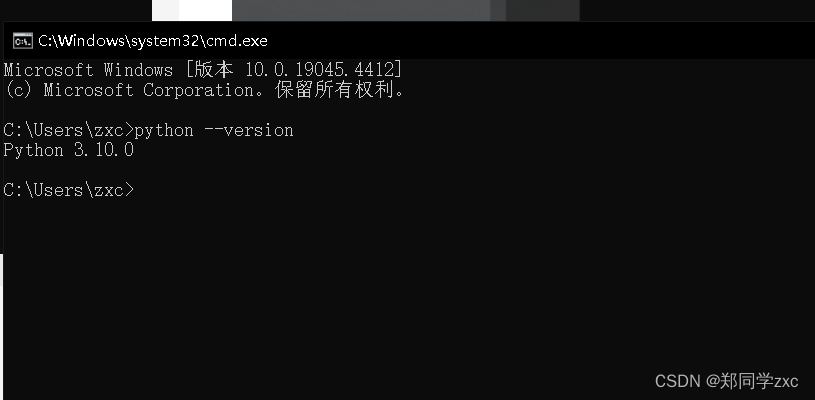
3、创建tensor的虚拟环境
在键盘上同时按下win+R键,先输入cmd,弹出小黑框后,然再输入指令:python --version查看python版本。
安装虚拟环境:
conda create -n tensor python=3.9
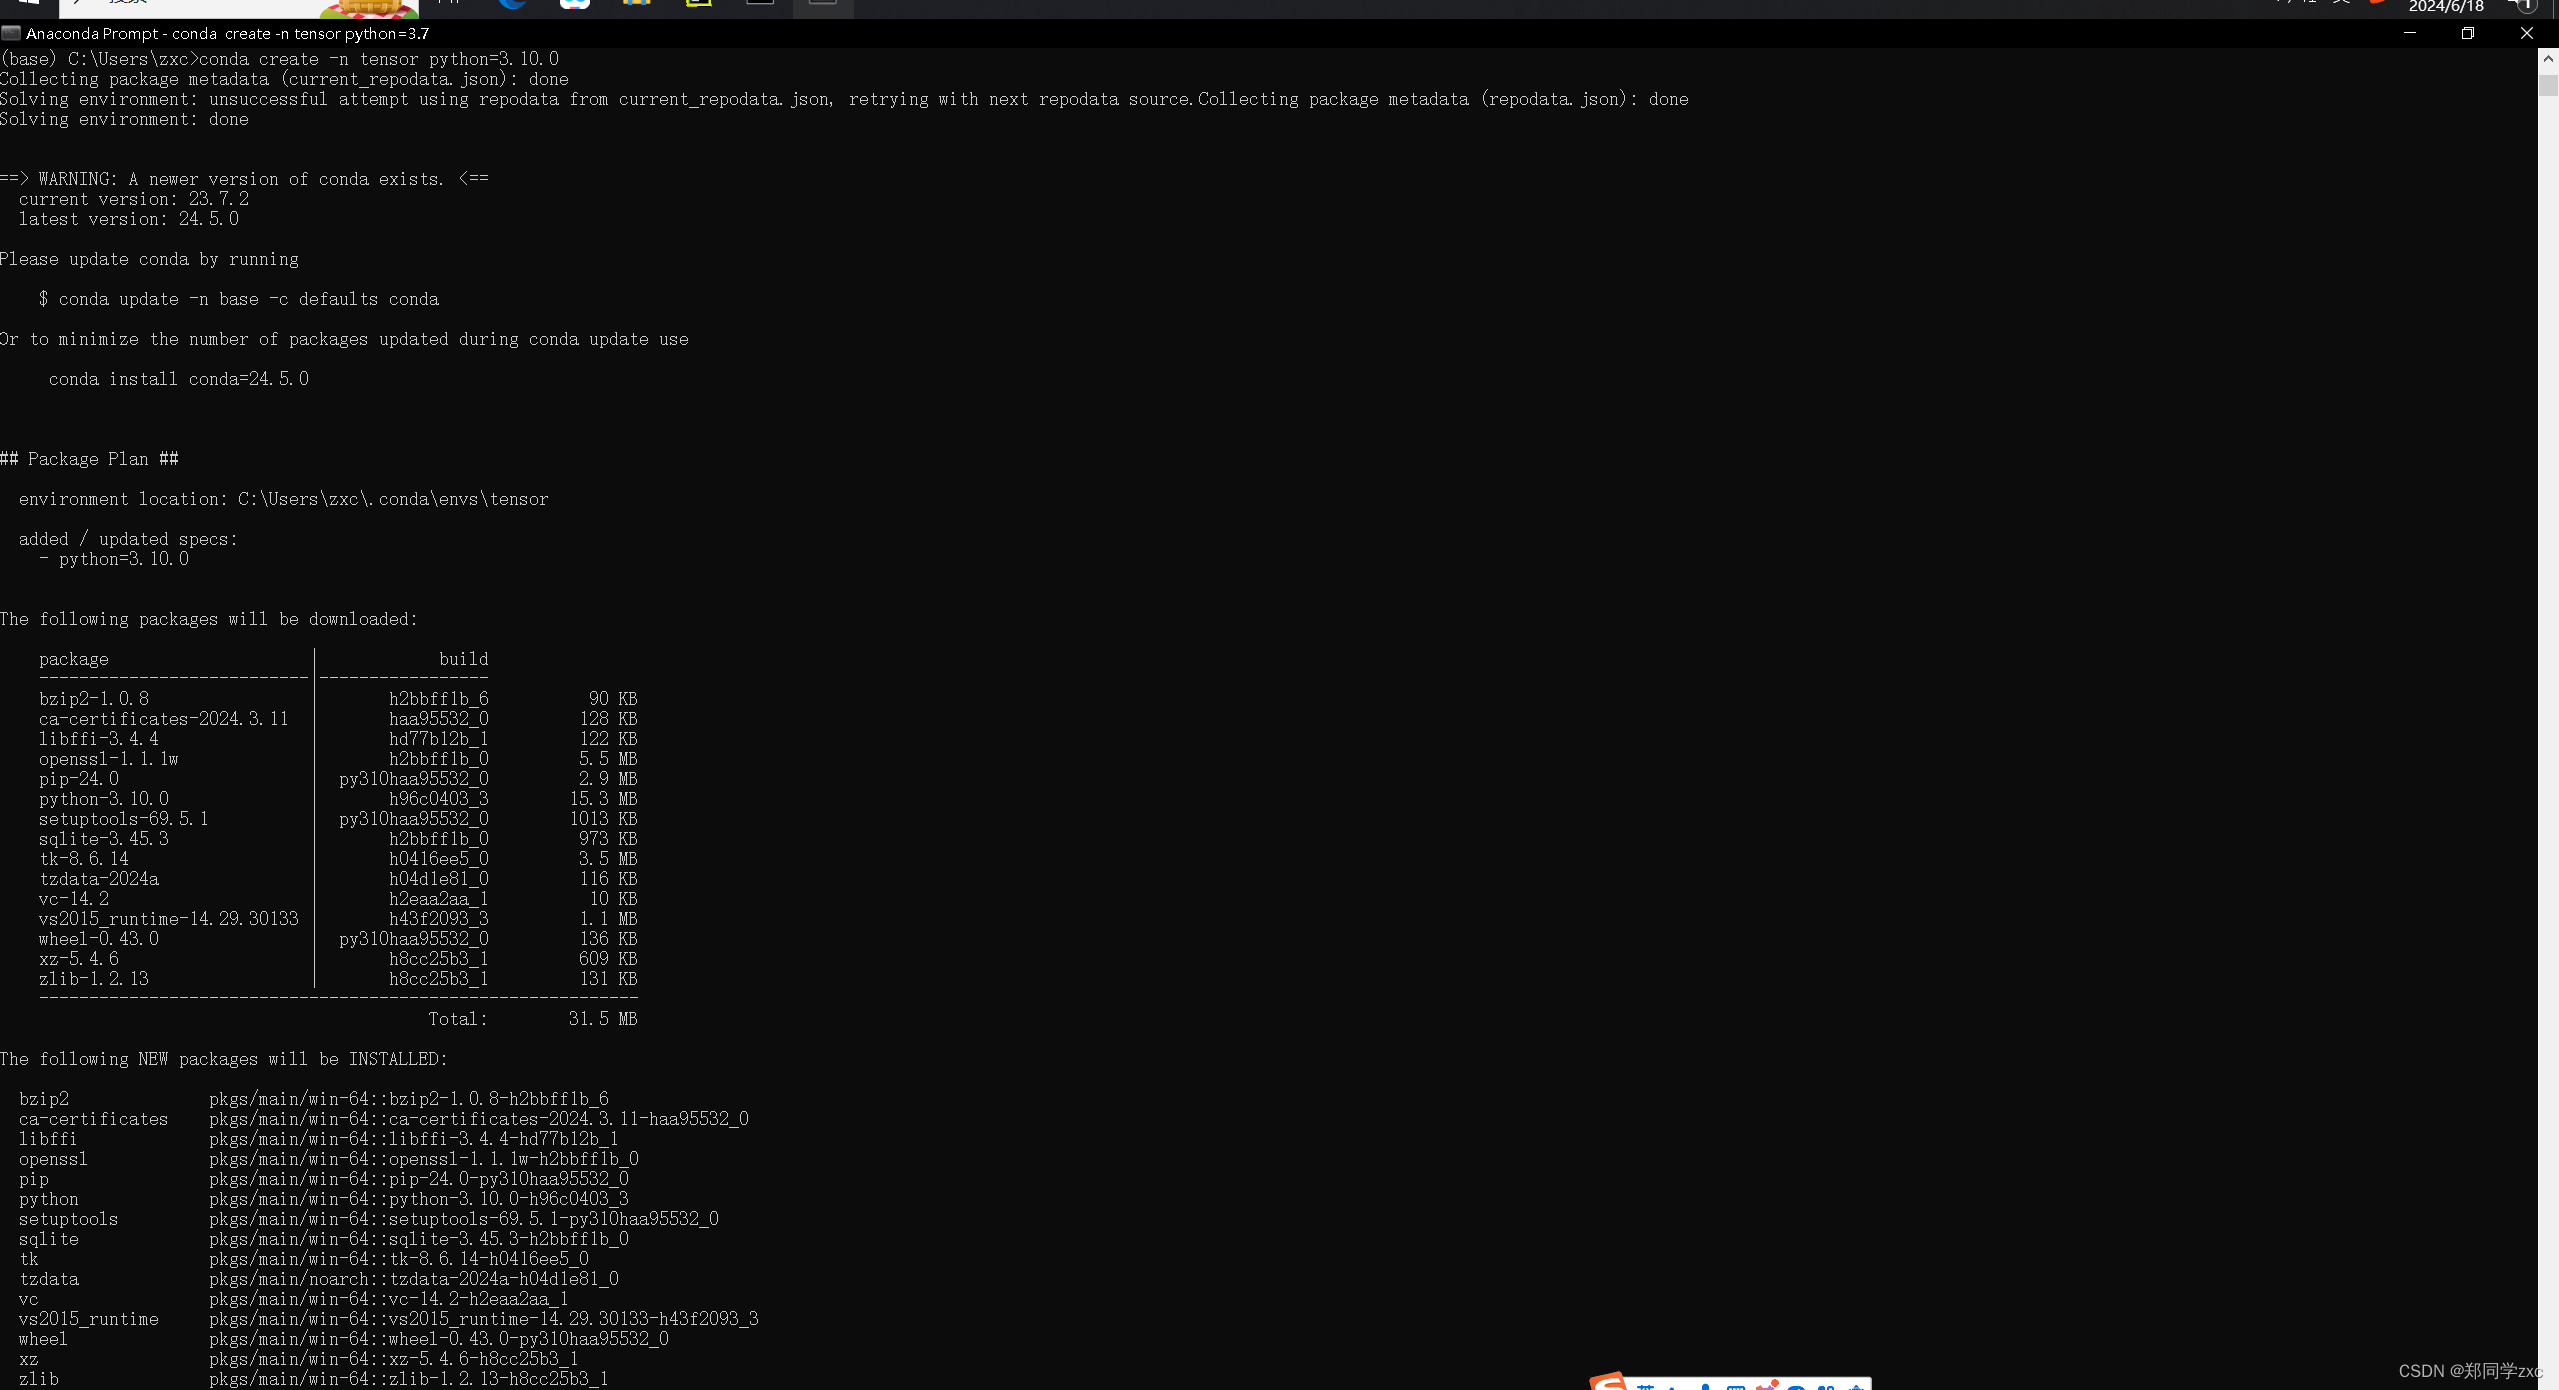
之后输入y即可

注意:如果出现
UnavailableInvalidChannel: The channel is not accessible or is invalid. 错误,执行 指令:conda config – remove-key channels 用来恢复默认源,然后再执行第三步命令,最后输入 y 确认即可
再次输入 指令:conda env list 查看虚拟环境是否安装成功
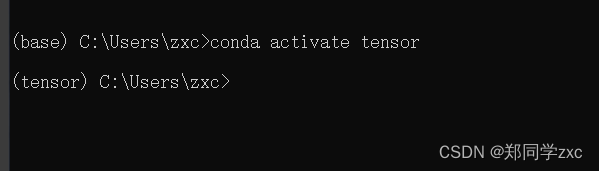
4、激活所已经创建的虚拟环境中
输入指令:conda activate tensor

前面由base变成tensor则激活成功
5、安装tensorflow
激活tensor后,切换到自己想要安装虚拟环境的路径后,输入指令:pip install tensorflow==2.9 -i https://pypi.tuna.tsinghua.edu.cn/simple/
这里最近我安装tensorflow的时候发现:根据TensorFlow官方文档和公开信息,TensorFlow官方目前支持的Python版本包括Python 3.6、Python 3.7、Python 3.8和Python 3.9。这意味着,Python 3.10并非TensorFlow官方直接支持的版本,但是我主机上安装的却是Python 3.10,所以我现在才回去改成3.9的Python。
执行命令pip install tensorflow-gpu,报错
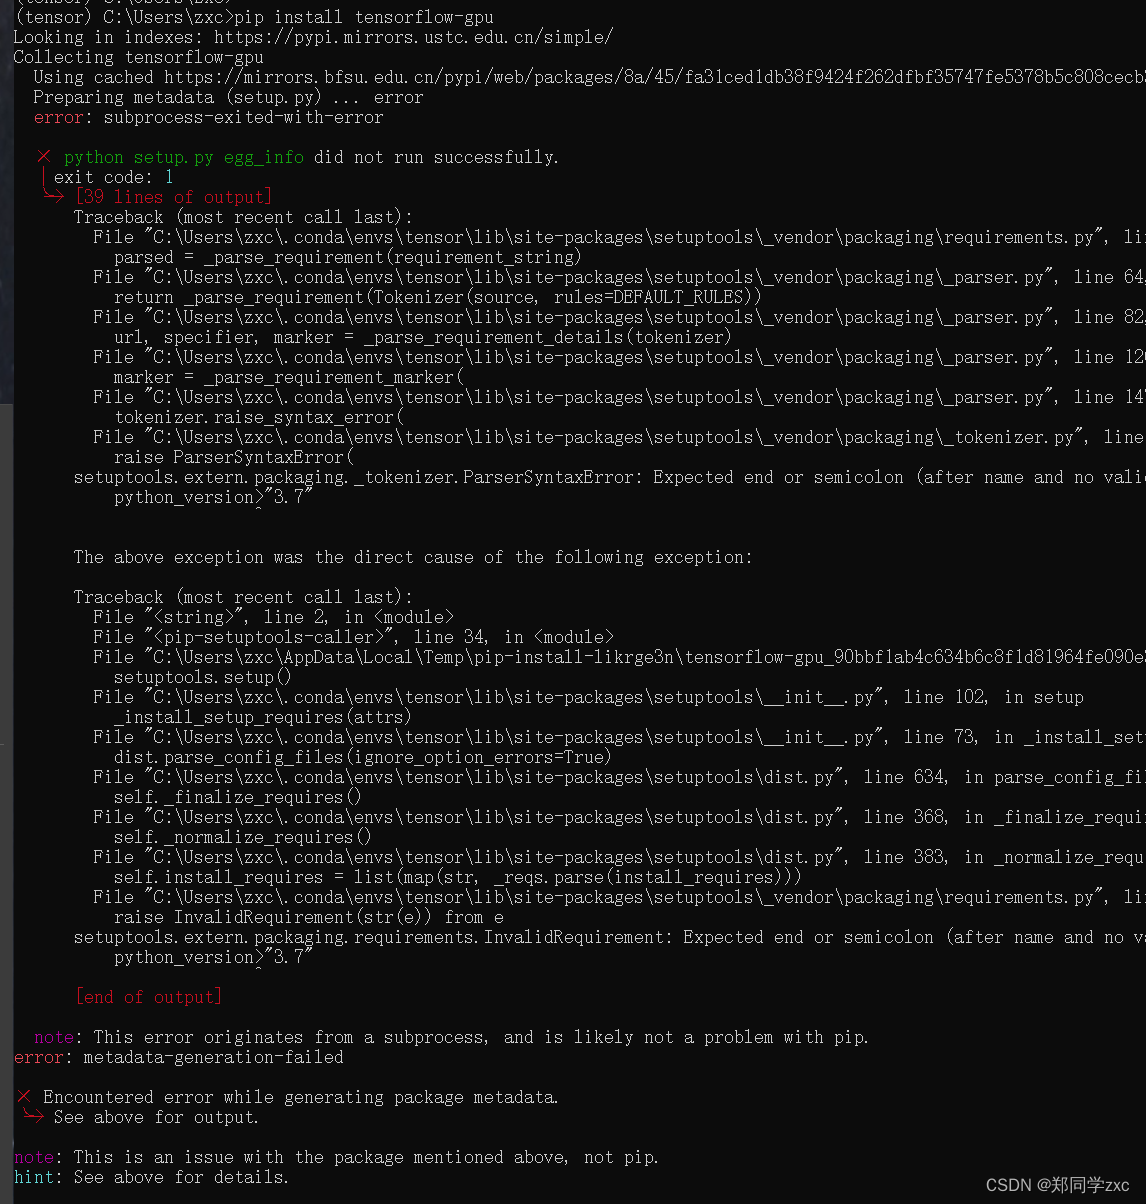
更新升级了pip跟setuptools以后还是会报这个错。
在安装 tensorflow-gpu 时遇到的错误是由于 setup.py 中的依赖描述语法错误导致的。具体来说,它在处理 python_version>"3.7" 时遇到了问题。为了避免这种错误,可以尝试以下几种解决方案:
-
升级
pip和setuptools:
确保你的pip和setuptools是最新的版本。这可以解决由于版本不兼容导致的问题。pip install --upgrade pip setuptools -
使用指定版本的
tensorflow-gpu:
有时候,指定一个已知可以正常工作的版本也可以避免这种问题。pip install tensorflow-gpu==2.12.0 -
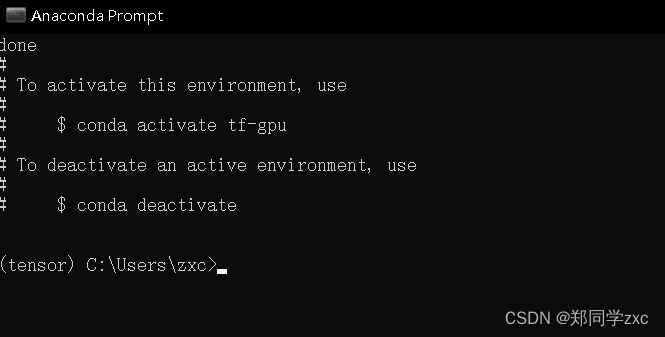
使用 Conda 环境:
如果你使用的是 Anaconda 或 Miniconda,可以尝试使用 Conda 来安装 TensorFlow,它会自动处理许多依赖问题。conda create -n tf-gpu tensorflow-gpu conda activate tf-gpu
又出现以下问题
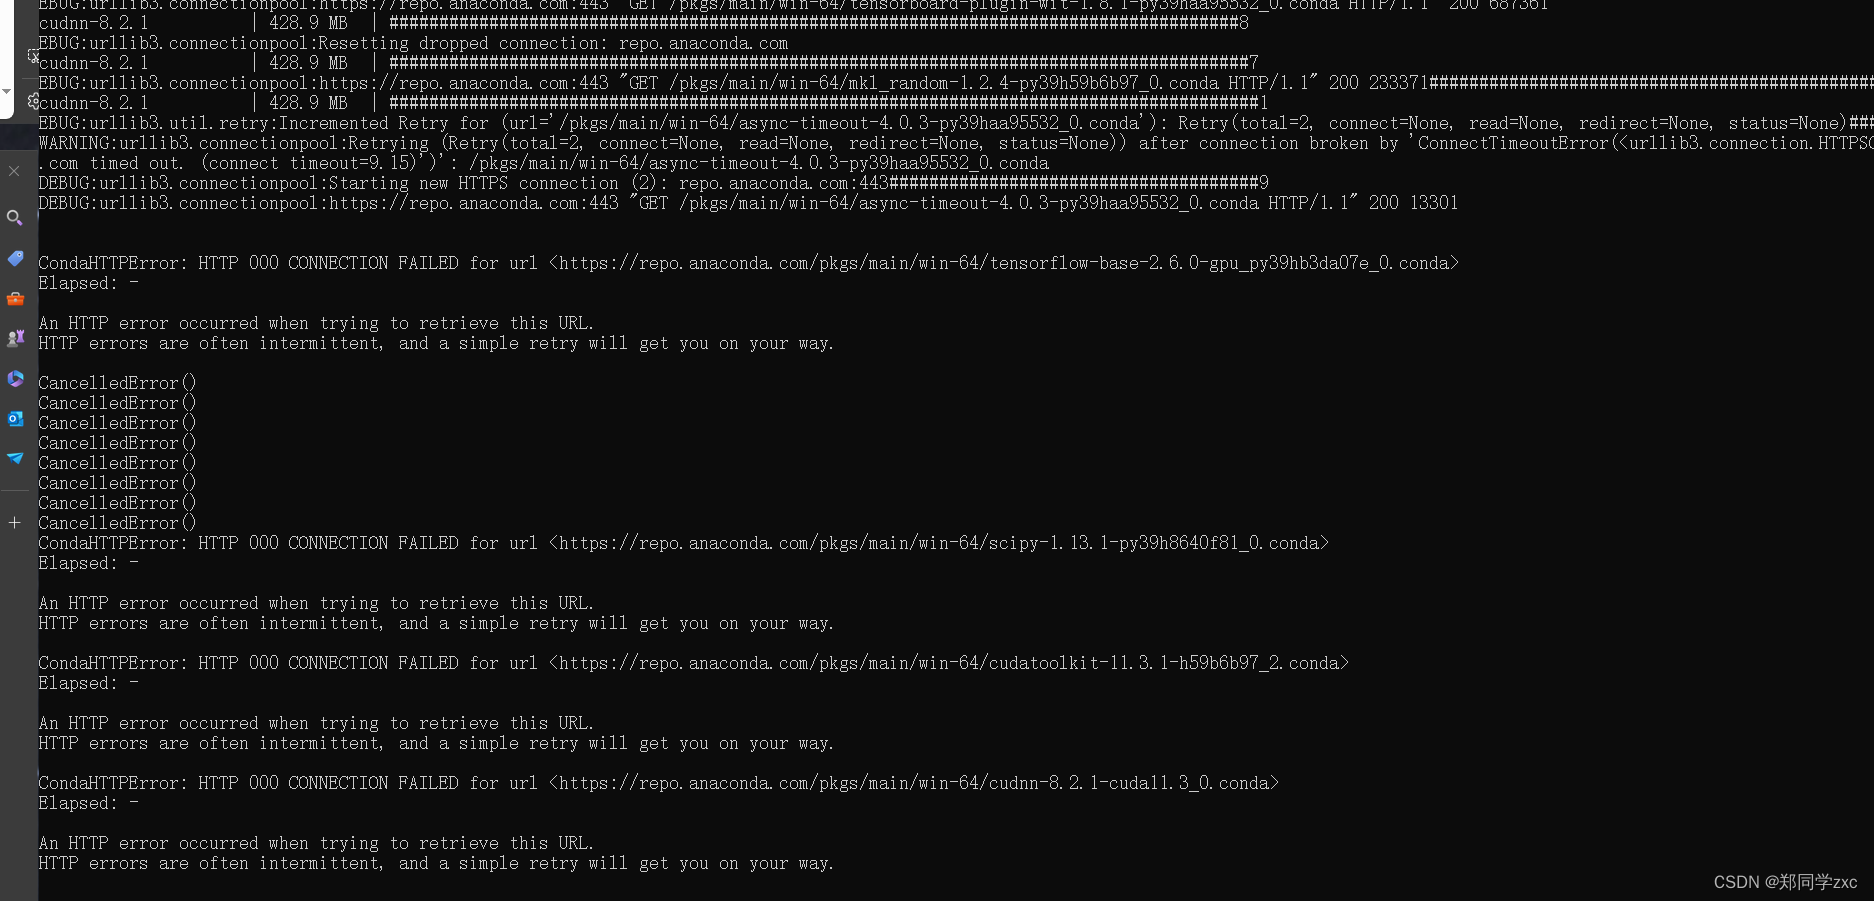
解决
你在使用 Conda 安装包时遇到的 HTTP 错误通常与网络连接问题或代理设置有关。以下是一些可能的解决方案:
-
更换镜像源:
Conda 支持使用镜像源来加速包的下载。在中国大陆,使用清华大学或中科大的镜像源可能会更快。你可以编辑 Conda 配置文件来更换镜像源:打开 Anaconda Prompt,然后运行以下命令:
conda config --add channels https://mirrors.tuna.tsinghua.edu.cn/anaconda/pkgs/free/
conda config --add channels https://mirrors.tuna.tsinghua.edu.cn/anaconda/pkgs/main/
conda config --set show_channel_urls yes
或者使用中科大的镜像源:
conda config --add channels https://mirrors.ustc.edu.cn/anaconda/pkgs/free/ conda config --add channels https://mirrors.ustc.edu.cn/anaconda/pkgs/main/ conda config --set show_channel_urls yes -
禁用 SSL 验证:
在某些情况下,禁用 SSL 验证可能会解决问题。请注意,这样做会降低安全性,仅在信任的网络环境中使用。conda config --set ssl_verify false -
重试安装:
由于网络问题可能是暂时的,你可以尝试重新运行安装命令:conda install tensorflow-gpu -
设置代理:
如果你在公司或学校网络环境中,需要通过代理访问互联网,可以设置代理:conda config --set proxy_servers.http http://<proxy>:<port> conda config --set proxy_servers.https https://<proxy>:<port> -
检查网络连接:
确保你的网络连接稳定,尝试在浏览器中访问https://repo.anaconda.com,以确认可以正常访问 Anaconda 的包源。 -
升级 Conda:
确保 Conda 是最新版本,有时升级 Conda 也能解决一些问题:conda update conda -
使用 VPN:
如果你所在的网络环境限制了访问 Anaconda 的包源,可以尝试使用 VPN 连接到其他网络,然后再尝试安装包。
以上方法应该可以帮助你解决 Conda 包安装过程中遇到的 HTTP 错误。如果问题依旧存在,请提供更多的错误日志信息,以便进一步诊断问题。
-
检查代理设置:
根据错误信息,有一部分错误可能与代理设置有关。如果你使用了代理,确保代理设置正确,或者尝试在没有代理的情况下进行安装。pip --proxy="" install tensorflow-gpu -
手动下载并安装:
如果自动安装失败,可以尝试手动下载tensorflow-gpu包并进行安装。- 访问 PyPI 网站并下载对应版本的
tensorflow-gpu包。 - 使用
pip install <package_path>命令进行本地安装。
- 访问 PyPI 网站并下载对应版本的
如果上述方法都没有解决问题,可以尝试如下命令禁用缓存后再试:
pip install --no-cache-dir tensorflow-gpu
换源之后依旧不太行,最终通过翻墙解决下面是MVP结算界面
6、安装完成后检查是否有tensorflow
输入指令:conda list
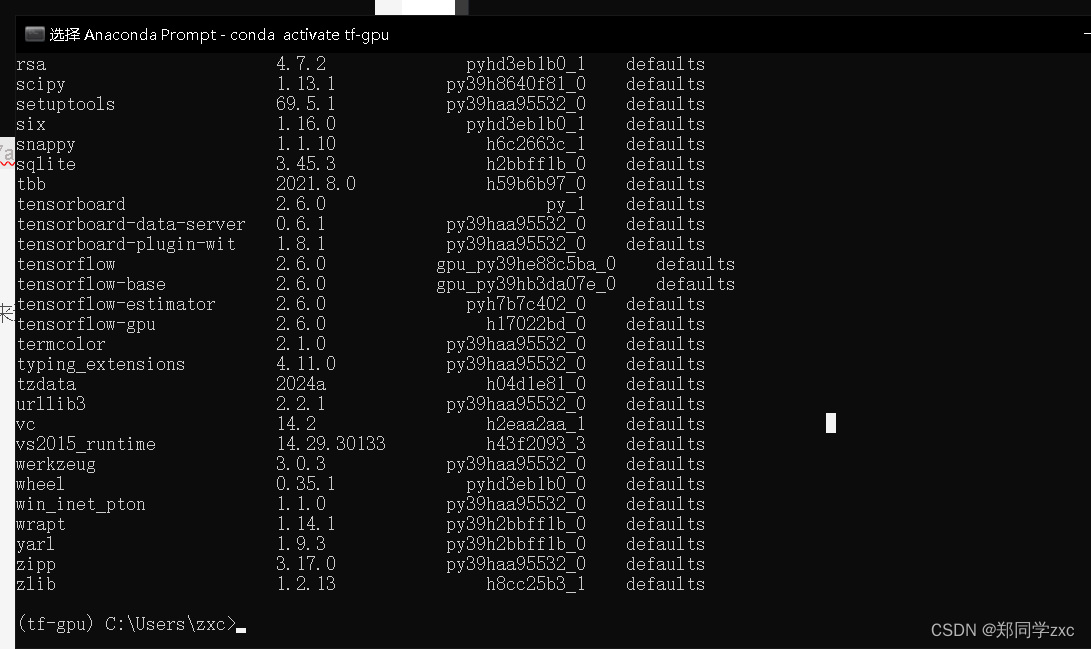
输入后查看是否有这些tensorflow,如果有则安装完成
7、检查tensorflow是否能用
1)、在当前环境输入指令:python
2)、再次输入指令:import tensorflow as tf
出错了
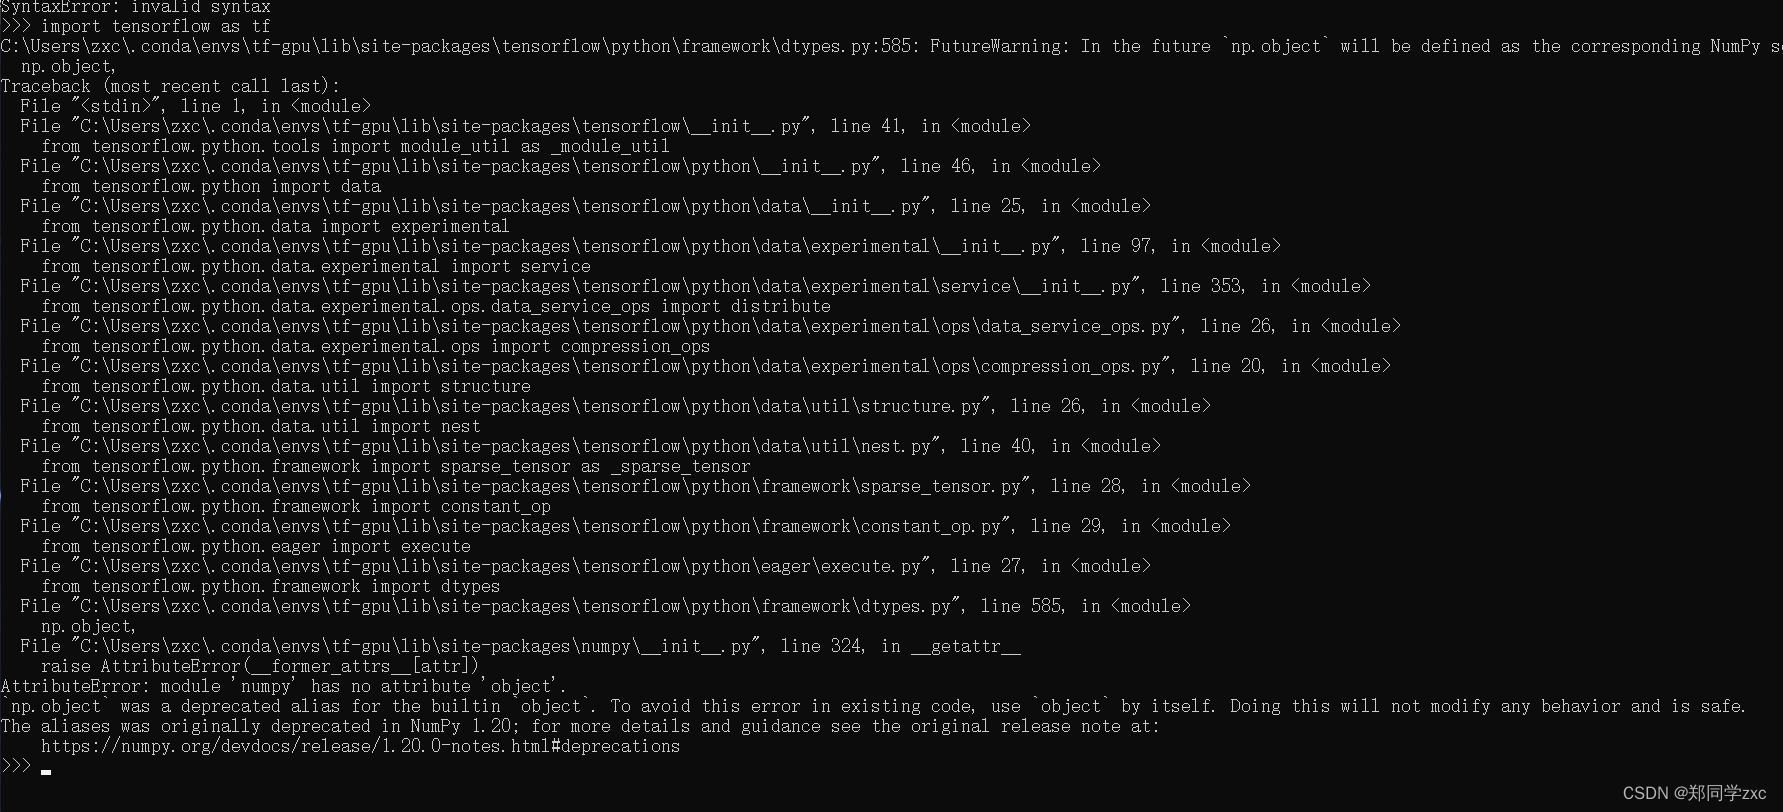
你遇到的错误是由于 numpy 版本与 tensorflow 不兼容导致的。在较新版本的 numpy 中,np.object 已经被弃用并移除,因此导致了你当前使用的 tensorflow 代码中的导入错误。
要解决这个问题,你可以采取以下几种方法:
1. 降级 numpy 版本
使用一个兼容的旧版本 numpy,例如 numpy==1.19.5。
pip install numpy==1.19.5
2. 升级 tensorflow 版本
确保你使用的是最新版本的 tensorflow,因为较新的版本可能已经解决了这个问题。
pip install --upgrade tensorflow
3. 修改 tensorflow 源代码(临时解决)
如果你不希望更改包的版本,可以通过手动修改 tensorflow 的源代码来解决问题。在 tensorflow 的文件中,将 np.object 替换为 object。不过,这只是临时解决方案,不建议用于生产环境。
- 找到
tensorflow安装目录。 - 打开错误中提到的文件,如
dtypes.py。 - 将
np.object替换为object。
示例代码:
# 找到
np.object,
# 替换为
object,
不过,请注意,直接修改库的源代码并不是一个好的长期解决方案,最好还是通过更新或降级包的版本来解决兼容性问题。
推荐方法
建议降级 numpy 版本,因为这种方法是最简单直接的,同时也不会影响到其他依赖 numpy 的库和代码。
具体步骤
假设你使用的是 conda 环境,可以按照以下步骤进行操作:
-
激活你的
conda环境:conda activate tf-gpu -
安装指定版本的
numpy:pip install numpy==1.19.5
然后再次运行你的代码,错误应该会消失。
首先这里不明确将numpy版本降到那个版本会有效,想办法找到正确的版本
寻找numpy版本
如果 tensorflow-gpu 包没有找到,可能是因为以下几种情况:
- 你并没有安装
tensorflow-gpu。 - 你安装的是
tensorflow而不是tensorflow-gpu,因为从 TensorFlow 2.0 开始,tensorflow包默认包含 GPU 支持。 - 你可能需要在激活的环境中重新检查。
为了确认 TensorFlow 版本和查看其依赖的 NumPy 版本,可以尝试以下步骤:
确认 TensorFlow 安装
首先,确保你在激活的 Conda 环境中,并且 TensorFlow 已正确安装。
-
激活你的 Conda 环境:
conda activate tf-gpu -
查看已安装的包:
pip list
在输出中查找 tensorflow 或 tensorflow-gpu 包。
查看 TensorFlow 依赖的 NumPy 版本
-
使用
pip show:
如果你发现安装的是tensorflow,而不是tensorflow-gpu,可以使用以下命令查看其依赖项:pip show tensorflow -
使用
pipdeptree:
安装pipdeptree并查看依赖树:pip install pipdeptree pipdeptree | grep -A 20 tensorflow
示例输出
使用 pip show
$ pip show tensorflow
Name: tensorflow
Version: 2.9.0
Summary: TensorFlow is an open source machine learning framework for everyone.
Home-page: https://www.tensorflow.org/
Author: Google Inc.
Author-email: packages@tensorflow.org
License: Apache 2.0
Location: /usr/local/lib/python3.8/dist-packages
Requires: absl-py, astunparse, flatbuffers, gast, google-pasta, grpcio, h5py, keras, keras-preprocessing, numpy, opt-einsum, protobuf, six, tensorboard, tensorflow-estimator, termcolor, typing-extensions, wheel, wrapt
Required-by:
使用 pipdeptree
$ pipdeptree | grep -A 20 tensorflow
tensorflow==2.9.0
  - absl-py [required: ~=0.10, installed: 0.13.0]
  - astunparse [required: ~=1.6.3, installed: 1.6.3]
  - flatbuffers [required: ~=1.12.0, installed: 1.12]
  - gast [required: ~=0.4.0, installed: 0.4.0]
  - google-pasta [required: ~=0.2, installed: 0.2.0]
  - grpcio [required: ~=1.34.0, installed: 1.34.0]
  - h5py [required: ~=3.1.0, installed: 3.1.0]
  - keras [required: ~=2.9, installed: 2.9.0]
  - keras-preprocessing [required: ~=1.1.2, installed: 1.1.2]
  - numpy [required: ~=1.19.2, installed: 1.19.5]
  - opt-einsum [required: ~=3.3.0, installed: 3.3.0]
  - protobuf [required: ~=3.9.2, installed: 3.17.3]
  - six [required: ~=1.15.0, installed: 1.15.0]
  - tensorboard [required: ~=2.9, installed: 2.9.0]
  - tensorflow-estimator [required: ~=2.9.0, installed: 2.9.0]
  - termcolor [required: ~=1.1.0, installed: 1.1.0]
  - typing-extensions [required: ~=3.7.4, installed: 3.7.4.3]
  - wheel [required: ~=0.35, installed: 0.36.2]
  - wrapt [required: ~=1.12.1, installed: 1.12.1]
确认 TensorFlow 和 NumPy 版本的兼容性
根据上述信息,可以确认 tensorflow 版本依赖的 numpy 版本。请根据这些信息来安装或降级 numpy。
安装或降级 NumPy
如果你的 TensorFlow 版本需要特定的 NumPy 版本,可以通过以下命令进行安装或降级:
pip install numpy==1.19.5 # 这里使用了示例中的版本号,请根据实际情况替换
做了以上尝试后只发现了这个
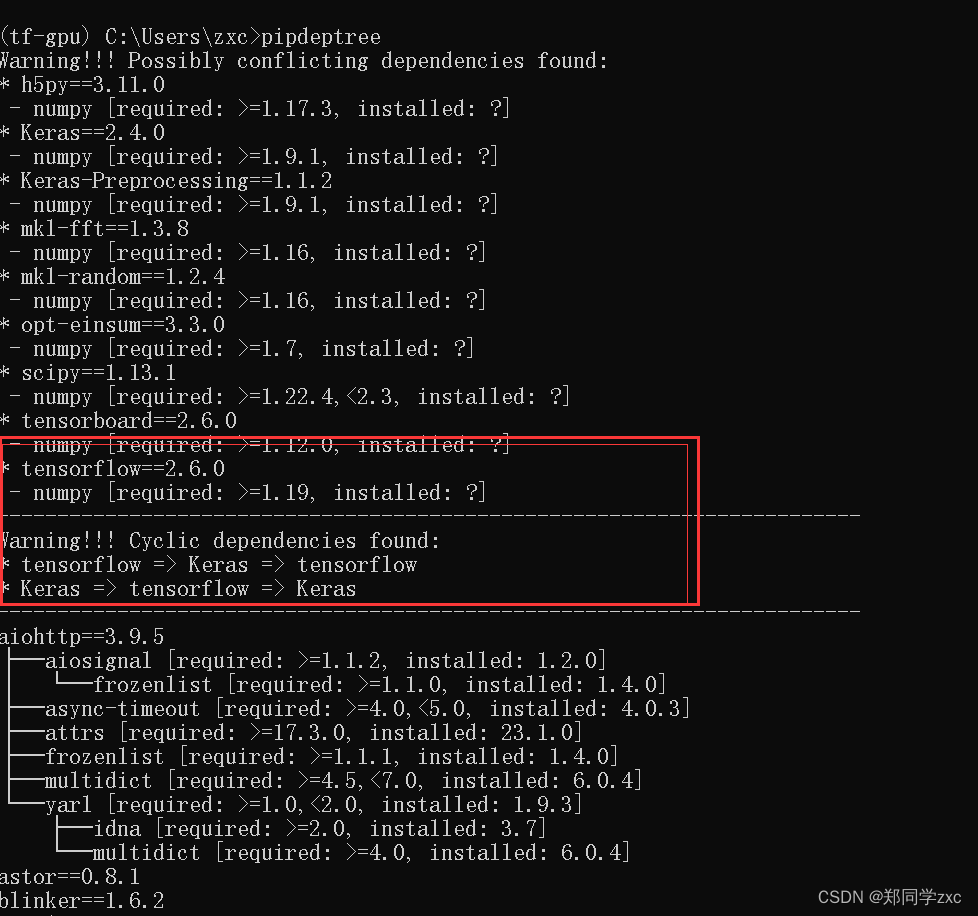
只能确定要大于1.19,在找其他办法确认版本的同时,也在一个版本一个版本的做尝试(二分法)。过程不赘述了,最终尝试版本到1.23.0终于正常,也不明白为什么这个版本是正常的,可能也需要和其他库兼容版本,目前还不熟悉不知道,希望答案在未来。
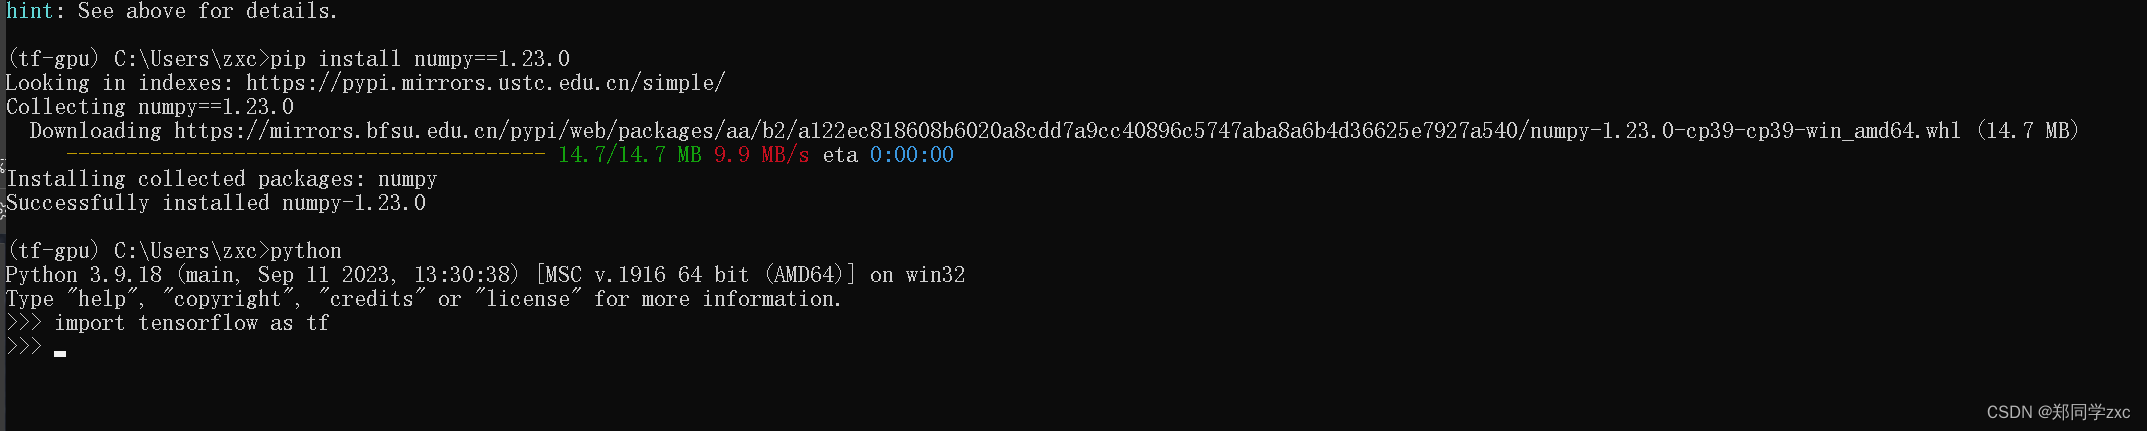
3)、然后再做一个简单的计算,输入指令:
print(tf.constant(1.)+tf.constant(2.))
fmvp结算画面
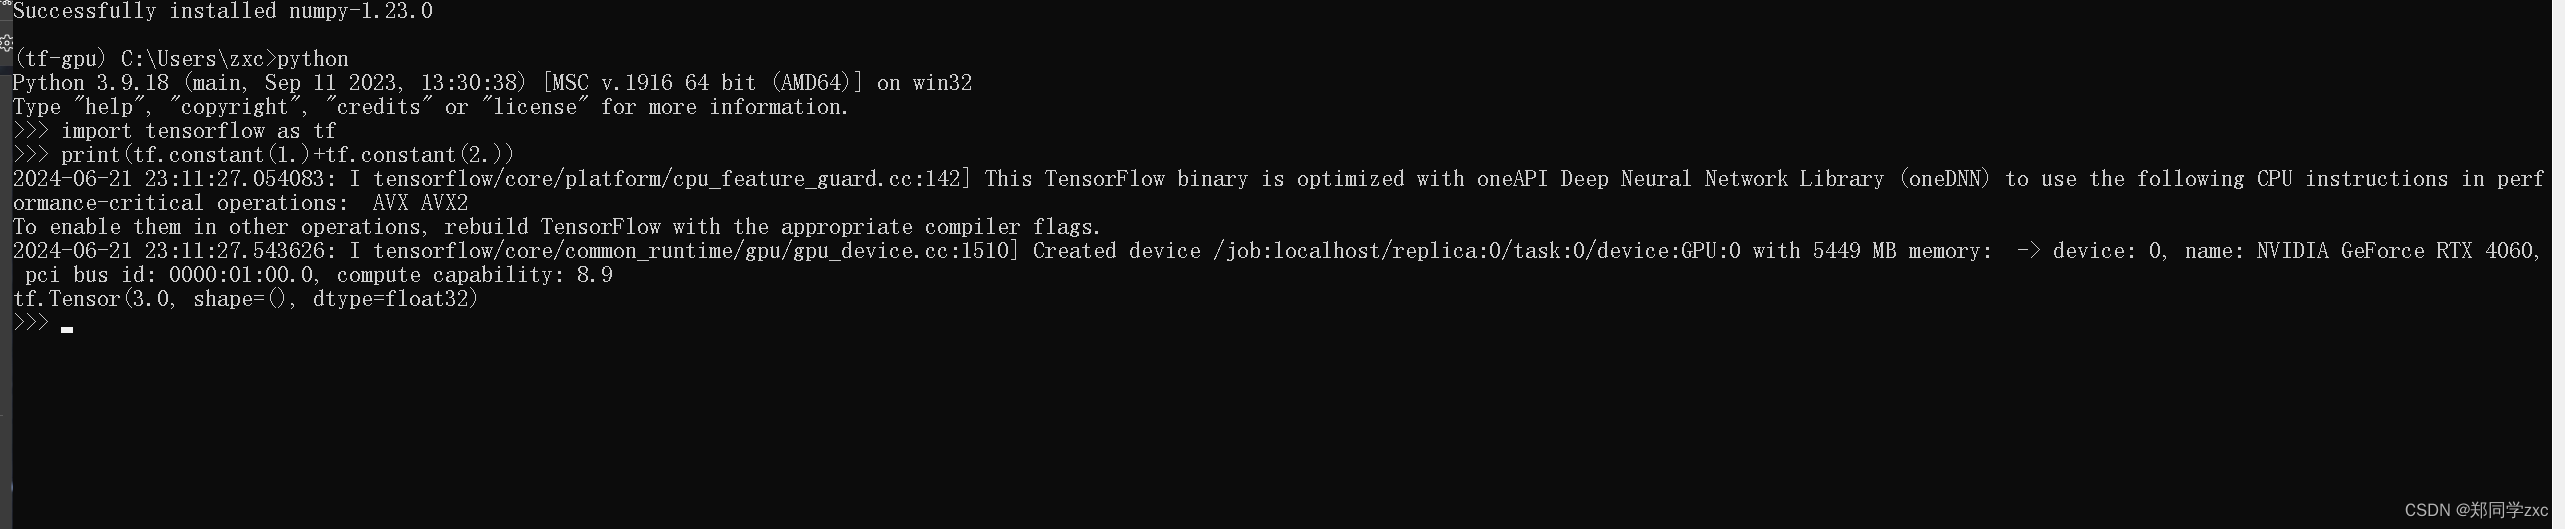
4)、检查如果有计算结果代表可用,tensorflow安装成功
安装完成,OK!


 1万+
1万+

 被折叠的 条评论
为什么被折叠?
被折叠的 条评论
为什么被折叠?
 到【灌水乐园】发言


