


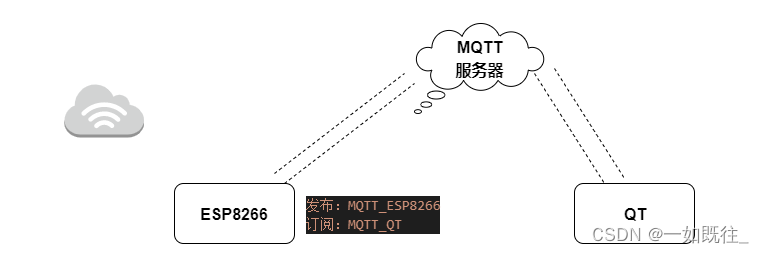
MQTT框架搭建:ESP8266+PlantformIo+QT
MQTT是轻量级的基于发布订阅的轻量级通讯协议,分别完成了MQTT硬件客户端搭建和QT软件客户端搭建,整个框架搭建完成后,后面可以直接或间接通过ESP8266完成数据采集完成一整个基于MQTT项目的设计了,下面的硬件和软件也可以和已有MQTT客户端单独使用。
开发环境:
硬件端:ESP8266+VSCode+ plantformIo+pubSubClient
软件端:QT5.14.2+Qmqtt+MSVC2017编译器
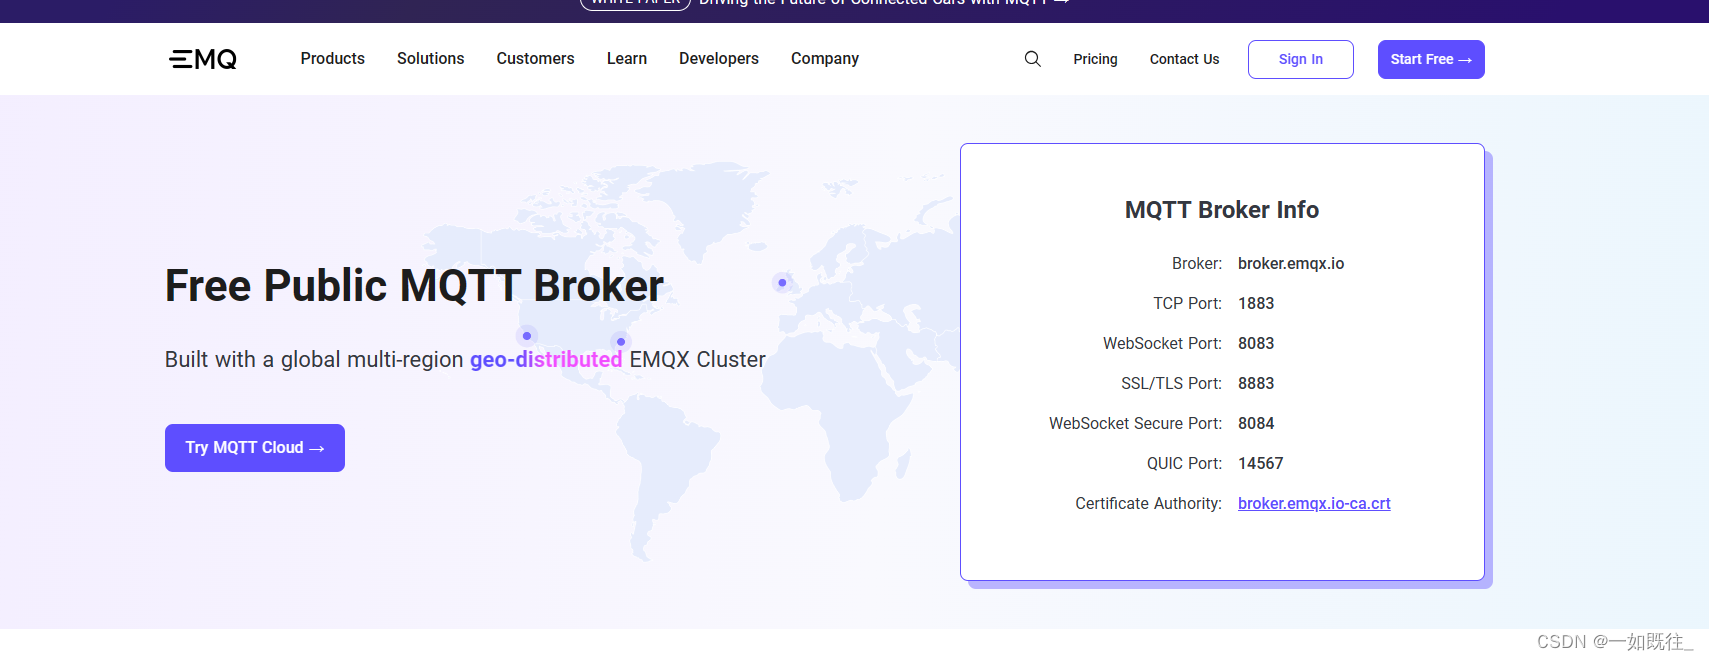
服务器:免费EMQ MQTT服务器
1.ESP8266硬件端
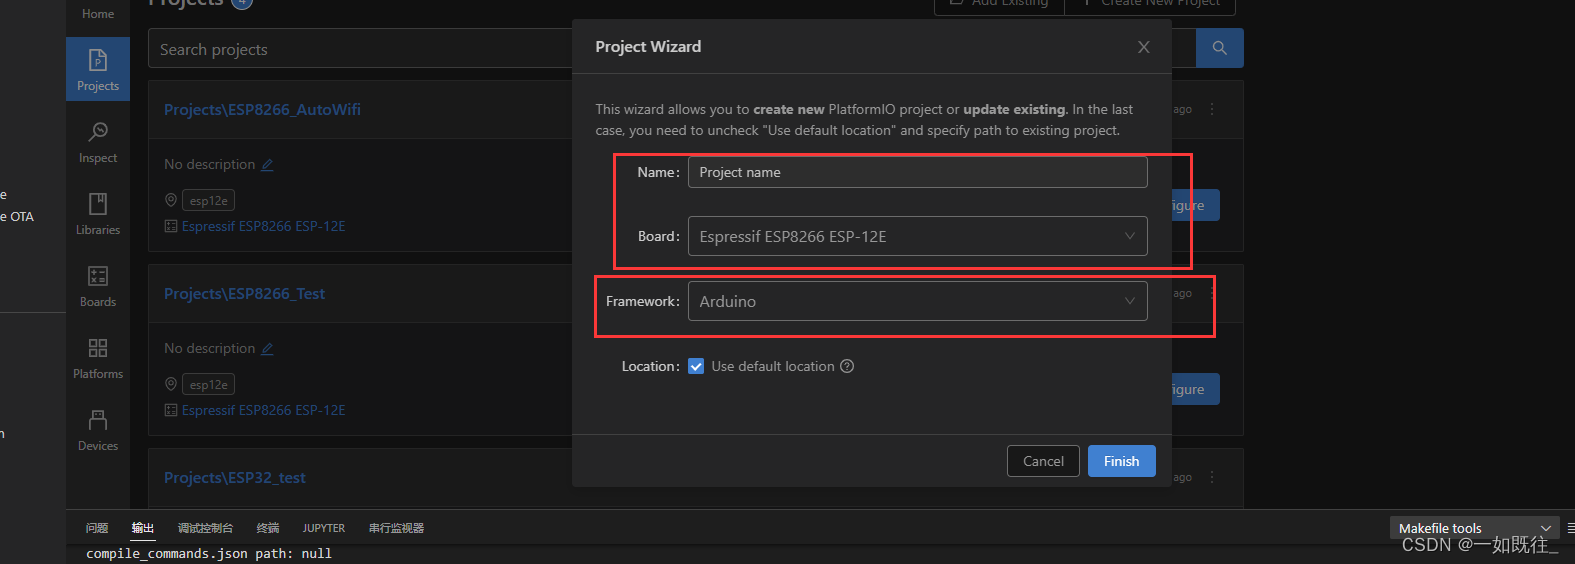
使用plantformIo,或者新建项目,下载第三方库需要翻墙,不翻墙的方法百度也有~~
1.VSCode下载plantformIo插件
2.新建ESP8266的工程,使用Arduino框架
3.plantformIo下载pubSubClient库到新建的8266工程下

4.使用MQTT的示例代码,我这修改了可以按需输入直接使用就行。
当实际使用时将发布的消息换成MCU采集的数据就可。
#include <ESP8266WiFi.h>
#include <PubSubClient.h>
#include <Arduino.h>
#include <ESP8266WiFi.h>
#include <PubSubClient.h>


// Update these with values suitable for your network.
//wifi名称
const char* ssid = "";
//wifi密码
const char* password = "";
//Mqtt服务器
const char* mqtt_server = "";
//发布
const char* Publish = "";
//订阅
const char* Subscription ="";


WiFiClient espClient;
PubSubClient client(espClient);
unsigned long lastMsg = 0;
#define MSG_BUFFER_SIZE	(50)
char msg[MSG_BUFFER_SIZE];
int value = 0;

void setup_wifi() {

  delay(10);
  // We start by connecting to a WiFi network
  Serial.println();
  Serial.print("Connecting to ");
  Serial.println(ssid);

  WiFi.mode(WIFI_STA);
  WiFi.begin(ssid, password);

  while (WiFi.status() != WL_CONNECTED) {
    delay(500);
    Serial.print(".");
  }

  randomSeed(micros());

  Serial.println("");
  Serial.println("WiFi connected");
  Serial.println("IP address: ");
  Serial.println(WiFi.localIP());
}

void callback(char* topic, byte* payload, unsigned int length) {
  Serial.print("Message arrived [");
  Serial.print(topic);
  Serial.print("] ");
  for (int i = 0; i < length; i++) {
    Serial.print((char)payload[i]);
  }
  Serial.println();

  // Switch on the LED if an 1 was received as first character
  if ((char)payload[0] == '1') {
    digitalWrite(BUILTIN_LED, LOW);   // Turn the LED on (Note that LOW is the voltage level
    // but actually the LED is on; this is because
    // it is active low on the ESP-01)
  } else {
    digitalWrite(BUILTIN_LED, HIGH);  // Turn the LED off by making the voltage HIGH
  }

}

void reconnect() {
  // Loop until we're reconnected
  while (!client.connected()) {
    Serial.print("Attempting MQTT connection...");
    // Create a random client ID
    String clientId = "ESP8266Client-";
    clientId += String(random(0xffff), HEX);
    // Attempt to connect
    if (client.connect(clientId.c_str())) {
      Serial.println("connected");
      // Once connected, publish an announcement...
      client.publish(Publish, "hello world");
      // ... and resubscribe
      client.subscribe(Subscription);
    } else {
      Serial.print("failed, rc=");
      Serial.print(client.state());
      Serial.println(" try again in 5 seconds");
      // Wait 5 seconds before retrying
      delay(5000);
    }
  }
}

void setup() {
  pinMode(BUILTIN_LED, OUTPUT);     // Initialize the BUILTIN_LED pin as an output
  Serial.begin(115200);
  setup_wifi();
  client.setServer(mqtt_server, 1883);
  client.setCallback(callback);
}

void loop() {

  if (!client.connected()) {
    reconnect();
  }
  client.loop();

  unsigned long now = millis();
  if (now - lastMsg > 2000) {
    lastMsg = now;
    ++value;
    snprintf (msg, MSG_BUFFER_SIZE, "hello world #%ld", value);
    Serial.print("Publish message: ");
    Serial.println(msg);
    client.publish(Publish, msg);
  }
}
2.QT软件端
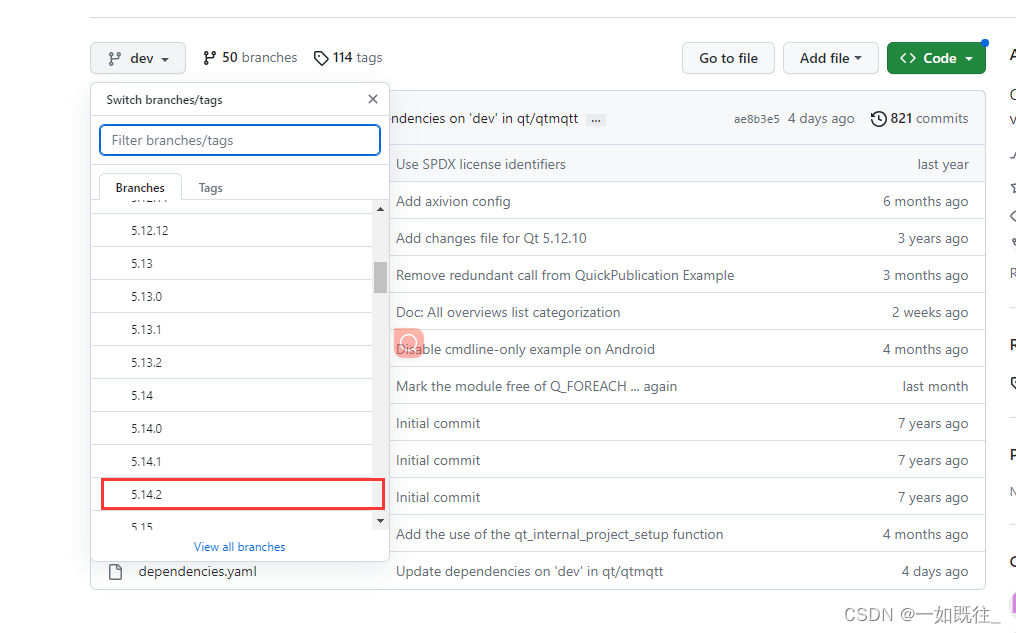
1.下载指定QT框架的Qmqtt源码 https://github.com/qt/qtmqtt
我的QT 版本是5.14.2下载的源码就是5.14.2
2.用QT打开qtmqtt.pro,用MSVC2017编译器使用Relase发布版本
Debug:调试版本,包含调试信息,不做任何优化
Release:发布版本,不保存调试信息,进行了各种优化,以达到代码最小和速度最优。
MSVC是微软的VC编译器,MinGW与MSVC编译生成的第三方库不通用。
3.报错“QtMqtt/qmqttglobal.h”: No such file or directory
将src源码文件夹下所有头文件复制一份到 编译器目录下include/QtMqtt文件夹(没有新建)
(D:\QT\5.14.2\5.14.2\msvc2017\include)
4.库文件移植
将lib中的文件全部复制到对应编译器的lib文件夹中。
将bin文件夹下的文件复制到对应编译器的bin文件夹中。
将mkspecs文件夹下的modules或者modules-inst复制到编译器\mkspecs\modules文件夹下。
5.新建QT文件。将examples\mqtt\simpleclient中的文件复制到新工程中
#include <qmqttclient.h>修改为#include <QtMqtt/qmqttclient.h>
之前通过别的方法编译的库文件遇到过错误可以参考我的这篇文章
链接: QT 实现MQTT 以及其中遇到的一些问题
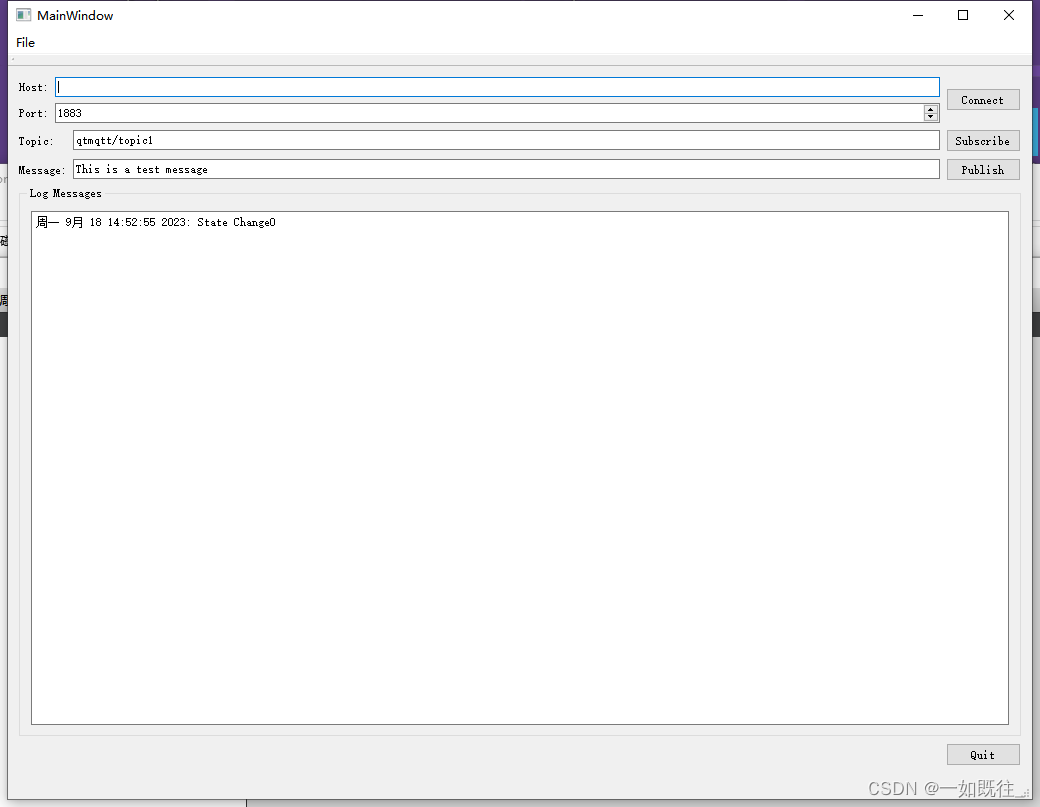
3.使用
在环境搭建时,使用的面得的MQTT服务器,当然,两个部分分别搭建过程中,使用已经有的MQTT客户端,可以查看搭建是否成功了。
链接: EMQ X MQTT 服务器
链接: MQTTX 客户端
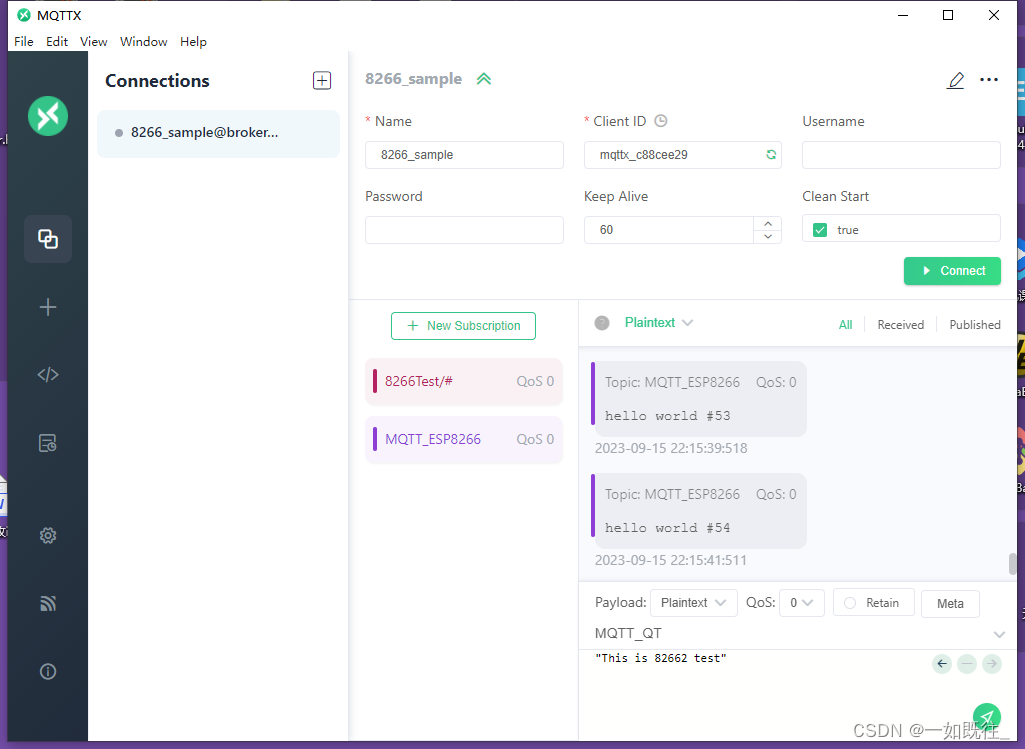 ESP8266上电,运行QT客户端,确定各自通知订阅的信息软硬件成功通过MQTT通信。


 439
439


 被折叠的 条评论
为什么被折叠?
被折叠的 条评论
为什么被折叠?
 到【灌水乐园】发言


