


与神经网络相关的都在torch.nn里
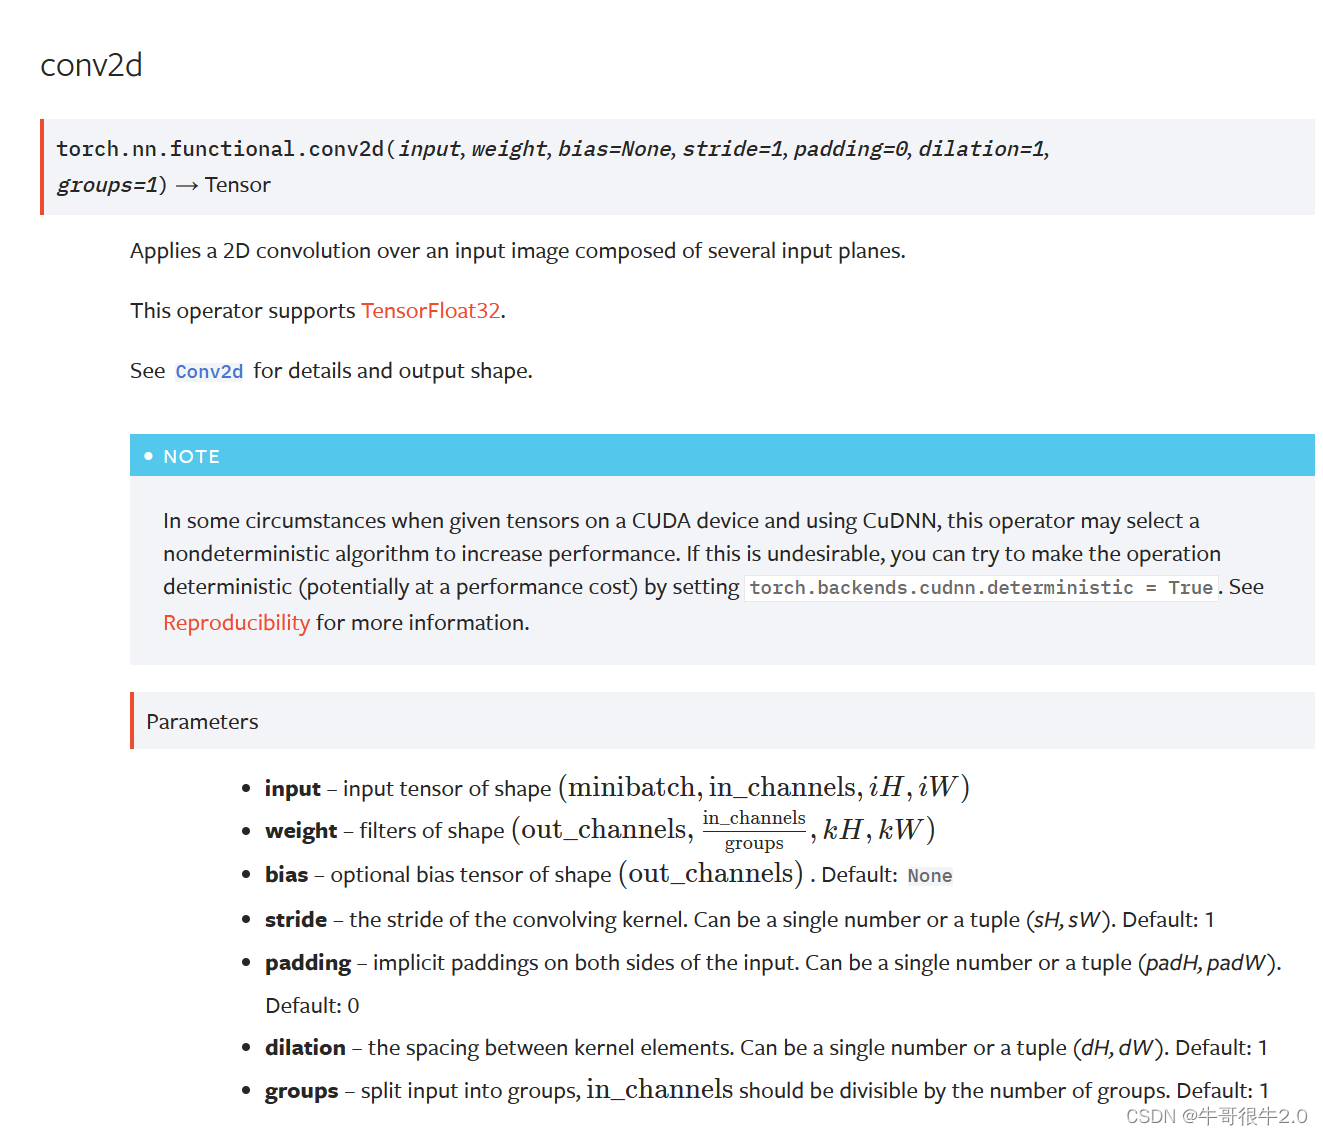
这里讨论Convolution Layers,一下展示的时torch.nn.functional里的conv2d卷积层,其中包含有一些参数:input(输入),weight(权重),bias(偏置),stride(步径)等
卷积操作:
输入图像:
| 1 | 2 | 0 | 3 | 1 |
| 0 | 1 | 2 | 3 | 1 |
| 1 | 2 | 1 | 0 | 0 |
| 5 | 2 | 3 | 1 | 1 |
| 2 | 1 | 0 | 1 | 1 |
表1
卷积核:
| 1 | 2 | 1 |
| 0 | 1 | 0 |
| 2 | 1 | 0 |
表2
设置stride=1,则表示横纵向滑动步长都为1,红色部分与卷积核进行第一次卷积操作,结果为1*1+2*2+0*1+0*0+1*1+2*0+1*2+2*1+1*0=10;3*3的卷积向后滑动1步,则为表1中数字背景为黄色的部分与卷积核进行卷积操作,结果为2*1+0*2+3*1+1*0+2*1+3*0+2*2+1*1+0*0=12,以此类推...对输入通过3*3的卷积核操作后的输出结果为:
| 10 | 12 | 12 |
| 18 | 16 | 16 |
| 13 | 9 | 3 |
设置padding参数的含义就是对输入图形的矩阵进行填充,比如设置为1,则输入图像的矩阵表变为,其中绿色背景的数字所组成的表格表示初始的输入图像数据:
| 0 | 0 | 0 | 0 | 0 | 0 | 0 |
| 0 | 1 | 2 | 0 | 3 | 1 | 0 |
| 0 | 0 | 1 | 2 | 3 | 1 | 0 |
| 0 | 1 | 2 | 1 | 0 | 0 | 0 |
| 0 | 5 | 2 | 3 | 1 | 1 | 0 |
| 0 | 2 | 1 | 0 | 1 | 1 | 0 |
| 0 | 0 | 0 | 0 | 0 | 0 | 0 |
使用代码实现:
import torch
import torch.nn.functional as F
#输入矩阵
input = torch.tensor([[1,2,0,3,1],
                      [0,1,2,3,1],
                      [1,2,1,0,0],
                      [5,2,3,1,1],
                      [2,1,0,1,1]])
#卷积核
kernel = torch.tensor([[1,2,1],
                       [0,1,0],
                       [2,1,0]])
#用torch的reshape切换尺寸
input = torch.reshape(input,(1,1,5,5))
kernel = torch.reshape(kernel,(1,1,3,3))
#应用conv2d的input尺寸有4个参数,查看原尺寸只有2个,使用reshape函数切换尺寸
print(input.shape)
print(kernel.shape)

output = F.conv2d(input,kernel,stride=1)
print(output)

output2 = F.conv2d(input,kernel,stride=2)
print(output2)

#设置padding进行填充
output3 = F.conv2d(input,kernel,stride=1,padding=1)
print(output3)
运行结果与预期一致:


 7333
7333


 被折叠的 条评论
为什么被折叠?
被折叠的 条评论
为什么被折叠?
 到【灌水乐园】发言


