


目录
本文基于Mnist图像搭建其自己所需数据集,从而对其数据集进行保存,然后对模型进行训练,保存其最优参数,断点续训,实现acc,loss的可视化,对未知图片进行处理然后带入预测。
1.所用到的函数解析
打开图片
img=Image.open('图片文件路径')显示图片
img.show()保存图片
img.save('图像名称')转换图片模式
img.convert('L')可选参数有:
- 1: 1位像素,黑白,每字节一个像素存储
- L: 8位像素,黑白
- P: 8位像素,使用调色板映射到任何其他模式
- RGB: 3x8位像素,真彩色
- RGBA: 4x8位像素,带透明度掩模的真彩色
- CMYK: 4x8位像素,分色
- YCbCr: 3x8位像素,彩色视频格式
- I: 32位有符号整数像素
- F: 32位浮点像素
转化为Numpy数组
np.array(img)文件保存与读取
np.load(文件路径)
np.save(文件路径,要保存的数组)np.load和np.save是读写磁盘数组数据的两个主要函数,默认情况下,数组是以未压缩的原始二进制格式保存在扩展名为.npy的文件中。
np.save()只能保存一维或二维的数据。
回调函数
tf.keras.callbacks.ModelCheckpoint(
    filepath,
    save_best_only=False,
    save_weights_only=False
)| 参数 | |
|---|---|
filepath | 保存模型的文件路径。 |
save_best_only | 如果 ,则仅当模型被认为是“最佳”时,它才会保存,并且根据监控的数量,最新的最佳模型不会被覆盖。如果不包含格式选项,则将被每个新的更好的模型覆盖。 |
save_weights_only | 如果为 True,则仅保存模型的权重 (),否则保存完整模型 ()。 |
2.构建神经网络模型
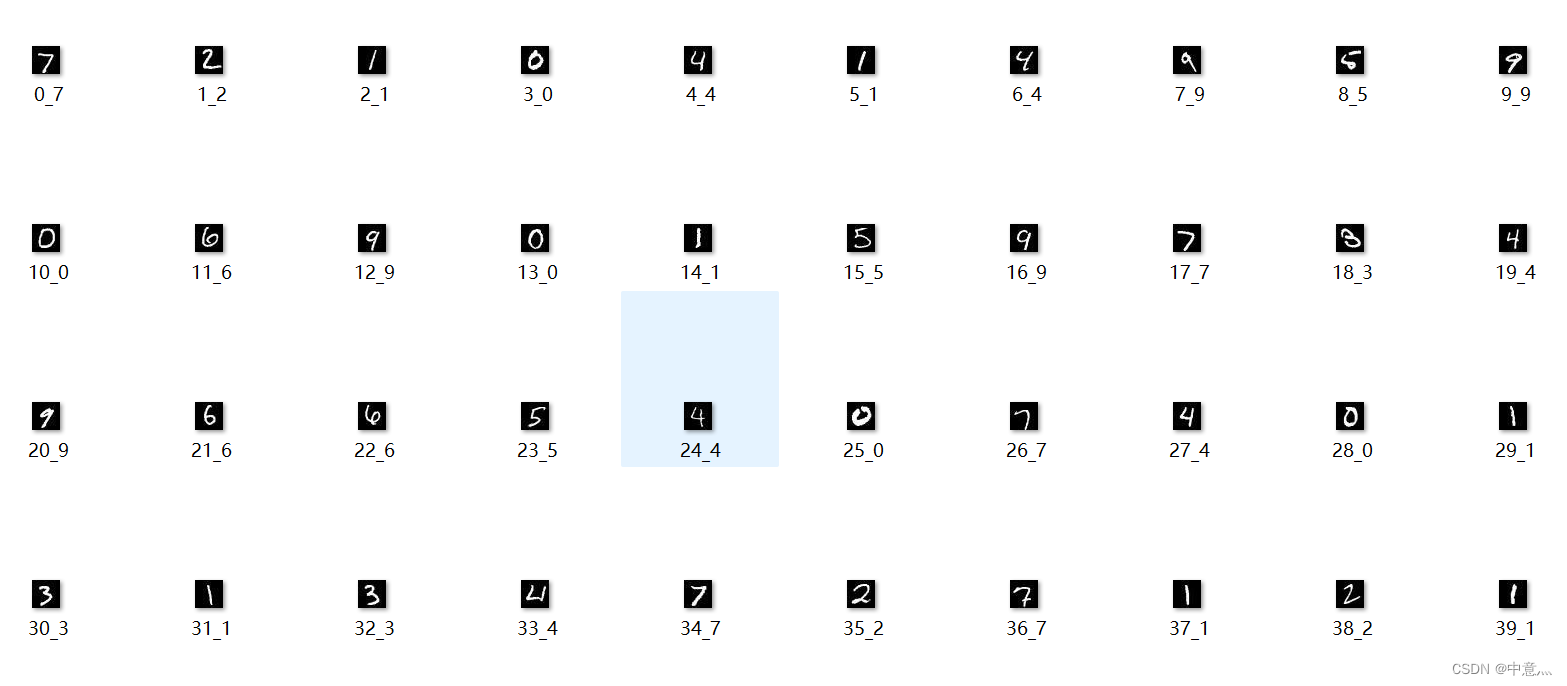
其所用数据集来源于mooch网
数据集


代码
# -*- coding: utf-8 -*-
# @Time : 2022/8/27 9:49
# @Author : 中意灬
# @FileName: Mnist.py
# @Software: PyCharm
"""第一步:导入相关库"""
import os.path
import matplotlib.pyplot as plt
import numpy as np
import tensorflow as tf
from PIL import Image
np.set_printoptions(threshold=np.inf)
"""第二步:准备数据集合"""
train_path="E:/BaiduNetdiskDownload/mnist_image_label/mnist_train_jpg_60000"
train_txt="E:/BaiduNetdiskDownload/mnist_image_label/mnist_train_jpg_60000.txt"
x_train_save_path='./mnist_image_label/mnist_x_train.npy'
y_train_save_path='./mnist_image_label/mnist_y_train.npy'
test_path="E:/BaiduNetdiskDownload/mnist_image_label/mnist_test_jpg_10000"
test_txt="E:/BaiduNetdiskDownload/mnist_image_label/mnist_test_jpg_10000.txt"
x_test_save_path='./mnist_image_label/mnist_x_test.npy'
y_test_save_path='./mnist_image_label/mnist_y_test.npy'
def genrateda(path,txt):
with open(txt,'r')as f:
contents=f.readlines()
x,y=[],[]
for content in contents:
value=content.split()
img_path=path+'/'+value[0]
img=Image.open(img_path)#打开图片
img=np.array(img.convert("L"))#将图片转换为灰度图像,即每个像素用八个bit表示,0表示黑,255表示白
img=img/255#归一化
x.append(img)
y.append(value[1])
print("loading:"+content)
x=np.array(x)
y=np.array(y)
y=y.astype(np.int64)
return x,y
if os.path.exists(x_test_save_path)and os.path.exists(x_train_save_path) and os.path.exists(y_test_save_path) and os.path.exists(y_train_save_path):
print('==========Load Dataset==========')
x_train_sava=np.load(x_train_save_path)
y_train=np.load(y_train_save_path)
x_test_save=np.load(x_test_save_path)
y_test=np.load(y_test_save_path)
x_train=x_train_sava.reshape(len(x_train_sava),28,28)#由于保存的时候为(60000,n)所以需要转换一下
x_test=x_test_save.reshape(len(x_test_save),28,28)
print('==========Load Over==========')
else:
"""初次需要制作数据集"""
print('==========Genrateda Datasets==========')
x_train,y_train=genrateda(train_path,train_txt)
x_test,y_test=genrateda(test_path,test_txt)
x_train,x_test=x_train/255,x_test/255#归一化,没过像素点为0-255
""""保存数据集"""
print('==========Save Datasets==========')
x_train_save = x_train.reshape(len(x_train), -1)#x_train为(60000,28,28),转换为(60000,n),因为np.save只能保存一维和二维数据
x_test_save = x_test.reshape(len(x_test), -1)
np.save(x_train_save_path,x_train_save)
np.save(x_test_save_path,x_test_save)
np.save(y_train_save_path,y_train)
np.save(y_test_save_path,y_test)
print('==========Save Over==========')
"""第三步:用model.Sequential搭建神经网络结构"""
model=tf.keras.models.Sequential([
tf.keras.layers.Flatten(input_shape=(28,28)),
tf.keras.layers.Dense(128,activation='relu'),
tf.keras.layers.Dense(10,activation='softmax')
])
"""第四步:在model.compile()中配置模型参数"""
model.compile(optimizer='adam',
loss=tf.keras.losses.SparseCategoricalCrossentropy(from_logits=False),
metrics=['sparse_categorical_accuracy'])
""""保存最优模型参数"""
checkpoint_save_path = "./checkpoint/mnist.ckpt"
if os.path.exists(checkpoint_save_path + '.index'):
print('==========load the model==========')
model.load_weights(checkpoint_save_path)
"""回滚操作"""
cp_callback = tf.keras.callbacks.ModelCheckpoint(filepath=checkpoint_save_path,
save_weights_only=True,#是否只保留参数
save_best_only=True)#是否只保留最优
"""第五步:用model.fit()训练模型"""
history=model.fit(x_train,y_train,batch_size=32,epochs=5,validation_data=(x_test,y_test),validation_freq=1,callbacks=[cp_callback])
#导出最优参数
f=open('trainable_bariables.txt','w')
f.write(str(model.trainable_variables))
f.close()
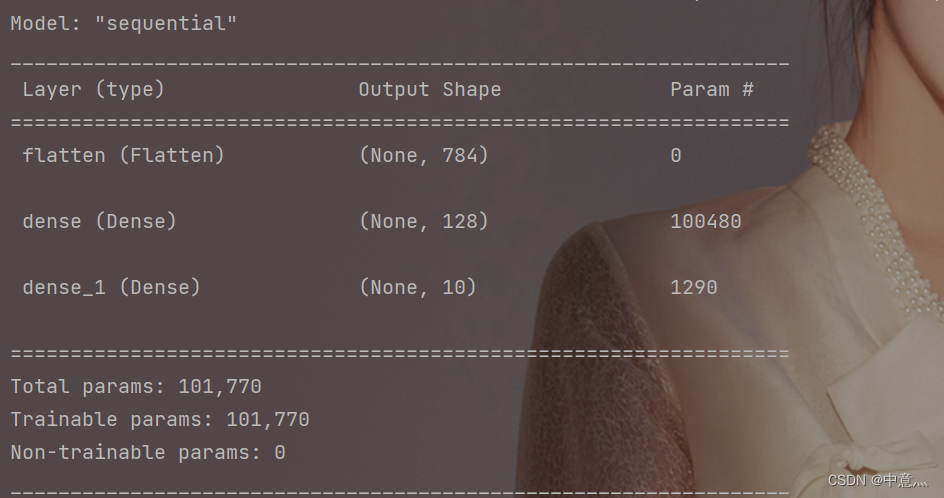
"""第六步:使用model.summary()打印网络结构"""
model.summary()
"""绘图"""
acc=history.history['sparse_categorical_accuracy']#训练集准确率
val_acc=history.history['val_sparse_categorical_accuracy']#测试集准确率
loss=history.history['loss']#训练集loss
val_loss=history.history['val_loss']#测试集loss
plt.rcParams['font.sans-serif']=['SimHei'] #用来正常显示中文标签
plt.figure()
plt.subplot(1,2,1)
plt.plot(acc,label='训练集准确率')
plt.plot(val_acc,label='测试集准确率')
plt.title('测试集与训练集准确率')
plt.legend()
plt.subplot(1,2,2)
plt.plot(loss,label='训练集loss')
plt.plot(val_loss,label='测试集loss')
plt.title('测试集与训练集loss')
plt.legend()
plt.show()
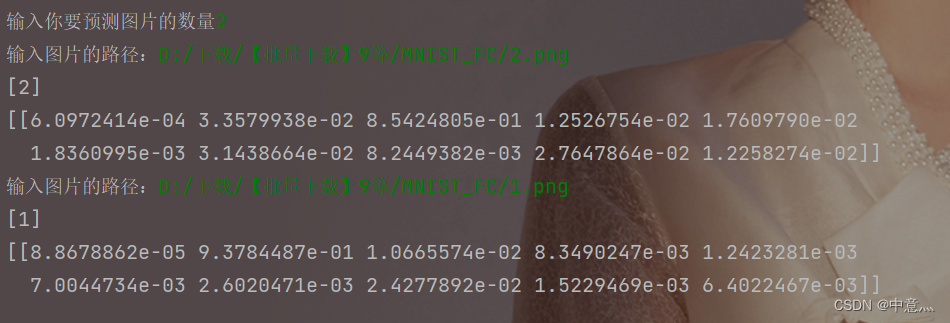
"""预测"""
preNum=int(input('输入你要预测图片的数量'))
for i in range(preNum):
image_path=input('输入图片的路径:')
img=Image.open(image_path)
img=img.resize((28,28),Image.ANTIALIAS)#Image.ANTIALTAS---高质量
img_arr=np.array(img.convert('L'))
"""增强数据特征"""
for i in range(28):
for j in range(28):
if img_arr[i][j]>200:
img_arr[i][j]=0
else:
img_arr[i][j]=1
img_arr=img_arr/255.0 #归一化
x_predict=img_arr.reshape(1,28,28)#在原数组前增加一个维度
result=model.predict(x_predict)
print(np.argmax(result, axis=1)) # 输出类别
print(result) #输出概率
训练效果
模型准确率与损失值:

模型结构:
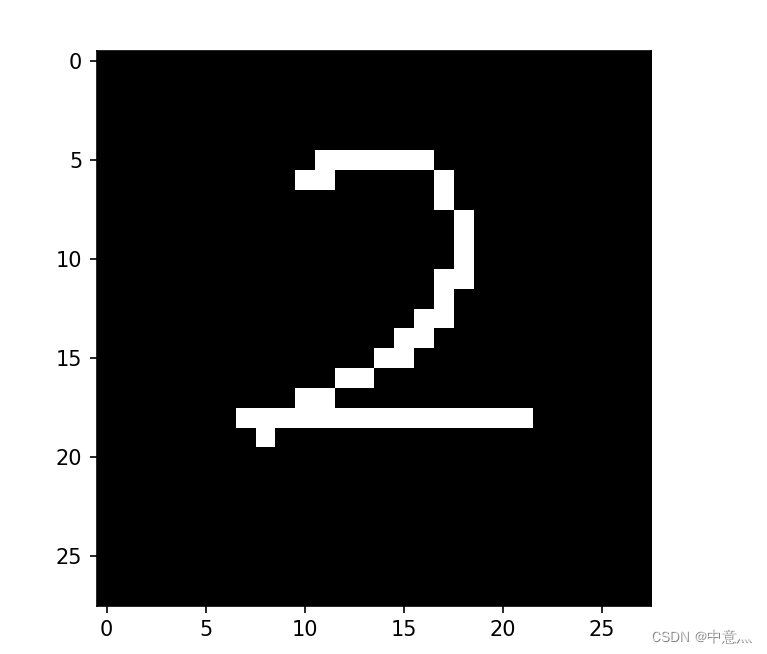
预测的图片

对其进行部分处理后如下所示
最终预测效果
 模型参数的保存


 1万+
1万+


 被折叠的 条评论
为什么被折叠?
被折叠的 条评论
为什么被折叠?
 到【灌水乐园】发言


