Pascal Voc2012数据集在object detection 和 instance segmention都具有较大的作用,并且相比于COCO来说,它比较小,更加适合像我这种穷学生操作。COCO实在是太大了,在本地还是在服务器上操作都太难受了,之前在服务器上下载COCO都花了几天的时间,在本地使用的linux和window双系统,给linux就分配了200G,这要是下载一个数据集就把我磁盘容量用完。。
Pascal Voc2012数据集的结构:
把VOC2012下载下来后,打开VOC2012这个文件夹,里面有如下几个文件夹:
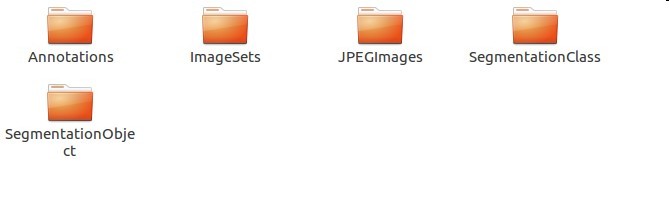
分别简单的说下各个文件夹里面的内容吧。
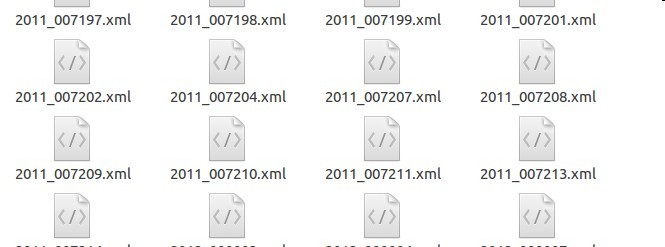
Annotations中是各个图的标注,包括了2007-2012年所有的标注,总共有17125项。
<annotation>
	<folder>VOC2012</folder>
	<filename>2007_000323.jpg</filename>
	<source>
		<database>The VOC2007 Database</database>
		<annotation>PASCAL VOC2007</annotation>
		<image>flickr</image>
	</source>
	<size>
		<width>500</width>
		<height>375</height>
		<depth>3</depth>
	</size>
	<segmented>1</segmented>
	<object>
		<name>person</name>
		<pose>Frontal</pose>
		<truncated>1</truncated>
		<difficult>0</difficult>
		<bndbox>
			<xmin>277</xmin>
			<ymin>3</ymin>
			<xmax>500</xmax>
			<ymax>375</ymax>
		</bndbox>
	</object>
	<object>
		<name>person</name>
		<pose>Frontal</pose>
		<truncated>1</truncated>
		<difficult>0</difficult>
		<bndbox>
			<xmin>12</xmin>
			<ymin>3</ymin>
			<xmax>305</xmax>
			<ymax>375</ymax>
		</bndbox>
	</object>
</annotation>
在2007_000323.jpg这张图里面有两个object。每个object下包括了它的bndbox,第一个是xmin=277,ymin=3,xmax=500,ymax=375;第二个是xmin=12,ymin=3,xmax=305,ymax=375。
这个是很一般的一个标注,在VOC2012中也存在人体姿态的标注,在使用时需要注意:
<annotation>
	<folder>VOC2012</folder>
	<filename>2007_000272.jpg</filename>
	<source>
		<database>The VOC2007 Database</database>
		<annotation>PASCAL VOC2007</annotation>
		<image>flickr</image>
	</source>
	<size>
		<width>333</width>
		<height>500</height>
		<depth>3</depth>
	</size>
	<segmented>0</segmented>
	<object>
		<name>person</name>
		<pose>Right</pose>
		<truncated>1</truncated>
		<difficult>0</difficult>
		<part>
			<name>head</name>
			<bndbox>
				<xmin>142</xmin>
				<ymin>93</ymin>
				<xmax>256</xmax>
				<ymax>229</ymax>
			</bndbox>
		</part>
		<part>
			<name>hand</name>
			<bndbox>
				<xmin>233</xmin>
				<ymin>372</ymin>
				<xmax>304</xmax>
				<ymax>425</ymax>
			</bndbox>
		</part>
		<bndbox>
			<xmin>25</xmin>
			<ymin>71</ymin>
			<xmax>304</xmax>
			<ymax>500</ymax>
		</bndbox>
	</object>
</annotation>
可以看出加入了人的head 和 hand的姿态标注。之前编程查找bounding box的时候还被这个坑了。
还需要注意的是,在2007-2008年的标注中bounding box的顺序是
			<xmin>25</xmin>
			<ymin>71</ymin>
			<xmax>304</xmax>
			<ymax>500</ymax>
在2009-2012年的标注中bounding box的顺序是:
			<xmax>476</xmax>
			<xmin>52</xmin>
			<ymax>332</ymax>
			<ymin>71</ymin>
ImageSets这个文件夹暂时用不上,所以我也没有取管他具体意义,我就略过了。
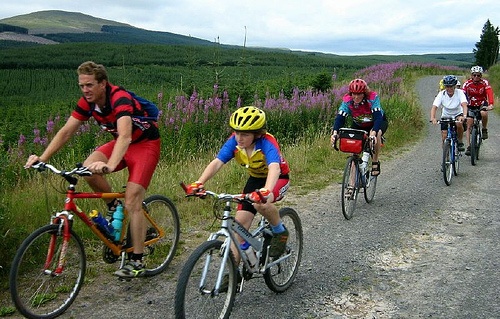
接下里就是JPEGImages文件夹,里面是所有的原图像,故它里面也是17125项。随便贴一张
SegmentationClass中存的是用于语义分割的标注图,也瞎贴一张,总共2913项。
最后一个文件夹是实例分割用到的标注图,瞎贴一张,总共2913项。
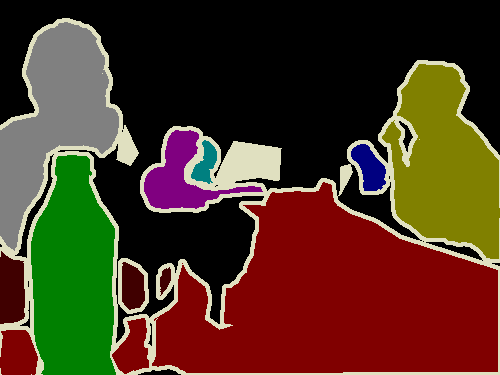
做过计算机视觉这一块的人应该很清楚语义分割和实例分割的区别,图中也给出来了。
因为我需要用它来训练Mask R-CNN,所以我需要的是segmentation的图片,用到的文件夹就包括了三个:Annotation、JPEGImages、SegmentationObject。
接下来就实现如何把segmentation图片和原图片以及标准整合到一个pkl文件中。
代码实现整合:
1.读取必要的库和必要的参数定义:
import
cv2
import
glob
import
os
import
numpy
as
np
import
scipy.misc
import
scipy.ndimage
import
matplotlib.pyplot
as
plt
import
pickle
import
sys
from
xml.etree
import
ElementTree
base_path
=
os.getcwd()
# 调整图片大小
IMAGE_MIN_DIM
=
512
IMAGE_MAX_DIM
=
512
year
=
"2012"
Object_path
=
glob.glob(
'./VOCdevkit_
%s
/VOC
%s
/SegmentationObject/*.png'
%
(year,year))
np.random.shuffle(Object_path)
# 数据随机打乱
Image_path
=
'./VOCdevkit_
%s
/VOC
%s
/JPEGImages'
%
(year,year)
Annotations_path
=
'./VOCdevkit_
%s
/VOC
%s
/Annotations'
%
(year,year)
2.解析xml文件函数定义:
#从标注中得到图片中每个实例对应的类别及其每个实例的bounding box
df analyze_xml(
file_name
=
None
):
class_name
=
[]
rectangle_position
=
[]
tree
=
ElementTree.parse(file_name)
root
=
tree.getroot()
for
object_tree
in
root.findall(
"object"
):
for
bounding_box
in
object_tree.iter(
"bndbox"
):
xmin
=
int
(bounding_box.find(
"xmin"
).text)
ymin
=
int
(bounding_box.find(
"ymin"
).text)
xmax
=
int
(bounding_box.find(
"xmax"
).text)
ymax
=
int
(bounding_box.find(
"ymax"
).text)
postion
=
[xmin, ymin, xmax, ymax]
rectangle_position.append(postion)
one_class
=
object_tree.find(
"name"
).text
class_name.append(one_class)
return
class_name, rectangle_position
这个没有包括人体的姿态部分的bounding box,稍微修改一下就可以实现解析出人体姿态的bounding box
def
analyze_xml
(
file_name
=
None
):
class_name
=
[]
rectangle_position
=
[]
part_class
=
[]
part_position
=
[]
tree
=
ElementTree.parse(file_name)
root
=
tree.getroot()
for
object_tree
in
root.findall(
"object"
):
#寻找object_tree下一级的bndbox
for
bounding_box
in
object_tree.iter(
"bndbox"
):
xmin
=
int
(bounding_box.find(
"xmin"
).text)
ymin
=
int
(bounding_box.find(
"ymin"
).text)
xmax
=
int
(bounding_box.find(
"xmax"
).text)
ymax
=
int
(bounding_box.find(
"ymax"
).text)
for
part
in
object_tree.findall(
"part"
):
for
part_box
in
part.iter(
"bndbox"
):
xmin
=
int
(part_box.find(
"xmin"
).text)
ymin
=
int
(part_box.find(
"ymin"
).text)
xmax
=
int
(part_box.find(
"xmax"
).text)
ymax
=
int
(part_box.find(
"ymax"
).text)
part_ps
=
[xmin, ymin, xmax, ymax]
part_position.append(part_ps)
part_cls
=
part.find(
"name"
).text
part_class.append(part_cls)
postion
=
[xmin, ymin, xmax, ymax]
rectangle_position.append(postion)
one_class
=
object_tree.find(
"name"
).text
class_name.append(one_class)
return
class_name, rectangle_position, part_class, part_position
获得object 的全部class:
###得到全部的类别
def
analyze_xml_class
(
file_names
,
class_name
=
[]):
'''解析xml的所有类别'''
for
file_name
in
file_names:
with
open
(file_name)
as
fp:
for
p
in
fp:
if
'<object>'
in
p:
class_name.append(
next
(fp).split(
'>'
)[
1
].split(
'<'
)[
0
])
3.对image进行resize,以及相应的对mask进行resize
def
resize_image
(
image
,
min_dim
=
None
,
max_dim
=
None
,
padding
=
False
):
"""
Resizes an image keeping the aspect ratio.
min_dim: if provided, resizes the image such that it's smaller
dimension == min_dim
max_dim: if provided, ensures that the image longest side doesn't
exceed this value.
padding: If true, pads image with zeros so it's size is max_dim x max_dim
Returns:
image: the resized image
window: (y1, x1, y2, x2). If max_dim is provided, padding might
be inserted in the returned image. If so, this window is the
coordinates of the image part of the full image (excluding
the padding). The x2, y2 pixels are not included.
scale: The scale factor used to resize the image
padding: Padding added to the image [(top, bottom), (left, right), (0, 0)]
"""
# Default window (y1, x1, y2, x2) and default scale == 1.
h, w
=
image.shape[:
2
]
window
=
(
0
,
0
, h, w)
scale
=
1
if
min_dim:
# Scale up but not down
scale
=
max
(
1
, min_dim
/
min
(h, w))
# Does it exceed max dim?
if
max_dim:
image_max
=
max
(h, w)
if
round
(image_max
*
scale)
>
max_dim:
scale
=
max_dim
/
image_max
# Resize image and mask
if
scale
!=
1
:
image
=
scipy.misc.imresize(
image, (
round
(h
*
scale),
round
(w
*
scale)))
if
padding:
# Get new height and width
h, w
=
image.shape[:
2
]
top_pad
=
(max_dim
-
h)
//
2
bottom_pad
=
max_dim
-
h
-
top_pad
left_pad
=
(max_dim
-
w)
//
2
right_pad
=
max_dim
-
w
-
left_pad
padding
=
[(top_pad, bottom_pad), (left_pad, right_pad), (
0
,
0
)]
image
=
np.pad(image, padding,
mode
=
'constant'
,
constant_values
=
0
)
window
=
(top_pad, left_pad, h
+
top_pad, w
+
left_pad)
return
image, window, scale, padding
def
resize_mask
(
mask
,
scale
,
padding
):
"""Resizes a mask using the given scale and padding.
Typically, you get the scale and padding from resize_image() to
ensure both, the image and the mask, are resized consistently.
scale: mask scaling factor
padding: Padding to add to the mask in the form
[(top, bottom), (left, right), (0, 0)]
"""
h, w
=
mask.shape[:
2
]
mask
=
scipy.ndimage.zoom(mask,
zoom
=
[scale, scale,
1
],
order
=
0
)
mask
=
np.pad(mask, padding,
mode
=
'constant'
,
constant_values
=
0
)
return
mask
4.对数据进行操作,得到数据的所有类别,并放在一个dict中:
class_all_name
=
[]
analyze_xml_class(glob.glob(os.path.join(Annotations_path,
'*.xml'
)),class_all_name)
class_set
=
set
(class_all_name)
# 转成set去除重复的
class_all_name
=
None
class_list
=
sorted
(
list
(class_set))
# 对所有的类别排序
class_set
=
None
##每个类别对应于一个id,dict = {name:id,.....}
class_dict
=
dict
(
zip
(class_list,
range
(
1
,
len
(class_list)
+
1
)))
# 类别从1开始,0 默认为背景
# key 和 value 交换一下,class_name_dict = {id:name,....}
class_name_dict
=
dict
(
zip
(class_dict.values(),class_dict.keys()))
5.写入到pkl文件中:
object_data
=
[]
object_data.append([class_dict])
# 生成的pickle数据存放在data文件下
if
not
os.path.exists(
'./data'
):
os.mkdir(
'./data'
)
for
num,path
in
enumerate
(Object_path):
# 进度输出
sys.stdout.write(
'
\r
>> Converting image
%d
/
%d
'
%
(
num
+
1
,
len
(Object_path)))
sys.stdout.flush()
file_name
=
path.split(
'/'
)[
-
1
].split(
'.'
)[
0
]
Annotations_path_
=
os.path.join(Annotations_path,file_name
+
'.xml'
)
# 对应的xml文件
class_name,rectangle_position
=
analyze_xml(Annotations_path_)
# 解析对象的mask[h,w,m] m为对象的个数,0、1组成的单通道图像
mask_1
=
cv2.imread(path,
0
)
print
(
type
(mask_1))
masks
=
[]
for
rectangle
in
rectangle_position:
pixel_list
=
[]
mask
=
np.zeros_like(mask_1,np.uint8)
print
(rectangle[
1
], rectangle[
3
],rectangle[
0
], rectangle[
2
])
mask[rectangle[
1
]:rectangle[
3
], rectangle[
0
]:rectangle[
2
]]
=
mask_1[rectangle[
1
]:rectangle[
3
],rectangle[
0
]:rectangle[
2
]]
mean_x
=
(rectangle[
0
]
+
rectangle[
2
])
//
2
mean_y
=
(rectangle[
1
]
+
rectangle[
3
])
//
2
end
=
min
((mask.shape[
1
],
int
(rectangle[
2
])
+
1
))
start
=
max
((
0
,
int
(rectangle[
0
])
-
1
))
flag
=
True
for
i
in
range
(mean_x,end):
x_
=
i;y_
=
mean_y
pixels
=
mask_1[y_, x_]
pixel_list.append(pixels)
if
pixels
!=
0
and
pixels
!=
220
:
# 0 对应背景 220对应边界线
temp
=
mask
==
pixels
mask
=
(mask
==
pixels).astype(np.uint8)
flag
=
False
break
if
flag:
for
i
in
range
(mean_x
-
1
, start,
-
1
):
x_
=
i;y_
=
mean_y
pixels
=
mask_1[y_, x_]
if
pixels
!=
0
and
pixels
!=
220
:
mask
=
(mask
==
pixels).astype(np.uint8)
break
masks.append(mask)
# mask转成[h,w,m]格式
masks
=
np.asarray(masks,np.uint8).transpose([
1
,
2
,
0
])
# [h,w,m]
# class name 与class id 对应
class_id
=
[]
[class_id.append(class_dict[i])
for
i
in
class_name]
class_id
=
np.asarray(class_id,np.uint8)
# [m,]
mask_1
=
None
# images 原图像
image
=
cv2.imread(os.path.join(Image_path, file_name
+
'.jpg'
))
# image = cv2.resize(image, (h, w)) # /255. # 不需要转到0.~1. 程序内部会自动进行归一化处理
# 图像与mask都进行缩放
image, _, scale, padding
=
resize_image(image,
min_dim
=
IMAGE_MIN_DIM,
max_dim
=
IMAGE_MAX_DIM,
padding
=
True
)
masks
=
resize_mask(masks, scale, padding)
object_data.append([image,masks,class_id])
if
num
>
0
and
num
%
700
==
0
:
with
open
(
'./data/data_'
+
str
(num)
+
'.pkl'
,
'wb'
)
as
fp:
pickle.dump(object_data,fp)
object_data
=
[]
#object_data.append([class_dict])
if
num
==
len
(Object_path)
-
1
and
object_data
!=
None
:
with
open
(
'./data/data_'
+
str
(num)
+
'.pkl'
,
'wb'
)
as
fp:
pickle.dump(object_data, fp)
object_data
=
None
sys.stdout.write(
'
\n
'
)
sys.stdout.flush()
6.测试一下保存的pkl值:
from matplotlib import pyplot as plt
import pickle
#读取保存的pkl文件
pkl_path='./data/data_700.pkl'
with open(pkl_path,'rb') as fp:
    data=pickle.load(fp)
读取序号为14的信息。data[0][0]存放的是class_name和class_ids;data[num][1][:,:,1]存放的第二个mask的值
num = 14
plt.imshow(data[num][1][:,:,1])
plt.show()
class_dict = data[0][0]
class_dict = {v:k for k, v in class_dict.items()}
print(data[num][2])
for i in data[num][2]:
    print(class_dict[i])
输出为:
[ 5 15 15 15 15]
bottle
person
person
person
person
看一下原图:
plt.imshow(data[num][0])
plt.show()
data[num][0].shape
输出为:


 9万+
9万+

 被折叠的 条评论
为什么被折叠?
被折叠的 条评论
为什么被折叠?
 到【灌水乐园】发言


