


香橙RK3588部署奥比中光orbb深度相机和yolov8检测模型
一 前言
本次是记录在香橙RK3588上使用奥比中光orbb深度相机获取视频帧在yolov8上进行目标检测的过程
本人配置:ubuntu22.04, 香橙RK3588
二 深度学习环境配置
2.1 安装anaconda
anconda下载地址


下载好了,安装直接走流程就行。
创建虚拟环境

conda create -n pytorch python=3.9
conda activate pytorch

pip install torch==2.3.1 torchvision==0.18.1 torchaudio==2.3.1 --index-url https://download.pytorch.org/whl/cu118
2.2 安装cuda和cudnn
驱动安装

在进行cuda安装之前,我们需要先安装cuda的相关依赖库,防止cuda安装出现错误。命令行输入以下命令,进行相关依赖库的安装:
sudo apt-get install freeglut3-dev build-essential libx11-dev libxmu-dev libxi-dev libgl1-mesa-glx libglu1-mesa libglu1-mesa-dev
cuda的下载链接:cuda下载链接


wget https://developer.download.nvidia.com/compute/cuda/11.8.0/local_installers/cuda_11.8.0_520.61.05_linux.run
sudo sh cuda_11.8.0_520.61.05_linux.run
输入上述命令后,稍有卡顿,随后出现以下界面:


输入accept进行后续操作,随即出现以下界面:这时候因为前面步骤已经安装了Driver,enter一下把Driver取消,不然安装不了

出现以下就安装好了,

查看是否安装成功,在cmd中输入nvcc -V

添加环境变量
 gedit ~/.bashrc
 source ~/.bashrc
export PATH=$PATH:/usr/local/cuda-11.8/bin
export LD_LIBRARY_PATH=$LD_LIBRARY_PATH:/usr/local/cuda-11.8/lib64

cudnn的下载链接:cudnn下载链接
需要注意cudnn的版本需要与cuda的版本相匹配。

将压缩包下载,输入命令进行解压,cuDNN对应文件拷贝至CUDA指定路径。
cd cudnn-linux-x86_64-8.8.1.3_cuda11-archive/
ls
include  lib  LICENSE

sudo cp include/cudnn*.h /usr/local/cuda-11.8/include
sudo cp lib/libcudnn* /usr/local/cuda-11.8/lib64
sudo chmod a+r /usr/local/cuda-11.8/include/cudnn*.h /usr/local/cuda-11.8/lib64/libcudnn*
三 训练自己的模型
3.1 数据集制作
安装labelimg
pip install labelimg
在终端输入下面命令直接打开
labelimg


划分数据集,train和va和test的比例通常为7:2:1
my_dataset
│
└───images
    │   train
    │   val
    │   test
│
└───labels
    │   train
    │   val
    │   test
制作yaml

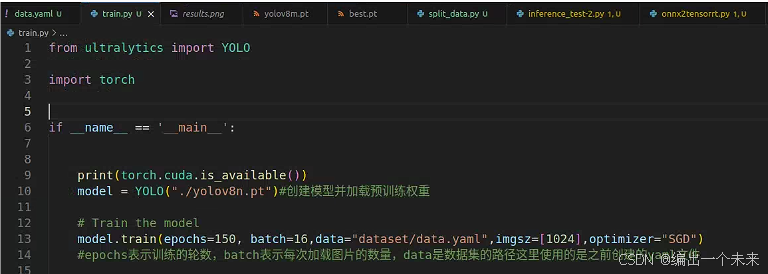
3.2 模型训练
克隆Rockchip官方的YOLOv8代码,仓库地址为https://github.com/airockchip/ultralytics_yolov8.git 。训练流程和官方YOLOv8一样,
v8参数解析 原创三叔家的猫
导出onnx

3.3 模型转换
先创建一个rk3588的虚拟环境
conda create -n rk3588 python=3.9
进入rk3588环境
conda activate rk3588
下载rknn-toolkit2https://github.com/airockchip/rknn-toolkit2.git我选择的1.6.0的版本

解压后进入rknn-toolkit2-1.6.0/rknn-toolkit2/packages/中
pip install -r requirements_cp39-1.6.0.txt -i https://mirror.baidu.com/pypi/simple
pip install rknn_toolkit2-1.6.0+81f21f4d-cp39-cp39-linux_x86_64.whl

dataset下面放一张测试图片1.jpg和dataset.txt,txt中写的是测试图片的名字。
dataset
│   ├── 1.jpg
│   └── dataset.txt
转化代码
import os
import cv2
from rknn.api import RKNN
import numpy as np

model_path = "/home/ljl/workers/ultralytics_yolov8/runs/detect/train7/weights/best.onnx"


if __name__ == '__main__':

# 确定目标设备
    target = 'RK3588'
    # 创建RKNN对象
    rknn = RKNN()

    # 配置RKNN模型
    print('--> config model')
    rknn.config(
        mean_values=[[0, 0, 0]],
        std_values=[[255, 255, 255]],
        target_platform=target,
    )
    print('done')

    # 加载 .onnx模型
    print('--> loading model')
    ret = rknn.load_onnx(model=model_path)
    if ret != 0:
        print("load model failed!")
        rknn.release()
        exit(ret)
    print('done')

    # 构建RKNN模型
    print('--> building model')
    ret = rknn.build(do_quantization=True, dataset="./dataset-1/dataset.txt")
    if ret != 0:
        print("build model failed!")
        rknn.release()
        exit(ret)
    print('done')

    # 导出RKNN模型
    print('-->export RKNN model')
    ret = rknn.export_rknn('./yolov8n.rknn')
    if ret != 0:
        print('export RKNN model failed')
        rknn.release()
        exit(ret)

四 板子部署
同样安装conda,创建向虚拟环境
conda create -n rknn python=3.9
激活环境
conda activate rknn
安装rknn_toolkit_lite2, 在下载的rknn-toolkit2-1.6.0/rknn_toolkit_lite2/packages中有rknn_toolkit_lite2-1.6.0-cp39-cp39-linux_aarch64.whl,把它移动到开发板上然后使用下面的命令安装
pip install rknn_toolkit_lite2-1.6.0-cp39-cp39-linux_aarch64.whl -i https://pypi.mirrors.ustc.edu.cn/simple/
安装opencv
pip install opencv-python -i https://pypi.tuna.tsinghua.edu.cn/simple
在开发板上新建一个yolov8_test来存放文件,dataset-1是存放的测试图片,dataset-2是保存测试结果的位置,yolov8.rknn是我们的rknn模型,rk3588_test-2.py是我们的测试脚本
├── dataset-1
│   └── 000000000650.jpg
├── dataset-2
├── rk3588_test-2.py
└── yolov8.rknn
rk3588_test-2.py文件如下所示
import os
import cv2
from rknnlite.api import RKNNLite
import numpy as np

RKNN_MODEL = "./yolov8.rknn"
IMG_FOLDER = "dataset-1"
RESULT_PATH = './dataset-2'

CLASSES = ['car']

OBJ_THRESH = 0.45
NMS_THRESH = 0.45

MODEL_SIZE = (640, 640)

color_palette = np.random.uniform(0, 255, size=(len(CLASSES), 3))


def sigmoid(x):
    return 1 / (1 + np.exp(-x))


def letter_box(im, new_shape, pad_color=(0, 0, 0), info_need=False):
    # Resize and pad image while meeting stride-multiple constraints
    shape = im.shape[:2]  # current shape [height, width]
    if isinstance(new_shape, int):
        new_shape = (new_shape, new_shape)

    # Scale ratio
    r = min(new_shape[0] / shape[0], new_shape[1] / shape[1])

    # Compute padding
    ratio = r  # width, height ratios
    new_unpad = int(round(shape[1] * r)), int(round(shape[0] * r))
    dw, dh = new_shape[1] - new_unpad[0], new_shape[0] - new_unpad[1]  # wh padding

    dw /= 2  # divide padding into 2 sides
    dh /= 2

    if shape[::-1] != new_unpad:  # resize
        im = cv2.resize(im, new_unpad, interpolation=cv2.INTER_LINEAR)
    top, bottom = int(round(dh - 0.1)), int(round(dh + 0.1))
    left, right = int(round(dw - 0.1)), int(round(dw + 0.1))
    im = cv2.copyMakeBorder(im, top, bottom, left, right, cv2.BORDER_CONSTANT, value=pad_color)  # add border

    if info_need is True:
        return im, ratio, (dw, dh)
    else:
        return im


def filter_boxes(boxes, box_confidences, box_class_probs):
    """Filter boxes with object threshold.
    """
    box_confidences = box_confidences.reshape(-1)
    candidate, class_num = box_class_probs.shape

    class_max_score = np.max(box_class_probs, axis=-1)
    classes = np.argmax(box_class_probs, axis=-1)

    _class_pos = np.where(class_max_score * box_confidences >= OBJ_THRESH)
    scores = (class_max_score * box_confidences)[_class_pos]

    boxes = boxes[_class_pos]
    classes = classes[_class_pos]

    return boxes, classes, scores


def nms_boxes(boxes, scores):
    """Suppress non-maximal boxes.
    # Returns
        keep: ndarray, index of effective boxes.
    """
    x = boxes[:, 0]
    y = boxes[:, 1]
    w = boxes[:, 2] - boxes[:, 0]
    h = boxes[:, 3] - boxes[:, 1]

    areas = w * h
    order = scores.argsort()[::-1]

    keep = []
    while order.size > 0:
        i = order[0]
        keep.append(i)

        xx1 = np.maximum(x[i], x[order[1:]])
        yy1 = np.maximum(y[i], y[order[1:]])
        xx2 = np.minimum(x[i] + w[i], x[order[1:]] + w[order[1:]])
        yy2 = np.minimum(y[i] + h[i], y[order[1:]] + h[order[1:]])

        w1 = np.maximum(0.0, xx2 - xx1 + 0.00001)
        h1 = np.maximum(0.0, yy2 - yy1 + 0.00001)
        inter = w1 * h1

        ovr = inter / (areas[i] + areas[order[1:]] - inter)
        inds = np.where(ovr <= NMS_THRESH)[0]
        order = order[inds + 1]
    keep = np.array(keep)
    return keep


def softmax(x, axis=None):
    x = x - x.max(axis=axis, keepdims=True)
    y = np.exp(x)
    return y / y.sum(axis=axis, keepdims=True)


def dfl(position):
    # Distribution Focal Loss (DFL)
    n, c, h, w = position.shape
    p_num = 4
    mc = c // p_num
    y = position.reshape(n, p_num, mc, h, w)
    y = softmax(y, 2)
    acc_metrix = np.array(range(mc), dtype=float).reshape(1, 1, mc, 1, 1)
    y = (y * acc_metrix).sum(2)
    return y


def box_process(position):
    grid_h, grid_w = position.shape[2:4]
    col, row = np.meshgrid(np.arange(0, grid_w), np.arange(0, grid_h))
    col = col.reshape(1, 1, grid_h, grid_w)
    row = row.reshape(1, 1, grid_h, grid_w)
    grid = np.concatenate((col, row), axis=1)
    stride = np.array([MODEL_SIZE[1] // grid_h, MODEL_SIZE[0] // grid_w]).reshape(1, 2, 1, 1)

    position = dfl(position)
    box_xy = grid + 0.5 - position[:, 0:2, :, :]
    box_xy2 = grid + 0.5 + position[:, 2:4, :, :]
    xyxy = np.concatenate((box_xy * stride, box_xy2 * stride), axis=1)

    return xyxy


def post_process(input_data):
    boxes, scores, classes_conf = [], [], []
    defualt_branch = 3
    pair_per_branch = len(input_data) // defualt_branch
    # Python 忽略 score_sum 输出
    for i in range(defualt_branch):
        boxes.append(box_process(input_data[pair_per_branch * i]))
        classes_conf.append(input_data[pair_per_branch * i + 1])
        scores.append(np.ones_like(input_data[pair_per_branch * i + 1][:, :1, :, :], dtype=np.float32))

    def sp_flatten(_in):
        ch = _in.shape[1]
        _in = _in.transpose(0, 2, 3, 1)
        return _in.reshape(-1, ch)

    boxes = [sp_flatten(_v) for _v in boxes]
    classes_conf = [sp_flatten(_v) for _v in classes_conf]
    scores = [sp_flatten(_v) for _v in scores]

    boxes = np.concatenate(boxes)
    classes_conf = np.concatenate(classes_conf)
    scores = np.concatenate(scores)

    # filter according to threshold
    boxes, classes, scores = filter_boxes(boxes, scores, classes_conf)

    # nms
    nboxes, nclasses, nscores = [], [], []
    for c in set(classes):
        inds = np.where(classes == c)
        b = boxes[inds]
        c = classes[inds]
        s = scores[inds]
        keep = nms_boxes(b, s)

        if len(keep) != 0:
            nboxes.append(b[keep])
            nclasses.append(c[keep])
            nscores.append(s[keep])

    if not nclasses and not nscores:
        return None, None, None

    boxes = np.concatenate(nboxes)
    classes = np.concatenate(nclasses)
    scores = np.concatenate(nscores)

    return boxes, classes, scores


def draw_detections(img, left, top, right, bottom, score, class_id):
    """
    Draws bounding boxes and labels on the input image based on the detected objects.
    Args:
        img: The input image to draw detections on.
        box: Detected bounding box.
        score: Corresponding detection score.
        class_id: Class ID for the detected object.
    Returns:
        None
    """

    # Retrieve the color for the class ID
    color = color_palette[class_id]

    # Draw the bounding box on the image
    cv2.rectangle(img, (int(left), int(top)), (int(right), int(bottom)), color, 2)

    # Create the label text with class name and score
    label = f"{CLASSES[class_id]}: {score:.2f}"

    # Calculate the dimensions of the label text
    (label_width, label_height), _ = cv2.getTextSize(label, cv2.FONT_HERSHEY_SIMPLEX, 0.5, 1)

    # Calculate the position of the label text
    label_x = left
    label_y = top - 10 if top - 10 > label_height else top + 10

    # Draw a filled rectangle as the background for the label text
    cv2.rectangle(img, (label_x, label_y - label_height), (label_x + label_width, label_y + label_height), color,
                  cv2.FILLED)

    # Draw the label text on the image
    cv2.putText(img, label, (label_x, label_y), cv2.FONT_HERSHEY_SIMPLEX, 0.5, (0, 0, 0), 1, cv2.LINE_AA)


def draw(image, boxes, scores, classes):
    img_h, img_w = image.shape[:2]
    # Calculate scaling factors for bounding box coordinates
    x_factor = img_w / MODEL_SIZE[0]
    y_factor = img_h / MODEL_SIZE[1]

    for box, score, cl in zip(boxes, scores, classes):
        x1, y1, x2, y2 = [int(_b) for _b in box]

        left = int(x1 * x_factor)
        top = int(y1 * y_factor)
        right = int(x2 * x_factor)
        bottom = int(y2 * y_factor)

        print('class: {}, score: {}'.format(CLASSES[cl], score))
        print('box coordinate left,top,right,down: [{}, {}, {}, {}]'.format(left, top, right, bottom))

        # Retrieve the color for the class ID

        draw_detections(image, left, top, right, bottom, score, cl)

        # cv2.rectangle(image, (left, top), (right, bottom), color, 2)
        # cv2.putText(image, '{0} {1:.2f}'.format(CLASSES[cl], score),
        #             (left, top - 6),
        #             cv2.FONT_HERSHEY_SIMPLEX,
        #             0.6, (0, 0, 255), 2)


if __name__ == '__main__':

    # 创建RKNN对象
    rknn_lite = RKNNLite()

    # 加载RKNN模型
    print('--> Load RKNN model')
    ret = rknn_lite.load_rknn(RKNN_MODEL)
    if ret != 0:
        print('Load RKNN model failed')
        exit(ret)
    print('done')

    # 初始化 runtime 环境
    print('--> Init runtime environment')
    # run on RK356x/RK3588 with Debian OS, do not need specify target.
    ret = rknn_lite.init_runtime()
    if ret != 0:
        print('Init runtime environment failed!')
        exit(ret)
    print('done')

    # 数据处理
    img_list = os.listdir(IMG_FOLDER)
    for i in range(len(img_list)):
        img_name = img_list[i]
        img_path = os.path.join(IMG_FOLDER, img_name)
        if not os.path.exists(img_path):
            print("{} is not found", img_name)
            continue
        img_src = cv2.imread(img_path)
        if img_src is None:
            print("文件不存在\n")

        # Due to rga init with (0,0,0), we using pad_color (0,0,0) instead of (114, 114, 114)
        pad_color = (0, 0, 0)
        img = letter_box(im=img_src.copy(), new_shape=(MODEL_SIZE[1], MODEL_SIZE[0]), pad_color=(0, 0, 0))
        # img = cv2.resize(img_src, (640, 512), interpolation=cv2.INTER_LINEAR) # direct resize
        input = np.expand_dims(img, axis=0)

        outputs = rknn_lite.inference([input])

        boxes, classes, scores = post_process(outputs)

        img_p = img_src.copy()

        if boxes is not None:
            draw(img_p, boxes, scores, classes)

        # 保存结果
        if not os.path.exists(RESULT_PATH):
            os.mkdir(RESULT_PATH)

        result_path = os.path.join(RESULT_PATH, img_name)
        cv2.imwrite(result_path, img_p)
        print('Detection result save to {}'.format(result_path))

        pass

    # cv2.imshow("full post process result", img_p)

    rknn_lite.release()
运行结果

五 奥比中光Orbbec SDK for Python
5.1 cmake 安装
1.在linux环境下打开网页浏览器,输入网址:https://cmake.org/download/,找到最新版本的位置。一般开放源代码软件都会有两个版本发布:Source Distribution 和 Binary Distribution,前者是源代码版,你需要自己编译成可执行软件。后者是已经编译好的可执行版,直接可以拿来用的。

tar zxvf cmake-3.10.1-Linux-x86_64.tar.gz
export PATH=$PATH:/home/qgm/cmake-3.10.1-Linux-x86_64/bin
cmake --version
5.2 Linux python SDK 编译
Orbbec SDK for Python 使用手册
下载 python sdk 源码
git clone https://github.com/orbbec/pyorbbecsdk.git
安装依赖
sudo apt-get install python3-dev python3-venv python3-pip python3-opencv
Python SDK 编译
cd pyorbbecsdk
# Strongly recommended create virtual environment.
python3 -m venv  ./venv
source venv/bin/activate # activate virtual environment
pip3 install -r requirements.txt
mkdir build
cd build
cmake -Dpybind11_DIR=`pybind11-config --cmakedir` ..
make -j4
make install
测试 Sample
cd pyorbbecsdk
# set PYTHONPATH environment variable to include the lib directory in the install directory
export PYTHONPATH=$PYTHONPATH:$(pwd)/install/lib/
# install udev rules
sudo bash ./scripts/install_udev_rules.sh
sudo udevadm control --reload-rules && sudo udevadm trigger
# run examples
python3 examples/depth_viewer.py
相机参数设置 128072030
   color_profile: VideoStreamProfile = profile_list.get_video_stream_profile(1280, 0, OBFormat.MJPG, 30)
   #color_profile: VideoStreamProfile = profile_list.get_default_video_stream_profile()
   depth_profile = profile_list.get_video_stream_profile(1280, 0, OBFormat.Y11, 30)
 # depth_profile = profile_list.get_default_video_stream_profile()
深度相机标定,彩色相机检查目标。
# ******************************************************************************
#  Copyright (c) 2023 Orbbec 3D Technology, Inc
#
#  Licensed under the Apache License, Version 2.0 (the "License");
#  you may not use this file except in compliance with the License.
#  You may obtain a copy of the License at
#
#      http:# www.apache.org/licenses/LICENSE-2.0
#
#  Unless required by applicable law or agreed to in writing, software
#  distributed under the License is distributed on an "AS IS" BASIS,
#  WITHOUT WARRANTIES OR CONDITIONS OF ANY KIND, either express or implied.
#  See the License for the specific language governing permissions and
#  limitations under the License.
# ******************************************************************************
from queue import Queue
from typing import List


import cv2
import numpy as np
import torch

from pyorbbecsdk import *
from utils import frame_to_bgr_image
from pyorbbecsdk import OBFormat


# ----------------------rknn_start------------------------------

import os
import cv2
from rknnlite.api import RKNNLite
import numpy as np
from rk3588 import *

RKNN_MODEL = "./yolov8.rknn"
IMG_FOLDER = "dataset-1"
RESULT_PATH = './dataset-2'

OBJ_THRESH = 0.45
NMS_THRESH = 0.45

MODEL_SIZE = (1024, 1024)


color_palette = np.random.uniform(0, 255, size=(len(CLASSES), 3))
# ----------------------rknn_end--------------------------------


MAX_DEVICES = 2
curr_device_cnt = 0

MAX_QUEUE_SIZE = 5
ESC_KEY = 27

color_frames_queue: List[Queue] = [Queue() for _ in range(MAX_DEVICES)]
depth_frames_queue: List[Queue] = [Queue() for _ in range(MAX_DEVICES)]
has_color_sensor: List[bool] = [False for _ in range(MAX_DEVICES)]
stop_rendering = False


def on_new_frame_callback(frames: FrameSet, index: int):
    global color_frames_queue, depth_frames_queue
    global MAX_QUEUE_SIZE
    assert index < MAX_DEVICES
    color_frame = frames.get_color_frame()
    depth_frame = frames.get_depth_frame()
    if color_frame is not None:
        if color_frames_queue[index].qsize() >= MAX_QUEUE_SIZE:
            color_frames_queue[index].get()
        color_frames_queue[index].put(color_frame)
    if depth_frame is not None:
        if depth_frames_queue[index].qsize() >= MAX_QUEUE_SIZE:
            depth_frames_queue[index].get()
        depth_frames_queue[index].put(depth_frame)


def rendering_frames(rknn_lite):
    global color_frames_queue, depth_frames_queue, result
    global curr_device_cnt
    global stop_rendering
    global center_x
    global center_y

    while not stop_rendering:
        for i in range(curr_device_cnt):
            color_frame = None
            depth_frame = None
            if not color_frames_queue[i].empty():
                color_frame = color_frames_queue[i].get()
            if not depth_frames_queue[i].empty():
                depth_frame = depth_frames_queue[i].get()
            if color_frame is None and depth_frame is None:
                continue
            color_image = None
            depth_image = None
            color_width, color_height = 0, 0
            if color_frame is not None:
                color_width, color_height = color_frame.get_width(), color_frame.get_height()
                color_image = frame_to_bgr_image(color_frame)


                img,ratio, dw, dh = letter_box(im=color_image.copy(), new_shape=(MODEL_SIZE[1], MODEL_SIZE[0]), pad_color=(0, 0, 0))


                # img = cv2.resize(img_src, (640, 512), interpolation=cv2.INTER_LINEAR) # direct resize
                input = np.expand_dims(img, axis=0)

                outputs = rknn_lite.inference([input])

                boxes, classes, scores = post_process(outputs)

                img_p = color_image.copy()

                if boxes is not None:
                    results = draw(img_p, boxes, scores, classes, ratio, dw, dh)

                for result in results:
                    classname, score, left, top, right, bottom = result
                    # print('class:{}, score:{:.2f},box coordinate left,top,right,down: [{}, {}, {}, {}]'.format(classname, score,left, top, right, bottom))

                    if classname == 'c' and depth_frame:

                        center_y = int((right - left) / 2)
                        center_x = int ((bottom - top) / 2 )

                        width = depth_frame.get_width()
                        height = depth_frame.get_height()
                        scale = depth_frame.get_depth_scale()

                        depth_data = np.frombuffer(depth_frame.get_data(), dtype=np.uint16)
                        depth_data = depth_data.reshape((height, width))
                        depth_data = depth_data.astype(np.float32) * scale

                        center_ys = int(height / 2)   # img center
                        center_xs = int(width / 2)

                        center_distance = depth_data[center_y, center_x]
                        print("center distance: ", center_distance)

                        depth_image = cv2.normalize(depth_data, None, 0, 255, cv2.NORM_MINMAX,
                                                    dtype=cv2.CV_8U)
                        depth_image = cv2.applyColorMap(depth_image, cv2.COLORMAP_JET)

                        print('class:{}, score:{:.2f},center distance:{},box coordinate left,top,right,down: [{}, {}, {}, {}]'.format(classname, score,center_distance,left, top, right, bottom))
                    else:
                        print('class:{}, score:{:.2f},box coordinate left,top,right,down: [{}, {}, {}, {}]'.format(classname, score,left, top, right, bottom))


                cv2.imshow("Device {}", img_p)
                key = cv2.waitKey(1)
                if key == ord('q') or key == ESC_KEY:
                    return


            # if color_image is not None and depth_image is not None:
            #     window_size = (color_width // 2, color_height // 2)
            #     color_image = cv2.resize(img_p, window_size)
            #     depth_image = cv2.resize(depth_image, window_size)
            #     image = np.hstack((color_image, depth_image))
            # elif depth_image is not None and not has_color_sensor[i]:
            #     image = depth_image
            # else:
            #     continue

            # cv2.imwrite("./1.jpg",image)


def start_streams(pipelines: List[Pipeline], configs: List[Config]):
    index = 0
    for pipeline, config in zip(pipelines, configs):
        print("Starting device {}".format(index))
        pipeline.start(config, lambda frame_set, curr_index=index: on_new_frame_callback(frame_set,
                                                                                         curr_index))
        index += 1


def stop_streams(pipelines: List[Pipeline]):
    for pipeline in pipelines:
        pipeline.stop()


def main():

    # 创建RKNN对象
    rknn_lite = RKNNLite()

    RKNN_MODEL = "/home/cat/pyorbbecsdk/my_yolov8_rknn/yolov8m.rknn"

    # 加载RKNN模型
    print('--> Load RKNN model')
    ret = rknn_lite.load_rknn(RKNN_MODEL)
    if ret != 0:
        print('Load RKNN model failed')
        exit(ret)
    print('done')

    # 初始化 runtime 环境
    print('--> Init runtime environment')
    # run on RK356x/RK3588 with Debian OS, do not need specify target.
    ret = rknn_lite.init_runtime()
    if ret != 0:
        print('Init runtime environment failed!')
        exit(ret)
    print('done')

    ctx = Context()
    device_list = ctx.query_devices()
    global curr_device_cnt
    curr_device_cnt = device_list.get_count()
    if curr_device_cnt == 0:
        print("No device connected")
        return
    if curr_device_cnt > MAX_DEVICES:
        print("Too many devices connected")
        return
    pipelines: List[Pipeline] = []
    configs: List[Config] = []
    global has_color_sensor
    for i in range(device_list.get_count()):
        device = device_list.get_device_by_index(i)
        pipeline = Pipeline(device)
        config = Config()
        try:
            profile_list = pipeline.get_stream_profile_list(OBSensorType.COLOR_SENSOR)
            color_profile: VideoStreamProfile = profile_list.get_video_stream_profile(1280, 0, OBFormat.MJPG, 30)
            #color_profile: VideoStreamProfile = profile_list.get_default_video_stream_profile()
            config.enable_stream(color_profile)
            has_color_sensor[i] = True
        except OBError as e:
            print(e)
            has_color_sensor[i] = False
        profile_list = pipeline.get_stream_profile_list(OBSensorType.DEPTH_SENSOR)
        # depth_profile = profile_list.get_default_video_stream_profile()
        depth_profile = profile_list.get_video_stream_profile(1280, 0, OBFormat.Y11, 30)
        print("depth profile: ", depth_profile)

        config.enable_stream(depth_profile)
        config.enable_stream(depth_profile)
        pipelines.append(pipeline)
        configs.append(config)
    global stop_rendering
    start_streams(pipelines, configs)
    try:
        rendering_frames(rknn_lite)
        stop_streams(pipelines)
    except KeyboardInterrupt:
        stop_rendering = True
        stop_streams(pipelines)


if __name__ == "__main__":
    main()


 1064
1064

 被折叠的 条评论
为什么被折叠?
被折叠的 条评论
为什么被折叠?
 到【灌水乐园】发言


