


系列文章目录
HarmonyOS Next 系列之省市区弹窗选择器实现(一)
HarmonyOS Next 系列之验证码输入组件实现(二)
HarmonyOS Next 系列之底部标签栏TabBar实现(三)
HarmonyOS Next 系列之HTTP请求封装和Token持久化存储(四)
HarmonyOS Next 系列之从手机选择图片或拍照上传功能实现(五)
HarmonyOS Next 系列之可移动悬浮按钮实现(六)
HarmonyOS Next 系列之沉浸式状态实现的多种方式(七)
HarmonyOS Next系列之Echarts图表组件(折线图、柱状图、饼图等)实现(八)
HarmonyOS Next系列之地图组件(Map Kit)使用(九)
HarmonyOS Next系列之半圆环进度条实现(十)
HarmonyOS Next 系列之列表下拉刷新和触底加载更多数据实现(十一)
HarmonyOS Next系列之实现一个左右露出中间大两边小带缩放动画的轮播图(十二)
系列文章目录2
【鸿蒙】HarmonyOS NEXT开发快速入门教程之ArkTS语法装饰器(上)
【鸿蒙】HarmonyOS NEXT开发快速入门教程之ArkTS语法装饰器(下)
【鸿蒙】HarmonyOS NEXT应用开发快速入门教程之布局篇(上)
【鸿蒙】HarmonyOS NEXT应用开发快速入门教程之布局篇(下)
【鸿蒙】HarmonyOS Next 组件或页面之间的所有通信(传参)方法总结
前言
HarmonyOS Next(基于API11)沉浸式状态实现的多种方式

一、方法一
1、实现讲解
(1)首先设置setWindowLayoutFullScreen(true)(设置全屏布局)。
布局将从屏幕最顶部开始到最底部结束,此时状态栏和底部规避区域还在,且与页面重叠,所以还需要设置页面根容器顶部内边距为状态栏高度,底部内边距为规避区域高度,这样页面就不会重叠。
(2)页面隐藏(或销毁)周期函数内恢复非全屏布局设置setWindowLayoutFullScreen(false)
全屏布局设置是全局生效的,一旦设置跳转到其他页面同样生效,对于其他页面不需要沉浸式状态栏需要恢复原样。
ps:全屏布局非全屏显示,区别在于状态栏、规避区域还在,页面布局从屏幕最顶端开始
2、代码实现
Index.ets(页面)
import { window } from '@kit.ArkUI'

@Entry
@Component
struct Index {
  @State statusHeight: number = 0 //状态栏高度
  @State bottomAvoidAreaHeight: number = 0 //手机底部规避区域高度
  @State windowClass: window.Window | null = null //窗口管理器

  aboutToAppear() {
    this.init()
  }

  onPageShow(): void {
  //设置全屏布局
    this.windowClass?.setWindowLayoutFullScreen(true)
  }

  onPageHide(): void {
     //取消全屏布局
      this.windowClass?.setWindowLayoutFullScreen(false)
  }

  //初始化
  init() {
    window.getLastWindow(getContext(this), (err, windowClass) => {
      if (!err.code) {
         //保存窗口管理器
        this.windowClass = windowClass
        //获取状态栏高度
        this.statusHeight = px2vp(windowClass.getWindowAvoidArea(window.AvoidAreaType.TYPE_SYSTEM).topRect.height)
        //获取手机底部规避区域高度
        this.bottomAvoidAreaHeight = px2vp(windowClass.getWindowAvoidArea(window.AvoidAreaType.TYPE_NAVIGATION_INDICATOR)
          .bottomRect
          .height)
        windowClass.setWindowLayoutFullScreen(true)

      }
    })
  }

  build() {
    Column() {
      //页面区域
      Column() {
        Text('沉浸式状态栏').fontColor('#fff')
      }
      .height('100%')
      .width('100%')
      .border({
        width: 1,
        color: 'red'
      })
    }
    .height('100%')
    .width('100%')
    .backgroundImage(`https://img1.baidu.com/it/u=3138942692,3007703896&fm=253&fmt=auto&app=138&f=JPEG?w=500&h=500`)
    .backgroundImageSize({ height: '100%', width: '100%' })
    .padding({ top: this.statusHeight, bottom: this.bottomAvoidAreaHeight })
  }
}
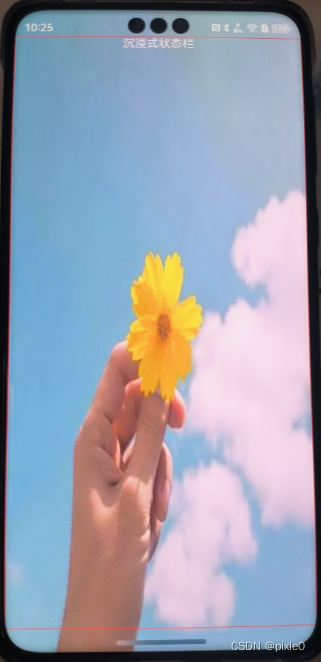
运行效果:

ps:为了肉眼好区分,给页面区域加了红色边框
3、全局缓存窗口管理器
当项目内多个页面需要设置全屏布局时,每个页面要重新获取窗口管理器、状态栏高度、底部规避区域高度就比较麻烦,可以在entryabili内获取到上述属性值(对象)并存储在全局对象globalThis上
EntryAbility.ets
import { AbilityConstant, UIAbility, Want } from '@kit.AbilityKit';
import { window } from '@kit.ArkUI';

export default class EntryAbility extends UIAbility {
  onCreate(want: Want, launchParam: AbilityConstant.LaunchParam): void {

  }


  onWindowStageCreate(windowStage: window.WindowStage): void {

    //添加如下代码
    windowStage.getMainWindow((err, data) => {
      if (!err.code) {
        //全局变量添加窗口对象
        globalThis.windowClass = data;
        //全局变量添加状态栏高度单位vp
        globalThis.statusHeight = px2vp(data.getWindowAvoidArea(window.AvoidAreaType.TYPE_SYSTEM).topRect.height)
        //全局添加底部规避区域高度单位vp
        globalThis.bottomAvoidAreaHeight = px2vp(data.getWindowAvoidArea(window.AvoidAreaType.TYPE_NAVIGATION_INDICATOR)
          .bottomRect
          .height)
      }
    })
    //
    windowStage.loadContent('pages/Index', (err) => {
      if (err.code) {
        return;
      }
    });
  }


}
Index.ets(页面)
import { window } from '@kit.ArkUI'

@Entry
@Component
struct Index {


  onPageShow(): void {
  //设置全屏布局
    globalThis.windowClass.setWindowLayoutFullScreen(true)
  }

  onPageHide(): void {
    //取消全屏布局
      globalThis.windowClass.setWindowLayoutFullScreen(false)
  }


  build() {
    Column() {
      //页面区域
      Column() {
        Text('沉浸式状态栏').fontColor('#fff')
      }
      .height('100%')
      .width('100%')
      .border({
        width: 1,
        color: 'red'
      })
    }
    .height('100%')
    .width('100%')
    .backgroundImage(`https://img1.baidu.com/it/u=3138942692,3007703896&fm=253&fmt=auto&app=138&f=JPEG?w=500&h=500`)
    .backgroundImageSize({ height: '100%', width: '100%' })
    .padding({ top: globalThis.statusHeight, bottom: globalThis.bottomAvoidAreaHeight })
  }
}
二、方法二
1、实现讲解
通过NavDestination作为页面根容器,并隐藏标题栏即可快速实现沉浸式状态,NavDestination从api 11开始默认支持安全区避让特性,所以关于页面重叠问题就不需要解决
2、代码实现
Index.ets(页面)
@Entry
@Component
struct Index{
  build() {
    NavDestination(){
      //页面区域
      Column(){
        Text('沉浸式状态栏').fontColor('#fff')
      }.width('100%')
      .height('100%')
      .border({
        width:1,
        color:'red'
      })
    }
     .hideTitleBar(true)
    .backgroundImage(`https://img0.baidu.com/it/u=2299333132,3832906774&fm=253&fmt=auto&app=138&f=JPEG?w=500&h=500`)
    .backgroundImageSize({height:'100%',width:'100%'})
  }
}
运行效果:

三、方法三
1、实现讲解
通过expandSafeArea属性支持组件不改变布局情况下扩展其绘制区域至安全区外
2、代码实现
@Entry
@Component
struct Index {
  build() {
    Stack() {
      Image('https://img0.baidu.com/it/u=356163033,4214949602&fm=253&fmt=auto&app=120&f=JPEG?w=500&h=1083')
        .height('100%').width('100%').expandSafeArea()
      //页面区域
      Column() {
        Text('沉浸式状态栏').fontColor('#fff')
      }
      .height('100%')
      .width('100%')
      .border({
        width: 1,
        color: 'red'
      })

    }.height('100%')
    .width('100%')

  }
}
运行效果:

如果只需要头部区域沉浸

实现代码:
@Entry
@Component
struct Index {
  build() {
    Column() {
      Column() {
        Text('沉浸式状态栏').fontColor('#fff')
      }.height(100).width('100%').backgroundColor('#0A7EE6').expandSafeArea([SafeAreaType.SYSTEM], [SafeAreaEdge.TOP])

    }.height('100%')
    .width('100%')

  }
}
最后补充
如果想修改状态栏文字颜色可通过:setWindowSystemBarProperties实现
   window.getLastWindow(getContext(this), (err, windowClass) => {
      if (!err.code) {
        windowClass.setWindowSystemBarProperties({
          statusBarContentColor:"#ffffff"
        })
      }
    })


 2983
2983

 被折叠的 条评论
为什么被折叠?
被折叠的 条评论
为什么被折叠?
 到【灌水乐园】发言


