


最近再体验点点互娱游戏 《无尽冬日》,一款泛用户的数值游戏(SLG),上线很快就冲上榜单,无论是UI,还是3D都做 的非常不错,再微信端也很 流畅的运行。今天我来实现下《无尽冬日》雪地效果制作。
老规矩,先看效果:

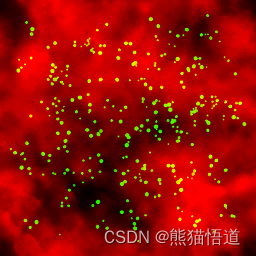
使用的素材贴图:(百度下的,断色阶,大家 有好的灰度图 效果更好)

方案一:采用 法线贴图试限凹凸,并 采用 兰伯特光照或半兰伯特 光照实现;
优点:制作 难度 小 ,比较常规,只需要重新计算光照角度。
缺点:法线需要精度高,开销大 ,即使做平铺也是需要相对大显存空间。
方案二(我采用的方案):采用灰度图和模型法线切线空间交叉 计算,实现 视觉上的起伏变化;
其原理跟法线贴图类似,只是我再shader里面重新做了计算;
优点:性能比较好,实现效果也比较OK ;
缺点 :技术难度 还是有一些,对shader的优化也要做到极致;
先看看凹凸变化的效果:
核心实现:
在顶点着色器里面对UV做重新运算,实现世界空间平铺:
//世界空间UV计算
fixed2 xz = mul(unity_ObjectToWorld, v.vertex).xz;
接下来对 模型的UV从新 计算,算法 如下:
o.uv.y *= _Graymap_TexelSize.z / _Graymap_TexelSize.w;
o.uv.x += 0.5f;
o.uv.zw = (xz - fixed2(0, _Global_Stamp_OffsetZ)) * _Global_Stamp_TexelSize.xy;
o.uv.zw.x += 0.5f;
获取灰度图 做开始和结束的深度(视觉高度计算)表达的可能不对,即开始到结束的值;
fixed getBump(fixed4 uv, fixed2 offset)
			{
				fixed stampBump = tex2D(_Global_Stamp_Texture, uv.zw + _Global_Stamp_TexelSize.zw * offset).r * 0.15;
				fixed backBump = tex2D(_Graymap, uv.xy + _Graymap_TexelSize.xy * offset).r;
				return (stampBump + (1 - stampBump) * backBump) * _BumpScale;
			}
转化城法线;
//灰度图转法线
				fixed  bump	  = getBump(i.uv, fixed2(0, 0));
				fixed3 up	  = fixed3(0, 1, getBump(i.uv, fixed2(0, 1)) - bump);
				fixed3 right  = fixed3(1, 0, getBump(i.uv, fixed2(1, 0)) - bump);
				fixed3 normal = UnityObjectToWorldNormal(mul(cross(right, up), rotation));
实现凹凸变化完整代码如下:
Shader "Custom/Curved Snowfield01"
{
	Properties
	{
		_Color("Main Color", Color) = (1, 1, 1, 1)
		_Graymap("Normalmap (Gray)",2D) = "white"{}
		_Tiling("Tiling", Range(0.5, 2)) = 2
		_BumpScale("BumpScale", Range(0, 64)) = 16
	}
	SubShader
	{
		pass
		{
			Tags{ "LightMode" = "ForwardBase"}
			CGPROGRAM
			#pragma vertex vert
			#pragma fragment frag
			#pragma multi_compile_fog
			#include "Lighting.cginc"
			#include "UnityCG.cginc"
			struct a2v
			{
				float4 vertex	: POSITION;
				fixed3 normal	: NORMAL;
				fixed4 tangent	: TANGENT;
			};
			struct v2f
			{
				float4 pos		: SV_POSITION;
				fixed3 normal	: NORMAL;
				fixed4 tangent	: TANGENT;
				fixed4 uv		: TEXCOORD;
				UNITY_FOG_COORDS(3)
			};
			fixed _Tiling;
			fixed _BumpScale;
			fixed4 _Color;
			sampler2D _Graymap;
			fixed4 _Graymap_TexelSize;
			fixed     _Global_Stamp_OffsetZ;
			fixed4    _Global_Stamp_TexelSize;
			sampler2D _Global_Stamp_Texture;

			v2f vert(a2v v)
			{
				v2f o;
			    o.pos = UnityObjectToClipPos(v.vertex); //转换裁剪空间
				o.normal = v.normal;
				o.tangent = v.tangent;

				//世界空间UV计算
				fixed2 xz = mul(unity_ObjectToWorld, v.vertex).xz;
				o.uv.xy = xz * _Tiling * 0.1;   //贴图缩放
				o.uv.y *= _Graymap_TexelSize.z / _Graymap_TexelSize.w;
				o.uv.x += 0.5f;
				o.uv.zw = (xz - fixed2(0, _Global_Stamp_OffsetZ)) * _Global_Stamp_TexelSize.xy;
				o.uv.zw.x += 0.5f;

				UNITY_TRANSFER_FOG(o, o.pos);
				return o;
			}

			fixed getBump(fixed4 uv, fixed2 offset)
			{
				fixed stampBump = tex2D(_Global_Stamp_Texture, uv.zw + _Global_Stamp_TexelSize.zw * offset).r * 0.15;
				fixed backBump = tex2D(_Graymap, uv.xy + _Graymap_TexelSize.xy * offset).r;
				return (stampBump + (1 - stampBump) * backBump) * _BumpScale;
			}

			fixed4 frag(v2f i) : SV_Target
			{
				//法线
				fixed3	 binormal = cross(normalize(i.normal), normalize(i.tangent.xyz)) * i.tangent.w;
				float3x3 rotation = float3x3(i.tangent.xyz, binormal, i.normal);

				//灰度图转法线
				fixed  bump	  = getBump(i.uv, fixed2(0, 0));
				fixed3 up	  = fixed3(0, 1, getBump(i.uv, fixed2(0, 1)) - bump);
				fixed3 right  = fixed3(1, 0, getBump(i.uv, fixed2(1, 0)) - bump);
				fixed3 normal = UnityObjectToWorldNormal(mul(cross(right, up), rotation));

				//颜色+环境光
				fixed3 lightDir = _WorldSpaceLightPos0.xyz;
				fixed3 light = _LightColor0.rgb * saturate(dot(normal, lightDir));
				fixed3 ambient = ShadeSH9(fixed4(normal, 1));
				fixed4 col = _Color;
				col.rgb *= light + ambient; //最终颜色
				UNITY_APPLY_FOG(i.fogCoord, col);
				return col;
			}
			ENDCG
		}

	}
}
接下来咱们在这个基础上还原《无尽 冬日 》雪地 效果:
在 当前 基础上我们需要将优化光照模型为 布林效果(也是 兰伯特);
_Color("Main Color", Color) = (1, 1, 1, 1)
_Specular("Specular", Range(0, 1)) = 0
_Glass("Glass", Range(0, 1)) = 0
注意 :因为要 在web端顺利跑起来,我们需要合理 的去运用贴图:
  //雪景第二通道(绿通道)采用高光点效果
_Graymap("Normalmap (Gray)",2D) = "white"{}
为了方便,我们将 原来 的灯光库文件 #include "Lighting.cginc"修改成 #include "AutoLight.cginc"
加入光照 计算,注意:第二层高光 我是最合并在specularColor上如下:
fixed3 specularColor = float3(_Specular,_Specular,_Specular)*_BumpTex.r*2; 完整灯光组件:
  //灯光
                fixed attenuation = LIGHT_ATTENUATION(i);
                fixed3 attenColor = attenuation * _LightColor0.xyz;

               //光滑度
                fixed2 uv = i.uv *_SpecularTiling*0.1;
				 fixed4 _BumpTex =tex2D(_Graymap,i.uv);
                fixed4 _SpecularTex =tex2D(_Graymap,uv);
                fixed gloss = ((_SpecularTex.g)*_Glass);//贴图第二通道,
                fixed specPow = exp2( gloss *10 + 1.0 );
			    fixed3 viewDirection = normalize(_WorldSpaceCameraPos.xyz- i.posWorld.xyz-0.5);
                fixed3 lightDir = _WorldSpaceLightPos0.xyz;

                //高光强度
				//float NdotL = max(0.0,dot((viewDirection+lightDir), lightDir ));
				fixed NdotL = max(0.0,dot((viewDirection+lightDir), normal ));
                fixed3 specularColor = fixed3(_Specular,_Specular,_Specular)*_BumpTex.r*2;
                fixed3 light = _LightColor0.rgb *pow(NdotL,specPow)*specularColor;
                fixed3 specular = light;
				fixed3 ambient = ShadeSH9(fixed4(normal, 1));
				fixed3 diffuse = _Color+ specular;
最终代码如下:
Shader "Custom/Curved Snowfield02"
{
	Properties
	{
		_Color("Main Color", Color) = (1, 1, 1, 1)
		_Specular("Specular", Range(0, 1)) = 0
		_Glass("Glass", Range(0, 1)) = 0

        //雪景第二通道(绿通道)采用高光点效果
		_Graymap("Normalmap (Gray)",2D) = "white"{}
		_Tiling("Tiling", Range(0.1, 2)) = 2
        //高光的重复度
        _SpecularTiling("Specular Tiling", float) = 2
		_BumpScale("BumpScale", Range(0, 200)) = 16
	}
	SubShader
	{
			 Tags {
			"RenderType" = "Opaque"
		}
		pass
		{
			Tags{

				"LightMode" = "ForwardBase"
			}
			CGPROGRAM
			#pragma vertex vert
			#pragma fragment frag
			#pragma multi_compile_fog
		    #include "AutoLight.cginc"
			#include "UnityCG.cginc"

		     fixed4 _LightColor0;
			 fixed4 _MainColor;
			 fixed _Specular;
			 fixed _Glass;

			struct a2v
			{
				float4 vertex	: POSITION;
				fixed3 normal	: NORMAL;
				fixed4 tangent	: TANGENT;
                fixed4 uv : TEXCOORD0;
			};
			struct v2f
			{
				float4 pos		: SV_POSITION;
				fixed3 normal	: NORMAL;
				fixed4 tangent	: TANGENT;
				fixed4 uv		: TEXCOORD0;
                float4 posWorld : TEXCOORD1;
				UNITY_FOG_COORDS(2)
                LIGHTING_COORDS(3,4)
			};
			fixed _Tiling;
            fixed _SpecularTiling;
			fixed _BumpScale;
			fixed4 _Color;
			sampler2D _Graymap;
			fixed4 _Graymap_TexelSize;
			fixed     _Global_Stamp_OffsetZ;
			fixed4    _Global_Stamp_TexelSize;
			sampler2D _Global_Stamp_Texture;

			v2f vert(a2v v)
			{
				v2f o;
			    o.pos = UnityObjectToClipPos(v.vertex); //转换裁剪空间
                o.uv=v.uv;
				o.normal =UnityObjectToWorldNormal(v.normal);
				o.tangent = v.tangent;
                o.posWorld = mul(unity_ObjectToWorld, v.vertex);
                fixed3 lightColor = _LightColor0.rgb;

				//世界空间UV计算
				fixed2 xz = mul(unity_ObjectToWorld, v.vertex).xz;
				o.uv.xy = xz * _Tiling * 0.1;   //贴图缩放

				o.uv.y *= _Graymap_TexelSize.z / _Graymap_TexelSize.w;
				o.uv.x += 0.5f;
				o.uv.zw = (xz - fixed2(0, _Global_Stamp_OffsetZ)) * _Global_Stamp_TexelSize.xy;
				o.uv.zw.x += 0.5f;

				UNITY_TRANSFER_FOG(o, o.pos);
                TRANSFER_VERTEX_TO_FRAGMENT(o)
				return o;
			}

			fixed getBump(fixed4 uv, fixed2 offset)
			{
				fixed stampBump = tex2D(_Global_Stamp_Texture, uv.zw + _Global_Stamp_TexelSize.zw * offset).r * 0.15;
				fixed backBump = tex2D(_Graymap, uv.xy + _Graymap_TexelSize.xy * offset).r;
				return (stampBump + (1 - stampBump) * backBump) * _BumpScale;
			}

			fixed4 frag(v2f i) : SV_Target
			{
				//法线
				fixed3	 binormal = cross(normalize(i.normal), normalize(i.tangent.xyz)) * i.tangent.w;
				float3x3 rotation = float3x3(i.tangent.xyz, binormal, i.normal);

				//灰度图转法线
				fixed  bump	  = getBump(i.uv, fixed2(0, 0));
				fixed3 up	  = fixed3(0, 1, getBump(i.uv, fixed2(0, 1)) - bump);
				fixed3 right  = fixed3(1, 0, getBump(i.uv, fixed2(1, 0)) - bump);
				fixed3 normal = UnityObjectToWorldNormal(mul(cross(right, up), rotation));
                //灯光
                fixed attenuation = LIGHT_ATTENUATION(i);
                fixed3 attenColor = attenuation * _LightColor0.xyz;

               //光滑度
                fixed2 uv = i.uv *_SpecularTiling*0.1;
				 fixed4 _BumpTex =tex2D(_Graymap,i.uv);
                fixed4 _SpecularTex =tex2D(_Graymap,uv);
                fixed gloss = ((_SpecularTex.g)*_Glass);//贴图第二通道,
                fixed specPow = exp2( gloss *10 + 1.0 );
			    fixed3 viewDirection = normalize(_WorldSpaceCameraPos.xyz- i.posWorld.xyz-0.5);
                fixed3 lightDir = _WorldSpaceLightPos0.xyz;

                //高光强度
				//float NdotL = max(0.0,dot((viewDirection+lightDir), lightDir ));
				fixed NdotL = max(0.0,dot((viewDirection+lightDir), normal ));
                fixed3 specularColor = fixed3(_Specular,_Specular,_Specular)*_BumpTex.r*2;
                fixed3 light = _LightColor0.rgb *pow(NdotL,specPow)*specularColor;
                fixed3 specular = light;
				fixed3 ambient = ShadeSH9(fixed4(normal, 1));
				fixed3 diffuse = _Color+ specular;

				diffuse.rgb *= diffuse + ambient; //最终颜色
                fixed4 col = fixed4(diffuse,1);
				UNITY_APPLY_FOG(i.fogCoord, col);
				return col;
			}
			ENDCG
		}

	}
}


 659
659

 被折叠的 条评论
为什么被折叠?
被折叠的 条评论
为什么被折叠?
 到【灌水乐园】发言


