


一、QAction
一、QAction的例子
main.cpp
#include "test.h"
#include <QtWidgets/QApplication>
#include<qpushbutton.h>
#include<qapplication.h>
int main(int argc, char *argv[])
{
    QApplication app(argc, argv);

    TEST win;
    win.show();

    return app.exec();
}
test.h
#ifndef TEST_H
#define TEST_H

#include <QtWidgets/QMainWindow>
#include "ui_test.h"

class TEST : public QMainWindow
{
    Q_OBJECT

public:
    TEST(QWidget *parent = 0);
    ~TEST();

private:
    void open();
    QAction *openAction;
};

#endif // TEST_H
test.cpp
#include "test.h"
#include <QAction>
#include <QMenuBar>
#include <QMessageBox>
#include <QStatusBar>
#include <QToolBar>
TEST::TEST(QWidget *parent)
: QMainWindow(parent)
{
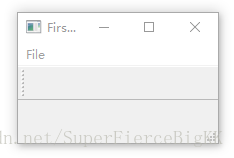
setWindowTitle(tr("First Main Window"));
openAction = new QAction(QIcon(":/images/doc-open"), tr("&Open..."), this);
openAction->setShortcuts(QKeySequence::Open);
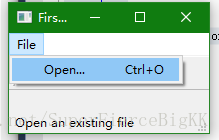
openAction->setStatusTip(tr("Open an existing file"));
connect(openAction, &QAction::triggered, this, &TEST::open);//当有triggered()信号发出时触发槽函数open()
QMenu *file = menuBar()->addMenu(tr("&File"));
file->addAction(openAction);
QToolBar *toolBar = addToolBar(tr("&File"));
toolBar->addAction(openAction);
statusBar();
}
TEST::~TEST()
{
}
void TEST::open()
{
QMessageBox::information(this, tr("Information"), tr("Open"));
}
效果如图:
二、对于代码的解读
1)test.h
在test.h中我们声明了TEST类中:
a、私有函数open()
b、私有指针openAction,指向一个QAcion型数据
2)test.cpp
a、setWindowTitle() 设置title内容,tr()为规范化
b、QAction类的构造函数解析:
openAction = new QAction(QIcon(":/images/doc-open"), tr("&Open..."), this);第一参数:图标
QIcon():输入为一个路径,函数找到了这里的 document-open.png 图标
第二参数:为action的名称
从效果图上能看出对应的位置,需要注意的是文本前的”&”符号,意味着有设定了快捷键,在紧接着调用的setShortcut()函数就是设置快捷键。
第三参数:this指针
c、other
menuBar()、toolBar()和statusBar()三个是QMainWindow的函数,用于创建并返回菜单栏、工具栏和状态栏。我们可以从代码清楚地看出,我们向菜单栏添加了一个 File 菜单,并且把这个QAction对象添加到这个菜单;同时新增加了一个 File 工具栏,也把QAction对象添加到了这个工具栏。我们可以看到,在菜单中,这个对象被显示成一个菜单项,在工具栏变成了一个按钮。至于状态栏,则是出现在窗口最下方,用于显示动作对象的提示信息的。


 6964
6964


 被折叠的 条评论
为什么被折叠?
被折叠的 条评论
为什么被折叠?
 到【灌水乐园】发言


